Example: Houdini Particles
例如: Houdini粒子
We can take particles generated in Houdini, bring them into Cinema 4D and then render them with Redshift. When you import particles from Houdini with an alembic file the particles are automatically converted into Thinking Particles. More information on that here.
我们可以把 Houdini 产生的粒子放到4 d 电影中,然后用红移渲染它们。当你从霍迪尼进口粒子与白纸文件粒子自动转换为思考粒子。点击这里了解更多信息。
So first we are going to locate our Alembic file that we exported from Houdini and merge it into our current scene.
因此,首先我们要找到我们从 Houdini 导出的 Alembic 文件,并将其合并到我们当前的场景中。
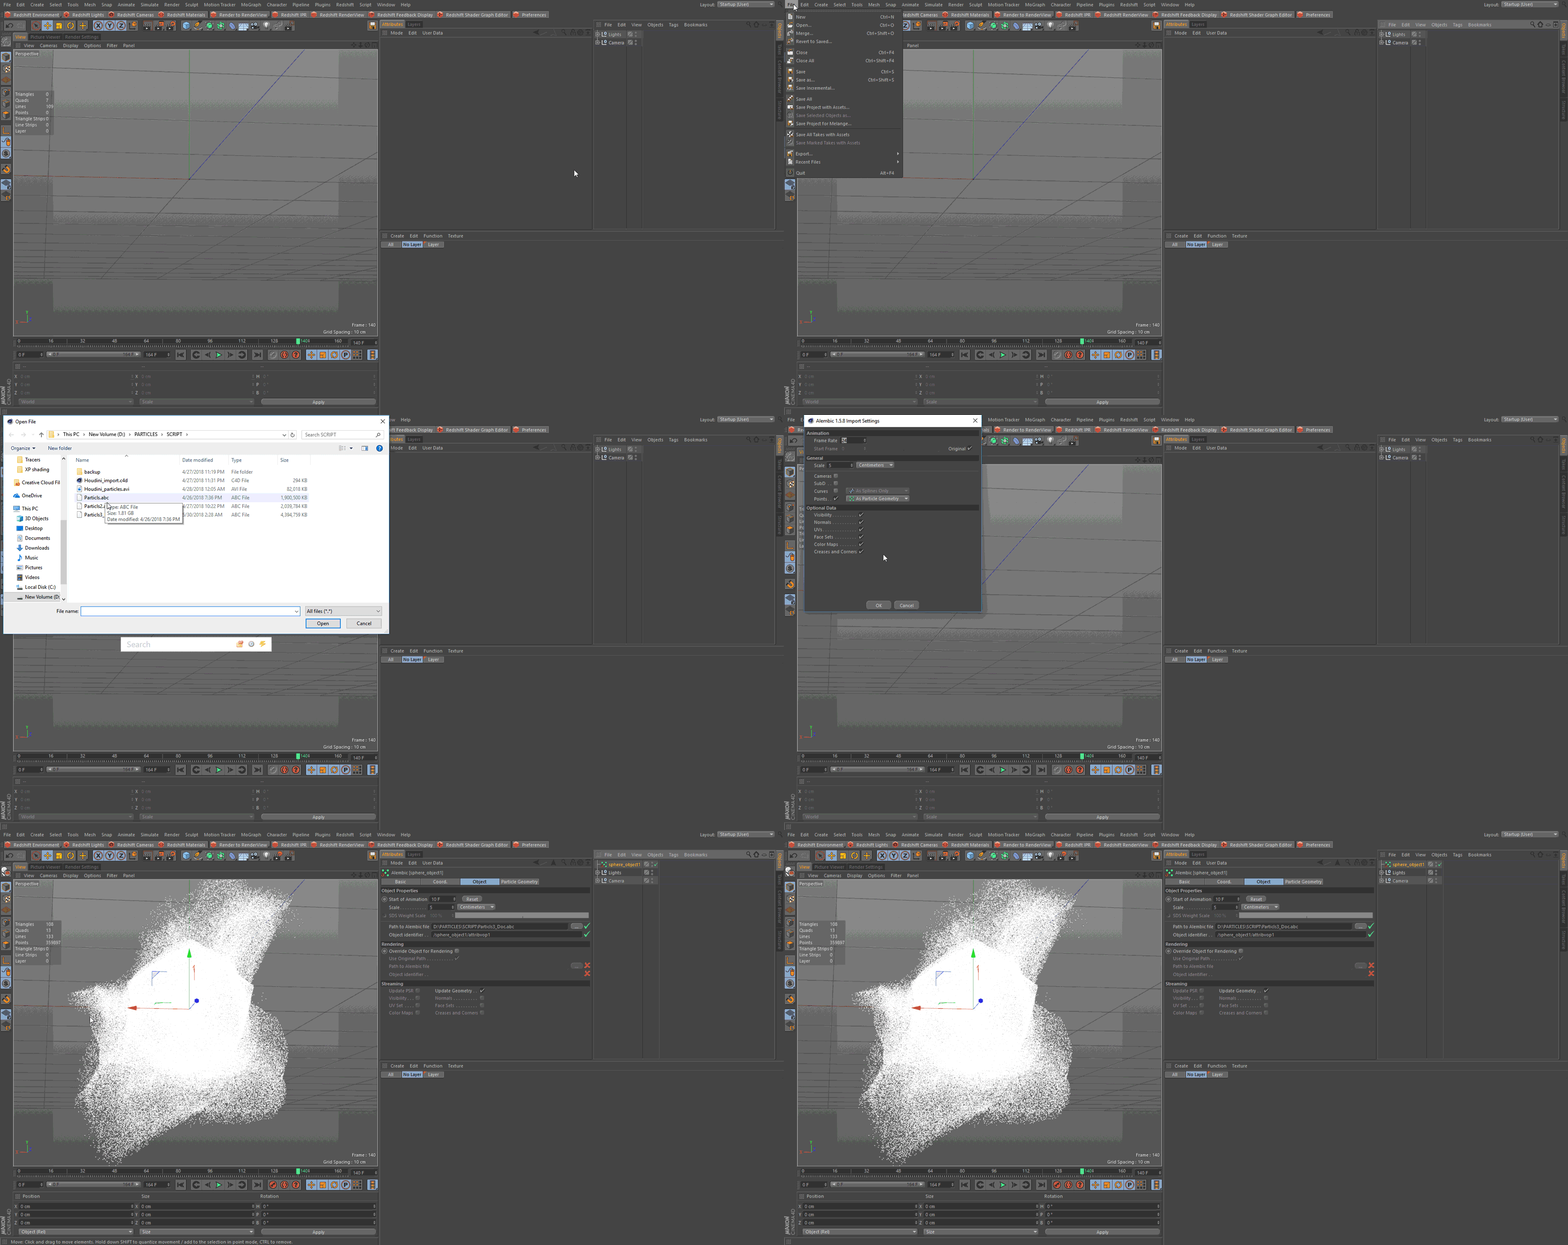
Now we are going to add our Redshift Object Tag and adjust the some of the parameters.
现在我们要添加我们的红移对象标签和调整一些参数。
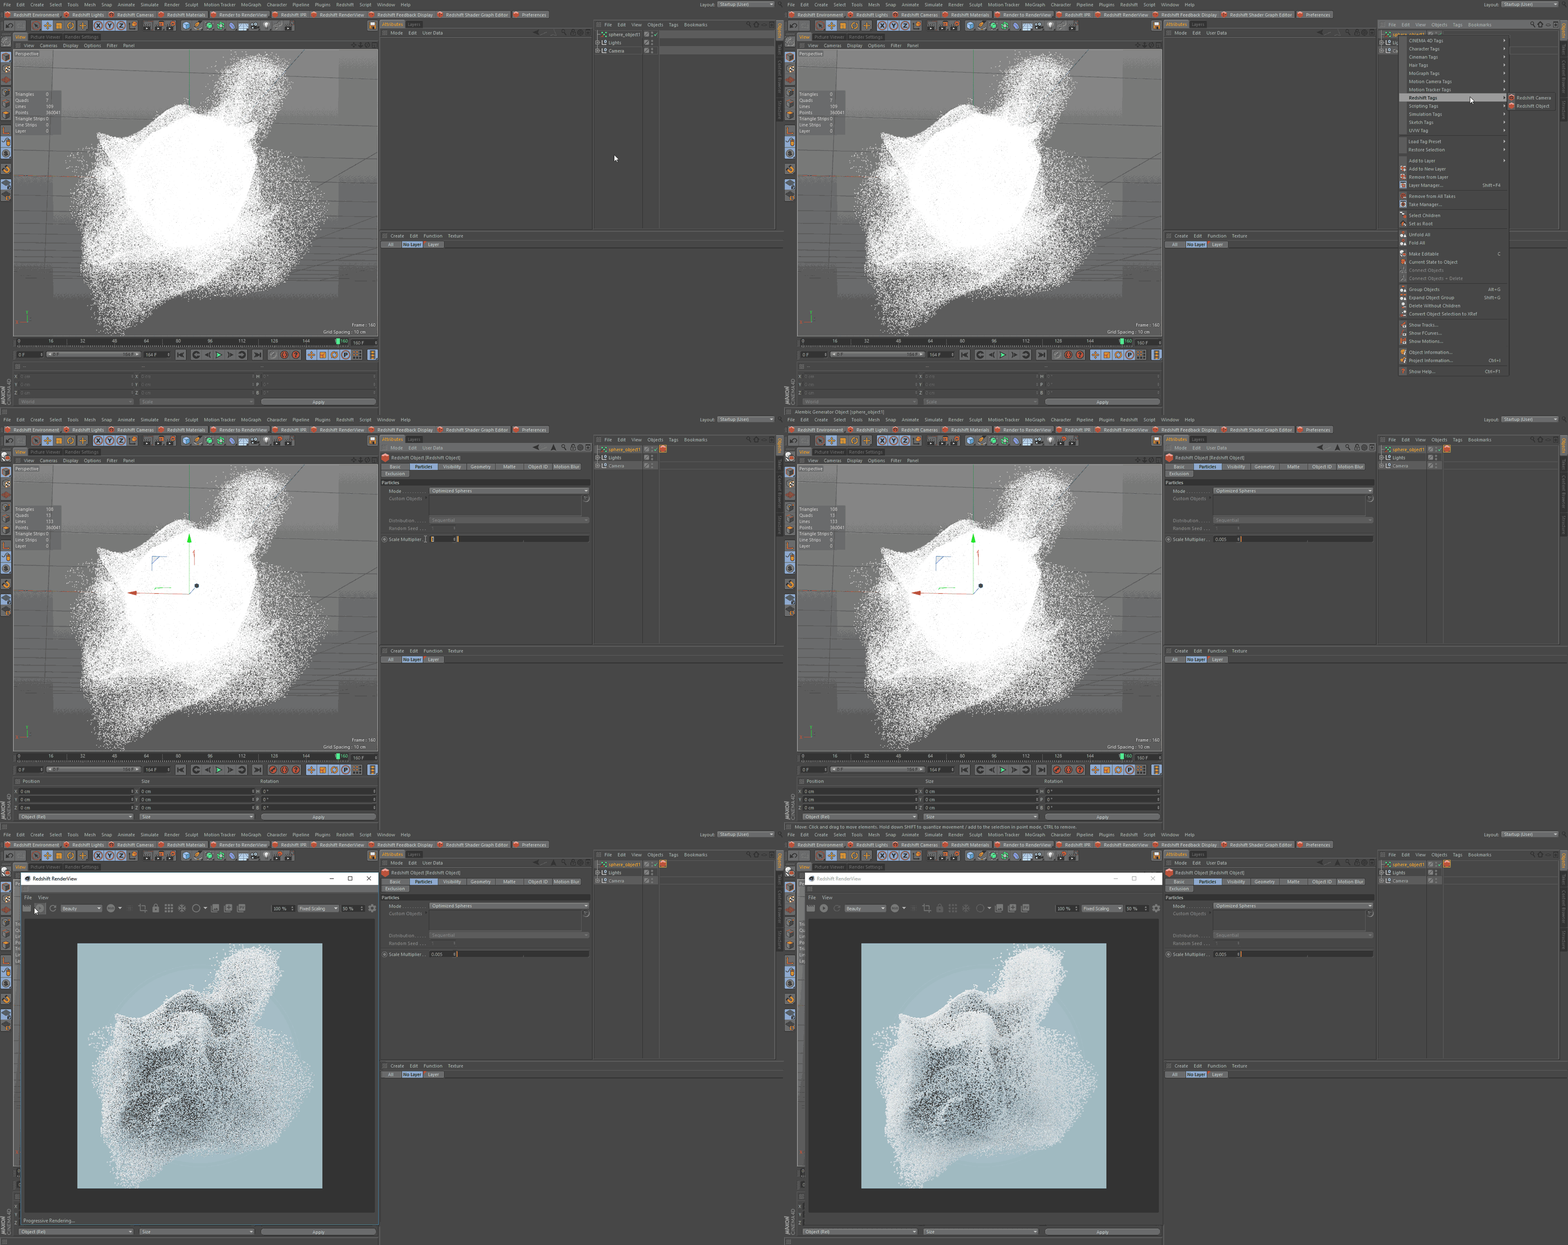
The Scale Multiplier is dependent on the scene scale in Cinema 4D and Houdini.
比例乘数取决于 Cinema 4 d 和 Houdini 的场景规模。
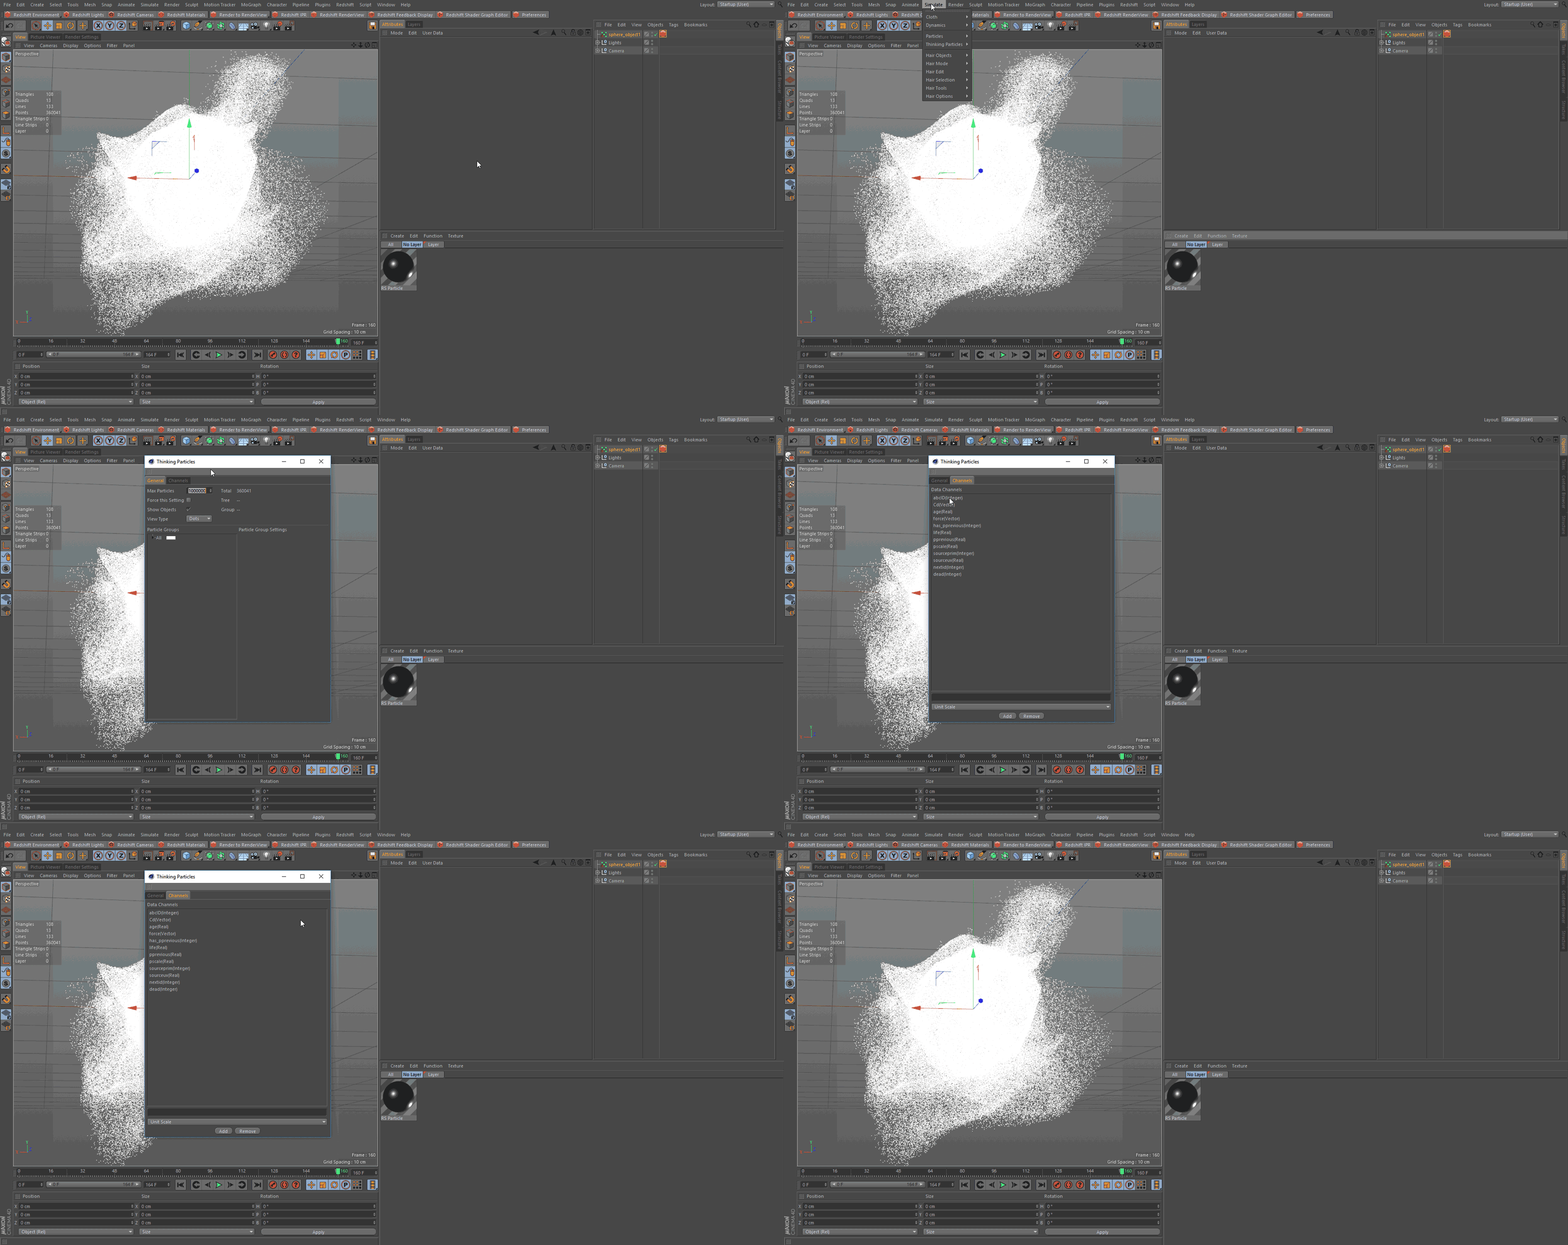
Next we are going to setup our material for our particles. First lets check our available attributes, under our Thinking Particle settings, to use for shading. Check here for more information.
接下来我们要设置粒子的材料。首先让我们检查我们的可用属性,在我们的思考粒子设置,使用阴影。更多信息请点击这里。
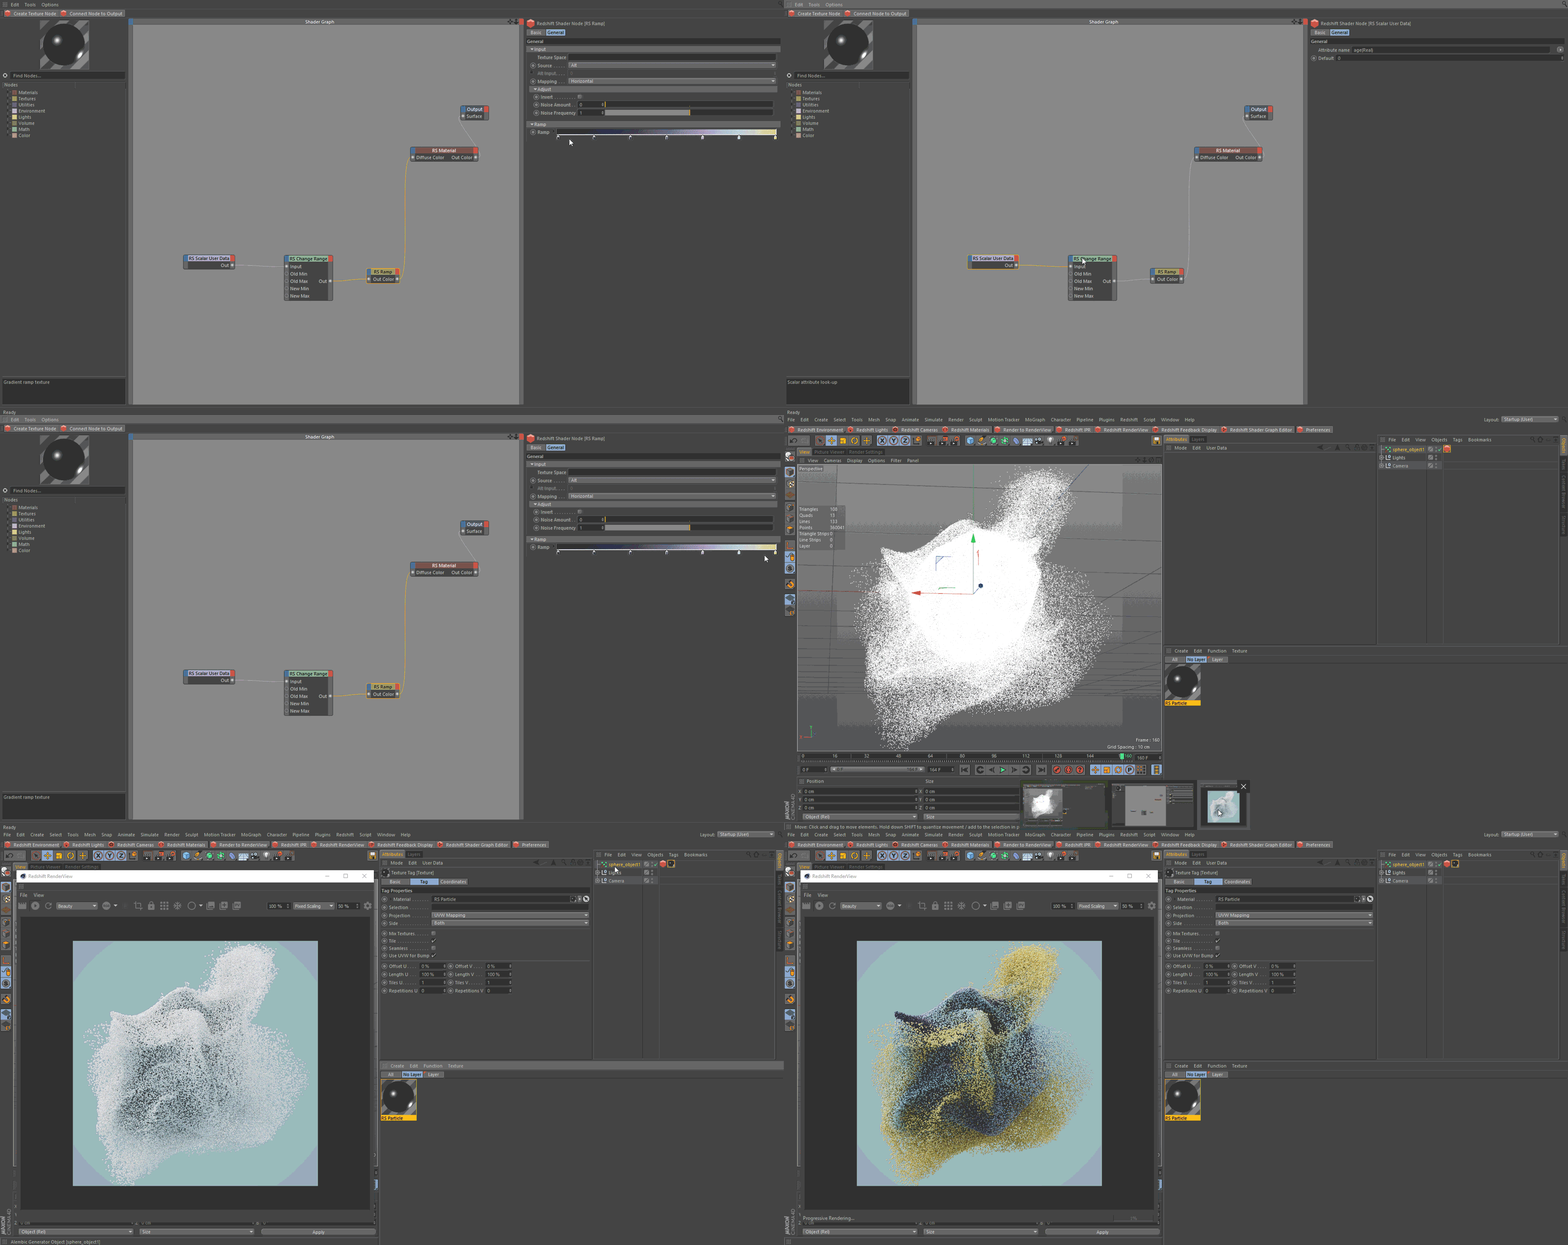
Now we're going to set up the material. We're using a User Scalar Data node and the age(Real) attribute connected to a Change Range node. That is then connected into a Ramp node to remap those values to colors we selected.
现在我们来准备材料。我们正在使用 userscaladata 节点和连接到 Change Range 节点的 age (Real)属性。然后连接到 Ramp 节点,将这些值重新映射到我们选择的颜色。
Setting up pScale
建立 pScale
Let's set up our pScale attribute to effect our scale of our particles.
让我们设置 pScale 属性来影响粒子的尺度。
First we need to add an Xpresso tag to our particles and open up the Xpresso Editor.
首先,我们需要添加一个 Xpresso 标签到我们的粒子和打开 Xpresso 编辑器。
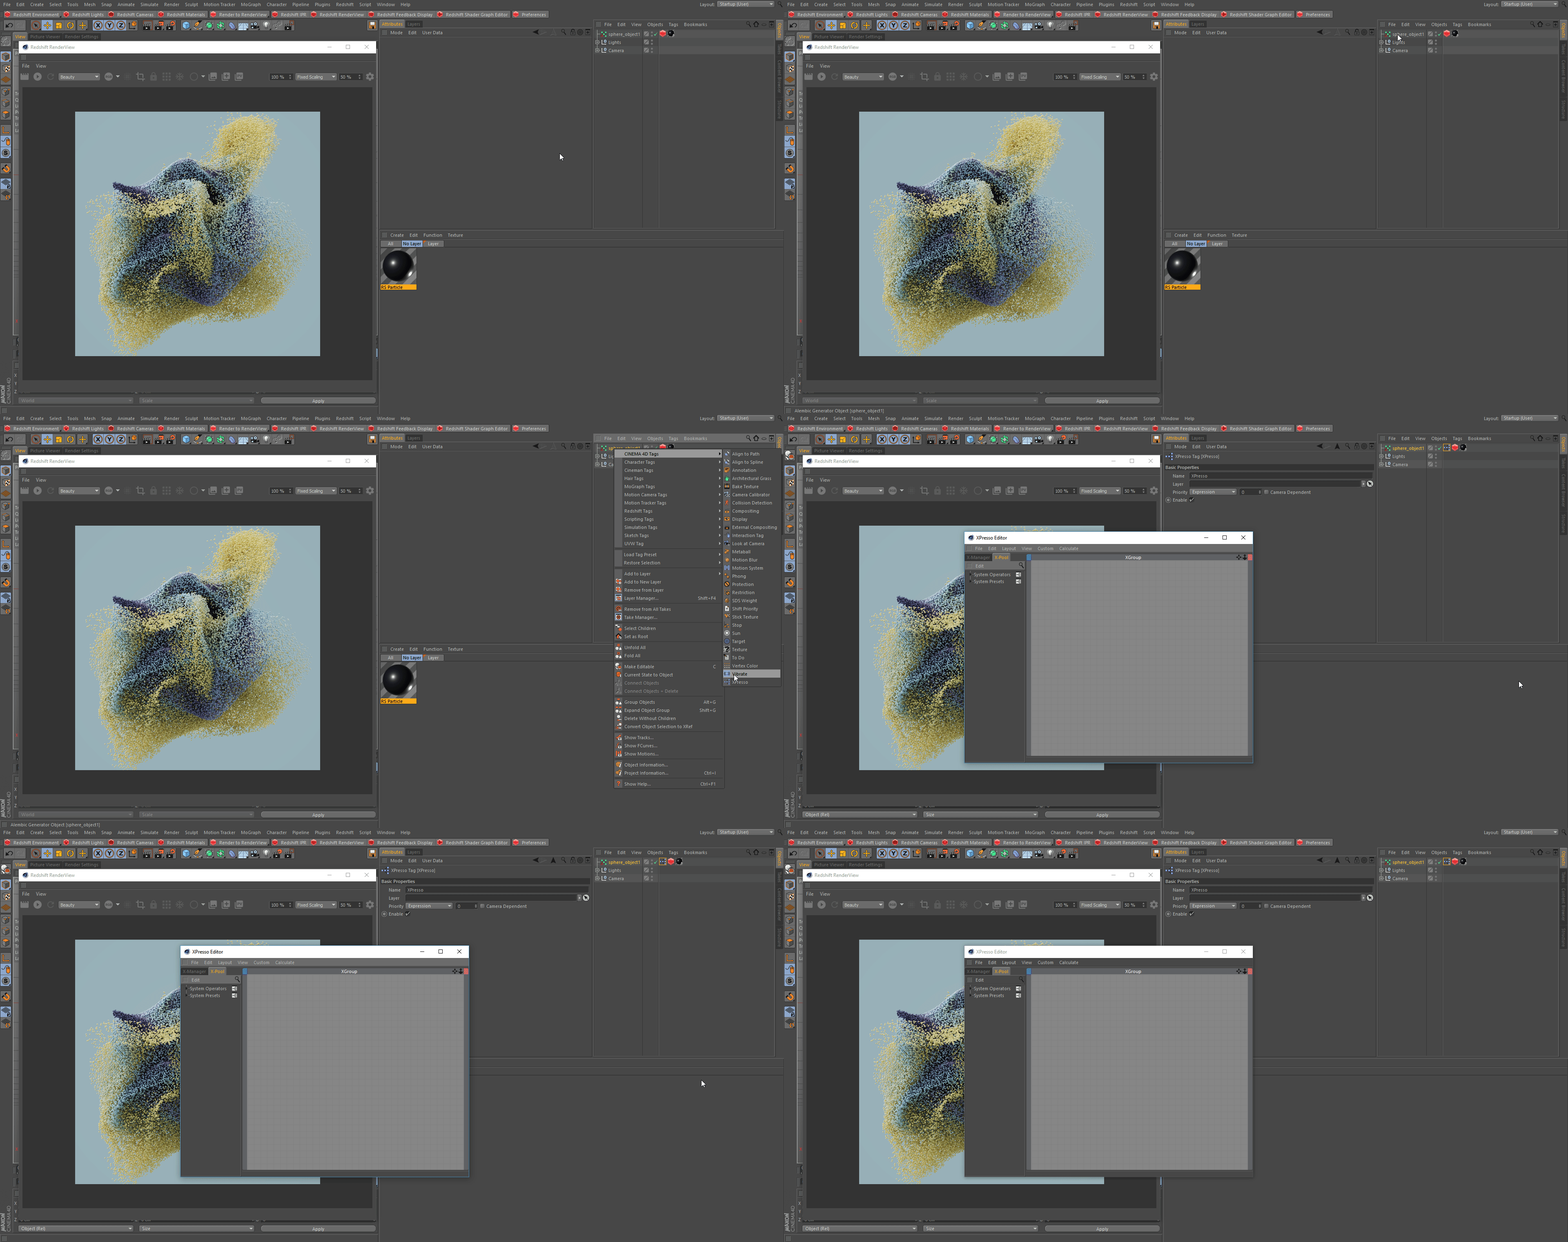
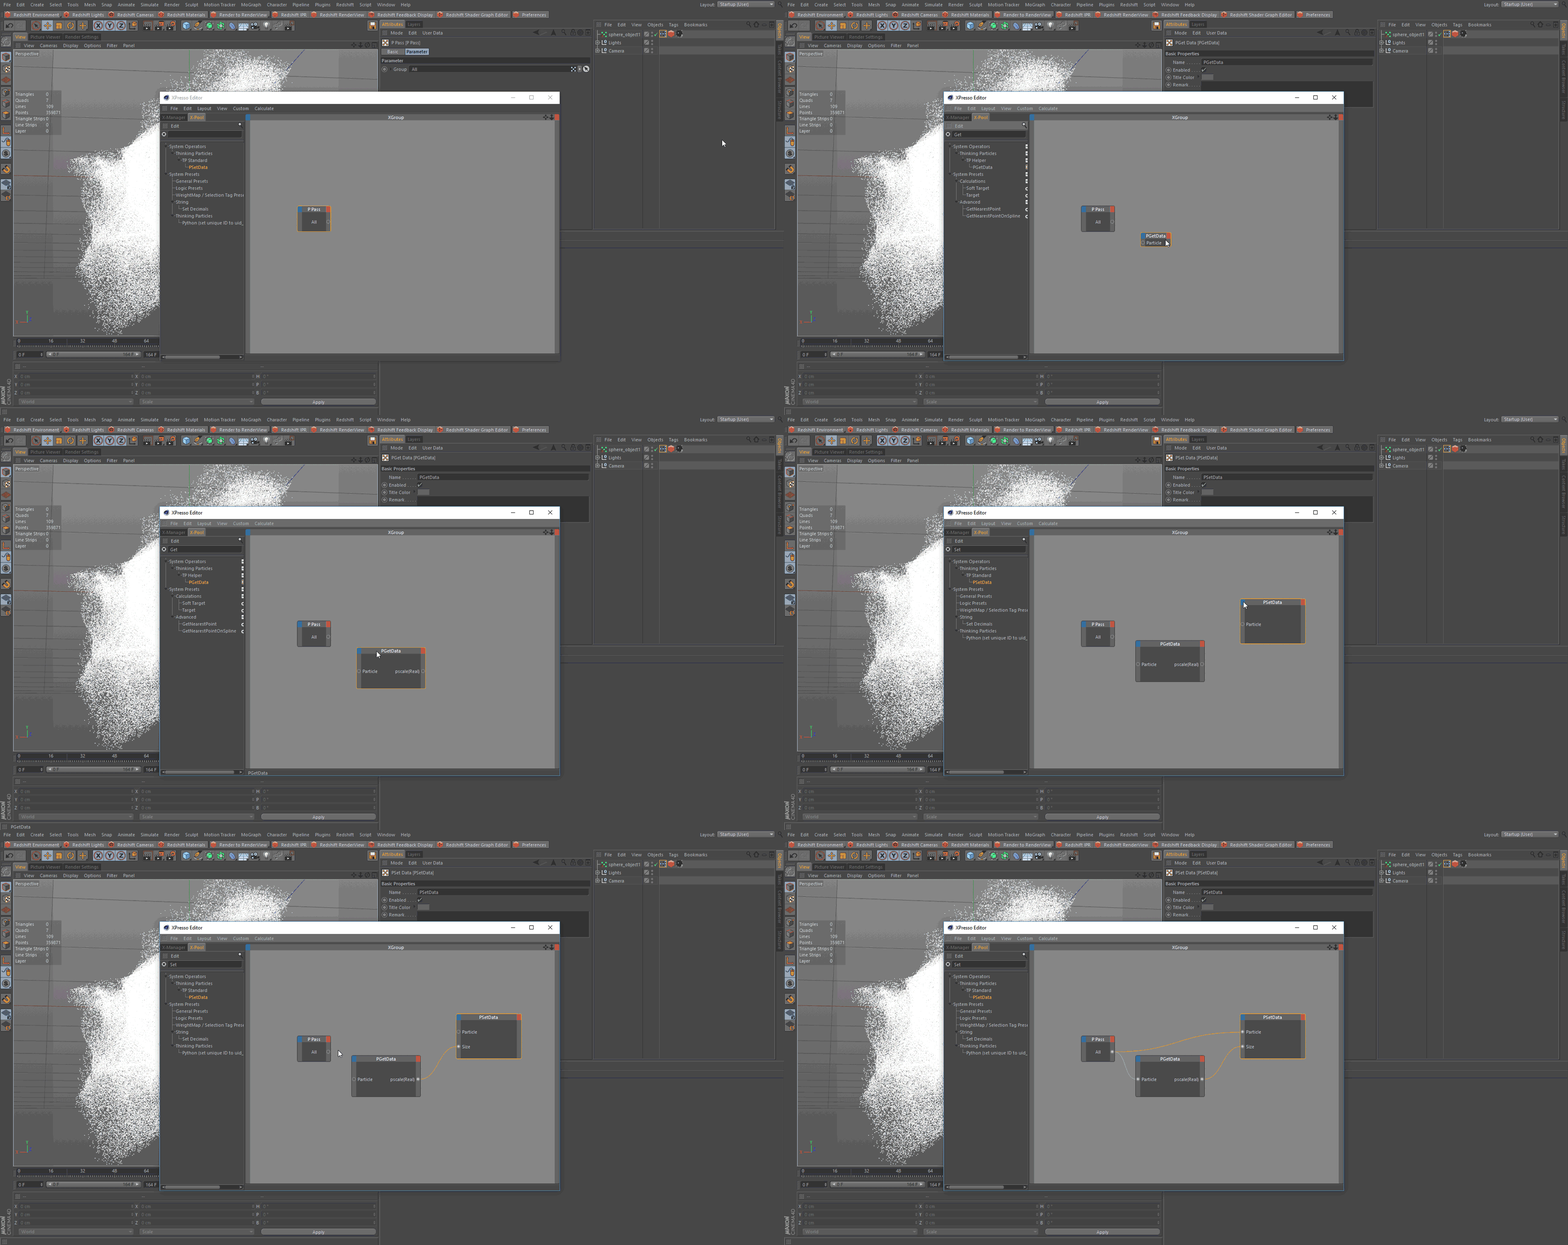
Next we need a couple of nodes to complete our setup. First we need to bring in a P Pass node, and then go to our Thinking Particle Settings and drag in our group.
接下来,我们需要两个节点来完成我们的设置。首先我们需要引入一个 p Pass 节点,然后进入我们的 Thinking Particle Settings 并拖动到我们的组中。

Then we need two more nodes, the GetData node and SetData node.Then we need to expose the pScale parameter on the GetData and the Size parameter on our SetData node. We connect the P Pass to our GetData node, then connect our pScale(Real) on our GetData to our SetData's Size parameter. We also need to connect our P Pass to our SetData in the Particle parameter. Note that you might need to reset your timeline for the scale to become effective.
然后,我们还需要两个节点,GetData 节点和 SetData 节点。然后,我们需要在 GetData 上公开 pScale 参数,并在 SetData 节点上公开 Size 参数。我们将 p Pass 连接到 GetData 节点,然后将 GetData 上的 pScale (Real)连接到 SetData 的 Size 参数。我们还需要将 p Pass 连接到 Particle 参数中的 SetData。请注意,您可能需要重新设置您的时间线,以便规模生效。
 |
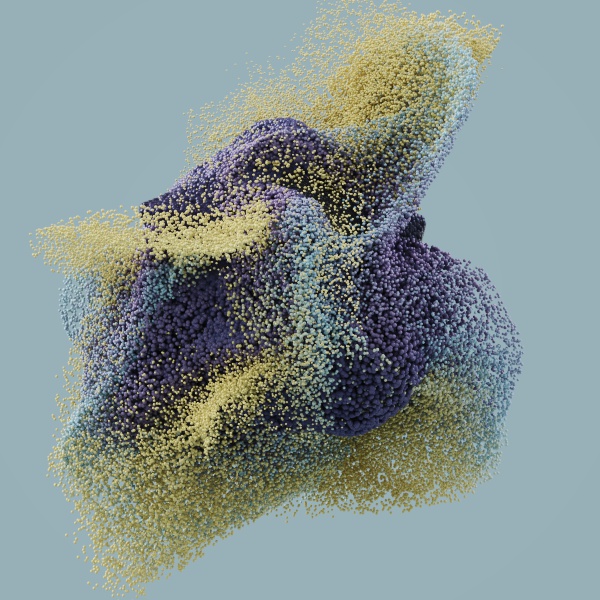 |
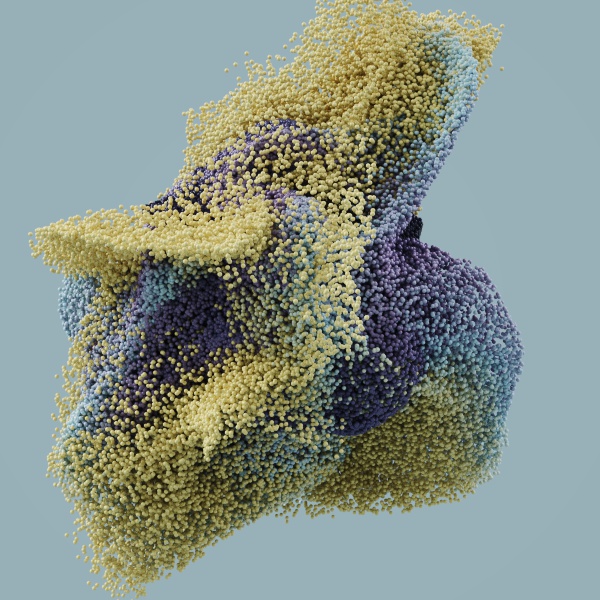
| No pScale (all particles same size) 无 pScale (所有粒子大小相同) | pScale Setup |

赶快留个言打破零评论!~