OSL AND PROCEDURAL VERTEX DISPLACEMENT (VECTOR AND HEIGHT)
New nodes: Vertex displacement, and Vertex displacement mixer
OSL和过程顶点置换(矢量和高度)
新节点:顶点置换和顶点置换混合器
You can now render procedural and OSL vertex displacement (either height or vector displacement) before rendering. This is a robust displacement system which doesn't suffer the same limitations as the old displacement system (which is now known as Texture Displacement). Octane also allows you to mix/layer vector/height displacement maps using the new displacement mixer node.
现在,您可以在渲染之前渲染程序和OSL顶点置换(高度或矢量置换)。这是一个强大的置换系统,与旧的置换系统(现在称为“纹理置换”)没有相同的限制。 Octane还允许您使用新的置换混合器节点来混合/分层矢量/高度置换图。
Vertex displacement will take any texture you provide, whether it's a procedural texture, OSL texture, or images. All projections are supported also (triplanar, for instance). For image textures, set the gamma to 1.0. To avoid holes in the geometry, the vertices should be shared between adjacent faces. In addition, as opposed to the workflow you're used to with texture displacement, Vertex Displacement will need subdivided meshes. This can either be handled in Cinema 4D by adding subdivision to your mesh, or controlled within the displacement node under the Subdivision parameter. Be mindful that using the subdivision parameter will subdivide your mesh at render time (e.g. meshes without retainer edges or subdivision near the edges may change the shape/soften your mesh).
顶点置换将采用您提供的任何纹理,无论是程序纹理,OSL纹理还是图像。还支持所有投影(例如,三重投影)。对于图像纹理,将灰度系数设置为1.0。为避免在几何图形中出现孔,应在相邻面之间共享顶点。此外,与您习惯使用纹理置换的工作流程相反,“顶点置换”将需要细分的网格。可以在Cinema 4D中通过向网格中添加细分来进行处理,也可以在“细分”参数下的置换节点内进行控制。请注意,使用细分参数会在渲染时细分您的网格(例如,没有固定边缘的网格或边缘附近的细分可能会改变形状/软化您的网格)。
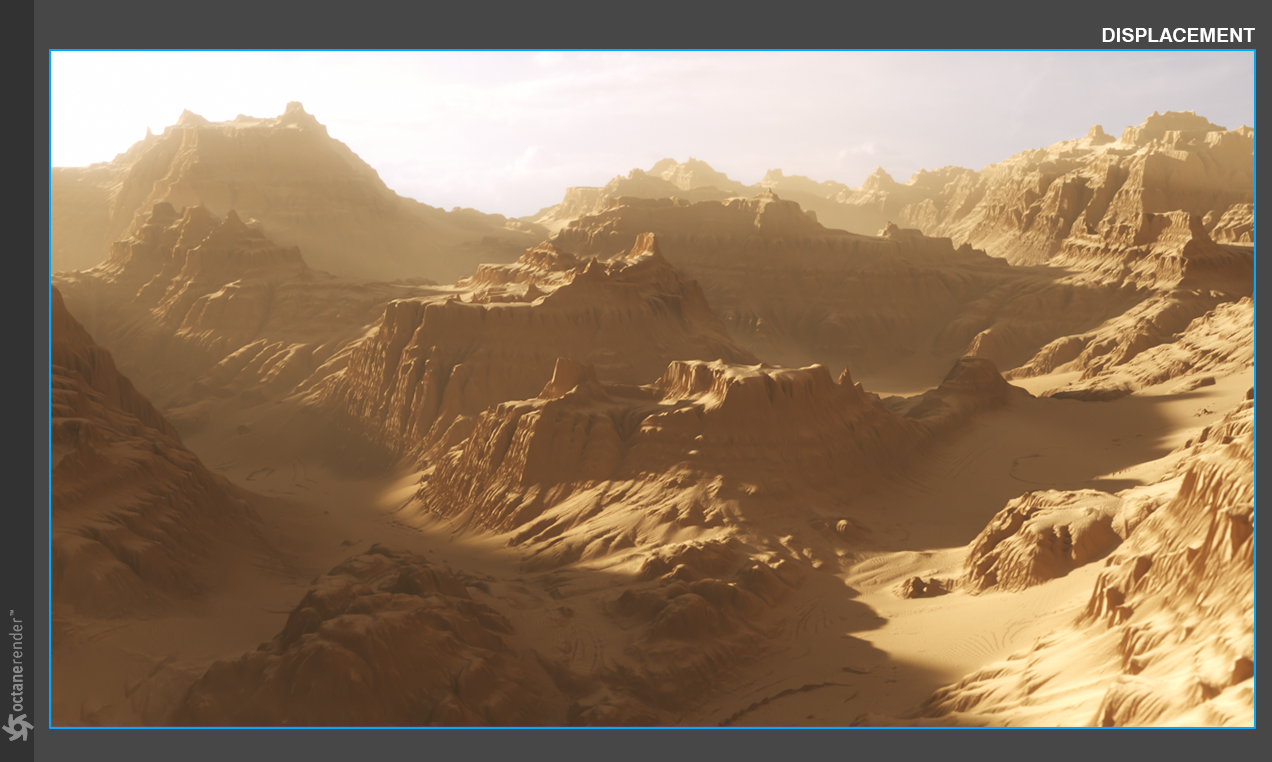
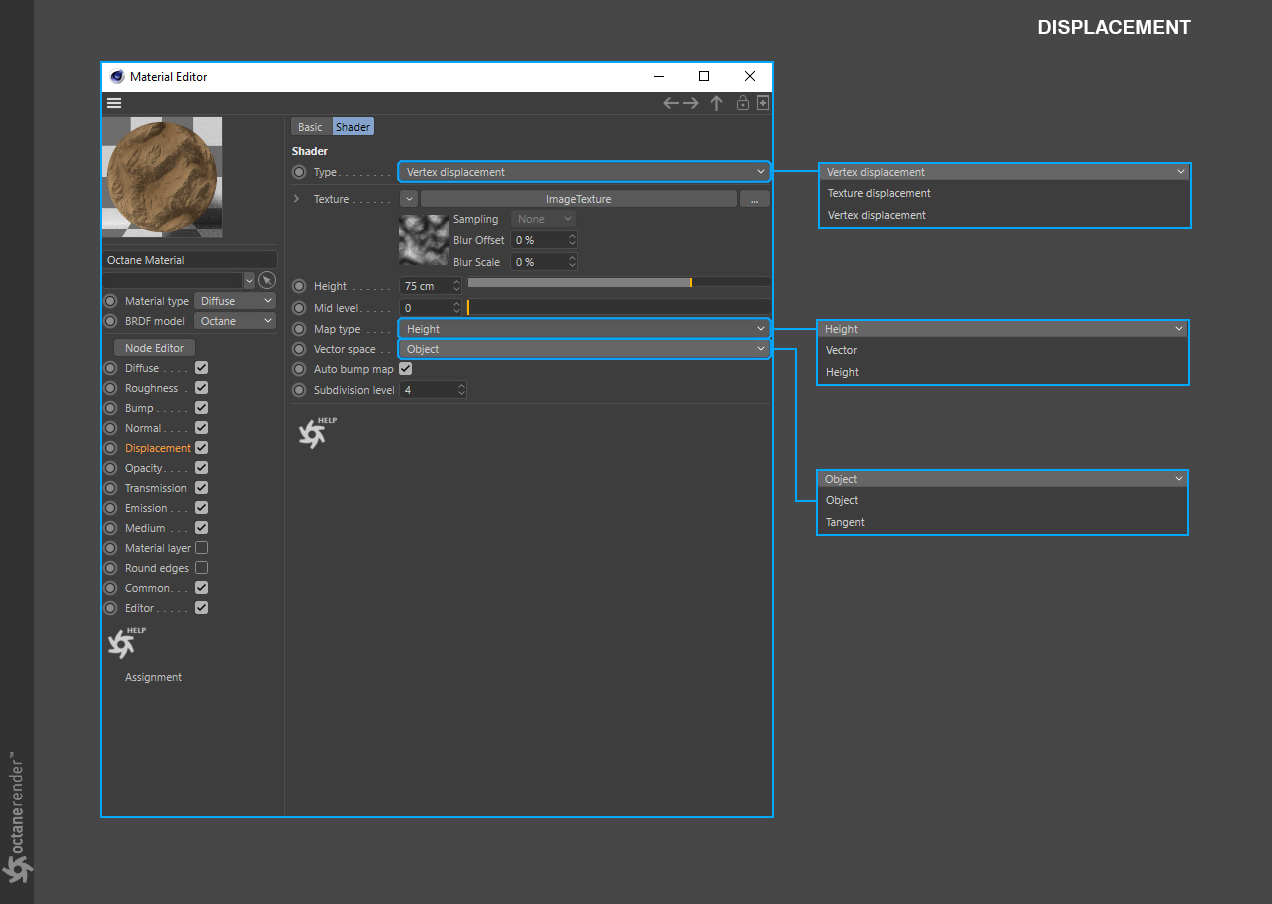
In the example above, only a sudivided plane was used to create the landscape, along with volume fog and another feature in the new displacement, Auto-Bump (more on that later). Below you can see the new attributes for displacement. Let's break down the settings with the new node using the material we built for the scene above:
在上面的示例中,仅使用了细分平面来创建景观以及体积雾和新置换中的另一个特征Auto-Bump(稍后会详细介绍)。 在下面,您可以看到置换的新属性。 让我们使用为上一场景构建的材质来分解新节点的设置:
TEXTURE
The displacement texture. All texture types are supported, including images, procedurals and OSL textures. Texture Displacement is driven by texture image and the node setting's resolution, while the new Vertex Displacement uses the mesh's data to achieve displacement. Each have their own pros and cons.
纹理
置换纹理。支持所有纹理类型,包括图像,程序和OSL纹理。纹理置换由纹理图像和节点设置的分辨率驱动,而新的顶点置换使用网格的数据来实现置换。每个人都有自己的优点和缺点。
HEIGHT
The displacement height.
高度
置换高度。
MID LEVEL
The value in the image which corresponds to no displacement. The range is always normalized to [0,1]. Set this value to 0.5 for image textures that use 50% to represent no displacement.
中级
图像中对应于无置换的值。该范围始终标准化为[0,1]。对于使用50%表示无置换的图像纹理,将此值设置为0.5。
MAP TYPE
The displacement map type. Height maps and Vector displacement maps are supported.
地图类型
置换图类型。支持高度图和矢量置换图。
VECTOR SPACE
The vector displacement map space. Only valid if the Map Type is set to Vector. Tangent would be chosen when using a specialized vector displacement map, from a sculpting program, for instance.
矢量空间
向量置换图空间。仅在Map Type设置为Vector时有效。例如,在使用专门的矢量置换图时,例如从雕刻程序中选择切线。
AUTO BUMP MAP
Generates an automatic bump map to achieve fine details, without requiring high subdivision levels. Only supported for Height displacement maps.
自动碰撞图
生成自动凹凸贴图以实现精细的细节,而无需高细分级别。仅支持高度置换贴图。
SUBDIVISION LEVEL
The subdivision level applied to polygons using this material. Overrides the subdivision level set in geometry preferences. Higher subdivision levels will achieve greater displacement detail, but can also increase render and pre-processing times.
细分级别
使用此材质的细分级别应用于多边形。覆盖在几何首选项中设置的细分级别。较高的细分级别将获得更多的置换细节,但也会增加渲染和预处理时间。
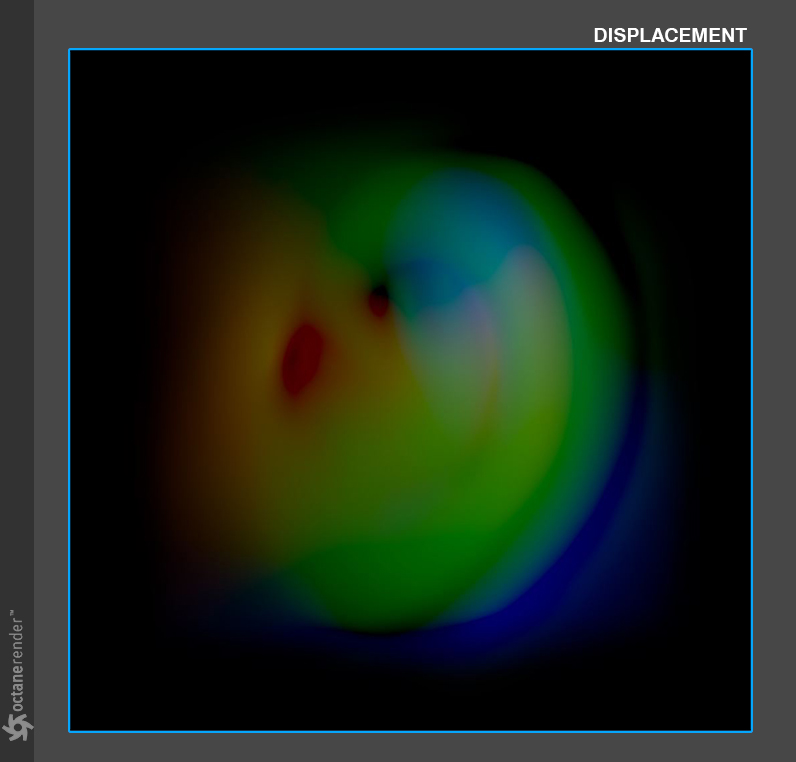
Let's start by looking at an example of a render using the Map Type: Vector. Height is the setting you'll likely use in most cases, giving you two directions of displacement, but Vector is omni-directional and can create actual convex/concave areas, especially when used with vector displacement maps and the Vector Space parameter set to Tangent. Let's first look at what one of these specialized maps look like that would typically come from a sculpting application:
让我们从使用“地图类型:矢量”的渲染示例开始。高度是您在大多数情况下可能会使用的设置,为您提供两个置换方向,但是Vector是全方位的,可以创建实际的凸/凹区域,尤其是在与向量置换贴图和Vector Space参数设置为Tangent一起使用时。首先,让我们看一看这些专门制作的地图通常是由雕刻应用程序生成的:
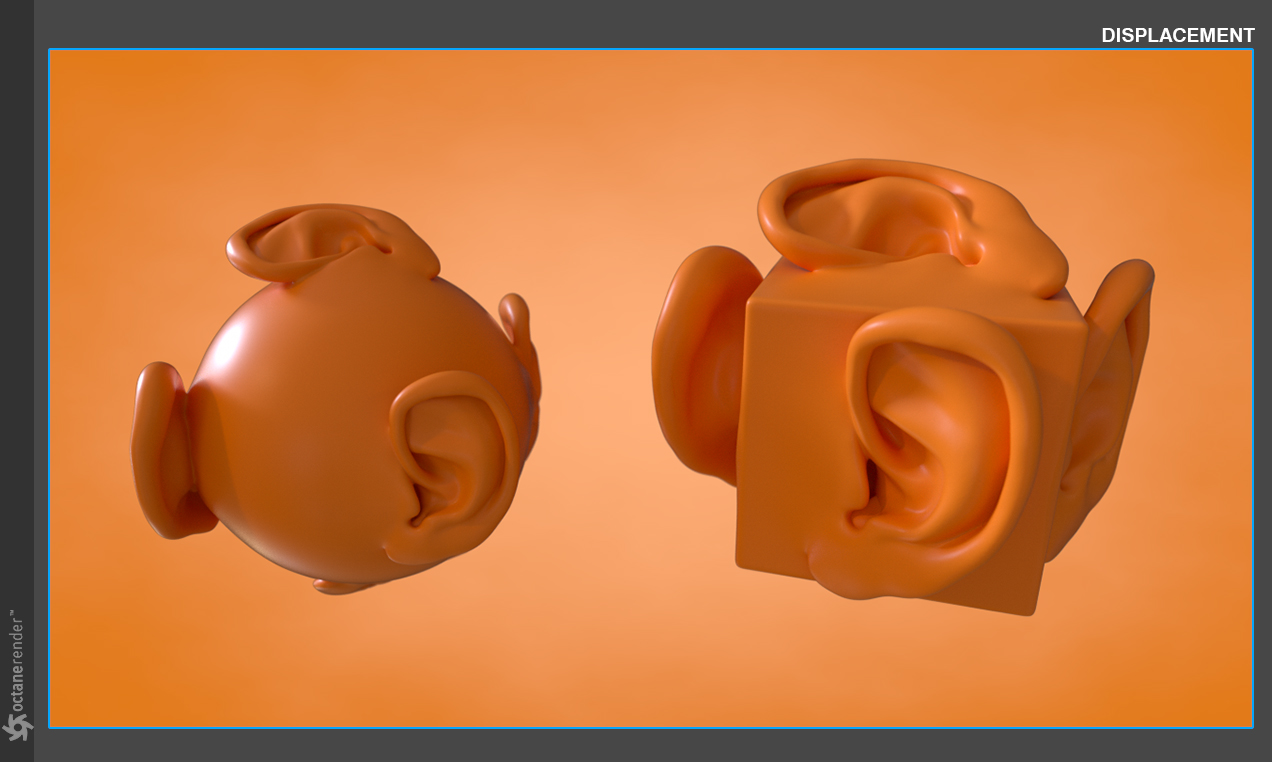
Below is a render using this map, with the settings we defined above, with a box projection on a simple parametric sphere, and cube. As you can see, we're creating complex geometry, from all angles, with one map.
下面是使用此贴图的渲染器,具有我们在上面定义的设置,在简单的参数球体和立方体上具有箱形投影。 如您所见,我们正在使用一张地图从各个角度创建复杂的几何图形。
Taking this a step further, we can use the new Displacement Mixer node, and the ability to now use triplanar mapping with displacement, to create something even more complex below:
更进一步,我们可以使用新的置换混合器节点,以及现在可以将三面贴图与置换一起使用的功能,以在下面创建更复杂的东西:
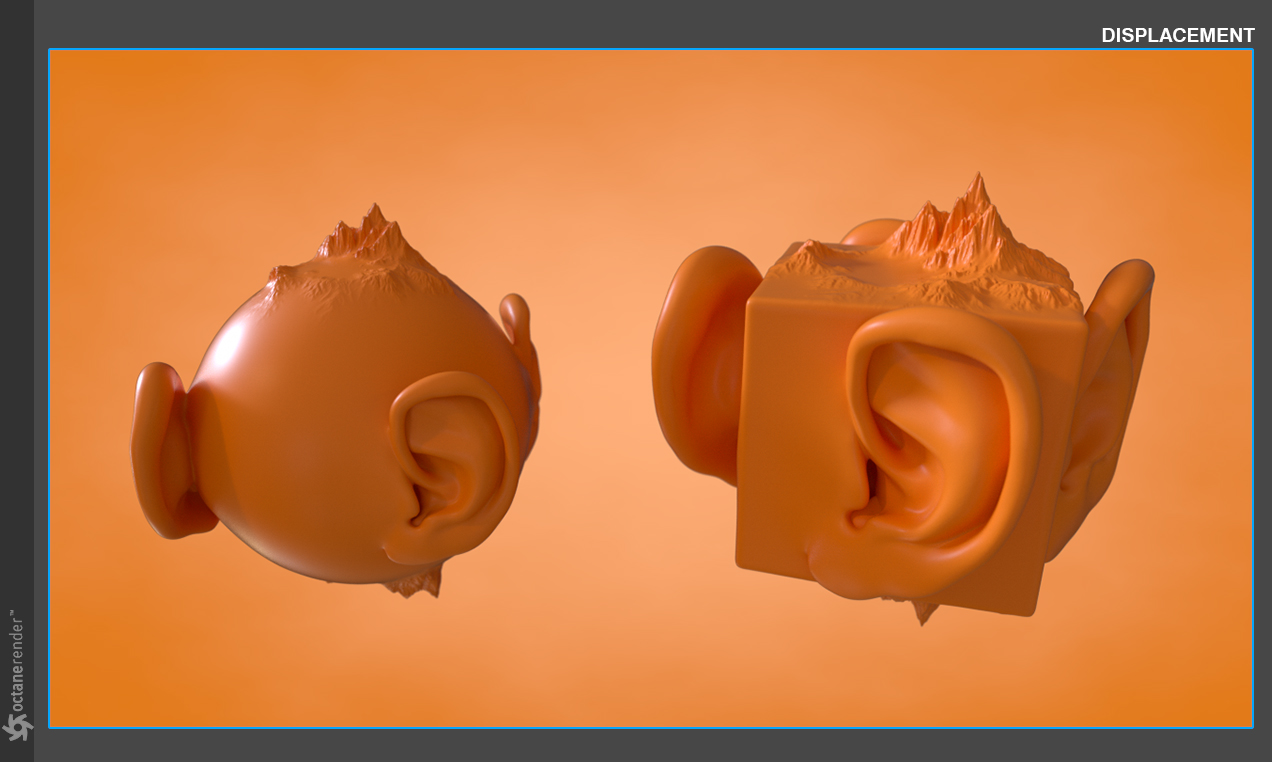
In this example above, we used a terrain displacement map for the Y+ and Y- areas of the meshes, then the ear vector displacement for the X+, X-, Z+, Z-. As you can see in the node layout below, we used a different displacement nodes for each map, then ran those into a Displacement Mixer. We used an RGB Spectrum node, set to black, in the other triplanar inputs so that the other axes were not displaced in addition to the displacement the other map creates.
在上面的示例中,我们为网格的Y +和Y-区域使用了地形置换图,然后为X +,X-,Z +,Z-使用了耳朵向量置换。 正如您在下面的节点布局中看到的那样,我们为每个贴图使用了一个不同的置换节点,然后将它们运行到置换混合器中。 我们在其他三边形输入中使用了设置为黑色的RGB Spectrum节点,因此除了其他贴图创建的置换之外,其他轴也没有置换。
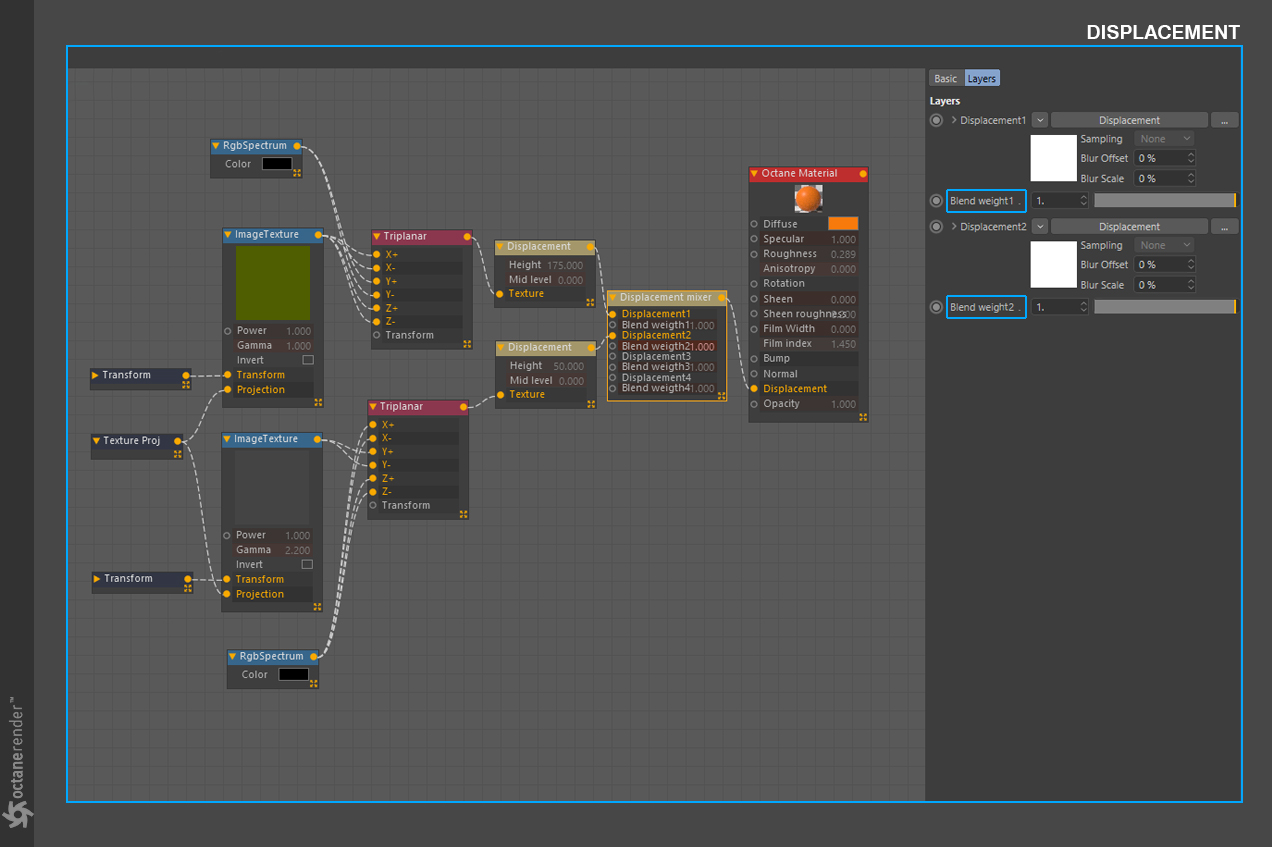
Expanding on the new Displacement Mixer that we used in the previous render, you can only mix Vertex Displacement, do not use Texture Displacement. The Blend Weights, highlighted in the above image, are simply a power/intensity slider for the input above the slider.
在我们之前的渲染中使用的新的置换混合器上进行扩展,您只能混合顶点置换,不使用纹理置换。 上图中突出显示的“混合权重”只是一个功率/强度滑块,用于该滑块上方的输入。
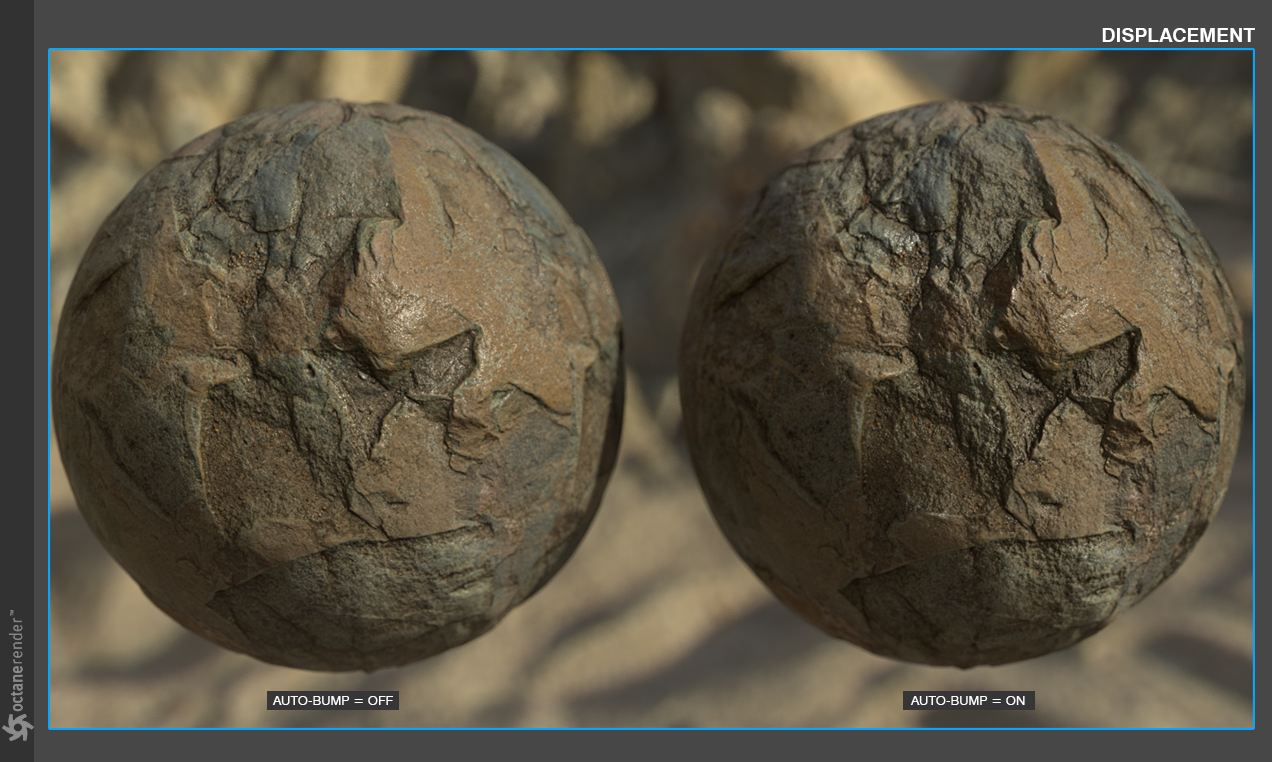
One of the last settings we're going to cover is the Auto Bump Map. Below, you'll find a side-by-side comparison example of the difference when using the Auto Bump Map attribute. You can use lower subdivision levels and allow the extra detail to be added in via bump mapping with this parameter. The bump mapping works the same as if you were using the bump channel in the material, thus creating the illusion of extra detail, while not creating more polygons. In light of that, depending on the angle and distance from the camera, sometimes it will be in your best interest to raise the Subdivision Level for the extra detail you need.
我们要介绍的最后一项设置是“自动凹凸贴图”。 在下面,您将找到使用自动凹凸贴图属性时差异的并排比较示例。 您可以使用较低的细分级别,并允许使用此参数通过凹凸贴图添加额外的细节。 凹凸贴图的工作方式与您在材质中使用凹凸贴图通道的方式相同,从而产生了额外细节的错觉,而没有创建更多的多边形。 有鉴于此,根据与相机的角度和距离,有时有时需要提高细分级别以获取所需的更多细节。


赶快留个言打破零评论!~