preparIng scene and upload to orc
There are a few things you need to do before you send the scene to the ORC, now let us explain them step by step.
准备场景并上传到兽人
在将场景发送到ORC之前,您需要做一些事情,现在让我们逐步解释它们。
PreparING scene
First, prepare your scene. Optimize it as we talked about before. Set the frames range. Make all settings from Cinema 4D's render setup. Do not worry about the output format and the save path because you will set them in the cloud.
准备现场
首先,准备好场景。如我们之前讨论的那样对其进行优化。设置帧范围。从Cinema 4D的渲染设置中进行所有设置。不必担心输出格式和保存路径,因为您将在云中进行设置。
exportING scene for cloud
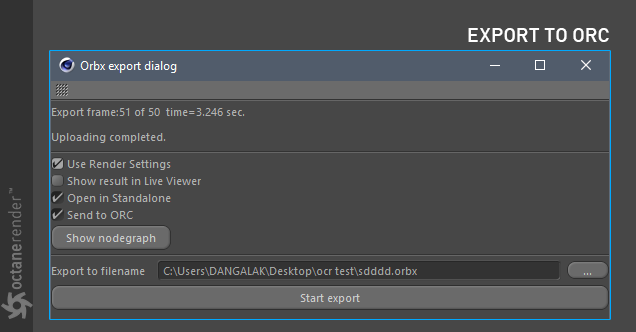
If you finished with the scene setup, go to the "Cloud" menu in Live Viewer and select "Send Scene". As soon as you choose this, a save window will open. Save the scene. The scene will be saved in Orbx format. In this format, problems such as the relative file path is not a problem because the whole scene is saved into a single container file. You can think like FBX. If there are complicated particle/dynamics/hair or cloth systems on your scene, be sure to bake or cache them. The file size may be too large according to your scene structure, it is normal. (If you are wondering what the Orbx format is, you can look at this link). Once you've saved the scene, you will see the "Orbx export dialog" window as you see in the picture below, and the frames will be processed one by one.
导出云场景
如果完成了场景设置,请转到Live Viewer中的“云”菜单,然后选择“发送场景”。选择此选项后,将打开一个保存窗口。保存场景。场景将以Orbx格式保存。以这种格式,诸如相对文件路径之类的问题就不成问题了,因为整个场景都保存在单个容器文件中。您可以像FBX一样思考。如果您的场景中存在复杂的粒子/动力学/头发或衣服系统,请务必烘焙或缓存它们。根据您的场景结构,文件大小可能太大,这是正常的。 (如果您想知道Orbx格式是什么,可以查看此链接)。保存场景后,您将看到“ Orbx导出对话框”窗口,如下图所示,并且帧将被一一处理。

The most important of these options is "Use render Settings". So you have used the settings you made in Cinema 4D render settings. If you do not check this, the setup in Live Viewer will be exported accordingly.
这些选项中最重要的是“使用渲染设置”。因此,您已使用在Cinema 4D渲染设置中所做的设置。如果不选择此项,Live Viewer中的设置将相应导出。
The "Open Standalone" option is for you to view your scene in the standalone software as soon as the export progress finished. This way you can check whether your scene is correct. If you double-click on "Render target" from the "node graph", your scene will start to render. We recommend going through the various frames to check for any errors. You can leave Standalone when you are done.
导出进度完成后,即可使用“打开独立文件”选项在独立软件中查看场景。这样您可以检查场景是否正确。如果双击“节点图”中的“渲染目标”,则场景将开始渲染。我们建议仔细检查各个框架以检查是否有任何错误。完成后,您可以保持“独立”状态。
"Export to filename" is for determining where your orbx file will be saved. Then, you can click "Start Export" and start exporting your scene. Depending on your scene, this progress can be long or short.
``导出到文件名''用于确定您的orbx文件将保存在何处。然后,您可以单击“开始导出”并开始导出场景。根据您的场景,进度可能会很长,也可能很短。
uploadIng scene to ORC
将场景上传到ORC
Once your scene has finished exporting, you can upload the orbx file to the Octane Render Cloud. The first thing you need to do is go to the main orc website. You need to have subscription membership and account in order to use this system. You can get detailed information from this link. Let's assume you've done this and continue. Now click the "Scenes" link above from the Cloud homepage. This page is for managing all your uploaded scenes. Click on the "upload orbx scene" icon to load your first scene.
场景导出完成后,可以将orbx文件上传到Octane Render Cloud。您需要做的第一件事是访问主要的orc网站。您需要具有订阅成员资格和帐户才能使用此系统。您可以从此链接获取详细信息。假设您已完成此操作并继续。现在,从Cloud主页中单击上方的“场景”链接。该页面用于管理所有上传的场景。单击“上传orbx场景”图标以加载第一个场景。

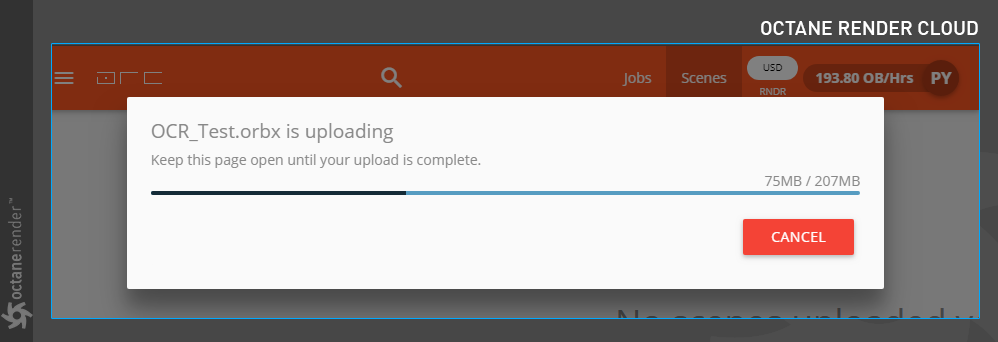
Select the orbx scene file from the file explorer window. As soon as you choose this, your file will begin uploading to the ORC. Depending on the size of your file and your internet speed, this process will take a while.
从文件资源管理器窗口中选择orbx场景文件。 选择此选项后,您的文件将开始上传到ORC。 根据文件大小和互联网速度,此过程将花费一些时间。

uploadIng scene to ORC (alternatIve method)
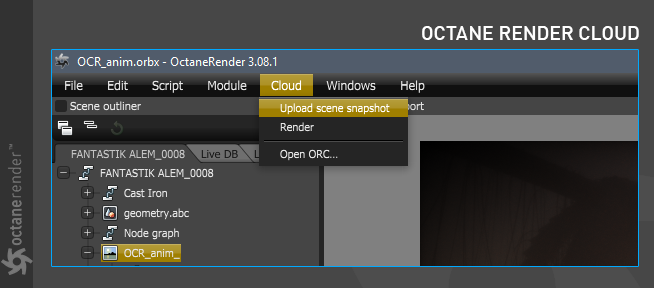
You can also upload from Octane Standalone software. Once you have opened the exported scene in Standalone, go to the "Cloud" menu and select "Upload Scene Snapshot". As soon as you select this, you will see the upload progress on the ORC in the lower left corner. After uploading, go to ORC and you can see your scene in the "Scenes" section and prepare for the final render.
将场景上载到ORC(alternatIve方法)
您也可以从Octane Standalone软件上载。 在独立环境中打开导出的场景后,转到“云”菜单,然后选择“上传场景快照”。 选择此选项后,您将在左下角的ORC上看到上传进度。 上传后,转到ORC,您可以在“场景”部分中看到场景,并准备最终渲染。


赶快留个言打破零评论!~