FLOAT
Float texture is like a swiss knife. You can use it for many situations in Octane. One usage is that actually creates a gray scale value for the material channels. For example, if any channel has RGB color, this float value creates black for 0 and white for 1. The float here also works the same in Roughness, Bump, Normal, Opacity and Transmission channels.
Other usage is that you can define the float value to mix node as an amount factor. Any node has a parameters like "amount" or "texture" you can use float for them.
Let's take a look at a few usages of this node:
浮动
浮动纹理就像瑞士刀。您可以在Octane中将其用于许多情况。一种用法是实际上为材质通道创建灰度值。例如,如果任何通道具有RGB颜色,则此float值将为0创建黑色,为1创建白色。此处的float在“粗糙度”,“凹凸”,“正常”,“不透明度”和“透射”通道中也相同。
其他用法是您可以将混合节点的浮点值定义为数量因子。任何节点都有一个参数,例如“ amount”或“ texture”,您可以对它们使用float。
让我们看一下该节点的一些用法:
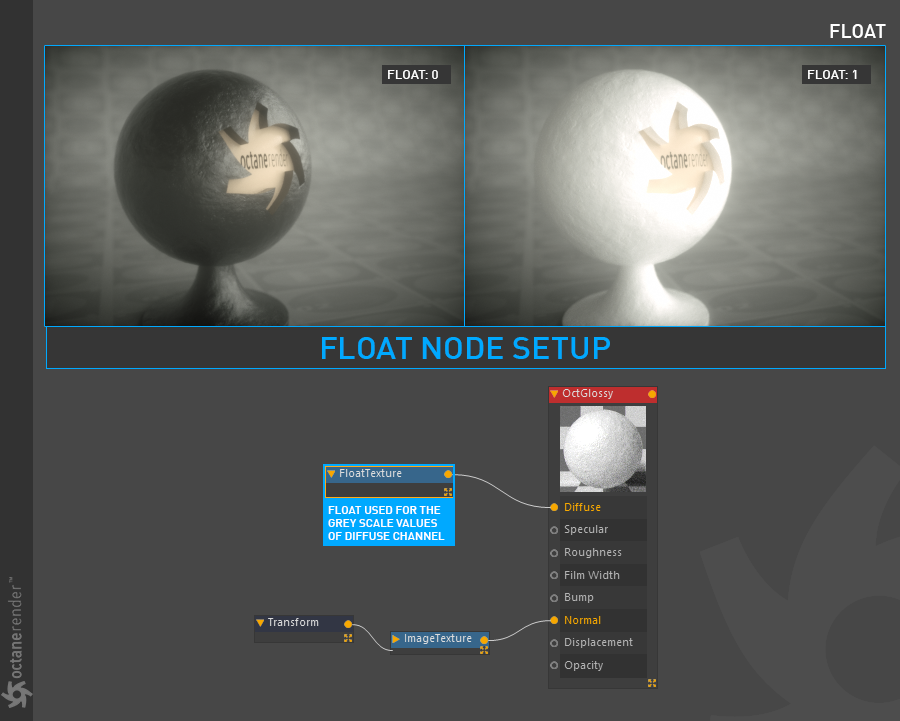
Create grey scale value from "Float" node for the material channel
Open the Node editor and prepare the setup as you see in the picture below. In this setup, you will create the gray scale values when you connect the Float Node to the diffuse channel of the parent material. The color in your diffuse channel is overridden by float texture. This is the simplest use.
Info: You can use any material channel that has "float" option
从“浮动”节点为材质通道创建灰度值
打开节点编辑器并准备设置,如下图所示。在此设置中,当您将“浮动节点”连接到父材质的漫反射通道时,将创建灰度值。漫反射通道中的颜色被浮动纹理覆盖。这是最简单的用法。
信息:您可以使用任何具有“浮动”选项的材质渠道
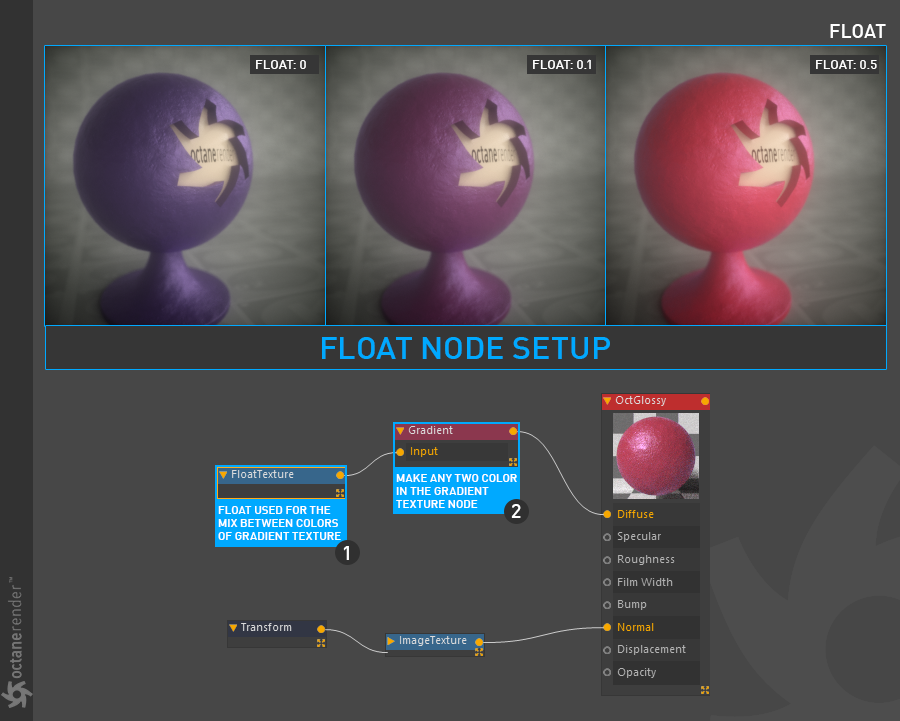
Create MIX BETWEEN gradIent TEXTURE NODE USING FLOAT
Open the Node editor and prepare the setup as you see in the picture below. In this setup, connect the Float Node to the input option of the Gradient texture node and enter any 2 color values from the gradient texture options. Then connect the gradient texture node to the diffuse channel of the parent material. As you can see in the picture below, when you play with float value, you will be mixing the gradient color values. You can easily use this setup in many scenarios. Also you can increase the number of gradient colors for more color mixes. We will explain the "Gradient Texture Node" later in detail.
使用浮标在渐变纹理节点之间创建混合
打开节点编辑器并准备设置,如下图所示。 在此设置中,将“浮动节点”连接到“渐变”纹理节点的输入选项,然后从渐变纹理选项中输入任意2个颜色值。 然后将渐变纹理节点连接到父材质的漫反射通道。 如下图所示,当您使用浮点值时,您将混合渐变颜色值。 您可以在许多情况下轻松使用此设置。 另外,您可以增加渐变色的数量以获得更多的混色。 稍后我们将详细解释“渐变纹理节点”。
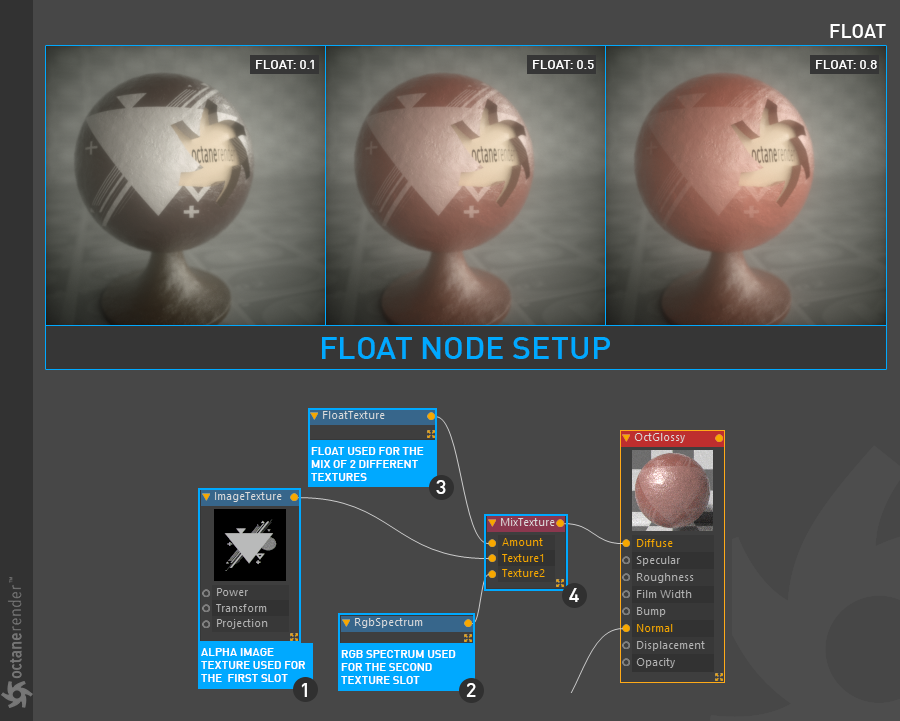
USING FLOAT WITH THE MIX TEXTURE NODE
Open the Node editor and prepare the setup as you see in the picture below. In this setup, you can mix the Float Node into the amount slot of the Mix texture node and mix it between two different textures. We will not discuss the use of Mix texture and other nodes here. For a detailed description of these nodes, you can refer to the relevant sections.
将浮点数与MIX TEXTURE NODE结合使用
打开节点编辑器并准备设置,如下图所示。 在此设置中,您可以将“浮动节点”混合到“混合”纹理节点的数量插槽中,并将其混合在两个不同的纹理之间。 我们将不在这里讨论混合纹理和其他节点的使用。 有关这些节点的详细说明,可以参考相关部分。


赶快留个言打破零评论!~