Volume Rendering 体积渲染
Volume Rendering Explained 体积渲染解释
Redshift can render non-homogeneous volume objects such as smoke and fire. A volume's shape can be specified either through an OpenVDB file or, in certain cases, via each individual DCC's volume creation functionality.
红移可以渲染非同质体积对象,如烟和火。卷的形状可以通过 OpenVDB 文件指定,在某些情况下,也可以通过每个 DCC 的卷创建功能指定。
Volume objects have to be stored on the GPU's memory in their entirety and are not handled by Redshift's out-of-core system. Therefore, if a scene uses too many different volume objects or if these volume objects are of a particularly high resolution and do not fit on the GPU's memory, rendering will be aborted with an out-of-VRAM error message.
卷对象必须完整地存储在 GPU 的内存中,并且不能被 Redshift 的核外系统处理。因此,如果一个场景使用了太多不同的卷对象,或者如果这些卷对象的分辨率特别高,并且不适合 GPU 的内存,渲染将被终止与一个超出 vram 的错误消息。
To define the volume's shading, a Redshift Volume Shader needs to be assigned to the volume. This is explained below. 为了定义体积的阴影,需要为体积分配一个红移体积着色器
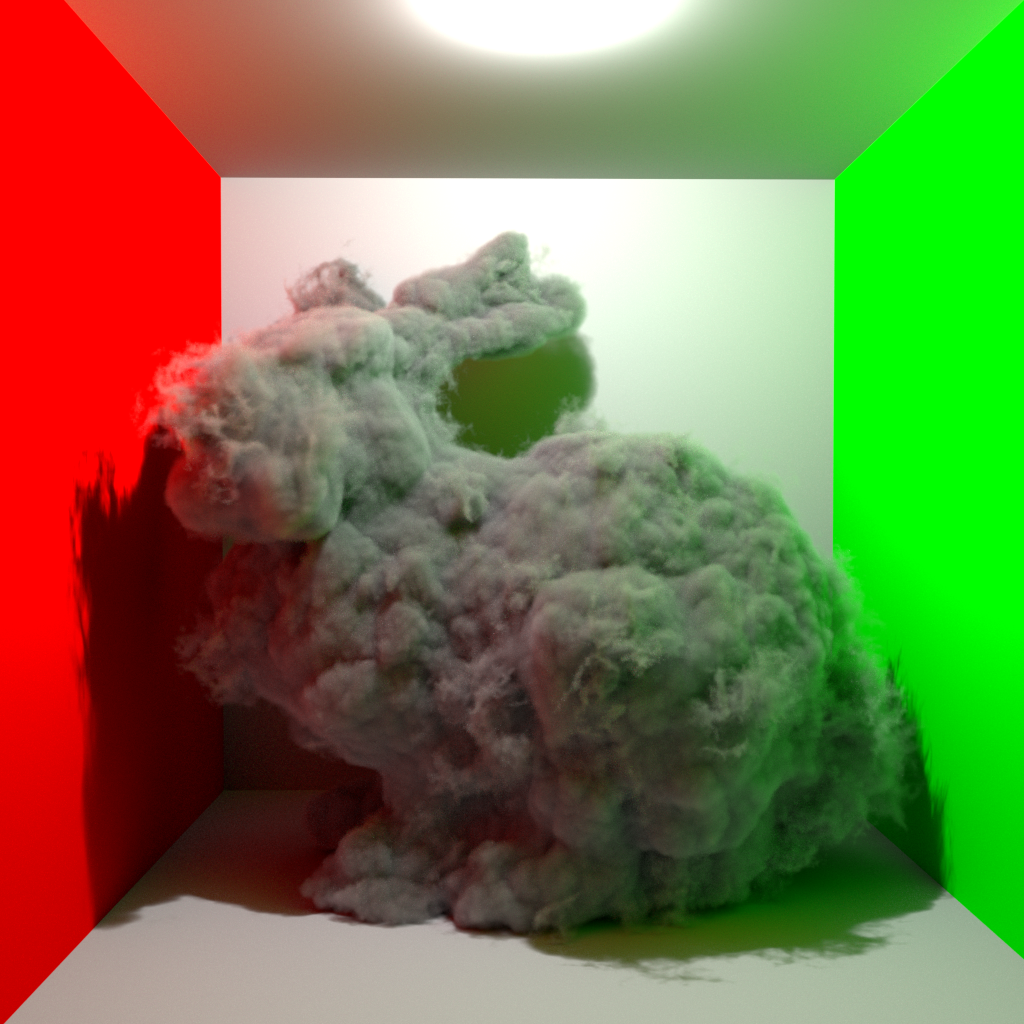
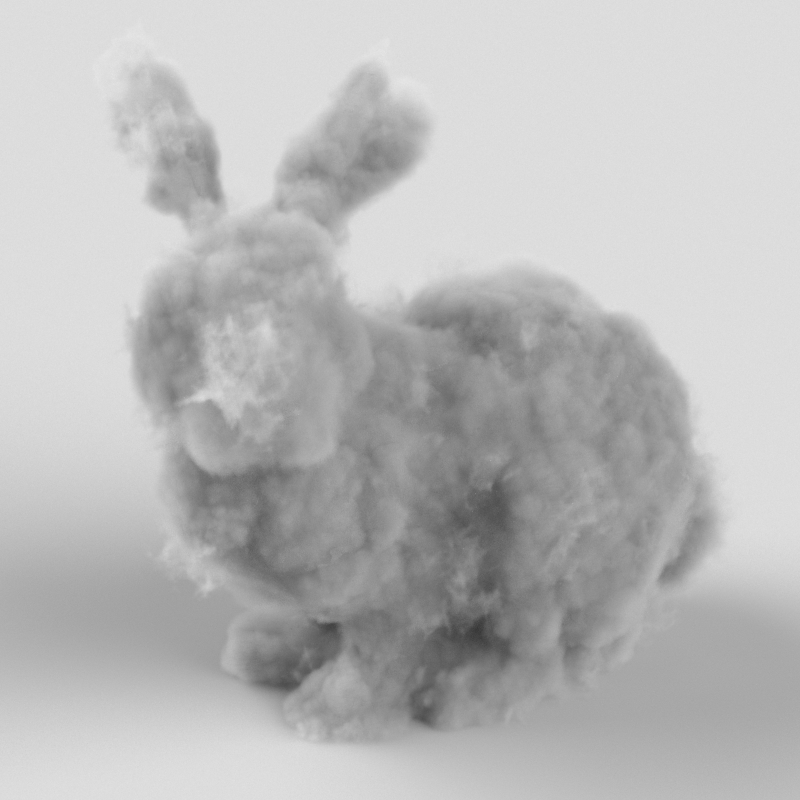
A cloud bunny in the Cornell box
康奈尔盒子里的云兔
OpenVDB files and channels
文件和通道
OpenVDB files are to volumes what EXR files are to textures. While a texture stores pixels (also called texels), an OpenVDB file stores voxels which are 3D pixels. Each voxel stores information that describes the volume at a particular XYZ point. For example, it can store a density value which tells the renderer how opaque or transparent the volume is at that point. In some ways, this is similar to the alpha channel in a PNG or EXR file.
OpenVDB 文件之于卷就像 EXR 文件之于纹理一样。纹理存储像素(也称为 texels) ,而 OpenVDB 文件存储3D 像素。每个体素存储描述特定 XYZ 点上的卷的信息。例如,它可以存储一个密度值,这个密度值告诉渲染器体积在这一点上是多么的不透明或者透明。在某些方面,这类似于 PNG 或 EXR 文件中的 alpha 通道。
OpenVDB organizes its voxel data in channels. As mentioned above, a typical channel is 'density'. Another channel is 'temperature' which tells us how cold or hot a voxel is. As it will be shown later, the temperature channel can be used to render fire.
OpenVDB 将其体素数据组织在通道中。如上所述,一个典型的通道是“密度”。另一个通道是“温度”,它告诉我们体素有多冷或多热。正如稍后将要展示的,温度通道可以用来渲染火焰。
One thing to remember with OpenVDB channels is that they are named. In theory, a 3d app could be exporting VDB density information in a channel named "bob". Thankfully, though, most applications follow fairly standard naming conventions. In a later section of this document we'll show how to use Redshift log files to find out the channel names within an OpenVDB file. Knowing the channel names of your OpenVDB file is essential when using the Redshift Volume Shader, as it will be shown below!
对于 OpenVDB 通道,需要记住的一点是,它们是以。理论上,一个3d 应用程序可以在一个名为“ bob”的通道中输出 VDB 密度信息。不过,值得庆幸的是,大多数应用程序都遵循相当标准的命名约定。在本文后面的部分中,我们将展示如何使用 Redshift 日志文件查找 OpenVDB 文件中的通道名称。在使用 Redshift Volume Shader 时,知道 OpenVDB 文件的通道名是必不可少的,如下所示!
Creating a volume grid
创建卷网格(2)
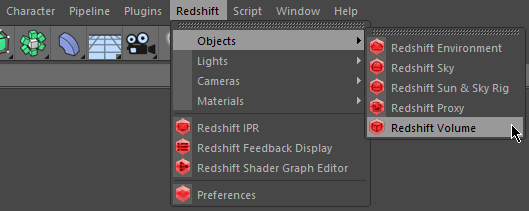
To create a Volume object, from the Redshift menu select the Redshift Volume option from the Objects sub-menu
要创建卷对象,从红移菜单中选择对象子菜单中的红移卷选项
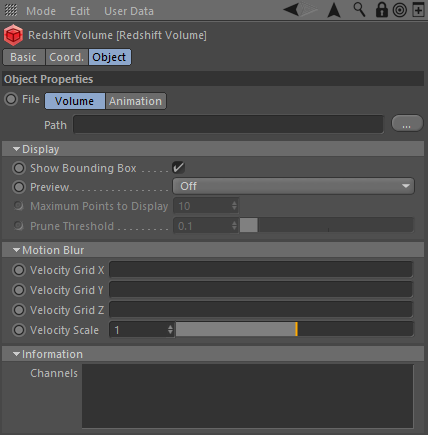
You can use the path setting to select an OpenVDB file.
您可以使用路径设置来选择 OpenVDB 文件。
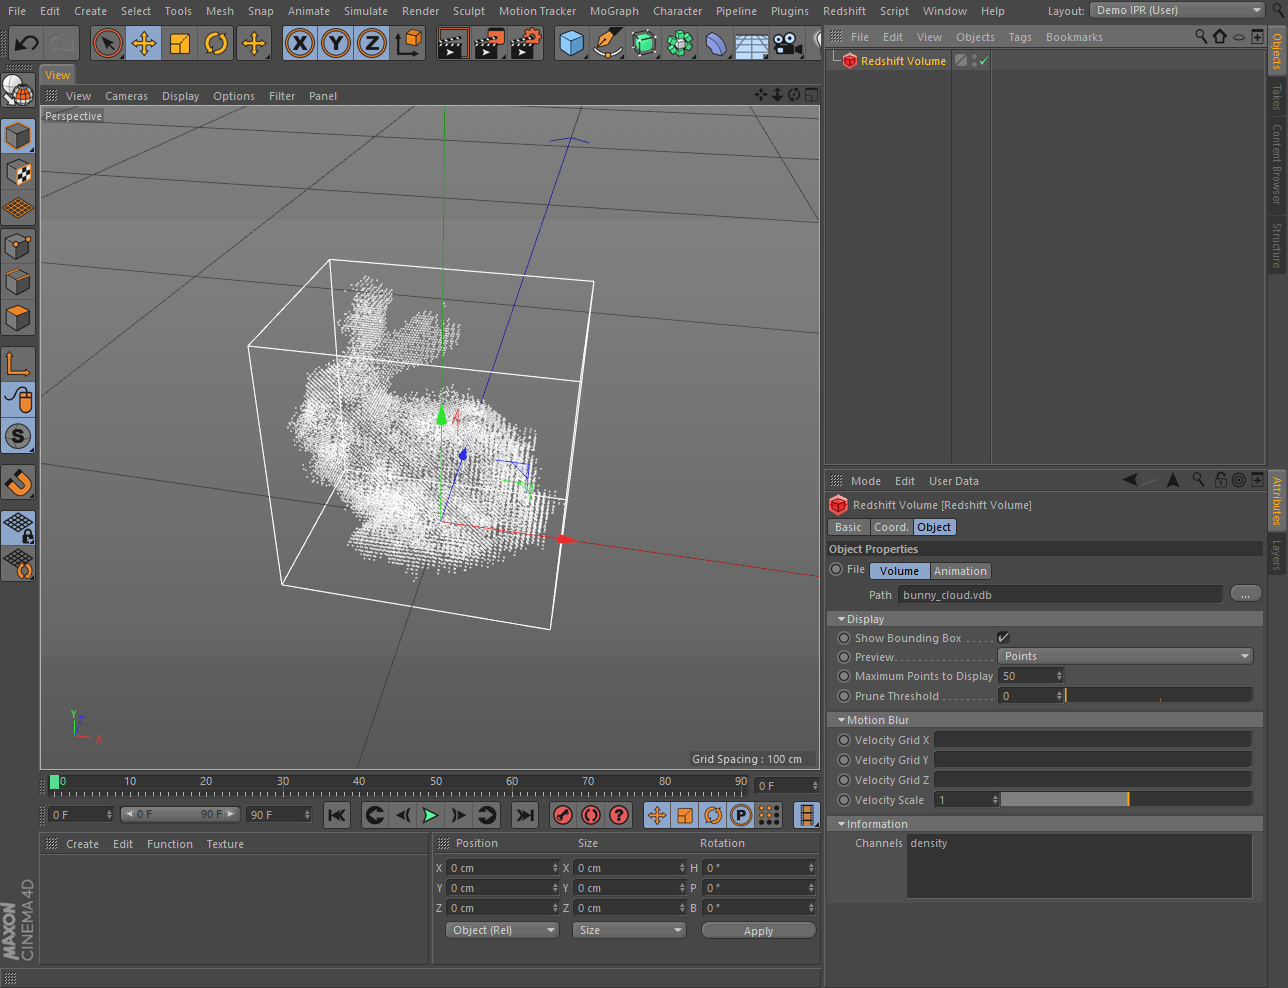
In this case we pointed to the bunny_cloud.vdb file which was downloaded from http://www.openvdb.org/download
This is how it appears in Cinema 4D when the Display Mode is set to "Points", with small adjustments to the Maximum Points to Display, and Prune Threshold settings.
在这个例子中,我们指向了兔子云。Vdb 文件,从 http://www.openvdb.org/download 下载当显示模式设置为“点数”时,在4 d 电影中就是这样显示的,只需对显示的最大点数和 Prune Threshold 设置进行小的调整。
The Volume Object Settings
音量对象设置
Display Mode 显示模式
Selects how the volume data will be shown in the 3d app's viewport. The choices are Bounding Box (where only the bounding box is shown), Points (where a number of representative points from the grid are shown) and Bounding Box & Points (where both the bounding box and points are shown). The number of points shown is controlled by the Max Points and Prune Threshold, explained below
选择如何在3 d 应用的视窗中显示音量数据。选择包围盒(只显示包围盒) ,点(显示网格中的一些代表点)和包围盒和点(显示包围盒和点)。所显示的点数由最大点数和 Prune 阈值控制,解释如下
Keep Points In Memory 记住分数
Normally, when switching to a bounding box view, any allocated preview points are freed. Enabling this option keeps the preview points in memory so that the user can quickly switch between bounding box and points without having to resample the OpenVDB file.
通常,当切换到边界框视图时,所有分配的预览点都会被释放。启用此选项将预览点保留在内存中,以便用户可以在边界框和点之间快速切换,而无需重采样 OpenVDB 文件。
Max Points 最大点数
Specifies the maximum number of points that would be drawn if the OpenVDB file was completely filled.
指定如果 OpenVDB 文件完全填充,将绘制的最大点数。
Prune Threshold 西梅干门槛
Any OpenVDB voxels that are lower or equal to this value won't be drawn as points. This is useful to cut away empty space during volume data previewing.
任何低于或等于这个值的 OpenVDB 体素都不会作为点绘制。这对于在预览卷数据时减少空白空间非常有用。
Creating A Redshift Volume Shader 创建红移卷着色器
To render a Redshift Volume, you have to assign a Redshift Volume Shader to it. Adjusting the settings of the Redshift Volume Shader defines the look of the volume object.
要渲染一个红移量,你必须给它分配一个红移量着色器。调整红移卷着色器的设置定义了卷对象的外观。
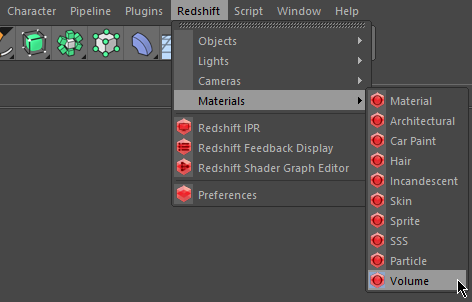
To create a Volume material, from the Redshift menu select the Volume option from the Materials sub-menu
要创建卷材质,从红移菜单中选择材质子菜单中的卷选项
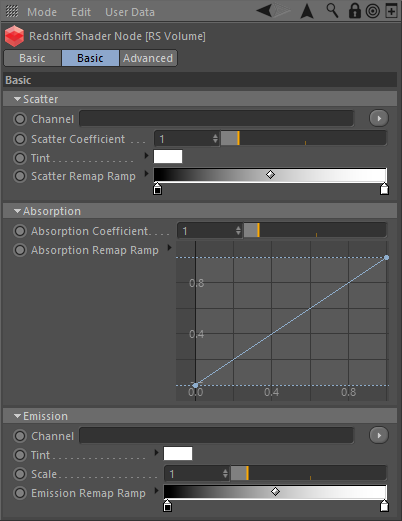
Within the ShaderGraph of the new material and RS Volume node can be found, with the following settings
在 shader 中可以找到新材料的图形和 RS 卷节点,具有以下设置
Before You Proceed, Create A Volume-Affecting Light!
在你继续之前,创建一个体积-影响光
To be able to see your volume, you'll need to place one or more volume-affecting lights in your scene. Simply create a Redshift light (any kind: physical, domelight, IES, etc) and ensure that its volume contribution scale is set to 1.0.
为了能够看到你的音量,你需要在你的场景中放置一个或多个影响音量的灯。只需创建一个红移光(任何种类: 物理,天窗,IES 等) ,并确保其体积贡献规模设置为1.0。
Important note! If the scene doesn't contain any volume-affecting lights, the volume will render black!
重要提示! 如果场景中没有任何影响音量的灯光,音量将呈现黑色!
Using The Redshift Volume Shader
使用红移音量着色器
The Scatter/Absorption/Emission Shading Components
散射/吸收/发射遮光组件
As it can be seen, the Redshift Volume Shader is divided in three shading components: scatter, absorption and emission.
可以看出,红移体积着色器分为三个着色部分: 散射、吸收和发射。
You can think of scatter as "diffuse". Absorption is "transparency". And emission is "incandescence" or "self-illumination".
你可以把散射理解为“漫射”。吸收是“透明”。发射是“白炽”或“自发光”。
Therefore, if you want to make your volume brighter or darker, you need to adjust the scatter parameters. If you want to make your volume more solid or more transparent, you need to adjust the absorption parameters. And, finally, if your volume represents a self-illuminating effect like fire and want to make it brighter or dimmer, you need to adjust the emission parameters.
因此,如果您想使您的音量更亮或更暗,您需要调整散射参数。如果你想使你的体积更坚实或更透明,你需要调整吸收参数。最后,如果你的音量代表一个自我照明的效果,像火,并希望使它更明亮或更暗,你需要调整发射参数。
Channel Names
频道名称
Important note! If you don't set the scatter or emission channel names, Redshift won't render the volume!
重要提示! 如果您不设置分散或发射通道名称,红移将不会呈现卷!
All three shading components have a "channel" textbox. As mentioned earlier, each OpenVDB voxel can contain values that describe different properties of the volume. Typical examples include 'density' and 'temperature'. If your OpenVDB file was exported from SideFX Houdini, it will almost certainly contain a channel called 'density'. And if it's a fire or explosion effect, it will also contain a channel called 'temperature'. The density channel name (in this case 'density') should be typed in the scatter channel box. And the temperature channel name (in this case 'temperature') should be typed in the emission channel box.
所有三个阴影部分都有一个“频道”文本框。如前所述,每个 openvdbvoxel 可以包含描述卷的不同属性的值。典型的例子包括密度和温度。如果你的 OpenVDB 文件是从 SideFX Houdini 导出的,它几乎肯定会包含一个称为“ density”的通道。如果是火灾或爆炸效应,它也会包含一个叫做“温度”的通道。密度通道名称(在本例中为‘ density’)应该在散射通道框中键入。温度通道名称(在本例中为“温度”)应该在发射通道框中键入。
But what if our OpenVDB doesn't contain channels called 'density' or 'emission'? What if they were called differently? You can use the Redshift Log File to find out which channels are contained in the OpenVDB file. When Redshift loads an OpenVDB file, it prints out the names of all the channels it contains. This is how this information looks like in the Redshift log file:
但是如果我们的 OpenVDB 不包含称为‘ density’或‘ em ission’的通道呢?如果他们的名字不同呢?您可以使用 Redshift 日志文件查找 OpenVDB 文件中包含的通道。当 Redshift 加载一个 OpenVDB 文件时,它会打印出它包含的所有通道的名称。以下是红移日志文件中的信息:
Preparing volume objects... Loading: c:\MyVDBFiles\bunny_cloud.vdb Contained grids: 'density' Done! Dim: (577, 572, 438). Num loaded grids: 1. Num voxels total: 26749120 Time to process 1 volume objects: 0ms |
In this particular case, we can see that bunny_cloud.vdb contains one channel called 'density', so we type 'density' (without the quotes) in the scatter's channel box.
在这个特殊的例子中,我们可以看到兔子云。Vdb 包含一个称为“ density”的信道,因此我们在 scatter 的 channel 框中键入“ density”(没有引号)。
Scattering and absorption
散射和吸收
Scattering and absorption are similar to "diffuse" and "transparency" respectively. Redshift computes these using the OpenVDB file's density channel. We'll demonstrate how this happens through a series of examples.
散射和吸收分别类似于“漫射”和“透明”。使用 OpenVDB 文件的密度通道计算这些。我们将通过一系列例子来演示这是如何发生的。
The most basic adjustment of scattering and absorption can happen through the "Scatter Coefficient" and "Absorption Coefficient" parameters. Increasing the scatter coefficient makes the volume brighter. Increasing the absorption coefficient makes the volume more opaque. A thing to keep in mind is that, the more opaque the volume, the less light it will allow to travel through it. In other words, high absorption means the volume render darker. If you want to preserve the same approximate intensity, we recommend adjusting the scatter and absorption coefficients together. I.e. if you want to make your volume more opaque by doubling the absorption coefficient, also double the scatter coefficient. This is demonstrated in the following examples:
最基本的散射和吸收调节可以通过“散射系数”和“吸收系数”参数来实现。增加散射系数使体积更明亮。增加吸收系数使体积更不透明。需要记住的一点是,体积越不透明,它允许的光线就越少。换句话说,高吸收意味着体积渲染更黑暗。如果你想保持相同的近似强度,我们建议将散射系数和吸收系数一起调整。也就是说,如果你想通过加倍吸收系数来使你的体积更不透明,也要加倍分散系数。下面的例子说明了这一点:
|
|
|
|
|
Scatter Coefficient=1.0. Absorption Coefficient=1.0 散射系数 = 1.0。吸收系数 = 1.0 |
Scatter Coefficient=3.0. Absorption Coefficient=3.0 散射系数 = 3.0。吸收系数 = 3.0 |
Scatter Coefficient=10.0. Absorption Coefficient=10.0 散射系数 = 10.0。吸收系数 = 10.0 |
If you want to make the volume brighter or darker, you can adjust the scatter coefficient without increasing the absorption one, as shown below 如果你想让音量变亮或变暗,你可以调整散射系数而不增加吸收系数,如下图所示
|
|
|
|
Scatter Coefficient=5.0. Absorption Coefficient=5.0 散射系数 = 5.0. 吸收系数 = 5.0 |
Scatter Coefficient=10.0. Absorption Coefficient=5.0 散射系数 = 10.0,吸收系数 = 5.0 |
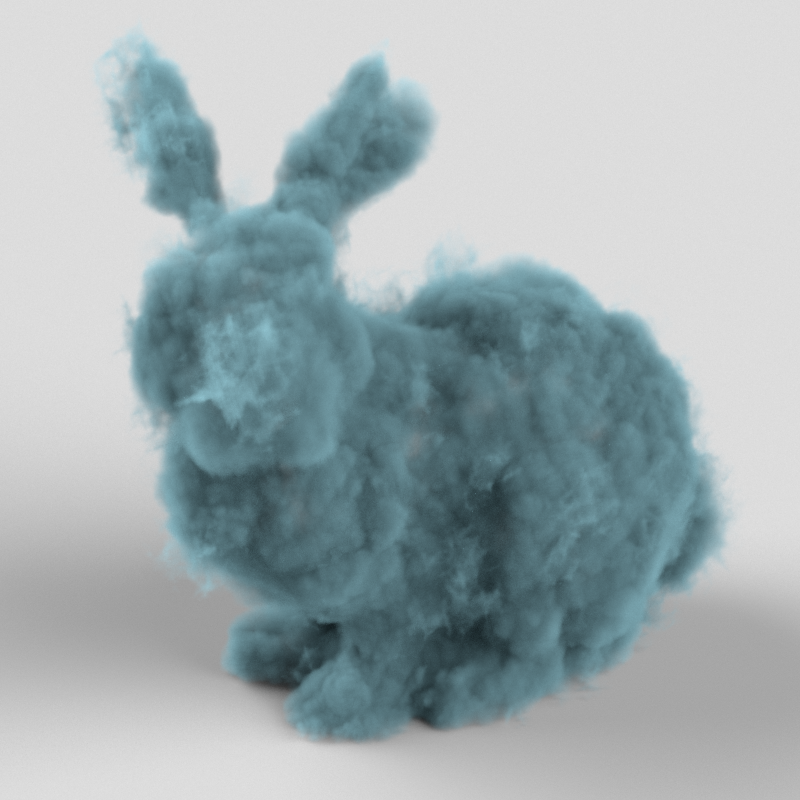
You can also use the "Scatter Tint" to adjust the overall color of the volume, as shown below
你也可以使用“散布色调”来调整音量的整体颜色,如下所示
|
|
|
|
White Tint (Scatter Coefficient=3.0. Absorption Coefficient=3.0) 白色(散射系数 = 3.0,吸收系数 = 3.0) |
Blue tint 蓝色调 |
More advanced manipulation of scattering can happen vie the scatter color ramp. As mentioned above, scattering and absorption happen by remapping the density OpenVDB channel. The scatter color ramp allows us to map the density channel into different colors.
更先进的分散操作可以发生竞争的分散色斜。如上所述,散射和吸收发生在重新映射的密度 OpenVDB 信道。散射色斜坡允许我们映射到不同的颜色的密度通道。
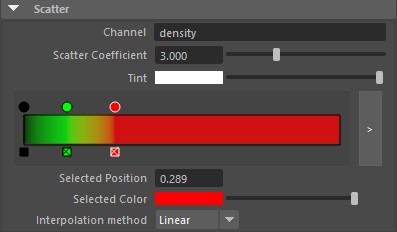
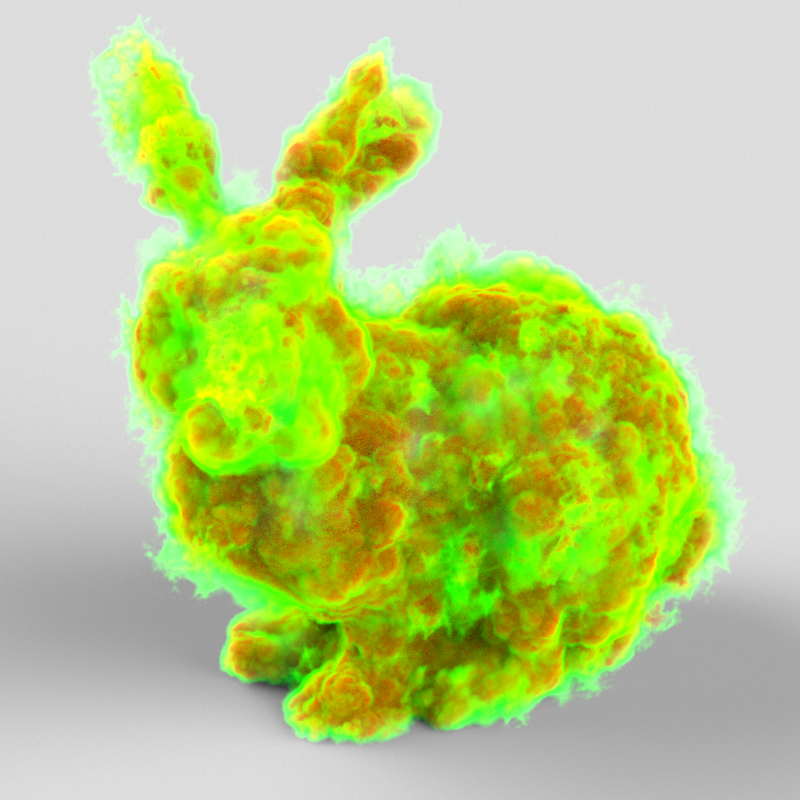
Let's assume that we want low density areas to be tinted green, while high density areas to be tinted red. We can use the ramp shown below (shown in Maya)
假设我们希望低密度区域是有色绿色,而高密度区域是有色红色。我们可以使用如下所示的斜坡(如玛雅所示)
…and get the following psychedelic result!
然后得到如下的迷幻效果!
The absorption shading component also contains a ramp, except it's a scalar ramp instead of a color ramp. Similar to the scatter component's color ramp, the absorption ramp allows for finer control of the opacity of the OpenVDB.
吸收阴影部分也包含一个斜坡,只不过它是一个标量斜坡而不是一个颜色斜坡。类似于散射组件的颜色斜坡,吸收斜坡允许更好地控制 OpenVDB 的不透明度。
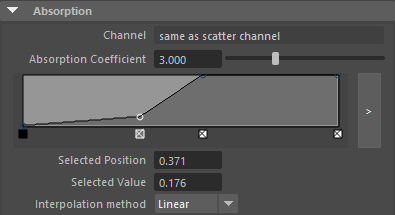
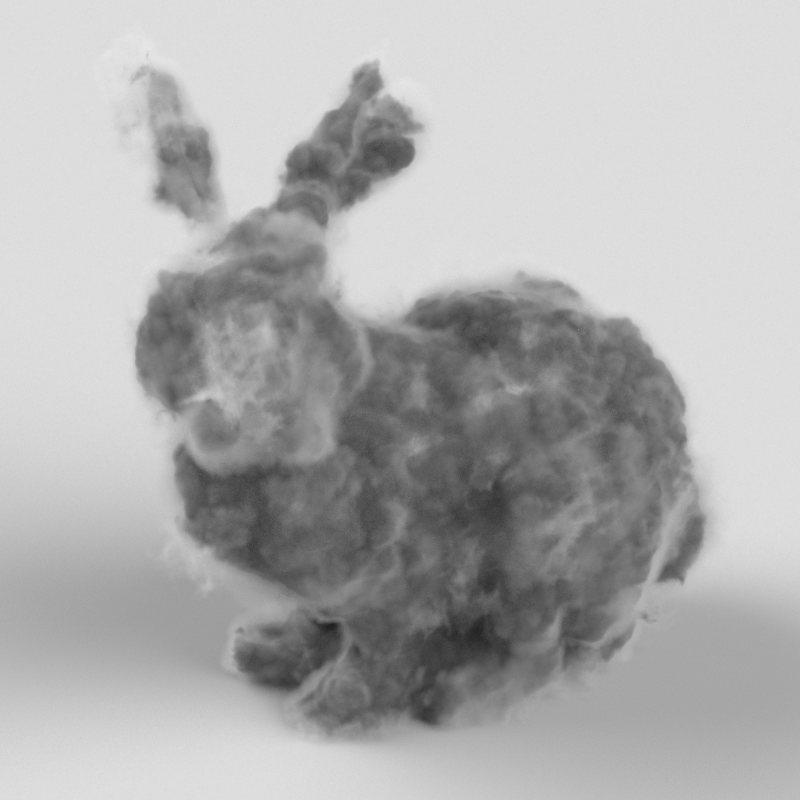
Say we wanted our volume's low-density edges appear transparent while making the higher-density areas become suddenly opaque (i.e. a higher absorption). We could make a ramp that looks like this:
假设我们希望我们的体积的低密度边缘显得透明,而使高密度区域突然变得不透明(即高吸收)。我们可以做一个斜坡,看起来像这样:
Notice how the outer edges of the bunny (low density areas) are bright (lower absorption) while the deeper, denser parts are now darker because of the increased absorption.
注意兔子的外部边缘(低密度区域)是明亮的(低吸收率) ,而更深,更密集的部分现在是黑暗的,因为增加吸收。
|
|
|
|
Without the ramp (Scatter Coefficient=3.0. Absorption Coefficient=3.0) 没有斜坡(散射系数 = 3.0,吸收系数 = 3.0) |
With the ramp (Scatter Coefficient=1.5, Absorption Coefficient=3.0) 对于斜坡(散射系数 = 1.5,吸收系数 = 3.0) |
Emission
排放
The emission component is useful when creating effects such as fire and explosions. For this section, we'll use the fire.vdb file which was downloaded from http://www.openvdb.org/download
This file contains both a density and a temperature channel, as it can be seen in the Redshift log file:
发射组件是有用的时候,创造效果,如火灾和爆炸。对于这一部分,我们将使用从 http://www.openvdb.org/download 下载的 fire.vdb 文件。这个文件包含一个密度和一个温度通道,正如在 Redshift 日志文件中看到的:
Preparing volume objects... Loading: c:\MyVDBFiles\fire.vdb Contained grids: 'density' 'temperature' Done! Dim: (161, 366, 153). Num loaded grids: 1. Num voxels total: 10707904 Time to process 1 volume objects: 0ms |
We, therefore, type 'density' (without the quotes) in the scatter channel textbox and 'temperature' (without the quotes) in the emission channel textbox.
因此,我们在分散信道文本框中键入“ density”(不带引号) ,在发射信道文本框中键入“ temperature”(不带引号)。
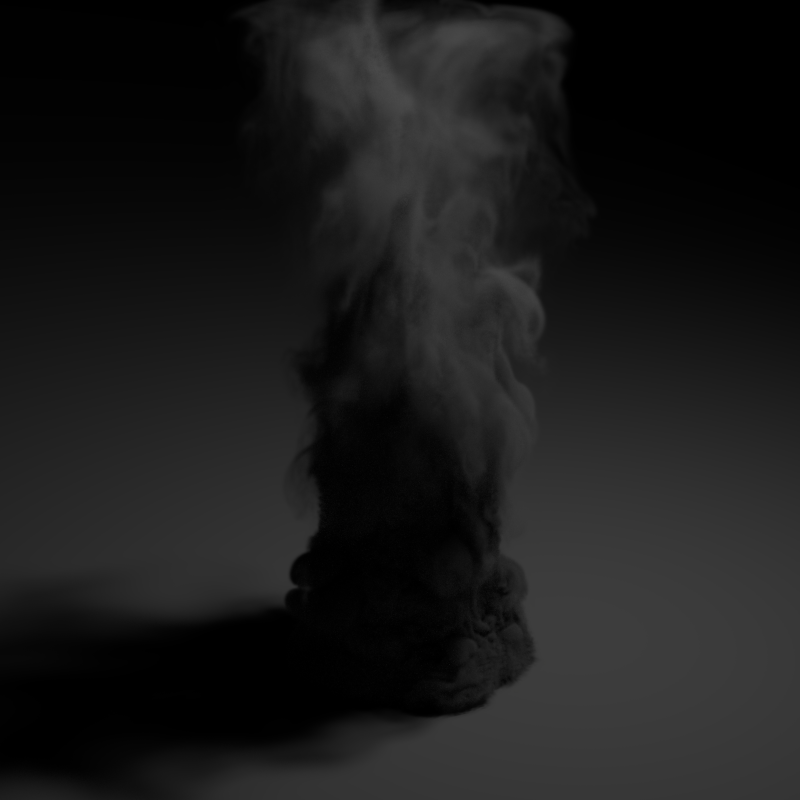
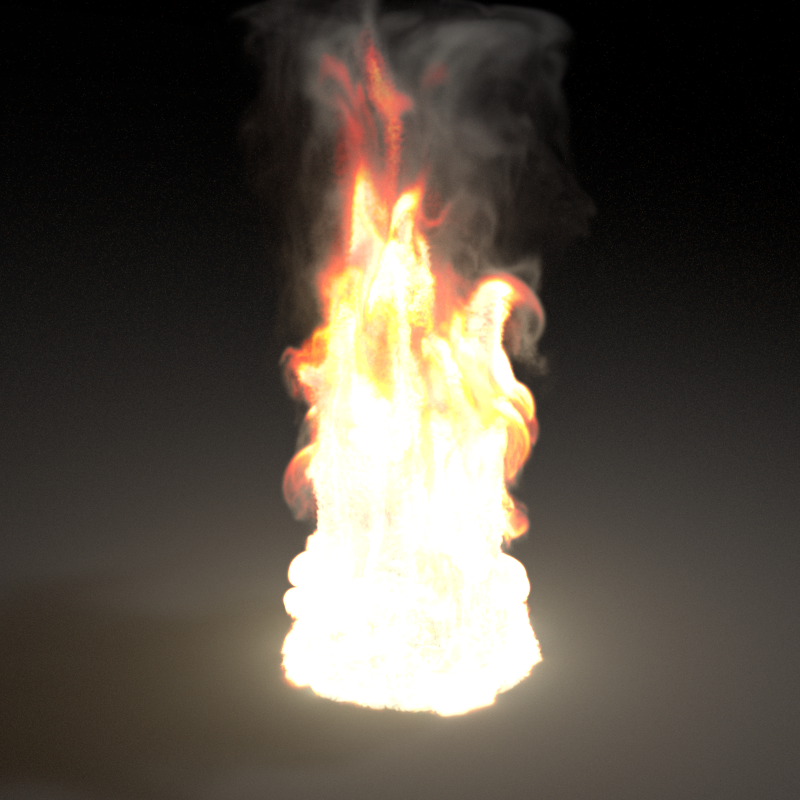
This is how the fire vdb file looks like without and with emission
这就是 fire vdb 文件在没有和有发射时的样子
|
|
|
|
Without emission, we can only see the smoke (density) part 没有发射,我们只能看到烟雾(密度)部分 |
With emission we can see the fire effect 通过发射我们可以看到火灾的影响 |
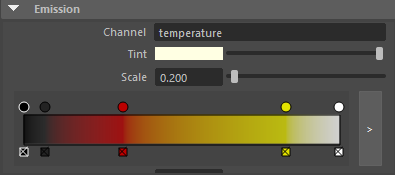
Achieving the effect shown above involves adjusting the emission color ramp. The reason for that is that the temperature channel that is stored in the OpenVDB file is simply a number per voxel which tells us how hot a voxel is. It doesn't describe how red or yellow the fire is. It's up to the user to adjust the emission color ramp to 'translate' the temperature value into emissive colors. 要达到上面显示的效果,需要调整发射颜色的斜坡。原因是存储在 OpenVDB 文件中的温度通道只是每个体素的一个数字,它告诉我们一个体素有多热。它没有描述火是红色还是黄色。这取决于用户调整发射颜色坡道“转换”温度值为发射颜色
For the above example, we used a ramp that looks like this:
在上面的例子中,我们使用了这样一个斜坡:
One way to read the above ramp is this:
阅读上面斜坡的一种方法是:
- For low temperatures, use black/gray 对于低温,使用黑色/灰色
- For medium temperatures use red 对于中等温度使用红色
- For higher temperatures use yellow/white 对于较高的温度使用黄色/白色
Achieving the expected look for emission can sometimes be challenging for two reasons:
达到预期的排放量外观有时是一项挑战,原因有二:
- Emission works in conjunction with scattering and absorption. As it can be seen in the above example, there's also a density (smoke) channel in the OpenVDB file which can be seen in the left picture. Smoke (scatter/absorption) naturally obstructs fire (emission) so it reduces its effect. Therefore, care has to be taken to ensure that scattering/absorption (smoke) is adjusted properly and doesn't interfere too much or too little with the emission (fire). 发射工作与散射和吸收有关。在上面的例子中可以看到,OpenVDB 文件中还有一个密度(smoke)通道,可以在左图中看到。烟(散射/吸收)自然地阻碍火(发射) ,所以它降低了它的效果。因此,必须小心确保散射/吸收(烟雾)是适当调整,不干扰太多或太少的发射(火)
- The emission ramp is driven by the temperature OpenVDB channel. Depending on the 3d app used to author the OpenVDB file, the ranges can be pretty dramatic. In certain cases, a range remapping might have to happen (see relevant section below). 发射坡道是由温度 OpenVDB 通道驱动的。根据用于创建 OpenVDB 文件的3 d 应用程序,范围可能相当戏剧性。在某些情况下,可能需要重新映射范围(请参阅下面的相关部分)
Advanced Topics
高级主题
Shadow Density Scale
阴影密度尺度
In the advanced tab of the Redshift Volume Shader, you can find a parameter called "shadow density scale". This parameter allows a volume to appear more transparent or more opaque to shadow rays. It is, in essence, a "trick" that can help emulate multiple scattering, i.e. the effect of light bouncing around a volume. This can be achieved by setting the shadow density scale below 1.0.
在高级标签的红移体积着色,你可以找到一个参数称为“阴影密度规模”。这个参数允许一个体积在阴影射线下显得更透明或更不透明。从本质上讲,这是一个“技巧”,可以帮助模拟多次散射,即光线在一个体积周围反弹的效果。这可以通过将阴影密度设置在1.0以下来实现。
The other way for allowing more light to pass through the volume would have been to reduce its absorption. However, this would make the volume appear more 'puffy' and transparent. The shadow density scale, on the other hand, allows the volume to retain its "tightness" while allowing more light to pass through it, as shown below.
另一种允许更多光线通过这个体积的方法是减少它的吸收。然而,这会使体积看起来更“浮肿”和透明。另一方面,阴影密度尺度允许体积保持其“紧密性”,同时允许更多的光线通过,如下图所示。
|
|
|
|
Shadow density scale=1.0 (Scatter Coefficient=3.0. Absorption Coefficient=3.0) 阴影密度尺度 = 1.0(散射系数 = 3.0,吸收系数 = 3.0) |
Shadow density scale=0.5 (Scatter Coefficient=3.0, Absorption Coefficient=3.0) 阴影密度尺度 = 0.5(散射系数 = 3.0,吸收系数 = 3.0) |
Range Remapping
范围重新映射
The values stored in OpenVDB channels can vary wildly depending on the 3d app that was used to author them. This can be true for both density and emission channels.
The range remapping controls found in the advanced tab of the Redshift Volume Shader, allow the adjustment of these values just before Redshift uses them. The old min/max range is remapped to the new min/max range.
存储在 OpenVDB 通道中的值可能会根据用于创建它们的3 d 应用程序的不同而发生很大的变化。这对于密度和发射通道都是正确的。在红移音量着色器的高级选项卡中找到的范围重新映射控件,允许在红移使用之前调整这些值。旧的最小/最大范围重新调整为新的最小/最大范围。
For example, a temperature channel might contains values that range between 0 and 100 but the emission color ramp only accepts inputs ranging between 0 and 1. In this case, the user should use old min=0, old max=100 and leave new min and new max at their default 0 and 1 respectively. In essence, this would 'squash' the 0->100 range into a 0->1 range.
例如,温度通道可能包含范围在0到100之间的值,但是发射颜色斜坡只接受范围在0到1之间的输入。在这种情况下,用户应该使用旧的 min = 0,旧的 max = 100,新的 min 和新的 max 分别保持默认值0和1。本质上,这将把0-> 100的范围压缩到0-> 1的范围。
Noise
噪音
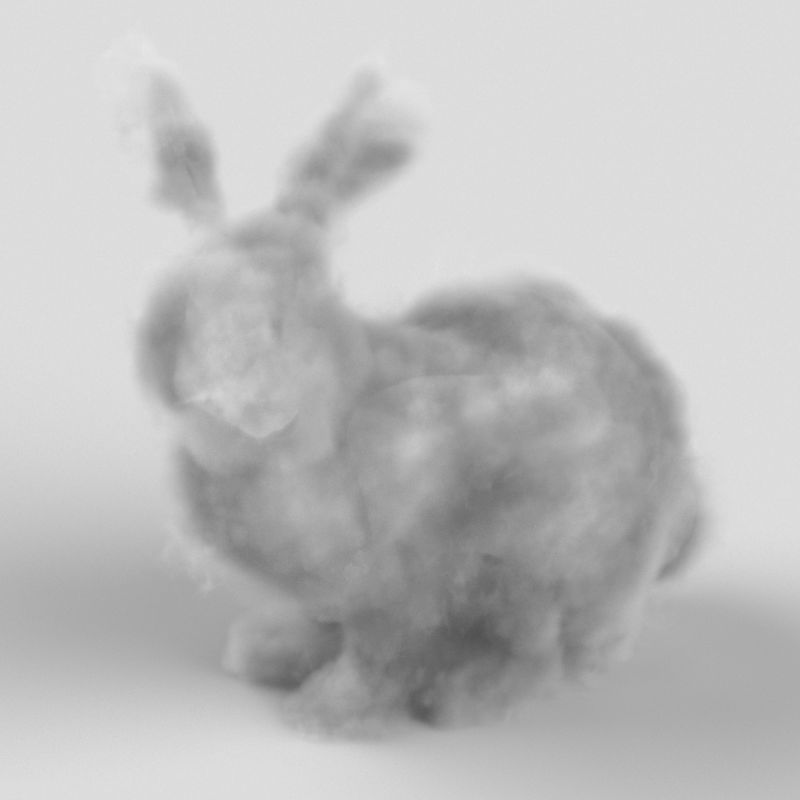
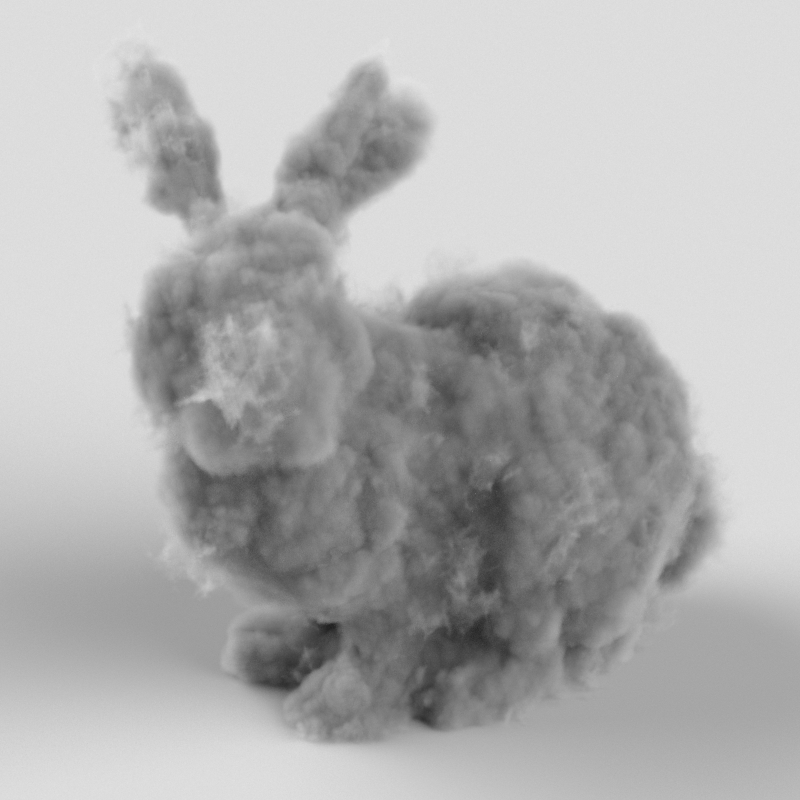
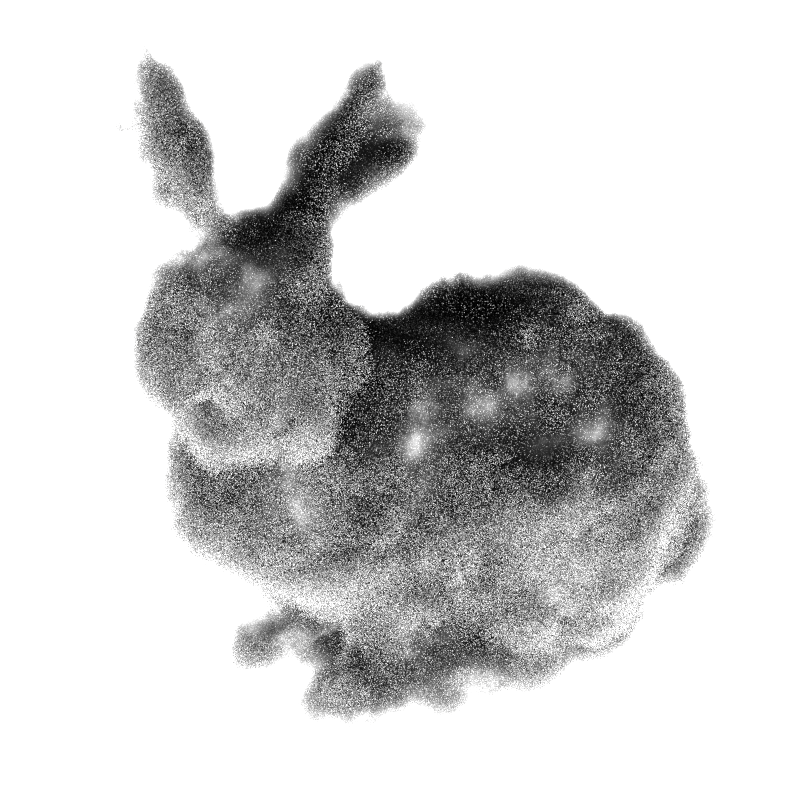
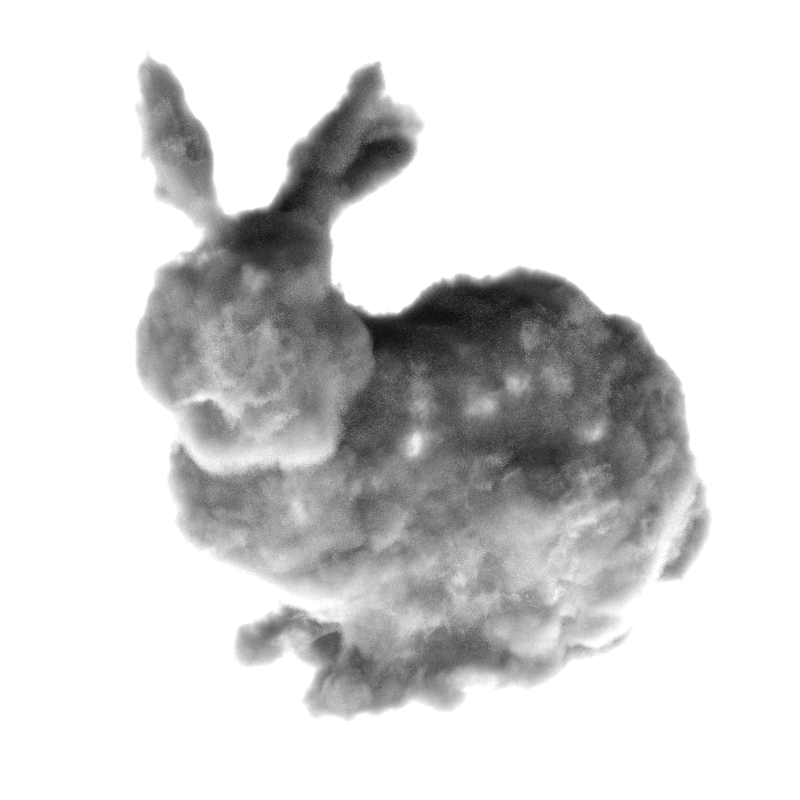
As mentioned above, a volume-affecting light is required in the scene in order to be able to see our volumes. Each light has a "volume samples" parameter which defines the quality of lighting on the volume. If a volume is rendering noisy/grainy, it's likely that it's being lit by a light that doesn't have enough samples. The following pictures demonstrate the effect of the lights volume num samples. Notice how the right image is cleaner.
如上所述,在场景中需要一个影响体积的光线,以便能够看到我们的体积。每盏灯都有一个“体积样品”参数,用于定义体积上的照明质量。如果一个物体呈现出噪音/颗粒状,那么它很可能是被没有足够样本的光照亮的。下面的图片演示了灯光容量样本的效果。注意正确的图像是如何清晰的。
Tip The more transparent the volume, the more samples it will need to render cleanly. Relatively opaque volumes can render cleanly with fewer samples.
提示: 体积越透明,需要渲染的样品就越多。相对不透明的体积可以用较少的样品进行清洁渲染。
|
|
|
|
Domelight's Volume Num Samples set to 1 穹顶灯的容积样品数量设置为1 |
Domelight's Volume Num Samples set to 512 穹顶灯的体积样本数量设置为512 |
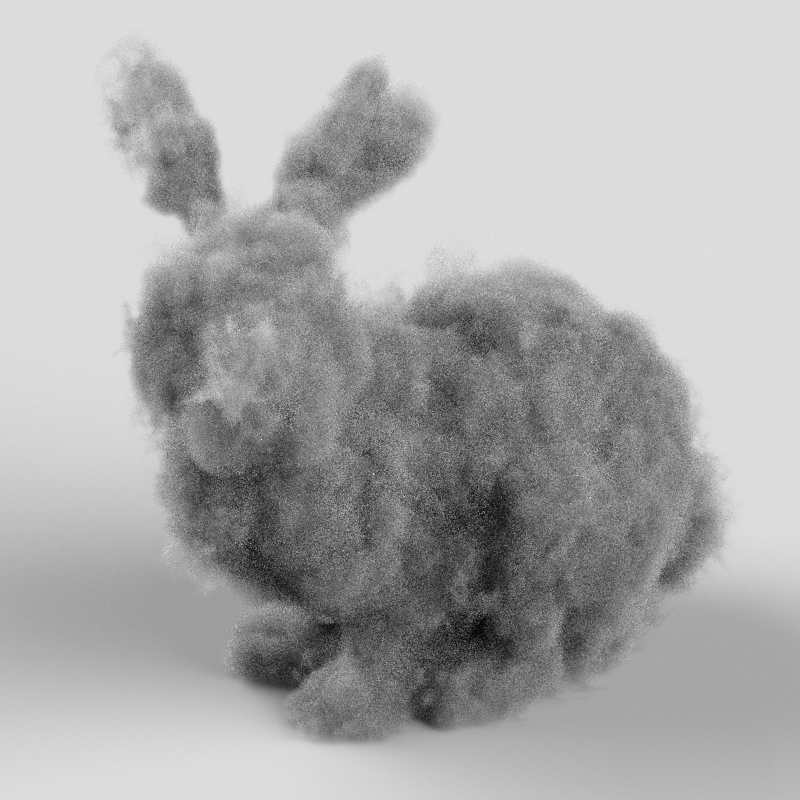
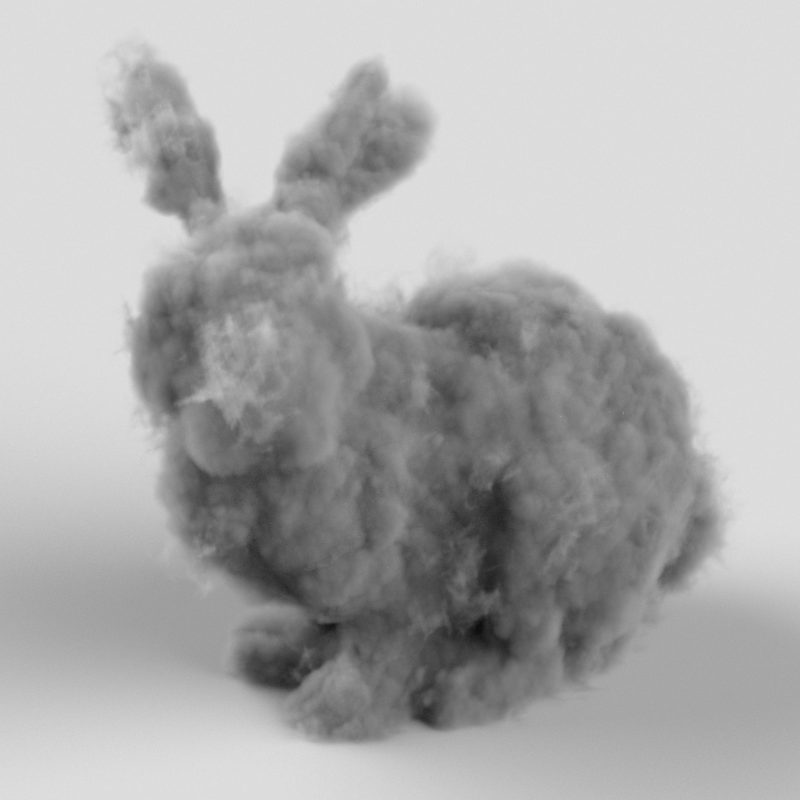
When using global illumination (GI), volume noise can appear because of brute-force GI rays, too.
当使用全局光源时,由于强力的 GI 射线,音量噪声也会出现。
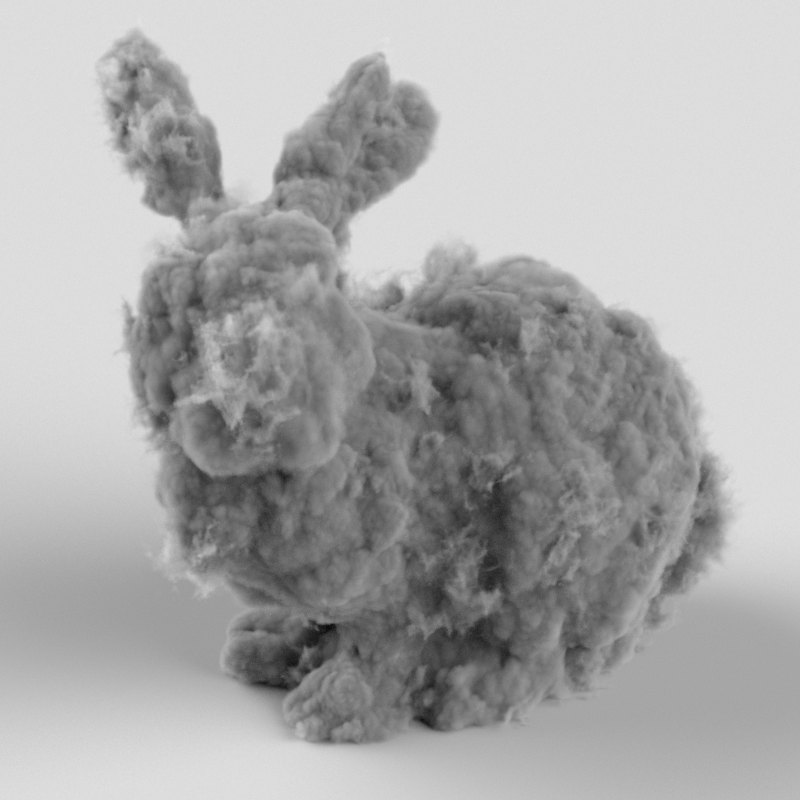
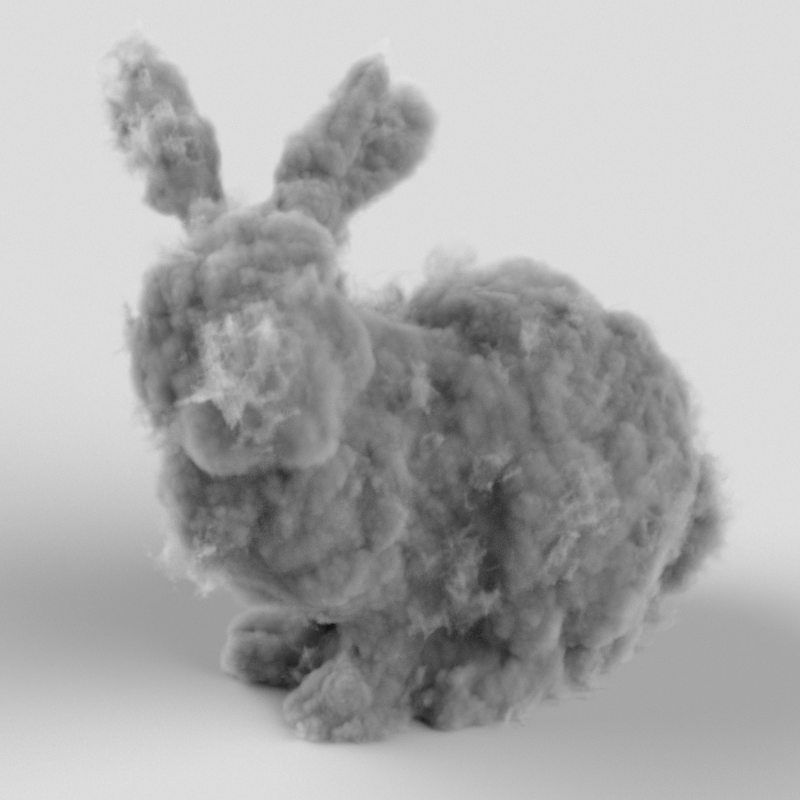
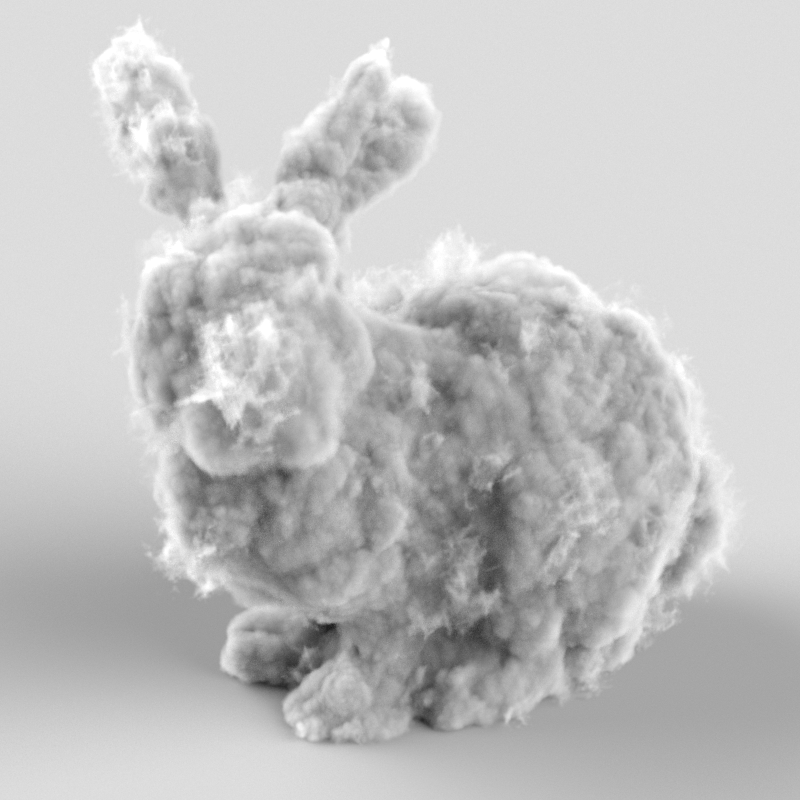
In the scene below we disabled our domelight, made the ground plane emissive and enabled brute-force GI. The effect is GI lighting coming from below the bunny. Notice how the image using more GI rays is cleaner.
在下面的场景中,我们关闭了我们的天窗,使地面平面发射和启用蛮力 GI。效果是胃肠照明来自下面的兔子。注意如何使用更多的胃肠道射线图像更干净。
|
|
|
|
Brute-force GI with 16 rays 使用16个射线的蛮力 GI |
Brute-force GI with 512 rays 使用512射线暴力攻击 GI |

赶快留个言打破零评论!~