Projection light
In this example we will explain how to make Projection Light. We prepared two sample scenes for you to download. You will be working on the "Default" from these scenes. "Finished" is a scene ready for rendering. If you want, you can open it.
Download the scene from here
投射灯
在此示例中,我们将说明如何制作Projection Light。 我们准备了两个示例场景供您下载。 您将在这些场景中处理“默认”。 “完成”是准备渲染的场景。 如果需要,可以将其打开。
从这里下载场景
1- First open the default scene. Create an "Area Light" from the LV. Position this Area Light on the front of the projector machine. Set the rotation so that the "Z" axis faces outward.
1-首先打开默认场景。 从LV创建“区域光”。 将该区域灯放在投影机的前面。 设置旋转角度,使“ Z”轴朝外。
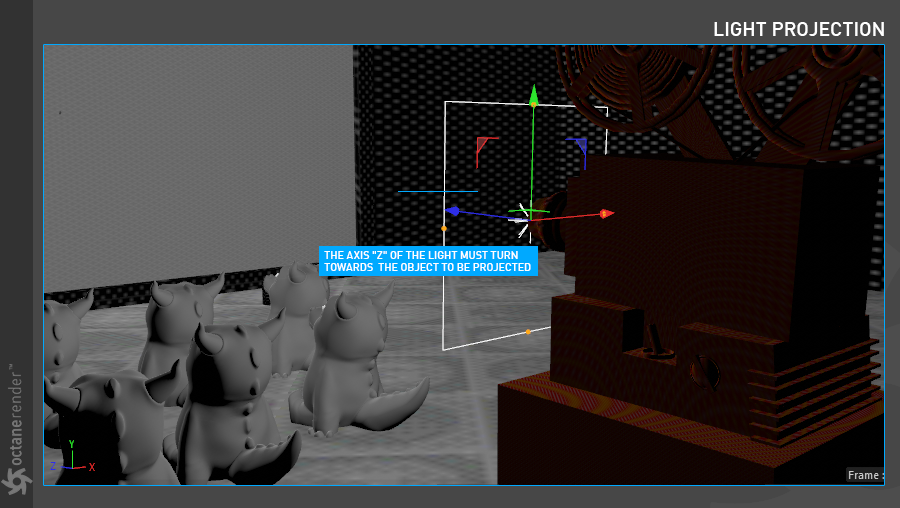
2- Now select Light Tag from object manager. Load any image you want to project to the distribution channel (remember to use Octane Image texture node). When you first load the image, you will not get the result you want because of the default settings, so you will have to do some setups. First, turn off "surface brightness," which means that the power will stay the same regardless of whether you enlarge or shrink the light object, then shrink your light object very much with the scale tool until you see the picture clearly. Make the light power setting between 600-800 for now.
2-现在从对象管理器中选择灯光标签。 将要投影的任何图像加载到分发通道(请记住使用Octane Image纹理节点)。 首次加载图像时,由于默认设置,您将无法获得所需的结果,因此必须进行一些设置。 首先,关闭“表面亮度”,这意味着功率将保持不变,而不管您是放大还是缩小灯光对象,然后使用缩放工具将灯光对象大大缩小,直到您清楚地看到图片为止。 现在将照明功率设置在600-800之间。
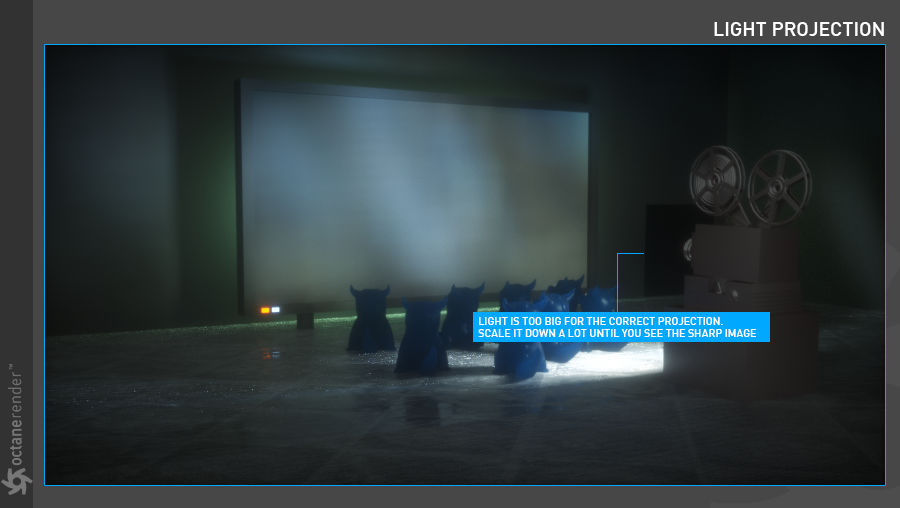
3- As you can see, even after you have scaled the light and see the picture clearly, we are still far from the correct result because the projection and transform settings of the image has not proper setup. We have to solve that.
3-如您所见,即使在缩放光源并清楚地看到图片之后,由于图像的投影和变换设置没有正确设置,我们仍然离正确的结果还差得很远。 我们必须解决这个问题。
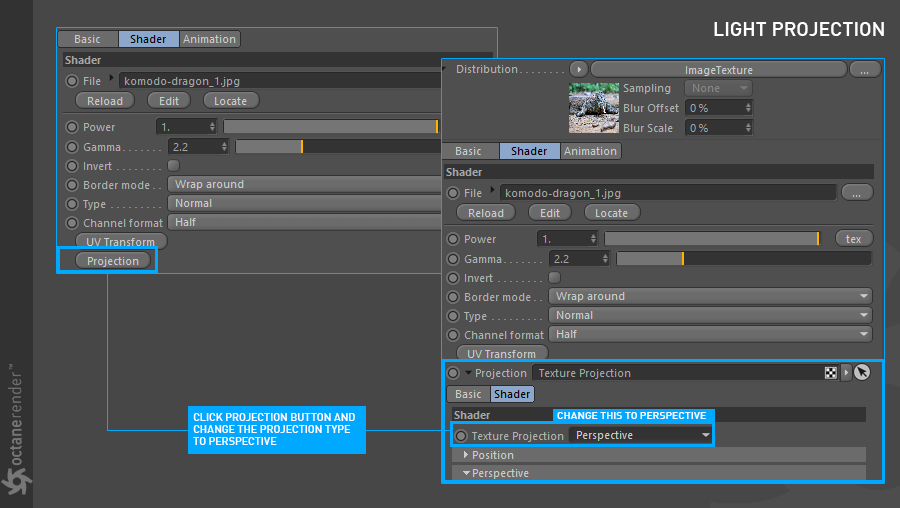
3- Now you need to set the "Projection" and "Transform" settings for the image you have loaded. Let's do the Projection settings first. Click the Projection button and change the settings as you see in the picture below.
3-现在,您需要为已加载的图像设置“投影”和“变换”设置。 让我们先进行“投影”设置。 单击投影按钮并更改设置,如下图所示。
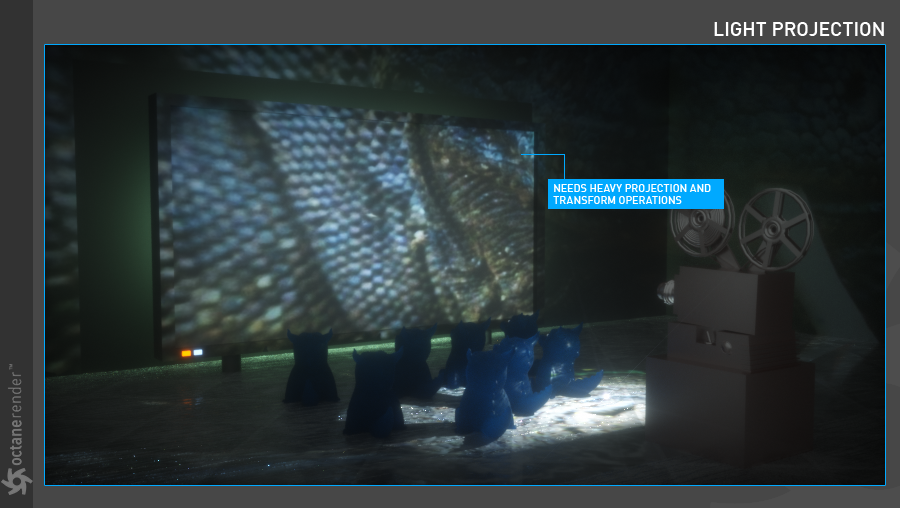
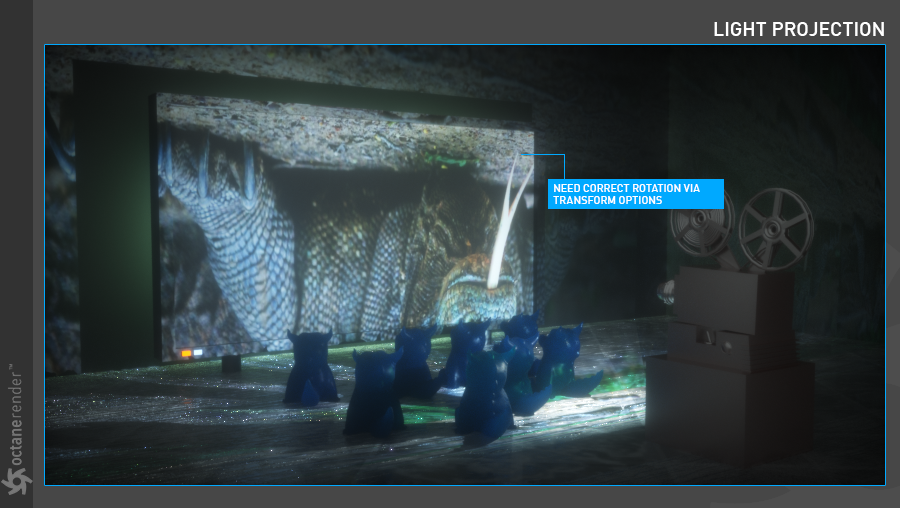
4- After making the projection setting, you will see a result as you see in the picture below. Here the picture looks in reverse. You also need to "Transform" the picture to make it smaller.
4-进行投影设置后,您将看到如下图所示的结果。 在这里,图片看起来相反。 您还需要“变换”图片以使其更小。
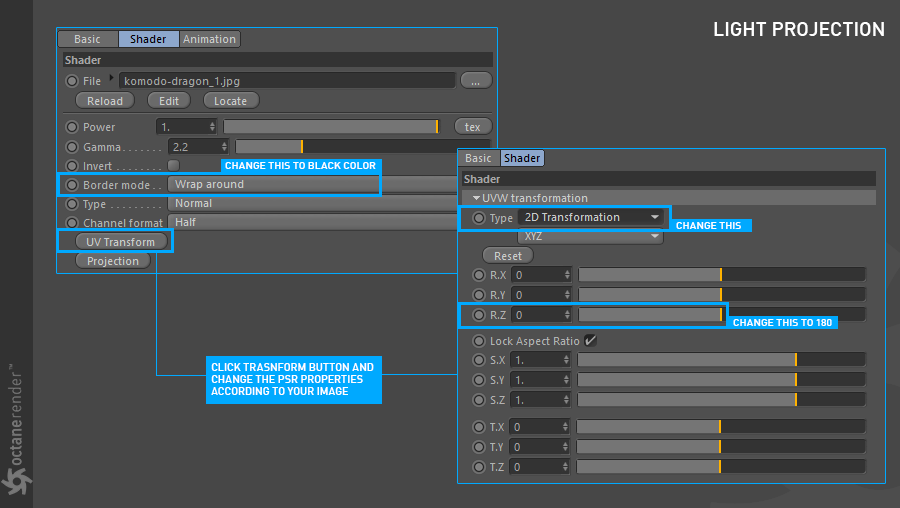
4- Now click the Transform button and first select Transform Type as "2D Transformation". Then adjust the image's transform settings so that it fits exactly on the screen. What you need to do in this section is to play with all three transform axes. Finally, select "Border Mode" as black color from the Image texture settings.
4-现在单击“变换”按钮,然后首先选择“变换类型”为“ 2D变换”。 然后调整图像的变换设置,使其完全适合屏幕。 在本节中,您需要使用所有三个变换轴。 最后,从“图像”纹理设置中选择“边框模式”作为黑色。
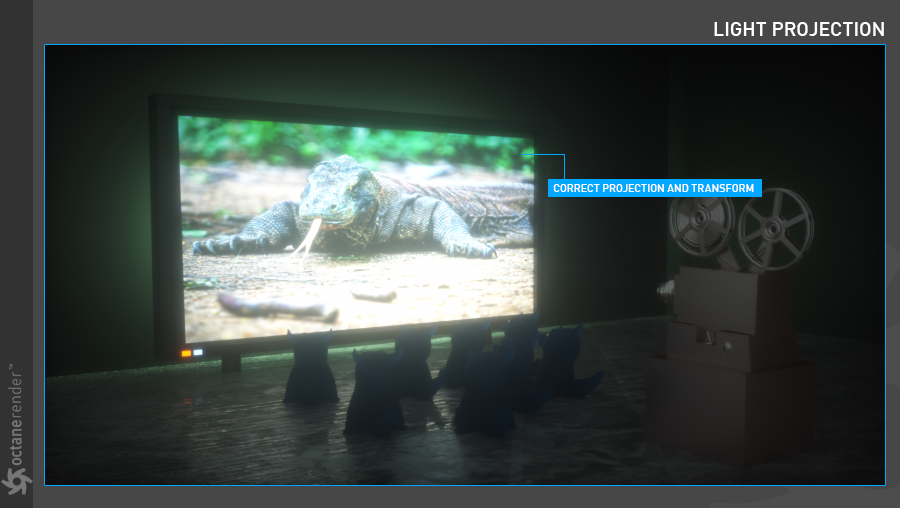
5- After this setup, your Light Projection should now be correct as you can see in the picture below.
5-完成此设置后,您的光投射现在应该正确无误,如下图所示。
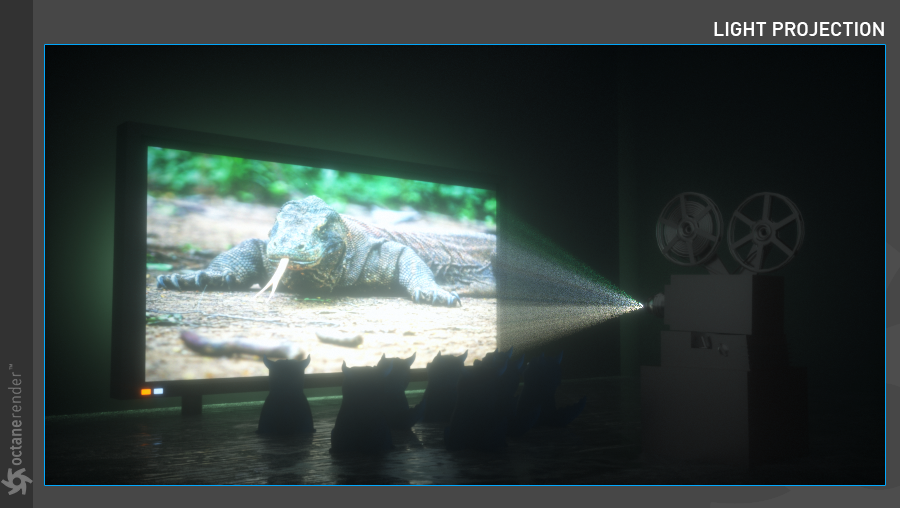
5- You can add visual appeal to render by giving the "volume effect" to the projection light. For this, you can apply this method from the previous section "Making Volume Lights".
5-您可以通过为投影光赋予“体积效果”来增加视觉吸引力。 为此,您可以从上一节“制作音量灯”中应用此方法。


赶快留个言打破零评论!~