Architectural 建筑
THIS SHADER IS DEPRECATED!! PLEASE USE THE REDSHIFT MATERIAL SHADER INSTEAD!
不推荐使用此着色器! ! 请改用红移材质着色器!
Introduction
引言
The architectural material is an 'uber shader' that attempts to cover the most commonly used material features in order to make a wide range of different material types, while maintaining energy conservation and having a 'physically correct' BSDF.
建筑材料是一个超级着色器,试图覆盖最常用的材料特性,以便制作各种不同的材料类型,同时保持节能和有一个物理正确的 BSDF。
It has built in support for Ambient Occlusion (see Ambient Occlusion documentation for a super-set of this shader's implementation), Diffuse Roughness, two Specular/Glossy reflections, Transparency/Refraction, depth-based fogging effects and localized, but familiar optimization options (see Optimization Options for detailed information on global cut-off).
它内置了对 Ambient Occlusion 的支持(参见 Ambient Occlusion 文档对这个着色器的超级集的实现) ,漫射粗糙度,两个 Specular/glossreflections,透明/折射,基于深度的雾化效果和本地化,但熟悉的优化选项(参见全局截止的详细信息优化选项)。
Diffuse
漫反射
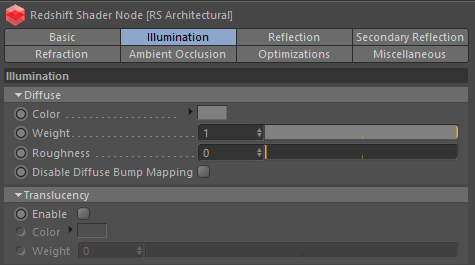
The architectural material is affected by both direct and indirect lighting. This tab controls the diffuse properties of the lighting model.
建筑材料受到直接和间接照明的影响。此选项卡控制照明模型的漫反射属性。
Color
颜色
This defines the color of the surface when reflecting diffuse direct lighting or indirect global illumination and essentially a tint. Setting this to black means no diffuse lighting.
这定义了反射漫射直接照明或间接全局光源时表面的颜色,本质上是一种淡色。将其设置为黑色意味着没有漫射照明。
Weight
重量
This scales the overall amount of diffuse lighting, with zero meaning no diffuse and one meaning maximum diffuse.
这可以缩放漫射照明的总体数量,零意味着没有漫射,一个意味着最大的漫射。
Roughness
粗糙度
This controls the 'roughness' of the diffuse lighting and is useful for simulating matte/dirty surfaces. We implement the Oren-Nayar shading model to emulate rough surface micro-facets. A roughness of 0.0 is equivalent to a perfectly smooth surface, or traditional Lambert shading.
这控制了漫射照明的“粗糙度”,对于模拟磨砂/脏表面很有用。我们实现了仿真粗糙表面微小切面的 Oren-Nayar 阴影模型。一个0.0的粗糙度相当于一个完美的光滑表面,或传统的朗伯阴影。
Disable Diffuse Bump Mapping
禁用漫反射凹凸贴图
This option allows you to switch to using the default un-bumped surface normals for direct and indirect diffuse lighting calculations.
此选项允许您在计算直接和间接漫射照明时切换到使用默认的非碰撞表面法线。
Translucency
半透明
Enable
启用
This enables double-sided lighting, useful for materials such as leaves.
这使双面照明,有用的材料,如叶子。
Color
颜色
This defines the color of the surface when reflecting translucent diffuse direct lighting, i.e. light that has travelled through the surface first. For more realistic translucency, see the Sub Surface Scattering shader doc.
这定义了当反射半透明漫反射直接照明时表面的颜色,即首先穿过表面的光线。更现实的半透明,请参阅亚表面散射着色器文件。
Weight
重量
This scales the overall amount of diffuse translucent lighting.
这可以缩放整个漫反射半透明照明的数量。
Diffuse in Detail 漫反射的细节
|
|
|
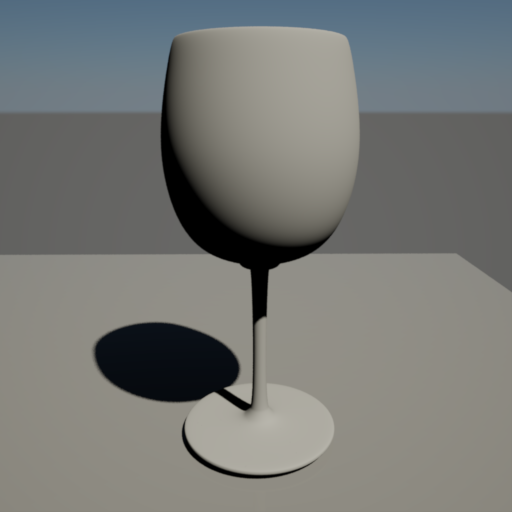
| This demonstrates diffuse light reflection, with no roughness ('Roughness' of 0.0) and a diffuse tint of (0.8, 0.8, 0.8). No Global Illumination is enabled. 这是漫反射光反射,没有粗糙度(“粗糙度”为0.0) ,漫反射色调为(0.8,0.8,0.8)。没有启用全局光源 |
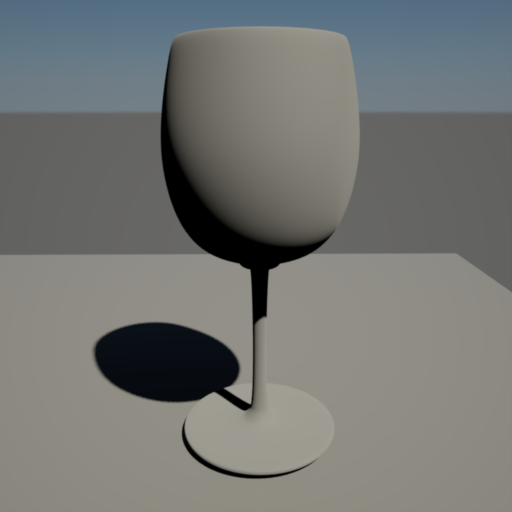
Now 'Roughness' is set to 1.0. 现在“粗糙度”设置为1.0。 |
Reflection 反思
At its simplest, when light interacts with a surface, some of it is scattered under the surface and exits (not covered here, see Sub Surface Scattering shader), some of it is transmitted (specular/glossy refraction) and some of it is reflected (diffuse/specular/glossy). This tab controls how light is to be transmitted and reflected.
In order to be physically correct, this shader attempts to preserve energy, whereby the amount of diffuse, reflection and refraction from the surface is automatically balanced such that
Diffuse + Reflection + Refraction <= 1.0
An example of this kind of preservation is to take a perfectly reflective mirror, where it doesn't matter how transparent or diffuse you may have set the parameters, the strong reflection will always win. In essence the rule is:
简单来说,当光线与物体表面相互作用时,一些光线会散射到物体表面下并且出现(这里没有提到,请参阅亚表面散射着色器) ,一些光线会被透射(镜面/光面折射) ,一些光线会被反射(漫射/镜面/光面)。这个选项卡控制光线如何被传输和反射。为了在物理上正确,这个着色器试图保存能量,从表面自动平衡漫反射、反射和折射的数量,这样漫反射 + 反射 + 折射 < = 1.0这种保存的一个例子是采取一个完美的反射镜,不管你设置了多么透明或漫反射的参数,强烈的反射总是会胜出。基本原则是:
- Incoming energy is first reflected. 入射的能量首先被反射
- Any leftover energy that was not reflected (e.g. if the surface is not perfectly reflected or has Fresnel) is transmitted (refracted). 任何没有被反射的剩余能量(例如,如果表面没有被完全反射或有菲涅耳)都会被传递(折射)
- Any leftover energy that was neither reflected nor transmitted contributes to the diffuse. 任何没有被反射或传递的剩余能量都会导致扩散
In other words, Reflection and Refraction will always win over Diffuse.
换句话说,反射和折射永远胜过漫射。
Primary / Secondary Reflection
主/次级反射
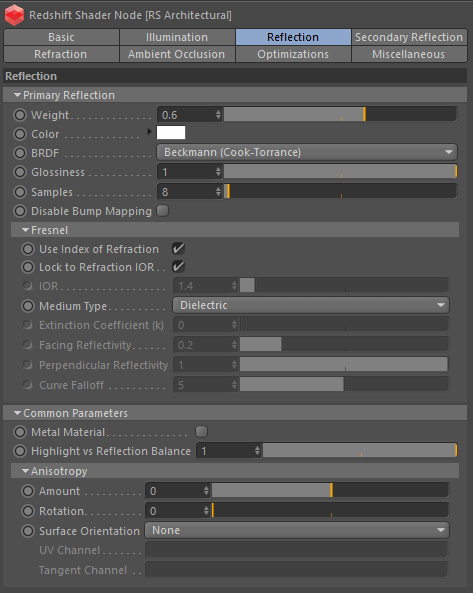
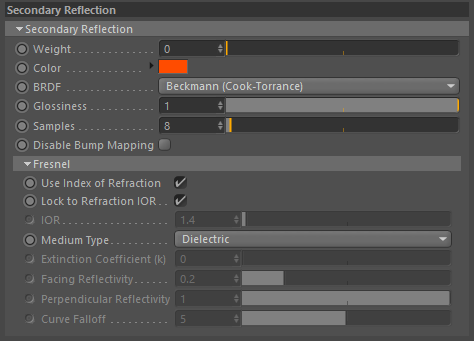
Weight
重量
This parameter controls the amount of reflection. Zero means "no reflection". One means "maximum reflection". Note that a weight and color of 1.0 does not necessarily guarantee a completely reflective object, unless Fresnel rules permit.
此参数控制反射的数量。零意味着“没有反射”。一个意思是“最大限度的反射”。请注意,1.0的重量和颜色并不一定保证完全反射的对象,除非菲涅耳规则允许。
Color
颜色
This controls the tint of specular/glossy reflections and traditional specular "highlights". Setting this to black means light will not be reflected and thus disables the effect.
这控制着镜面/光泽反射和传统镜面“高光”的色彩。将其设置为黑色意味着光线不会被反射,因此禁用效果。
BRDF
Allows you to choose the technique for simulating physically correct rough reflections. Beckmann is generally considered the standard for a good range of materials, but GGX has a wide specular tail, which is good for chrome materials.
允许您选择模拟物理上正确的粗糙反射的技术。贝克曼通常被认为是一个很好的材料范围的标准,但 GGX 有一个广泛的镜面尾巴,这是很好的铬材料。
- Ashikhmin-Shirley (legacy) 阿什克明-雪莉(遗产)
- Beckmann (Cook-Torrance) 贝克曼(库克-托伦斯)
- GGX
- Ashikhmin-Shirley
The legacy BRDF option uses a non-linear looking glossiness fall-off and exists to maintain compatibility with 1.0 materials.
传统的 BRDF 选项使用非线性的光泽度下降,并存在与1.0材料保持兼容性。
Glossiness
光泽度
High glossiness means sharp or 'specular' reflections. Lower numbers will make the reflections blurrier and 'rougher', with 0.0 yielding an almost diffuse look.
高光泽度意味着尖锐或镜面反射。较低的数字会使反射模糊化和粗糙化,0.0会使反射看起来几乎是漫反射。
Samples
样本
Blurry reflections (when "Glossiness" is less than 1.0) will need multiple samples to get a clean "grain-free" result. Higher numbers will reduce any potential grain issues but will take longer to render and vice-versa.
模糊反射(当“光泽度”小于1.0)将需要多个样本来得到一个干净的“无颗粒”的结果。更高的数字将减少任何潜在的谷物问题,但将需要更长的渲染时间,反之亦然。
Disable Prim. Refl. Bump Mapping
禁用 Prim. refile.Bump Mapping
This option allows you to switch to using the default un-bumped surface normals for direct and indirect reflection rays.
此选项允许您切换到使用直接和间接反射射线的默认非碰撞表面法线。
Reflections in Detail
详细的反思
|
|
|
|
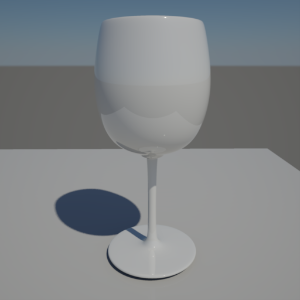
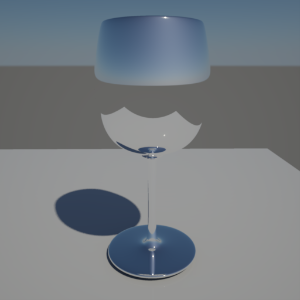
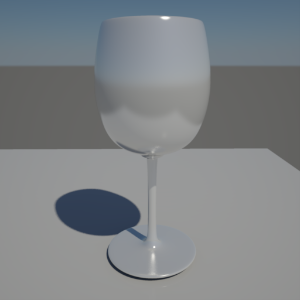
| This example of specular Fresnel reflection, with a 'Facing Reflectivity' strength of 0.2 and a 'Glossiness' of 1.0, which gives us a shiny plastic look. 镜面菲涅耳反射的例子,面向反射强度为0.2,光泽度为1.0,给我们一个闪亮的塑料外观 | This example shows specular mirror reflection, with a Facing Reflectivity strength of 1.0 and a Glossiness of 1.0, which gives us perfect specular reflection. Note how the reflection has 'taken away' all the diffuse lighting, this is because we are preserving energy, meaning we do not reflect more light than we receive. 这个例子展示了镜面反射,面向反射强度为1.0,光泽度为1.0,这给了我们完美的镜面反射(物理)。注意反射是如何带走了所有的漫射光,这是因为我们保存了能量,也就是说我们不会反射比我们接收到的更多的光 | The example now shows glossy Fresnel reflection, with a Facing Reflectivity strength on 0.5 and a Glossiness of 0.6, which gives the reflected surface a certain amount of roughness. As with transparency, here we use 64 samples to get good looking results. 现在的例子显示了光滑的菲涅耳反射,面向反射强度为0.5,光泽度为0.6,这使得反射表面具有一定的粗糙度。至于透明度,这里我们使用64个样本来得到好看的结果 |
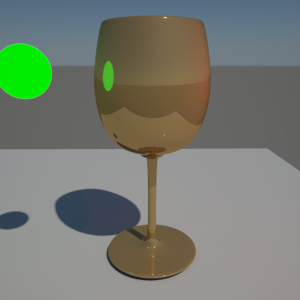
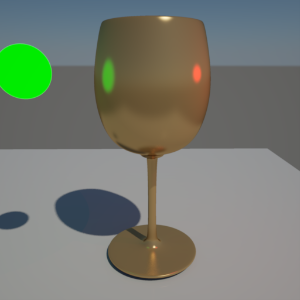
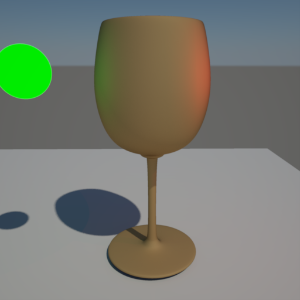
Below are examples of how 'specular highlights' look for different kind of lights and different kinds of glossiness. In all examples we have a green area light and a red point light.
下面是不同类型的灯光和不同类型的光泽度的镜面高光效果的例子。在所有的例子中,我们有一个绿色的区域灯和一个红色的点灯。
|
|
|
|
| This example has perfect specular reflection 'Glossiness' of 1.0. Both lights contribute a small amount of diffuse, but see how the point light specular reflection is not visible? This is because it is infinitesimally small. 这个例子有完美的镜面反射(物理)/光泽度/1.0。这两种光线都有少量的漫反射,但是看到为什么点光镜面反射(物理)不可见了吗?这是因为它非常小 | This example has a 'Glossiness' setting of 0.5, simulating a rougher surface. Now we can see the point light and the reflections look more blurry. 这个例子有一个0.5的光泽度设置,模拟一个粗糙的表面。现在我们可以看到点光和反射看起来更模糊 |
This example has a 'Glossiness' setting of 0.0. This is 'maximum roughness', so the reflections now look almost diffuse. 这个例子有一个光泽度为0.0的设置,这是最大的粗糙度,所以反射现在看起来几乎漫反射。 |
Fresnel (Primary / Secondary)
菲涅耳(小学/中学)
In nature reflections appear strongest when viewed at shallow angles. The Fresnel equation attempts to simulate this effect. What this means is that you will see the diffuse, reflection and refraction balance change, depending on the viewing angle between the surface and the camera.
在自然界中,从浅角度观察时,反射最强烈。菲涅耳方程试图模拟这种效应。这意味着你将看到漫反射、反射和折射平衡的变化,这取决于表面和相机之间的视角。
Use Index of Refraction
使用折射率
This is the default, because in nature, the Index of Refraction of a dielectric material determines how strong or weak the Fresnel effect is at different viewing angles. If you un-check this, because you want to control the refraction effect separately from the reflection strength, then you can bypass the Fresnel equation with the options presented below the Extinction Coefficient.
这是默认的,因为在本质上,一个介质材料的折射率决定了菲涅耳效应在不同视角下的强弱。如果你不检查这一点,因为你想要控制折射效果与反射强度分开,那么你可以绕过菲涅耳方程与消光系数下面的选项。
Lock to Refraction IOR
锁定折射率
This means use the refraction IOR to compute the Fresnel reflection. This is the default, because ideally the reflection and refraction IOR should be the same for dielectric materials.
这意味着利用折射率 IOR 计算菲涅耳反射。这是缺省值,因为在理想情况下,反射和折射 IOR 对于介质材料应该是相同的。
IOR
返回抑制
Alternative reflection IOR for Fresnel calculation when the 'Lock to Refraction IOR' option is disabled.
当禁用“锁定折射返回抑制”选项时,菲涅耳计算的可选反射返回抑制。
Medium Type
中型
This allows you to specify what kind of medium the material is, which determines how the Fresnel reflectance amount is calculated. There are two types:
这样你就可以确定材质是什么样的介质,这决定了菲涅耳反射率的计算方法。有两种类型:
- Dielectric (typically transparent materials, such as glass, water) 电介质(典型的透明材料,如玻璃、水)
- Conductor (typically solid, metal materials) 导体(通常为固体金属材料)
Extinction Coefficient (k)
消光系数(k)
This parameter is required for 'Conductor' materials.
这个参数是“导体”材料所必需的。
Facing Reflectivity
面对反射率
This controls the strength of reflections when viewed head on, 0 degree angle from the surface. The values range between 0.0 and 1.0. Typically, metals will have a high setting, with a perfect mirror being 1.0. Most materials with reflective coats, however, should have relatively low values, which is why the default is 0.2.
这控制的力量反射时,观察头部,0度角从表面。值范围在0.0到1.0之间。通常情况下,金属会有一个较高的设置,一个完美的镜子是1.0。然而,大多数有反光外套的材料应该有相对较低的值,这就是为什么默认值是0.2。
Perpendicular Reflectivity
垂直反射率
This controls the strength of reflections when viewed at a 90 angle from the surface. In keeping with the Fresnel effect, this should always bet set to 1.0 so that reflections will be stronger when viewed at shallow angles.
If the Facing and Perpendicular values are the same, then the Fresnel effect will be disabled and there will be equal reflection, regardless of viewing angle.
当从表面以90度角观察时,这控制着反射的强度。为了与菲涅耳效应保持一致,这应该总是设置为1.0,这样当从浅角度观察时,反射会更强。如果正面和垂直值是相同的,那么菲涅耳效应将被禁用,将有相同的反射,无论视角。
Curve Falloff
曲线下降
This controls how the facing and perpendicular reflected strength transitions between one and the other. Higher values produce a 'tighter' transition.
这控制如何面临和垂直反映力量之间的过渡。更高的价值会产生一个更紧密的过渡。
Fresnel in Detail
菲涅耳的细节
Below are examples of the Fresnel reflection effect.
下面是菲涅耳反射效应的例子。
The following examples show the floor surface material at default settings.
下面的示例显示默认设置下的地板表面材料。
|
|
|
| At a shallow angle, the reflection of the cup and sky is clearly visible. 在一个浅的角度,杯子和天空的反射是清晰可见的 |
Now viewed from a less shallow angle, notice how the Fresnel reflection effect is very weak and the cup and sky are hardly visible. 现在从一个不那么浅的角度来看,注意菲涅耳反射效应是多么微弱,而且杯子和天空几乎看不见。 |
Common Reflection Parameters
共反射参数
Metal Material
金属材料
This tints the reflections with the diffuse color and further brings down the diffuse contribution, which gives reflections a more metallic look.
这种颜色的反射与漫反射的颜色,并进一步带来了漫反射的贡献,这使得反射更金属的外观。
Highlight vs Reflection Balance
高亮与反射平衡
This allows you to control how strong traditional specular highlights are, relative to the ray-traced reflections. Setting this value to 0.0 means no specular highlights will be visible. Setting to 1.0, means fully visible.
这可以让你控制传统高光的强度,相对于光线追踪的反射。将此值设置为0.0意味着不会看到高光。设置为1.0,意味着完全可见。
Use this control with caution. This should only be used to balance non area light reflections. Area light reflections are calculated using a special technique called Multiple Importance Sampling (MIS) to automatically balance highlights with ray-traced reflections. MIS relies on a setting of 1.0 to work properly. Any other setting means reflected area lights may look too dark at low glossiness, or not visible at all.
谨慎使用此控件。这应该只用于平衡非区域光反射。面积光反射计算使用一种特殊的技术称为多重要性采样(MIS) ,以自动平衡高光与光线跟踪反射。管理信息系统依赖于1.0的设置来正常工作。任何其他设置意味着反射区域的灯光在低光泽度下看起来太暗,或者根本看不见。
Anisotropy
各向异性
Anisotropy controls the ratio between the 'width' and 'height' of glossy reflections and refractions. It is primarily used for effects such as brushed metal, to simulate the shape and orientation of micro-surface grooves. Visually it has the effect of stretching or contracting reflected highlights.
各向异性控制光滑反射和折射的“宽度”和“高度”之间的比率。它主要用于拉丝金属等效果,以模拟微表面沟槽的形状和方向。在视觉上,它具有拉伸或收缩反射亮点的效果。
Amount
金额
This parameter is in the range of -1.0 to 1.0, where 0.0 means no anisotropy (isotropic reflection/refraction), negative numbers mean the width of reflections will stretched (u direction), whereas positive numbers mean the height will be stretched (v direction).
这个参数在 -1.0到1.0之间,其中0.0表示没有各向异性(各向同性反射/折射) ,负数表示反射的宽度拉伸(u 方向) ,而正数表示高度拉伸(v 方向)。
Rotation
旋转
Use this control to change the orientation of the micro-surface grooves. The values are between 0.0 and 1.0, which represent rotation between 0.0 and 360.0 degrees respectively.
使用此控制来改变微表面沟槽的方向。值介于0.0和1.0之间,分别表示旋转角度介于0.0和360.0之间。
Surface Orientation
表面定向
In order to apply the anisotropic glossy effect, the shader needs to know the orientation of the surface in u and v directions. There are two ways to specify this:
为了应用各向异性光滑效果,着色器需要知道表面在 u 和 v 方向上的取向。有两种方法可以说明这一点:
- From UV Channel ( 由紫外线频道(XSI Only 仅限 XSI)
- From Tangent Channel 从切线通道
NOTE: 'From UV Channel' means the u and v directions are approximations and will yield faceting, unless the mesh is highly tessellated. If you are mapping a flat surface, this is fine, but it is recommended that you use the 'Tangent Channel' option for curved, or low tessellation surfaces
注意: “来自 UV 通道”意味着 u 和 v 方向是近似的,将产生面状,除非网格是高度镶嵌。如果你是映射一个平面,这是好的,但是建议你使用’切线通道’选项曲面,或低镶嵌表面
UV Set
紫外线
Specifies the UV set to use for anisotropy.
指定用于各向异性的 UV 设置。
Anisotropy in Detail
详细的各向异性
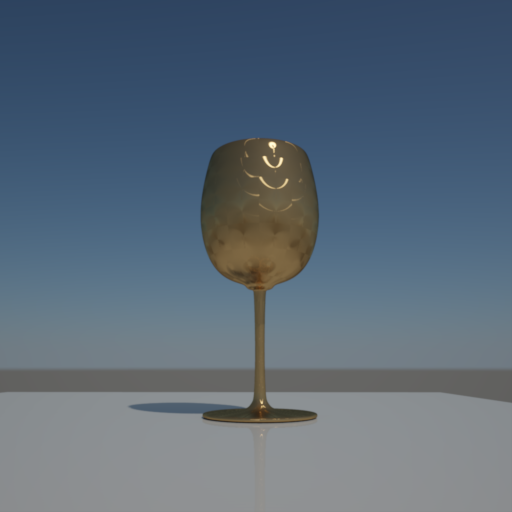
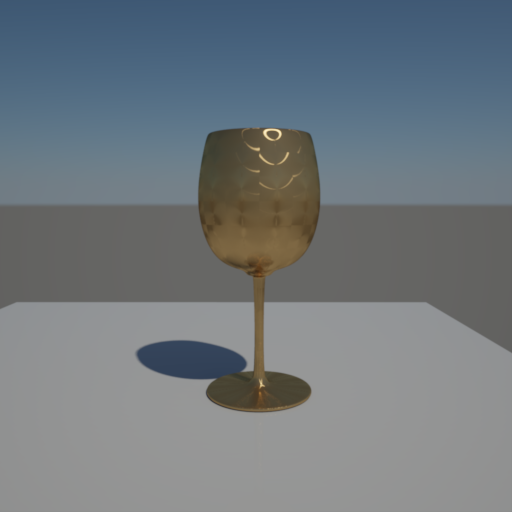
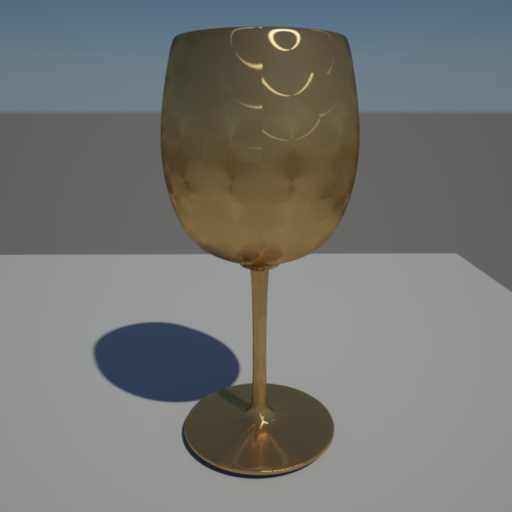
Here is an example of glossy Fresnel reflection, with a 'Diffuse Color' of bronze, the 'Metal Material' checked and a 'pounded metal' texture attached to the Anisotropic Rotation input, with an Anisotropy of -0.8.
这里是一个光滑的菲涅耳反射的例子,有一个“漫反射色”的青铜,“金属材料”检查和“捣碎的金属”纹理附加到各向异性旋转输入,与 -0.8。
Refraction
折射
Weight
重量
This parameter controls the amount of refraction. Zero means "no refraction". One means "maximum refraction". Note that a weight and color of 1.0 does not necessarily guarantee a completely transparent object, unless energy preservation and Fresnel rules permit (see Fresnel section for a description of this behavior).
这个参数控制折射的量。零意味着“没有折射”。一个意思是“最大折射”。请注意,1.0的重量和颜色并不一定保证物体是完全透明的,除非能量保持和菲涅耳规则允许(请参阅菲涅耳部分对这种行为的描述)。
Color
颜色
This controls the tint of refractions/transparencies. Setting this to black means light does not pass through the surface and thus disables the effect.
这可以控制折射/透明的色调。将其设置为黑色意味着光线不能通过表面,因此禁用效果。
Glossiness
光泽度
High glossiness means sharp or 'specular' refractions. Lower numbers will make the refractions blurrier, yielding a 'frosted' look. Note that this only takes effect if the IOR (see below) is a number other than 1.0.
高光泽度意味着锐利或镜面折射。较低的数字将使折射模糊,产生一个“霜”的外观。请注意,只有当 IOR (见下文)不是1.0时,才会生效。
Samples
样本
'Frosted' refractions (when Glossiness is less than 1.0) will need multiple samples to get a clean "grain-free" result. Higher numbers will reduce any potential grain issues but will take longer to render and vice-versa. Note that this only takes effect if the IOR (see below) is a number other than 1.0. A number of 1.0 will yield perfectly specular transmission.
磨砂折射(当光泽度小于1.0时)将需要多个样品来得到一个干净的“无纹理”的结果。更高的数字将减少任何潜在的谷物问题,但将需要更长的渲染时间,反之亦然。请注意,只有当 IOR (见下文)不是1.0时,才会生效。一些1.0将产生完美的镜面传输。
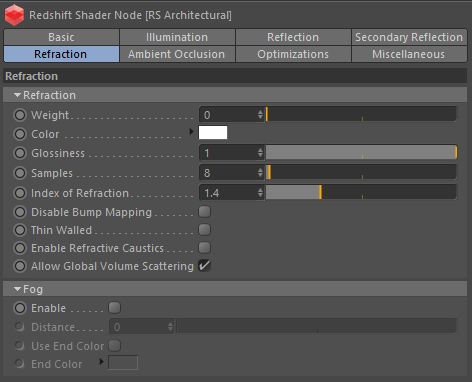
Index of Refraction
折射率
This describes how a light ray is bent as it travels from one medium to another. For example, an IOR of 1.0 is correct for a vacuum and roughly close to air at Standard Temperature and Pressure. Water is 1.33, while glass is usually represented by 1.4 (the default). Note that this can also indirectly control Fresnel-based reflection strength (see Fresnel section for a description of this behavior).
这描述了光线从一种介质传播到另一种介质时是如何弯曲的。例如,1.0的 IOR 对于真空和标准温度和压力下大致接近空气的情况是正确的。水是1.33,而玻璃通常是1.4(默认值)。请注意,这也可以间接控制基于菲涅耳的反射强度(请参阅菲涅耳部分对此行为的描述)。
Disable Refr. Bump Mapping
禁用 Refr.Bump 映射
This option allows you to switch to using the default un-bumped surface normals for indirect refraction/transparency rays.
此选项允许您切换到使用间接折射/透明光线的默认非碰撞表面法线。
Thin Walled
薄壁
This option is useful for modeling materials such as thin glass panes without actually having to model the pane thickness. In this example, you want the IOR to be 1.4 for Fresnel reflections to be realistic, but you don't actually want the ray to bend when it exits the pane, because it wouldn't be noticeable in real life if the pane is thin enough.
此选项对于建模材料(如薄玻璃窗格)非常有用,无需实际建模窗格厚度。在这个例子中,您希望菲涅耳反射的 IOR 为1.4,但实际上并不希望射线退出窗格时发生弯曲,因为如果窗格足够薄,在现实生活中就不会引人注意。
Enable Refractive Caustics
启用折射焦散
When this option is enabled, in conjunction with the global Photon Caustics setting enabled, the object's shadow becomes black and is instead expected to be defined by photon caustics.
当这个选项被启用时,结合全局光子焦散设置,物体的阴影变成黑色,并且被期望通过光子焦散来定义。
In order for this to work as expected, the light must be emitting caustic photons and the object must have caustics casting enabled.
为了达到预期的效果,光线必须发射焦散光子,物体必须启用焦散铸造。
Allow Global Volume Scattering
允许全局体散射
When Global Volume Scattering is added to the scene, enabling this option allows global fog and light volumes to 'pass through' a refracted medium. However, in real life, an enclosed medium would not be affected by the fog in air. If your model is closed and the normals are correct, un-checking this option will stop global fog and light volumes affecting the enclosed medium.
当全球体散射被添加到场景中,启用这个选项允许全球雾和光体积通过折射介质。然而,在现实生活中,封闭介质不会受到空气中雾的影响。如果您的模型是关闭的,法线是正确的,取消此选项将阻止全球雾和轻量影响封闭的介质。
Refraction in Detail
细节折射
|
|
|
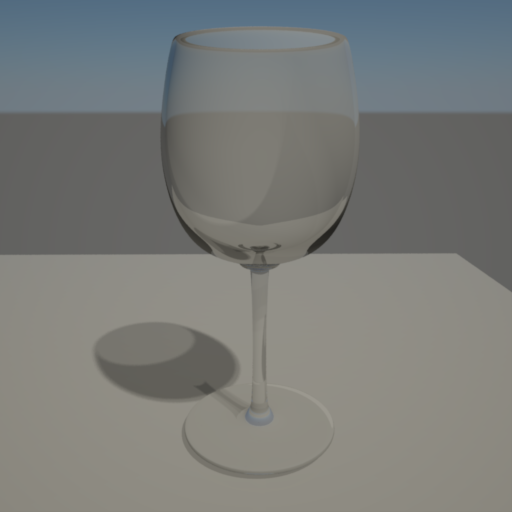
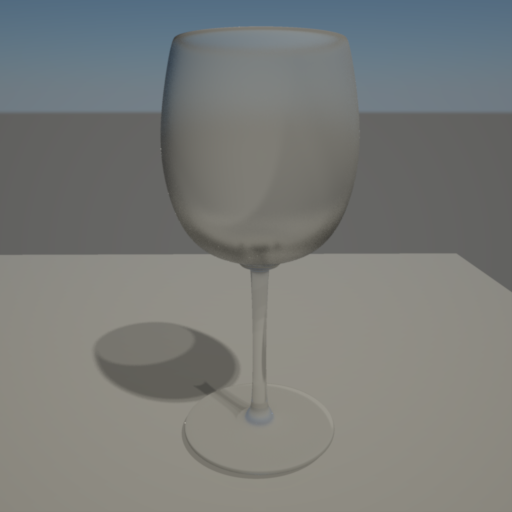
| The image below is an example of refraction, with IOR 1.4, no glossiness (1.0) and a weight of 0.8. As you can see, the light bends as it travels through the glass. Also note the darkness at the base of the glass, this is because we limit how deep our refraction rays can go (see Optimizations tab and Optimizations Options doc). 下面的图像是一个折射的例子,返回抑制1.4,没有光泽度(1.0) ,重量为0.8。正如你所看到的,光在穿过玻璃时会发生弯曲。还要注意玻璃底部的黑暗,这是因为我们限制了折射光的深度(参见优化标签和优化选项文档) | Below is the same example, but with a 'Glossiness' setting of 0.6 and number of samples set to 64. The lower the glossiness setting, the more 'frosted' the glass looks. Note that the lower the glossiness setting (i.e. the wider the gloss), the more samples you will need to remove noise. 下面是同样的例子,但是光泽度设置为0.6,样品数量设置为64。光泽度越低,玻璃看起来就越“磨砂”。注意,光泽度设置越低(即光泽度越宽) ,需要消除噪音的样品就越多 |
Fog
雾
Enable
启用
This option enables a 'fogging' effect inside, which is defined by the options below. By default (when 'Use End Color' is not selected) this means the object will fog to black, reaching black at the distance specific below.
此选项启用内部雾化效果,该效果由下面的选项定义。默认情况下(当“使用结束颜色”没有选择)这意味着对象将雾到黑色,达到黑色的距离具体下面。
Distance
距离
When 'Use End Color' is not checked, this defines the distance within the object at which refraction rays will stop and be pure black. When 'Use End Color' is checked, it defines the distance within the object at which the color becomes the 'End Color'. In this case, beyond that distance the fog color attenuates exponentially. Note that a distance of 0.0 means the effect is disabled..
如果不选择“使用终端颜色”,这将定义物体内折射光线停止并变成纯黑色的距离。当选中“使用结束颜色”时,它定义了对象内部颜色变成“结束颜色”的距离。在这种情况下,超过这个距离,雾的颜色衰减指数。注意,距离为0.0意味着该效果被禁用。.
Use End Color
使用结束颜色
This option enables exponential transmission 'fogging' that is most effective for modeling the thickness of tinted glass, with the 'End Color' being the tint.
这个选项使指数传输雾是最有效的建模厚度的有色玻璃,与’结束颜色’是色彩。
End Color
结束颜色
This is the tint that is applied when the 'Distance' is reached inside the object.
这是在物体内部达到“距离”时应用的色调。
Refraction Fog in Detail
细节折射雾
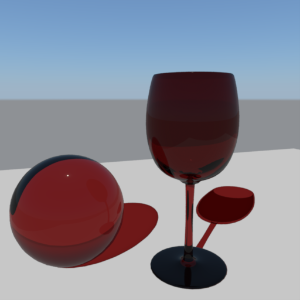
Here is a simple fog example. The sphere has fogging enabled, with a 'Distance' of 7.0, 'Use End Color' is false. The sphere has a radius of 4.0, so the refraction rays terminate within the deepest part of the object, while others escape at shallower parts around the edges.
下面是一个简单的雾的例子。球体已启用雾化,与’距离’的7.0,’使用结束颜色’是假的。球体的半径为4.0,因此折射光线终止于物体的最深部分,而其他光线则逃逸到边缘周围较浅的部分。
Here we demonstrate the differences between the refraction fog effect used to tint glass and regular refraction tinting.
在这里,我们演示了用于着色玻璃的折射雾效应和常规的折射着色之间的区别。
|
|
|
|
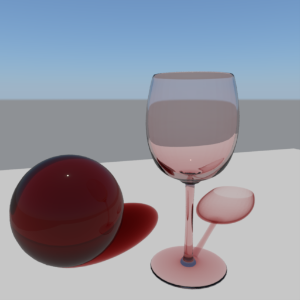
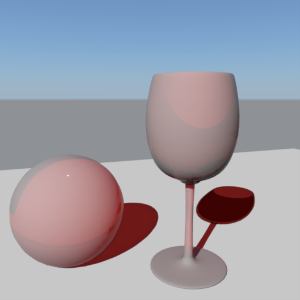
| In the following example refraction fog has been applied to give the illusion of volume for two 'glass' objects. For the solid glass ball on the left, 'Distance' is 1.0, 'Use End Color' is true, 'End Color' is (0.53,0.1,0.1). The 'Refraction Weight' and 'Color' are both set to 1.0. It is recommended that for this effect to work properly, 'Refraction Weight' and 'Color' should always be set to 1.0. A small amount of reflection has also been applied. The glass and shadows appear to have a nice, 'solid' tint to them. 在下面的例子中,折射雾被用来给两个“玻璃”物体的体积错觉。对于左边的实心玻璃球,“距离”为1.0,“使用结束颜色”为真,“结束颜色”为(0.53,0.1,0.1)。折射重量和颜色都设置为1.0。为了使这个效果正常工作,建议“折射重量”和“颜色”应该总是设置为1.0。还应用了少量的反射。玻璃和阴影似乎有一个很好的,’坚实的’色调他们 | This example has no fogging, but instead we rely on the (0.53, 0.1, 0.1) tint being applied only to the 'Refraction Color'. See how it doesn't look like glass anymore and the illusion of volume has gone? One of the reasons it has started to look more opaque is due to energy conservation kicking in, revealing diffuse lighting. 这个例子没有雾,但是我们依赖于(0.53,0.1,0.1)色彩被应用到“折射颜色”。看到它看起来不再像玻璃,体积的幻觉消失了吗?其中一个原因是由于能量守恒的影响,漫射照明开始显现出来 | The example now tries to improve things by knocking out the diffuse contribution ('Diffuse Color' and 'Weight' set to 0.0), but it still doesn't look as realistic as the fall-off effect and is too dark. See the shadows on the floor? The illusion of volume is still not there. 这个例子现在试图通过剔除漫反射(“漫反射颜色”和“重量”设置为0.0)来改进效果,但它看起来仍然不如下降效果那么真实,而且太暗了。看到地板上的阴影了吗?体积的错觉仍然没有出现 |
Ambient Occlusion
环境遮挡
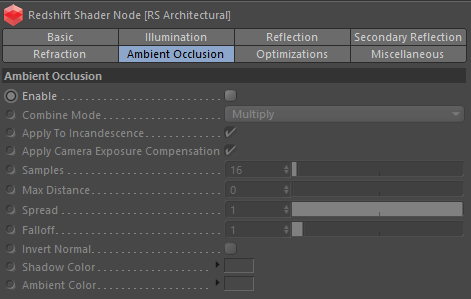
Ambient Occlusion (AO) is a subtle, cheap technique that is typically used in place of Global Illumination (GI). When enabled it gives the impression of soft shadows around geometric detail, which can make objects look more natural and 'present' in the scene. Without GI or AO, objects can look like they are 'floating' and not really part of the environment, because of the lack of subtle lighting interaction between objects. Redshift supports two modes for combining the AO result with the rest of the shader, the default being an additive effect that treats the AO result as if it was a diffuse 'indirect light' color that gets added to the lighting results. The second mode is a multiplicative effect that tints the final shader result with the AO result, which can be useful if you want to accentuate the occlusion 'shadows' without adding extra ambient 'light'.
环境遮挡(Ambient Occlusion,AO)是一种微妙、廉价的技术,通常用于代替全局光源(GI)。当启用时,它给人以几何细节周围柔和阴影的印象,使物体在场景中看起来更自然和“呈现”。没有 GI 或 AO,物体看起来像是漂浮的,并不是真正的环境的一部分,因为物体之间缺乏微妙的光线互动。红移支持两种模式来组合 AO 结果和其余的着色器,默认的是添加效果,将 AO 结果当作是一个漫反射的间接光颜色添加到照明结果中。第二种模式是一种乘法效果,它为最终着色结果添加 AO 效果,如果你想加重遮挡的阴影而不增加额外的环境光,这种效果很有用。
For a more thorough explanation of AO in general, see the Ambient Occlusion shader documentation.
有关 AO 的更详细的解释,请参阅 ambientocclusion 着色器文档。
Enable
启用
This enables the ambient occlusion effect.
这使环境遮挡效果成为可能。
Combine Mode
组合模式
This controls how the ambient occlusion result is combined with the rest of the shader results. The options are as follows:
这控制环境遮挡结果如何与其他着色器结果结合。备选方案如下:
- Add – add to the diffuse indirect lighting contribution 添加到漫射间接照明的贡献
- Multiply – multiply with the final shader result 乘-乘与最终着色结果
NOTE: 'Add' mode is best used as a cheap replacement for GI, whereas 'Multiply' mode should be used in conjunction with GI.
注意: ‘ Add’模式最好用作 GI 的廉价替代品,而‘ Multiply’模式应该与 GI 结合使用。
Apply To Incandescence
适用于白炽灯
When in 'Multiply' combine mode, AO should be only applied to direct and indirect lighting to be realistic. Enabling this option allows you to apply the multiplied AO to the incandescent color of the material too.
当使用“叠加”组合模式时,AO 只应用于直接和间接照明,以保持真实感。启用这个选项可以让你应用多重 AO 白炽灯的颜色太多的材料。
Apply Camera Exposure Compensation
应用相机曝光补偿
When in 'Add' mode, this adjusts the ambient occlusion result so that camera exposure compensation is factored in. This is useful when you are using lights with physically correct brightness in your scene and photographic exposure is required. If this is not enabled, your ambient occlusion result might appear too dim.
当在’添加’模式,这调整环境遮挡的结果,使相机曝光补偿的因素。这是有用的,当你使用的灯光物理上正确的亮度在你的场景和照相曝光是必要的。如果未启用此选项,您的环境遮挡效果可能显得太暗淡。
Samples
样本
This controls the number of rays shot. The more samples there are, the smoother the result. Using 32 to 64 samples produces generally good results.
这控制了射出的射线的数量。样本越多,结果越平滑。使用32至64个样本,一般会产生良好的结果。
Max Distance
最大距离
This controls the maximum distance of each ray. The larger the distance, the more likely the ray will hit something and contribute to the overall occlusion effect. Setting a length of 0.0 will use the maximum ray distance of the scene.
这控制了每条射线的最大距离。距离越大,射线就越有可能击中某物,从而产生遮挡效应。设置一个0.0的长度将使用场景的最大射线距离。
Spread
传播
Ambient occlusion works by shooting a number of rays for each pixel. These rays are shot in a hemispherical fashion which produces a smoothly spread out result. The spread parameter makes the rays more concentrated around the pixel's normal which allows the AO effect to be 'tightened'. The lower this value is, the tighter the AO effect.
环境遮挡通过为每个像素拍摄一定数量的光线来工作。这些射线以半球形的方式射出,产生一种平滑的展开效果。扩展参数使得光线更加集中在像素的正常范围,这使得 AO 效果被“收紧”。这个值越低,AO 效应越紧。
Falloff
女名女子名
This allows you to control the tightness of the transition between occluded and un-occluded areas, with values less than 1.0 biasing towards un-occluded and values greater than 1.0 toward occluded.
这使您可以控制紧密度之间的过渡闭塞和非闭塞地区,值小于1.0偏向非闭塞和大于1.0的值闭塞。
Invert Normal
反向正态
This option allows you to reverse the occlusion effect, whereby open corners will now receive the occlusion.
这个选项允许你扭转遮挡效果,即开放的角落现在将接收遮挡。
Shadow Color
阴影颜色
This is the color tint when completely occluded.
这是完全遮挡时的颜色色调。
Ambient Color
环境色彩
This is the color tint when completely un-occluded.
这是完全不遮挡时的色彩色调。
Ambient Occlusion in Detail
环境遮挡的细节
|
|
|
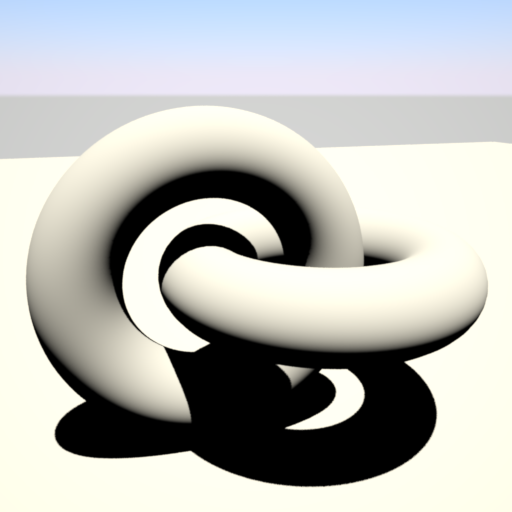
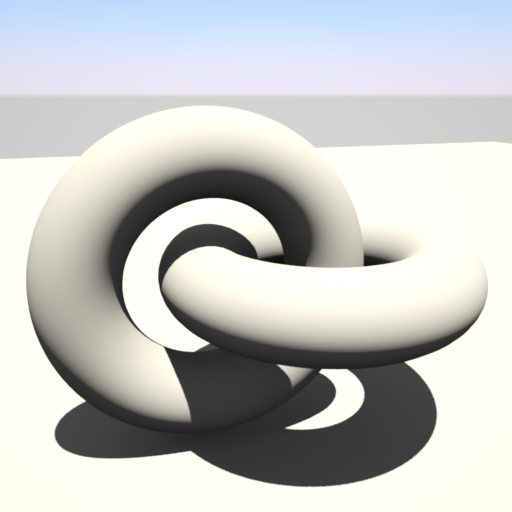
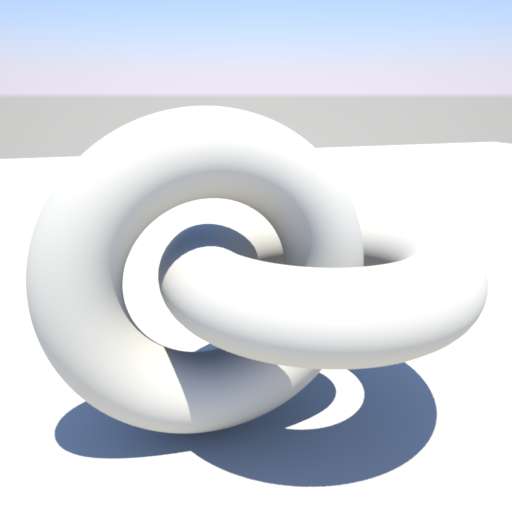
| This example shows a scene that is lit by the sun, with a photographic exposure camera shader applied. GI has been disabled. See how with no GI, the shadows are solid black, with no subtle detail. 这个例子展示了一个被太阳照亮的场景,使用了照相机着色器。GI 已经被禁用。看看如何没有 GI,阴影是纯黑色,没有微妙的细节 | This example shows the AO effect in 'Add' combine mode, with AO set for both the floor and the rings. The material has a 'Max Distance' of 10000.0, 256 'Samples', an 'Ambient Color' of (0.2,0.2,0.2) and a 'Shadow Color' of (0.0,0.0,0.0). You can clearly see the ambient 'indirect light' introduced, with subtle occlusion 'shadow' details. Also notice how the overall lighting is a bit brighter than the previous example. 这个例子显示了在“添加”组合模式中的 AO 效果,为地板和环设置 AO。材质的“最大距离”为10000.0,256“样品”,“环境色彩”为(0.2,0.2,0.2) ,“阴影色彩”为(0.0,0.0,0.0)。你可以清楚地看到环境“间接光”的介绍,与微妙的遮挡“阴影”细节。还要注意的是,整体照明比前面的例子要亮一些 |
|
|
|
| This example shows the same scene, but with GI now enabled and AO disabled. 这个示例显示了相同的场景,但是现在启用了 GI,禁用了 AO |
Now we re-enable AO, to accentuate the occlusion 'shadows', but this time in 'Multiply' combine mode because we don't want to add extra brightness. The color values used are the default for 'Multiply' mode: 'Shadow Color' of (0.2, 0.2, 0.2) and an 'Ambient Color' of (1.0, 1.0, 1.0). 现在我们重新启用 AO,以强调遮挡的“阴影”,但是这次在“叠加”组合模式,因为我们不想增加额外的亮度。使用的颜色值是“乘”模式的默认值: “阴影颜色”(0.2,0.2,0.2)和“环境颜色”(1.0,1.0,1.0)。 |
Optimizations 优化
While global optimization defaults are generally adequate for a whole scene, you can control some elements of per material performance with these settings.
虽然全局优化默认值对于整个场景来说已经足够了,但是你可以通过这些设置来控制每个材质性能的某些元素。
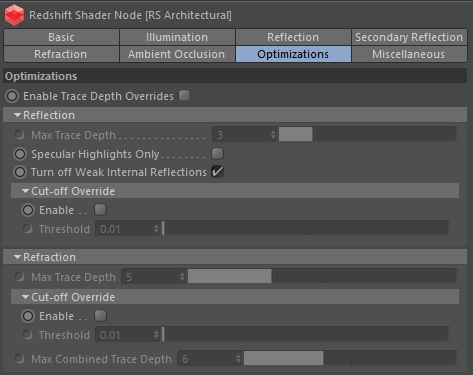
Enable Trace Depth Overrides
启用跟踪深度重写
This enables the Max Reflection/Refraction Trace Depth parameters.
When not enabled, the global trace depths will be used.
这启用了最大反射/折射跟踪深度参数。如果没有启用,将使用全局跟踪深度。
Reflection
反思
Trace Depth
追踪深度
This parameter controls the trace depth for rays shot from the material. If the reflected results are not very defined (they are blurry because of the glossiness parameter or have a low weight), then multiple reflection bounces can be a waste of rendering time. This parameter allows the user to reduce the trace depth and speed up rendering.
这个参数控制从材料中射出的射线的痕迹深度。如果反射的结果没有很好的定义(由于光泽度参数的原因而变得模糊或者重量很低) ,那么多次反射反弹就会浪费渲染时间。此参数允许用户减少跟踪深度并加快呈现速度。
Specular Highlights Only
镜面高光
When this parameter is enabled, only reflections from lights will be computed. I.e. no other object in the scene will show through the reflections. This is faster than computing full reflections and in some cases it might be desirable too (if reflections look "too busy"). However, it will also introduce visual inconsistencies especially if other materials in the same scene are configured to use full reflections. In these cases, this parameter should be enabled.
当启用此参数时,只计算光线的反射。例如,场景中没有其他物体会通过反射显示出来。这比计算完全反射要快,在某些情况下也是可取的(如果反射看起来“太忙”)。然而,它也会引入视觉不一致,特别是如果在同一场景中的其他材质被配置为使用全反射。在这些情况下,应该启用此参数。
Turn off Weak Internal Reflections
关闭微弱的内部反射
This is a simple, but important performance optimization to prevent rays being 'wasted' inside objects that are both reflective and refractive. Normally, two rays would be spawned for every surface hit inside the object, one for reflection and one for refraction. If you had a sphere, for example, you would have rays bouncing about, trapped inside the sphere until their max trace depth is reached, potentially adding very little to the overall visual quality of the sphere if the reflected amount is 'weak'.
这是一个简单但重要的性能优化,以防止光线被浪费在物体内部的反射和折射。通常情况下,每次撞击物体内部的表面都会产生两条射线,一条用于反射,一条用于折射。如果你有一个球体,例如,你会有光线反射,被困在球体内,直到它们的最大跟踪深度达到,潜在地增加很少的球体的整体视觉质量,如果反射量是弱的。
Having this option enabled turns off reflected rays inside the object. Note that this option does not affect refractive rays that are reflected due to Total Internal Reflection. One caveat of using this option is that internal specular reflections will be lost, which is not realistic, but often acceptable. This is enabled by default.
启用这个选项可以关闭物体内部的反射光线。注意,这个选项不会影响由于全内反射而反射的折射光线。使用这个选项的一个警告是内部镜面反射将会丢失,这是不现实的,但通常是可以接受的。这是默认启用的。
Cut-off Override Enable
切断重写启用
This enabled the ability to sepcify a custom reflection cut-off override.
这使得能够对自定义反射截止覆盖进行隔离。
Cut-off Override Threshold
截止覆盖阈值
When the reflected results are very dark (because of low "Weight" or "Color" values) they contribute very little to the final image. This parameter defines what is considered "very dark" at which point no more reflection rays will be shot - which will speed up rendering. Scenes containing very strong lights might need this parameter set to very low values such as 0.0001 in order to avoid early termination of tracing which can produce a grain-like effect.
当反射的结果非常黑暗(因为低的“重量”或“颜色”值) ,他们贡献非常小的最终图像。这个参数定义了什么被认为是“非常黑暗”,在这一点上没有更多的反射射线将被拍摄-这将加速渲染。包含非常强光的场景可能需要将这个参数设置为非常低的值,如0.0001,以避免过早终止跟踪,因为跟踪会产生类似颗粒的效果。
Refraction
折射
Trace Depth
追踪深度
This parameter controls the trace depth for rays shot from the material. If the refracted results are not very defined (they are blurry because of the glossiness parameter or have a low weight), then multiple refraction bounces can be a waste of rendering time. This parameter allows the user to reduce the trace depth and speed up rendering.
这个参数控制从材料中射出的射线的痕迹深度。如果折射结果没有很明确的定义(由于光泽度参数而模糊或重量较低) ,那么多次折射反弹可能会浪费渲染时间。此参数允许用户减少跟踪深度并加快呈现速度。
Cut-off Override Enable
切断重写启用
This enabled the ability to sepcify a custom refraction cut-off override.
这使得能够分隔自定义折射截止覆盖。
Cut-off Override Threshold
截止覆盖阈值
When the refracted results are very dark (because of low "Weight" or "Color" values) they contribute very little to the final image. This parameter defines what is considered "very dark" at which point no more refraction rays will be shot - which will speed up rendering. Scenes containing very strong lights might need this parameter set to very low values such as 0.0001 in order to avoid early termination of tracing which can produce a grain-like effect.
当折射结果是非常黑暗的(因为低“重量”或“颜色”值) ,他们贡献非常小的最终图像。这个参数定义了什么是“非常暗”,在这一点上不再有折射光线被拍摄——这将加速渲染。包含非常强光的场景可能需要将这个参数设置为非常低的值,如0.0001,以避免过早终止跟踪,因为跟踪会产生类似颗粒的效果。
Weak Internal Reflection in Detail
微弱的细节内反射
|
|
|
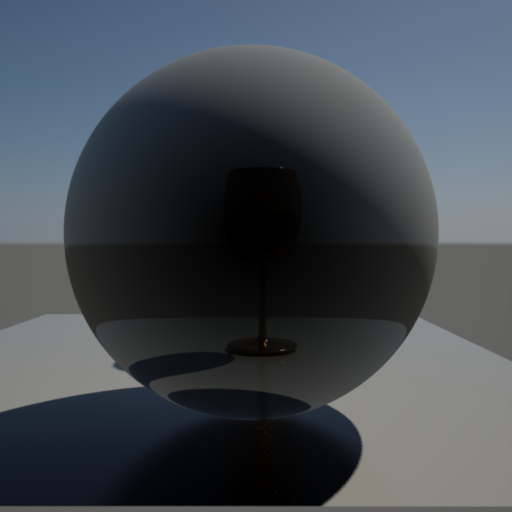
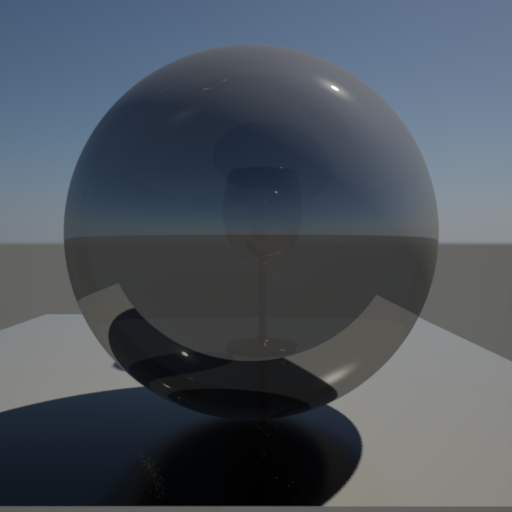
| In this example, the sphere is partially reflective and refractive (both weights are 0.3), with a goblet behind the sphere. 'Turn Off Weak Internal Reflections' has NOT been enabled, and you can see some reflected highlights inside the sphere from the multiple bounces. 在这个例子中,球体是部分反射和折射的(两个重量都是0.3) ,球体后面有一个杯状物。关闭微弱的内部反射没有启用,你可以看到一些反射球内部的多重反弹的高光 |
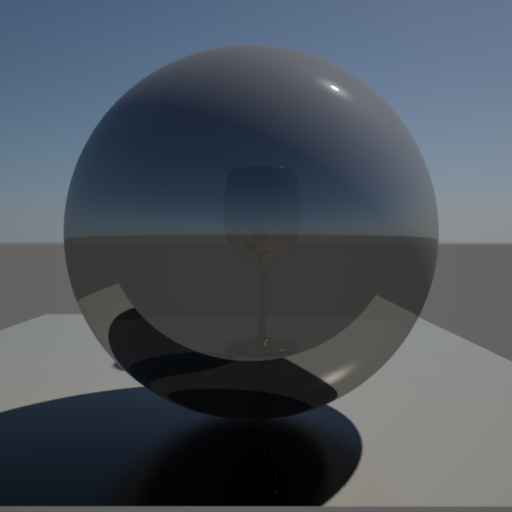
In this example, 'Turn Off Internal Reflections' is now checked. You can see that some internal reflection detail has been lost, particularly the 'hot' details, but it looks almost the same and, more importantly, renders significantly faster. 在这个例子中,“关闭内部反射”现在被选中。你可以看到一些内部反射的细节已经丢失,特别是“热”细节,但它看起来几乎一样,更重要的是,渲染速度明显更快。 |
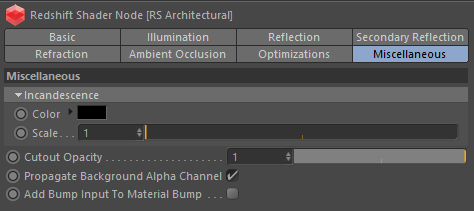
Miscellaneous 杂项
Cutout Opacity
不透明度
When textured this means that at values of 0.5 and above, the material will be treated as normal, but below that threshold, the material becomes completely transparent. This is useful for cutting out holes in otherwise solid polygons geometry.
当织纹这意味着在值0.5或以上,材料将被视为正常,但低于阈值,材料变得完全透明。这是有用的,否则在坚实的多边形几何切出洞。
Incandescent Color
白炽灯的颜色
This color is merely added to the final shaded color result. It is used to make an object glow.
这种颜色只是添加到最终的阴影颜色结果。它是用来使一个对象发光。
Incandescent Scale
白炽灯光刻度
Sets the scale of the incandescent color.
设置白炽灯颜色的比例。
Propogate Background Alpha Channel
通道背景
This allows blending between the current 'background' alpha channel value in the scene with the approximated opacity of the material, otherwise the alpha channel is replaced with 1.0.
这允许在场景中的当前背景 alpha 通道值与材质的近似不透明度之间进行混合,否则 alpha 通道将被替换为1.0。
Add Bump Input To Material Bump
添加凹凸输入到材质凹凸
This adds the bump map specified below to the shaders material level bump map.
这将下面指定的凹凸贴图添加到材质层凹凸贴图中。
Bump Input
颠簸输入
Connect your shader bump map here.
在这里连接你的着色器凹凸贴图。



赶快留个言打破零评论!~