AOV Tutorial AOV 教程
This tutorial shows how to use the various AOV options to generate a set of AOVs and then re-compose them back into the original beauty pass using Nuke.
本教程展示了如何使用各种各样的 AOV 选项来生成一组 AOV,然后重新组合他们回到原来的美丽通行证使用核。
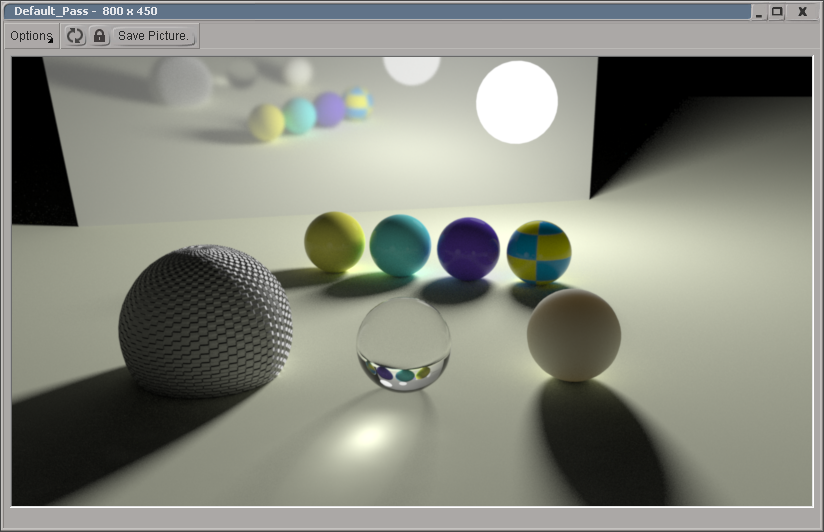
For this tutorial, we'll use a simple scene which is similar to the one used for the AOV document. This scene uses a combination of features such as diffuse lighting and GI, reflections, refractions, caustics, subsurface scattering and incandescence, so it covers all the shading-related AOVs.
在本教程中,我们将使用一个类似于 AOV 文档的简单场景。这个场景结合了漫射照明和 GI、反射、折射、焦散、次表面散射和白炽等特征,因此它涵盖了所有与阴影相关的 AOVs。
Table Of Contents
目录
Gamma Settings 伽玛设置
For this tutorial, we desire gamma-corrected results. For this reason Redshift's gamma settings are as follows:
对于本教程,我们希望得到经过伽玛校正的结果。因此,Redshift 的伽玛设置如下:
- Display Gamma: 2.2 显示伽马值: 2.2
- File Gamma: "Automatic" 文件 Gamma: “自动”
- Sampling Gamma: "Use Display Gamma" 采样伽玛: “使用显示伽玛”
As will be explained below, we'll use 16-bit OpenEXR files. As explained in this document, when the file gamma setting is set to "Automatic", any data written to a floating-point image file format (like EXR) will be written in Gamma 1.0 (linear) space. This simplifies the workflow of most compositing applications.
正如下面将要解释的,我们将使用16位 OpenEXR 文件。如本文所述,当文件 Gamma 设置设置为“ Automatic”时,任何写入浮点图像文件格式(如 EXR)的数据都将以 Gamma 1.0(线性)空间写入。这简化了大多数合成应用程序的工作流。
8-bit formats versus 16-/32-bit (half/float) image formats
8位格式与16-/32位(半/浮动)图像格式的比较
For maximum precision, we recommend that users prefer 16/32 bit (i.e. half/float) image formats over 8-bit ones. While 8-bit formats can also work, the lower numerical precision means that adjustments in a comp package can produce color banding and other types of visual artifacts. Furthermore, inconsistencies between compositing applications means that some 8-bit formats like PNG and TGA might not work the same between applications.
为了获得最高的精度,我们建议用户更喜欢16/32位(即半/浮点)的图像格式,而不是8位的。虽然8位格式也可以工作,较低的数字精度意味着调整在一个复合包可以产生颜色带和其他类型的视觉效果。此外,合成应用程序之间的不一致性意味着一些8位格式(如 PNG 和 TGA)在应用程序之间可能不能工作。
For most purposes, a half-precision 16-bit format such as OpenEXR is typically sufficient and provides a good balance between numerical precision and file size.
对于大多数用途,半精度的16位格式(如 OpenEXR)通常就足够了,并且在数值精度和文件大小之间提供了良好的平衡。
For this tutorial, we'll use the following AOVs, all of which are configured to use the 16-bit (half) OpenEXR file format:
对于本教程,我们将使用以下 aov,它们都被配置为使用16位(半) OpenEXR 文件格式:
- Diffuse Filter 漫反射滤镜
- Diffuse Lighting Raw 漫反射照明原材料
- Global Illumination Raw 全局光源
- Subsurface Scattering Raw 次表面散射
- Specular Lighting 镜面照明
- Reflections 反思
- Refractions 折射
- Emission 排放
- Caustics 焦散
How the AOVs should be recombined
卓越学科领域应如何重组
Once we have rendered the above AOV image files, the final beauty pass can be recombined with the following equation:
一旦我们渲染了上面的 AOV 图像文件,最终的美丽通行证可以与下面的等式重新组合:
Beauty = [ Diffuse Lighting + Global Illumination + Specular + Reflections + Refractions + Subsurface Scattering + Emission + Background + Caustics ] * Volume Tint + Volume Emission + Volume Lighting
美 = [漫射照明 + 全局光源 + 镜面 + 反射 + 折射 + 次表面散射 + 发射 + 背景 + 焦散] * 体积色调 + 体积发射 + 体积照明
Please note that if we were using "Caustics Raw" instead of "Caustics", these would have to also be multiplied by "Diffuse Filter".
请注意,如果我们使用“苛责原料”而不是“苛责”,这些也必须乘以“漫滤器”。
In Nuke
在纽克
All the EXR images were brought in Nuke. By default, Nuke uses a "linear" color space for EXRs – this is desirable. Using the correct color space is important, as an incorrect color space will produce wrong composition results!
所有的 EXR 图像都来自 Nuke。默认情况下,纽克使用一个“线性”色彩空间的 EXRs-这是可取的。使用正确的色彩空间很重要,因为不正确的色彩空间会产生错误的构图结果!
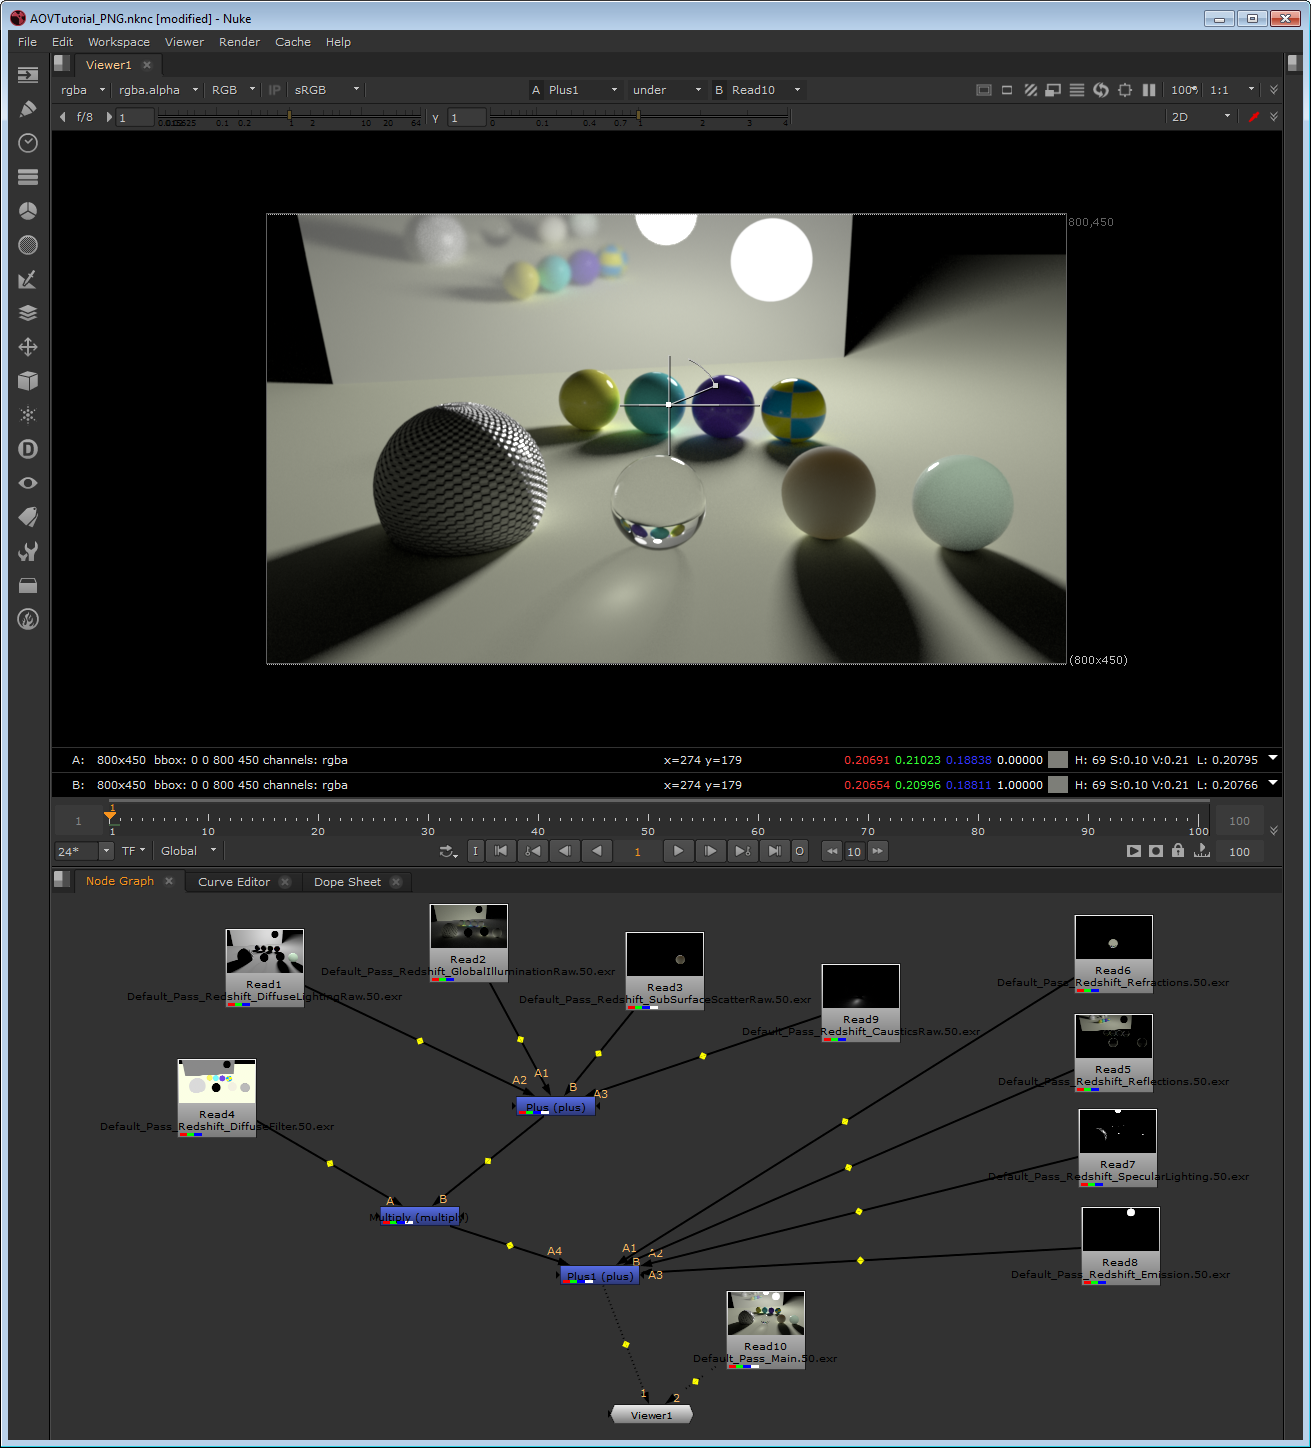
As can be seen in the next image, the DiffuseFilter AOV is multiplied by DiffuseLighingRaw (leftmost), GlobalIlluminationRaw (middle) and SubsurfaceScatteringRaw(rightmost). These three multiplications, along with the remaining AOVs are all added together using a Merge (plus) node.
在下一张图片中可以看到,DiffuseFilter AOV 被 DiffuseLighingRaw (最左边)、 GlobalIlluminationRaw (中间)和 SubsurfaceScatteringRaw (最右边)相乘。这三个乘法以及其余的 aov 都使用一个 Merge (+)节点相加。
We've also connected the original beauty pass (also a linear EXR) to the viewer node. Using Nuke's "wipe" tool we can compare it to our final comp and verify that the nodes are setup correctly.
我们还将原始的美丽通道(也是一个线性 EXR)连接到查看器节点。使用核武器的“擦除”工具,我们可以比较它与我们的最终比较,并验证节点设置正确。
So, what if we had used PNGs instead of EXRs?
那么,如果我们使用 png 代替 EXRs 会怎样呢?
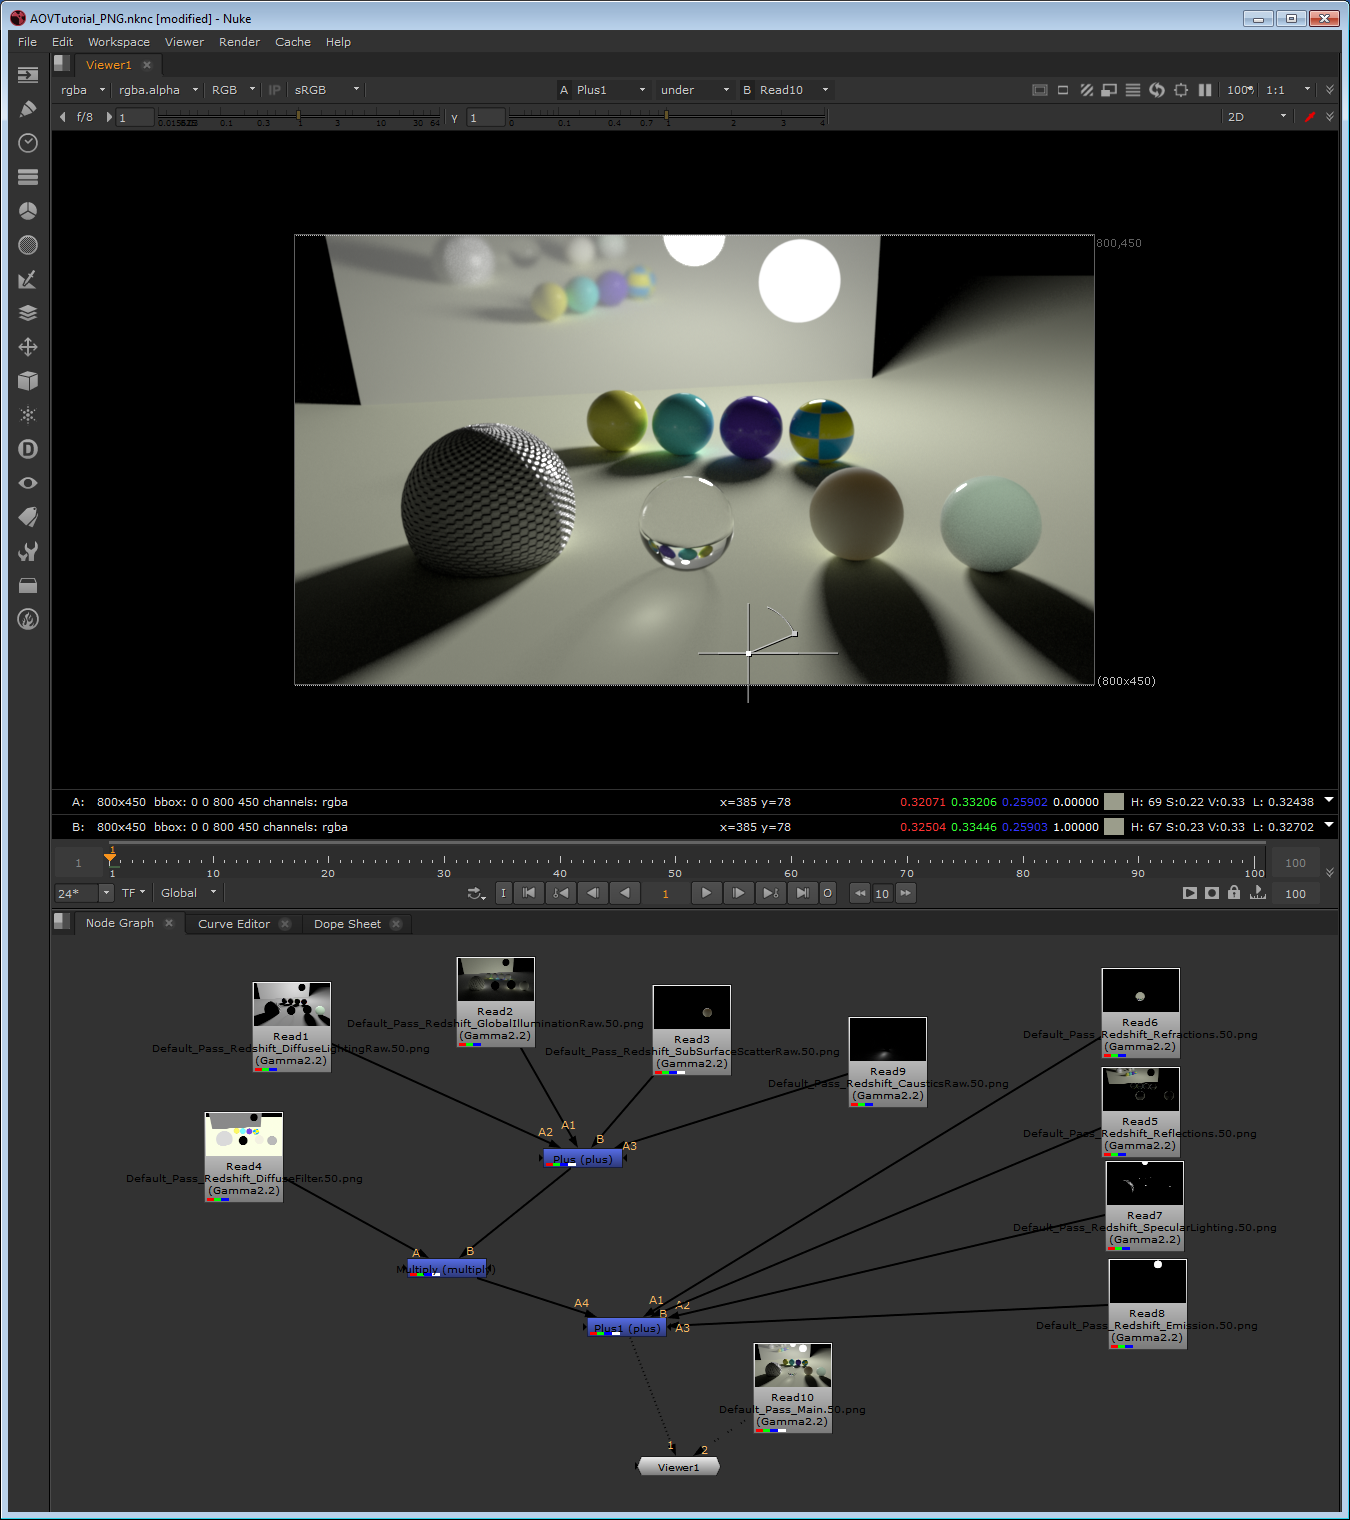
Well, the combination math is identical. The only difference is the color space we have to choose for each imported image. By default, Nuke assumes that all PNGs are using the sRGB color space. But, because we rendered these PNG images with a gamma of 2.2, the correct color space is "Gamma 2.2". Please note that the Gamma 2.2 color space looks very similar to the sRGB color space. In fact, they can look nearly identical to the naked eye, but there are some differences between them. Selecting an sRGB color space instead of Gamma 2.2 will mean some subtle errors in the math which will produce an image slightly (or not so slightly, depending on the case) different to the beauty image.
嗯,数学组合是相同的。唯一的区别是我们必须为每个导入的图像选择颜色空间。默认情况下,Nuke 假设所有的 png 都使用 sRGB 颜色空间。但是,因为我们用2.2的伽马值渲染了这些 PNG 图像,所以正确的颜色空间是“ Gamma 2.2”。请注意,Gamma 2.2色彩空间看起来非常类似于 sRGB 色彩空间。事实上,它们看起来和肉眼几乎一模一样,但是它们之间有一些不同。选择 sRGB 色彩空间而不是 Gamma 2.2将意味着数学上的一些细微错误,这将产生一个与美丽图像稍微不同的图像(或者不那么轻微,取决于情况)。
From that point onwards, it's possible to adjust the individual AOVs and tune the look. Or, alternatively, use one or more of Redshift's Puzzle Matte AOVs to mask parts of the image and perform per object (or per object group) or per-material adjustments.
从那时起,就有可能调整个别的 aov 和调整外观。或者,或者,使用一个或多个红移的拼图 aov 遮罩图像的一部分,执行每个对象(或每个对象组)或每个材质的调整。
Jagged Edges ("Aliasing") in the AOVs
锯齿边缘(“别名”)在视觉效果图
Some AOVs have options to disable antialiasing, such as then using "center sample" for depth or world position or disabling filtering for the motion vectors. However, most AOVs are generated with filtering (antialiasing) enabled by default.
一些 aov 具有禁用反走样的选项,例如使用“中心样本”进行深度或世界位置或禁用运动矢量的过滤。但是,大多数 aov 是默认在启用过滤(反走样)的情况下生成的。
Antialiasing in Redshift happens in an adaptive manner through unified sampling. In a nutshell, Redshift looks at the beauty pass colors and if it detects that a pixel is near a sudden color edge or around excessive noise, it refines that pixel by shooting more rays which, in turn, 'cleans' that pixel.
在 Redshift,反走样是通过统一的采样以一种自适应的方式发生的。简而言之,Redshift 查看美丽传递的颜色,如果它检测到一个像素接近突然的颜色边缘或周围过多的噪音,它通过拍摄更多的光线来提炼该像素,反过来,‘清理’该像素。
Since Redshift uses the beauty pass to do refinement, this can create the following problem: a pixel might be 'clean' for the beauty pass but it might not be for an AOV and, because it won't get refined, it might look jagged or noisy in the AOV.
由于红移使用美丽通道进行细化,这可能会产生以下问题: 一个像素可能是‘干净’的美丽通道,但它可能不是一个 AOV,因为它不会得到细化,它可能看起来参差不齐或有噪音的 AOV。
Examples of where the beauty is considered 'clean' by the adaptive refinement algorithm include areas with very dark lighting or no lighting at all (as in the following examples) or meshes using flat shaders such as "constant" or "incandescent".
自适应细化算法认为“干净”的美的例子包括光线非常暗或根本没有光线的区域(如下面的例子)或使用单位着色器(如“恒定”或“白炽灯”)的网格。
The solution to this problem is to use enough unified "min samples". Unified sampling settings like "min samples: 4, max samples: 256" should be avoided. "Min samples" settings like 32 or above should work for most cases.
解决这一问题的办法是使用足够统一的“最小样本”。应避免统一的取样设置,如“最小样本: 4,最大样本: 256”。“最小样本”的设置,如32或以上应工作在大多数情况下。
The following images demonstrate the above points.
下面的图片展示了以上几点。
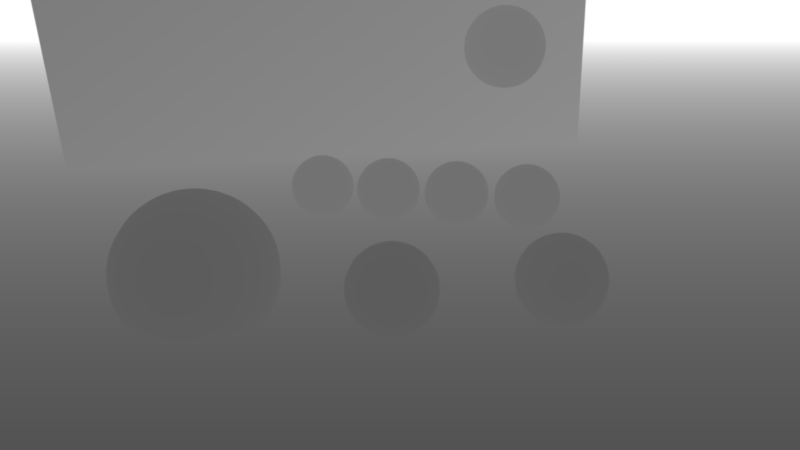
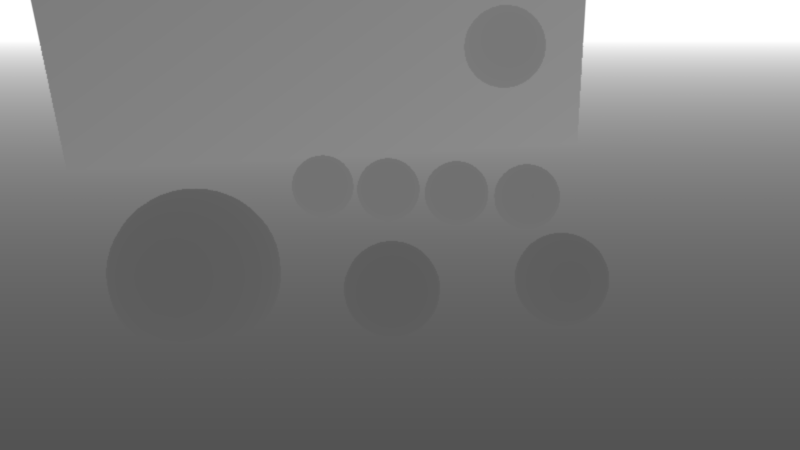
Our example scene is lit by a single area light. This is the Depth AOV with "Full" filtering enabled. The unified sampling settings are min samples:2, max samples:128. The Depth AOV in this case is clean because the beauty pass has enough contrast around the edges to force the adaptive antialiasing to refine.
我们的例子场景是由一个单一的区域照明。这是启用“全”过滤的深度 AOV。统一的抽样设置为最小样本: 2,最大样本: 128。深度 AOV 在这种情况下是干净的,因为美丽通道有足够的对比度周围的边缘,迫使自适应抗锯齿细化。
However, once the area light multiplier is set to zero the beauty pass becomes totally black. This makes the adaptive antialiasing algorithm terminate early which affects the quality for the Depth AOV, producing jagged edges
然而,一旦面积光倍增器设置为零,美丽通道变成完全黑色。这使得自适应反走样算法提前终止,从而影响深度 AOV 的质量,产生锯齿状边缘
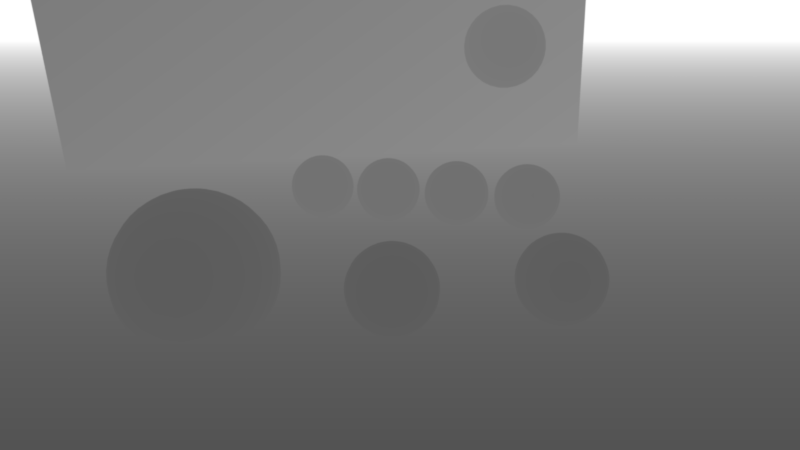
Increasing the unified "min samples" to 32, improves the Depth AOV quality.
将统一的“最小样本”增加到32个,提高了深度 AOV 质量。
'Halo' Artifacts When Using Raw AOVs
使用未加工的 AOVs 时的‘ Halo’工件
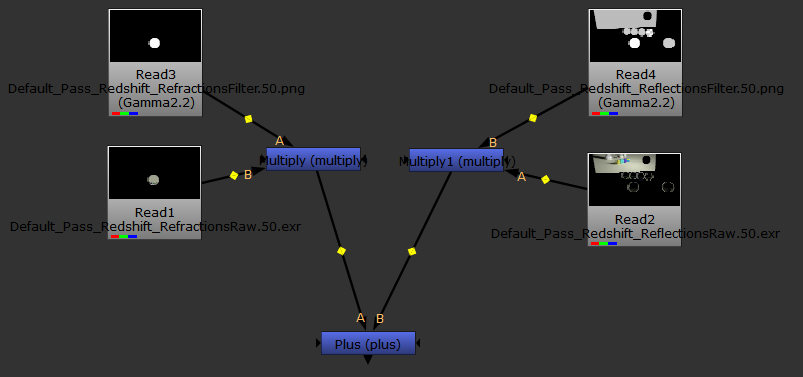
'Raw' AOVs consist of raw lighting results that exclude any tint/albedo 'filter' information that will have been applied for the surface materials. Raw AOVs are useful for tweaking lighting colors without affecting material albedo properties. To get full lighting results, one has to multiply the Raw AOV result by the equivalent Filter result.
“原始”的 AOVs 包括原始的照明结果,排除了任何色彩/反照率的“过滤”信息,将应用于表面材料。原始的 AOVs 是有用的调整照明颜色不影响材质反照率属性。要得到完整的照明结果,必须将原始的 AOV 结果与等效的滤镜结果相乘。
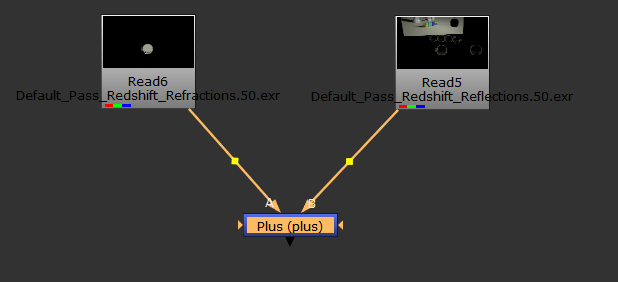
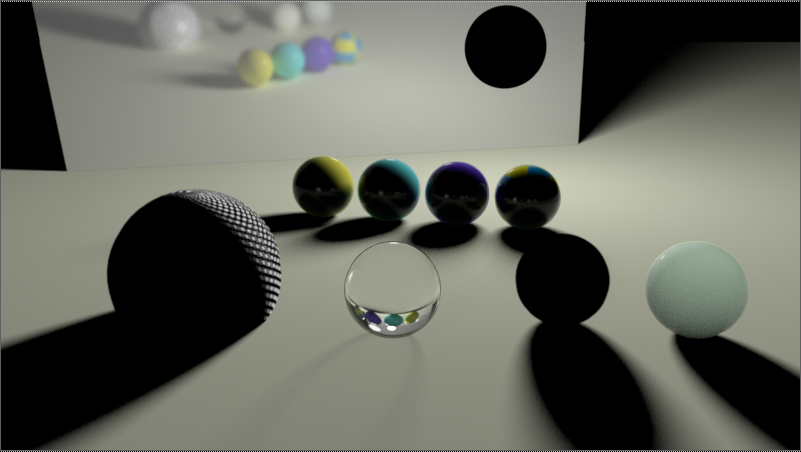
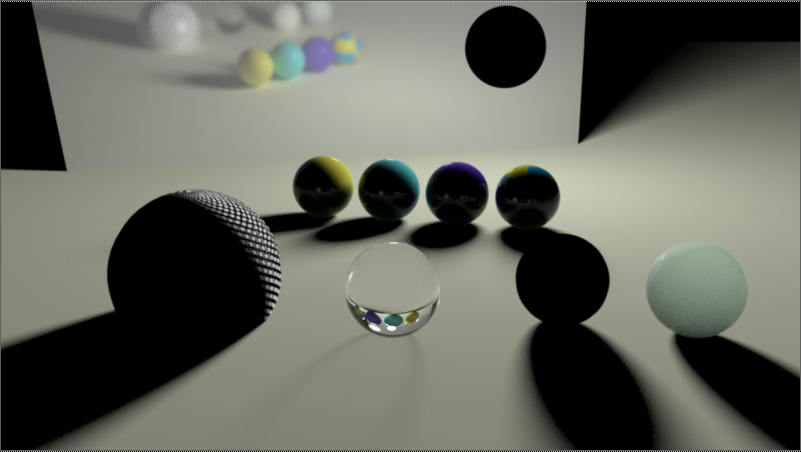
To illustrate the above statement, the images below show a comparison in Nuke between computing the full lighting result of reflection and refraction using raw and filter AOVs, vs using pre-computed full reflection and refraction AOV results:
为了说明上述情况,下面的图像显示了在 Nuke 中使用原始的和滤波的全反射和折射效果与使用预先计算的全反射和折射效果之间的比较:
|
|
|
|
Using Raw AOVs 使用 Raw aov |
Using pre-computed full lighting results 使用预先计算的全光照结果 |
With unified sampling filtering, the edges of high-contrast image data in the AOVs becomes softer and less jagged, producing images that are more pleasing to the eye. Mathematically, however, because of the multiply step in the composite this means that when using raw AOV results vs non-raw full lighting results you might see darkening or 'halo'-type artifacts around these high-contrast edge images. Depending on the severity, these 'halo' artifacts can result in a final composite image that does not match the beauty, particularly around high-frequency images such as hair.
通过统一的采样滤波,aov 中的高对比度图像数据的边缘变得更柔和,锯齿更少,产生的图像更加赏心悦目。然而,在数学上,由于合成图像中的乘法步骤,这意味着当使用原始的 AOV 结果和非原始的全光照结果时,你可能会在这些高对比度的边缘图像周围看到暗色或“晕轮”类型的伪影。根据严重程度的不同,这些“光环”工件可能会导致最终的合成图像与美丽不匹配,特别是在头发等高频图像周围。
The images below show a comparison of the resultant images using Raw AOVs vs full lighting AOVs. In the raw result composite, against the diffuse background you can see a dark halo around the refractive sphere in the middle of the image:
下面的图片显示了使用 Raw AOVs 和全光 AOVs 的结果图片的比较。在合成的原始结果中,在漫反射背景的衬托下,你可以看到图像中间折射球体周围的暗晕:
|
|
|
|
Using Raw AOVs 使用 Raw aov |
Using pre-computed full lighting results 使用预先计算的全光照结果 |
To fix this problem, Redshift 2.0 introduced a new option called 'Adjust Raw AOVs to Fix Halo Artifacts'. This option is enabled by default to ensure final composite matches beauty.
为了解决这个问题,Redshift 2.0引入了一个新的选项,称为“调整原始的 AOVs 来修复晕轮效果”。此选项默认启用,以确保最终的组合匹配美观。
This option works by adjusting the Raw AOV results based on the appropriate Filter AOV results in order to ensure the resultant composite will match the beauty. Because of this adjustment, you may see unexpected colors around the high-contrast edge images in the Raw AOVs – while this may look strange, mathematically it ensures the correct beauty results when multiplied with the appropriate albedo Filter AOV.
这个选项通过基于适当的过滤器 AOV 结果调整原始 AOV 结果来工作,以确保结果的组合将匹配美丽。由于这种调整,你可能会看到周围的高对比度边缘图像的原始 AOV-虽然这可能看起来奇怪,数学上它确保了正确的美丽结果时,乘以适当的反照率滤波器 AOV。
Noise In The AOVs
视觉效果图中的噪音
When Redshift generates the AOVs, it applies certain sampling optimizations that are based on how important that AOV is to the final image. For example, if a reflection is very dim, Redshift uses fewer rays to compute it.
当红移生成 AOV 时,它会根据 AOV 对最终图像的重要程度进行某些采样优化。例如,如果一个反射非常暗,红移使用较少的光线来计算它。
While this is perfectly fine for beauty renders, it means that AOVs can appear to be noisy when viewed on their own. If you intend on brightening up an AOV in a comp application, that noise can become particularly visible and ruin your final comp.
虽然这是完全精细的美丽呈现,这意味着 aov 可以出现的噪音时,看到自己的。如果你打算在一个合成应用程序中增亮一个 AOV,那么这个噪音会变得特别明显,并且会毁掉你最终的合成。
The images below show an example of this.
下面的图片就是一个例子。
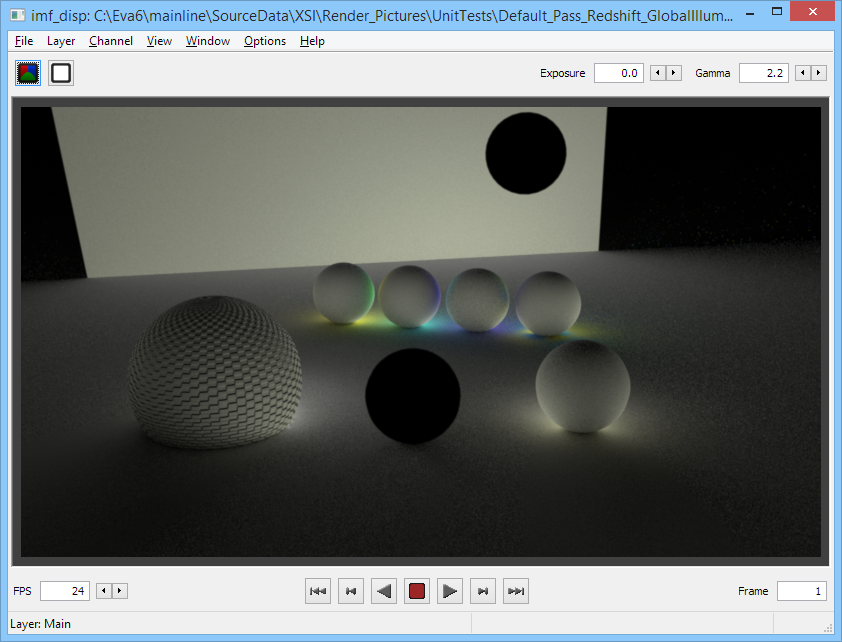
While the final rendered scene shown in the images above appears to be pretty 'clean' in terms of noise, if one looked at the GloballIlluminationRaw AOV by itself, they'd be able to see some noise:
虽然上面图片中最后渲染的场景在噪音方面看起来是相当干净的,但是如果你单独看一下 globalilluminationraw 的 AOV,他们可以看到一些噪音:
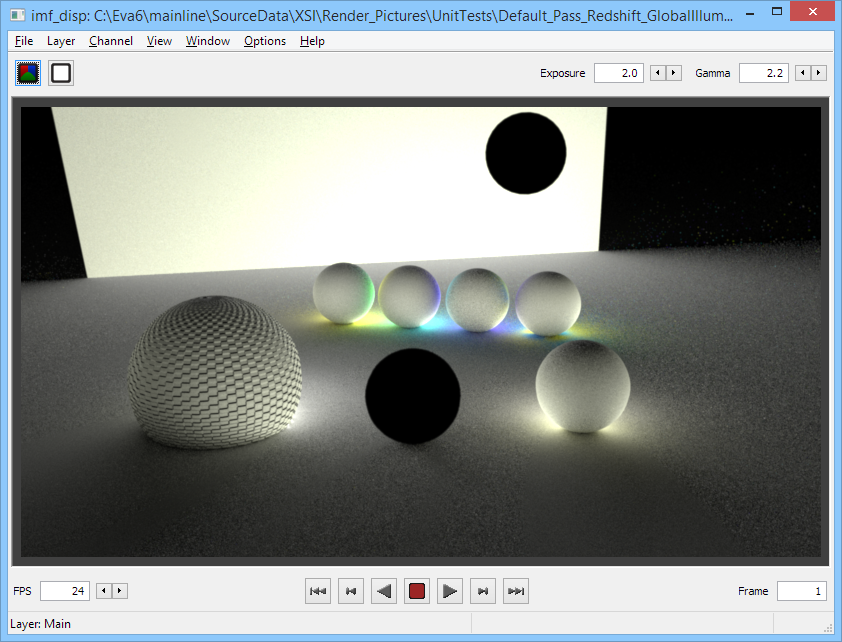
Increasing the exposure of that AOV to 2 stops (i.e. 4 times brighter) makes the noise even more visible:
增加曝光量至2个光圈(即4倍光圈) ,噪音会更明显:
The noise has now become more visible and, even worse, it's not consistent throughout the image! Certain parts of the image were able to be cleaned faster than others by Redshift's adaptive algorithms. As an example, look around the shadow area of the rightmost sphere. In this example, any place in the image that was most lit by direct lighting meant that indirect lighting (GI) didn't have to work as hard, because in the grand scheme of things it wasn't as important. Shadowed areas, on the other hand, have no strong direct lighting in them so GI is more visible and has to be cleaned more. This is the reason why areas under shadow appear to have cleaner GI.
噪音现在变得更加可见,更糟糕的是,它不是一致的整个图像!通过红移的自适应算法,图像的某些部分能够比其他部分更快地被清理。例如,环视最右边球体的阴影区域。在这个例子中,图像中任何一个最靠直接照明的地方都意味着间接照明(GI)不需要那么费力,因为在宏大的场景中,它并不那么重要。阴影区域,另一方面,没有强烈的直接照明在他们,所以 GI 是更可见的,必须清理更多。这就是为什么阴影下的区域显得更干净的原因。
This 'noisy AOV' issue can be solved by disabling certain optimizations:
这种“噪声 AOV”问题可以通过禁用某些优化来解决:
- Make the unified sampling min and max samples the same. This disables unified adaptive sampling. 统一的采样最小和最大采样相同,这样就不能进行统一的自适应采样
- In the Output tab, under "AOV Processing" enable the "Disable Importance-Based Optimizations" option. This ensures that reflection/refraction AOVs are not going to be noisy because the mirror/glass was dark. 在 Output 选项卡中,在“ AOV Processing”下启用“ Disable Importance-Based Optimizations”选项。这确保了反射/折射 aov 不会因为镜子/玻璃是黑色的而产生噪音
Unfortunately disabling these optimizations does mean longer render times!
不幸的是,禁用这些优化意味着更长的渲染时间!
Please note that even if an AOV appears to be noisy by itself, this doesn't necessarily mean that the noise will be visible on your final comp. AOV noise is typically an issue if something that used to be dark in the beauty was made significantly brighter in comp – as shown in the example above. This means that, in certain cases, you can get away without having to disable the above optimizations.
请注意,即使一个 AOV 看起来本身是噪音,这并不一定意味着噪音将在你的最终比赛可见。AOV 噪音是一个典型的问题,如果一些东西曾经是黑暗的美被显着明亮的比-如上面的例子所示。这意味着,在某些情况下,您可以不必禁用上述优化。
AOV Intensity Clamping
强度箝位
Redshift supports intensity clamping for primary rays ("Max Subsample Intensity") as well as secondary rays such as reflection/refraction/GI rays ("Max Secondary Ray Intensity"). These two controls limit the maximum allowed brightness of rays which helps with situations where very bright light sources produce visual artifacts known as 'fireflies' and excessive noise. Please refer to this documentation page for more information about these controls.
红移支持初级光线的强度钳制(“最大子样强度”)以及次级光线,如反射/折射/GI 光线(“最大次级光线强度”)。这两个控制限制了光线的最大允许亮度,这有助于解决非常明亮的光源产生被称为“萤火虫”和过多噪音的视觉伪影的情况。有关这些控件的详细信息,请参阅此文档页。
By default, the 'max subsample intensity' clamp is only applied on the beauty pass. For Softimage and 3dsMax, the intensity clamping controls can be found in the "AOV Processing" parameter group in Redshift's "Output" tab. In Maya, the controls are in Redshift's "AOV" tab.
默认情况下,’最大子样强度’钳只适用于美容通行证。对于 Softimage 和3dsMax,强度箝位控制可以在“红移”的“输出”标签中的“ AOV Processing”参数组中找到。在玛雅,控制是在红移的“ AOV”标签。
The following example demonstrates the effect of AOV clamping and its importance in matching the beauty pass, assuming that the beauty pass is also using clamping, of course.
下面的例子说明了 AOV 夹紧的效果及其在匹配美通道中的重要性,当然前提是美通道也使用夹紧。
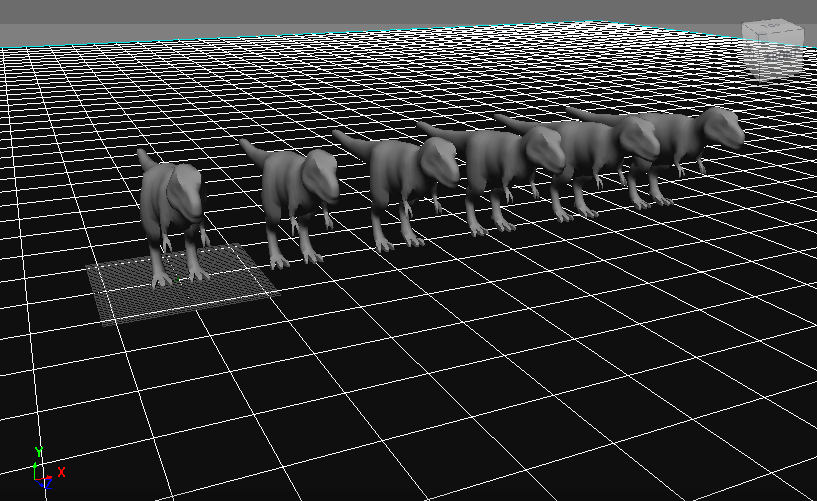
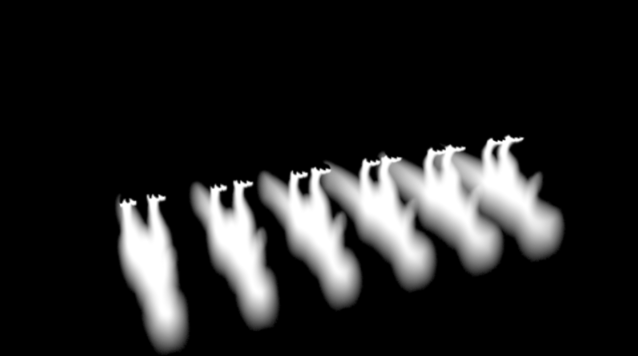
The scene contains a series of self-illuminated dinosaur models on top of a plane using a glossy reflection shader.
该场景包含一系列自我照明的恐龙模型在一个平面顶部使用光滑的反射着色器。
The test scene
测试场景
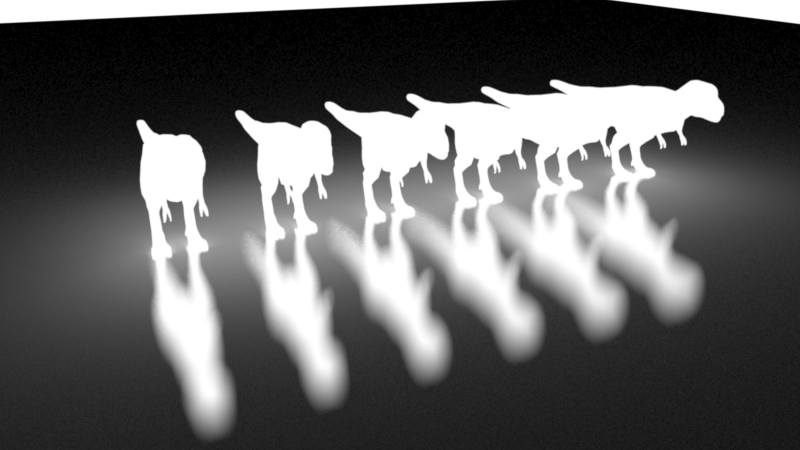
For this test, we assume that we want to use a 'max subsample intensity' of 1.0 for our beauty pass.
对于这个测试,我们假设我们想使用“最大子样强度”的1.0为我们的美容通过。
Scene rendered with a 'max subsample intensity' of 1.0
场景渲染的最大子样强度为1.0
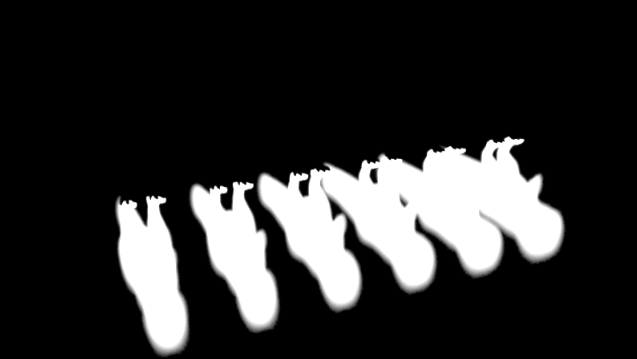
The Reflection AOV rendered with AOV clamping disabled. Notice how the reflections appear harder than our beauty image above.
反射 AOV 渲染与 AOV 夹紧禁用。注意如何反射显示比我们上面的美丽图像更难。
If we were to use the unclamped reflection AOV, the final comp wouldn't match the beauty pass.
如果我们使用不夹紧的反射 AOV,最终的比赛将不匹配的美丽通行证。
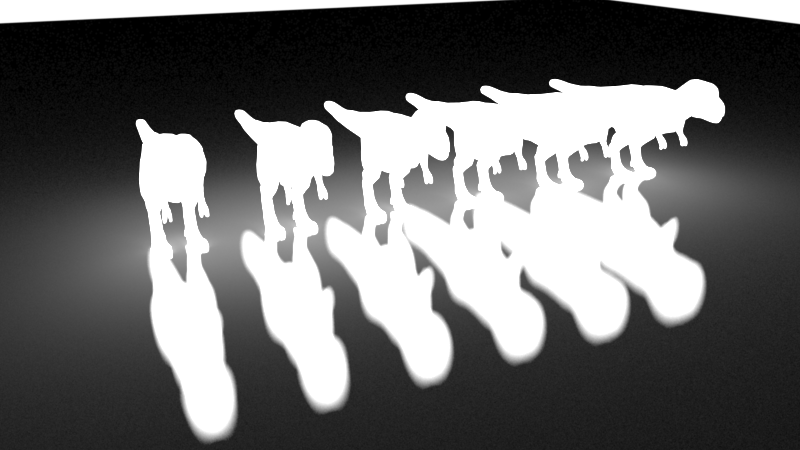
Reflection AOV rendered with AOV clamping enabled. Notice how the reflections now match the beauty's look.
反射 AOV 渲染与 AOV 夹紧启用。注意如何反射现在匹配的美丽的外观。
Please be aware that intensity clamping either on the beauty or AOVs can produce discrepancies between the two. The reason is that intensity clamping on the beauty pass is applied on the final pixel, while AOV intensity clamping happens on each AOV individually. As a result, when the AOVs are recombined in a comp package, they can produce a result that differs in intensity compared to the beauty pass. Depending on the lighting scenario, this discrepancy can be small or large.
请注意,强度钳制的美丽或 aov 可以产生差异之间的两个。原因是美丽通道的强度箝位应用于最终像素,而 AOV 强度箝位发生在每个 AOV 单独。因此,当 aov 被重新组合在一个组合包中时,他们可以产生一个在强度上不同于美丽通道的结果。根据照明情况,这种差异可大可小。
Hair Min Pixel Width and AOVs
头发最小像素宽度和 AOVs
The Hair Min Pixel Width (aka MPW) feature reduces aliasing artifacts on fine hair strands by automatically making the strands partially transparent within a certain pixel width threshold. When this feature is enabled, primary ray 'MPW' hair is not treated as transparent as far as AOVs are concerned and thus will not write the shading results to the 'Refraction' AOV. Instead, 'MPW' hair shading results will be written directly to the 'DiffuseLighting', SpecularLighting' etc AOV channels.
头发最小像素宽度(又名 MPW)功能通过自动使头发在一定的像素宽度阈值内部分透明,减少了精细头发上的混淆伪影。当启用这个特性时,主光线“ MPW”的头发就 AOV 而言并不被视为透明的,因此不会将阴影结果写入“折射”AOV。相反,“ MPW”头发着色结果将直接写入“ DiffuseLighting”、“ SpecularLighting”等 AOV 频道。
DiffuseLighting should be used instead of 应该用来代替DiffuseFilter * DiffuseLightingRaw 8. DiffuseFilter * DiffuseLightingRaw Reflections 反思 should be used instead of 应该用来代替ReflectionsFilter * ReflectionsRaw 3. reflections/filter * reflections/raw

赶快留个言打破零评论!~