baking
Let's say you're working on a game project. Suppose you use Cinema 4D and Octane for asset generation and Unity or Unreal for game production. You want to use the textures you created in Octane for the game engine. So you have both high quality and realistic textures and you will be eliminated the limited texture capabilities of game engines. This is where you will use the tool "Baking". Using this camera type, you can bake the textures that your objects in your scene have, and reuse them for other processes (eg game engines, compositing etc.). You will benefit both from render times and you will have quality texture output. Texture creation is an indispensable technique for game engines. With the use of camera baking you'll keep specular, reflection and other properties. Now let's briefly explain how to do this, and at the end of the chapter we will explain the options of Camera baking.
烘焙
假设您正在开发游戏项目。 假设您使用Cinema 4D和Octane进行资产生成,并使用Unity或Unreal进行游戏制作。 您想将在Octane中创建的纹理用于游戏引擎。 因此,您既拥有高质量的纹理又具有逼真的纹理,并且游戏引擎的有限纹理功能将被消除。 您将在此处使用“烘焙”工具。 使用此摄像机类型,您可以烘焙场景中对象具有的纹理,并将其重新用于其他过程(例如,游戏引擎,合成等)。 您将从渲染时间中受益,并且将获得高质量的纹理输出。 纹理创建是游戏引擎必不可少的技术。 通过使用相机烘焙,您将保持镜面反射,反射和其他属性。 现在,让我们简要说明如何执行此操作,并且在本章末尾,我们将说明“相机烘焙”的选项。
how to bake texture using camera baking
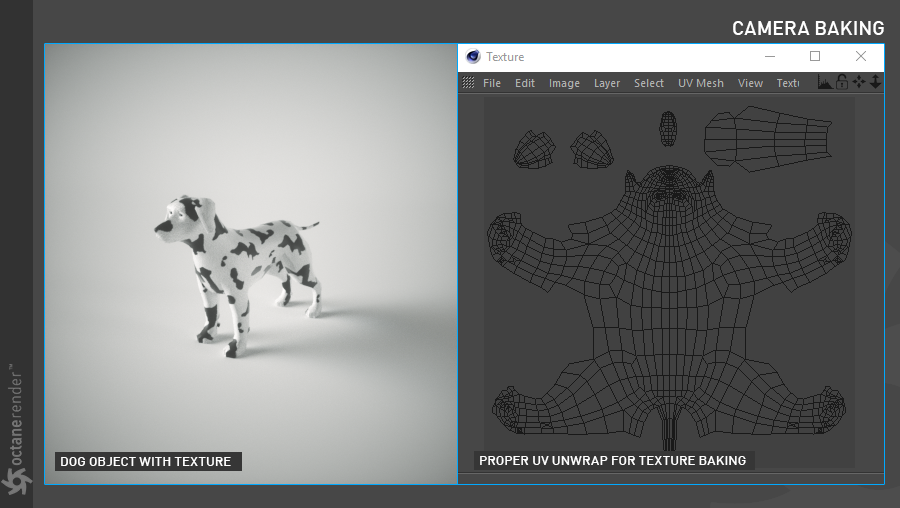
Prepare any scene. Make your objects' material and texture setups. Position the lights. So, do what you need in a classic scene setup. Get ready for the main action after the scene is done: UV UNWRAP. For camera baking to work properly, your objects in the scene must have absolutely neatly opened UV maps. What you need to be aware of when UV unwrapping is that UV islands do not overlap. As you can see in the picture below.
如何使用相机烘焙来烘焙纹理准备任何场景。
进行对象的材质和纹理设置。 放置灯。 因此,在经典场景设置中执行您需要的操作。 场景完成后,为主要动作做好准备:UV UNWRAP。 为了使相机烘焙正常进行,场景中的对象必须具有完全整齐打开的UV贴图。 UV展开时,您需要注意的是UV islands不会重叠。 如下图所示。
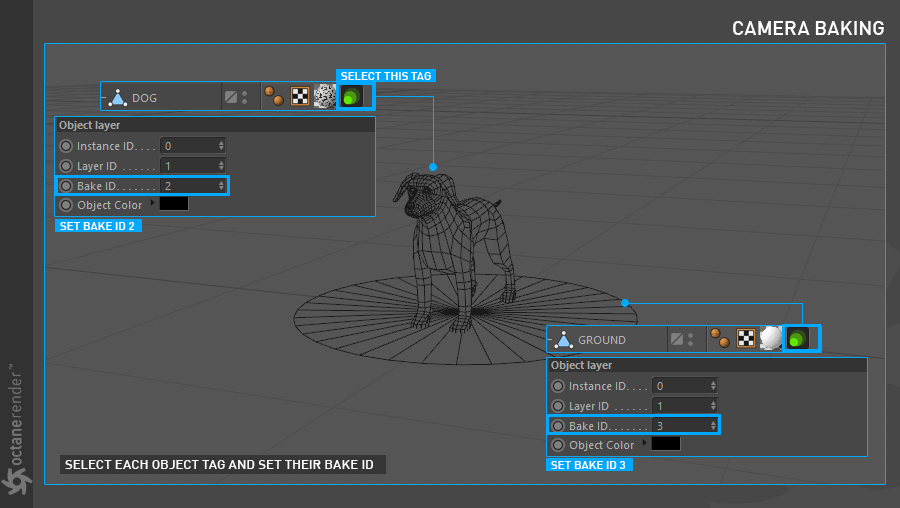
When the UV Map and textures are done, you can now ready for the camera bake. You have 2 options for bake: you either bake the whole of the scene (not recommended) or bake on an object basis. Let's explain how to do object-based bake operation. Let's say you have a scene like the picture below. In this scene, you want to bake the texture of both the Dog object and the Plane object. To do this, first create an "Octane Object Tag" for both objects and go to the "Object Layer" tab in the Tag window. Make a "Bake ID" 2 for the Dog object here. Make "Bake ID" 3 for the Ground Object. Now create one Octane Camera (now you know how to create one) and click on Camera Tag. Change Thinlens to Baking.
完成UV贴图和纹理后,您现在可以准备烘焙相机了。 您有2种烘焙选项:烘焙整个场景(不推荐)或基于对象进行烘焙。 让我们解释一下如何进行基于对象的烘焙操作。 假设您有一个如下图所示的场景。 在此场景中,您要烘焙Dog对象和Plane对象的纹理。 为此,首先为两个对象创建一个“Octane对象标签”,然后转到“标签”窗口中的“对象层”选项卡。 在此处为Dog对象创建一个“烘焙ID” 2。 为地面对象设置“烘焙ID” 3。 现在创建一台Octane相机(现在您知道如何创建一台)并单击Camera Tag。 将Thinlens更改为“烘焙”。
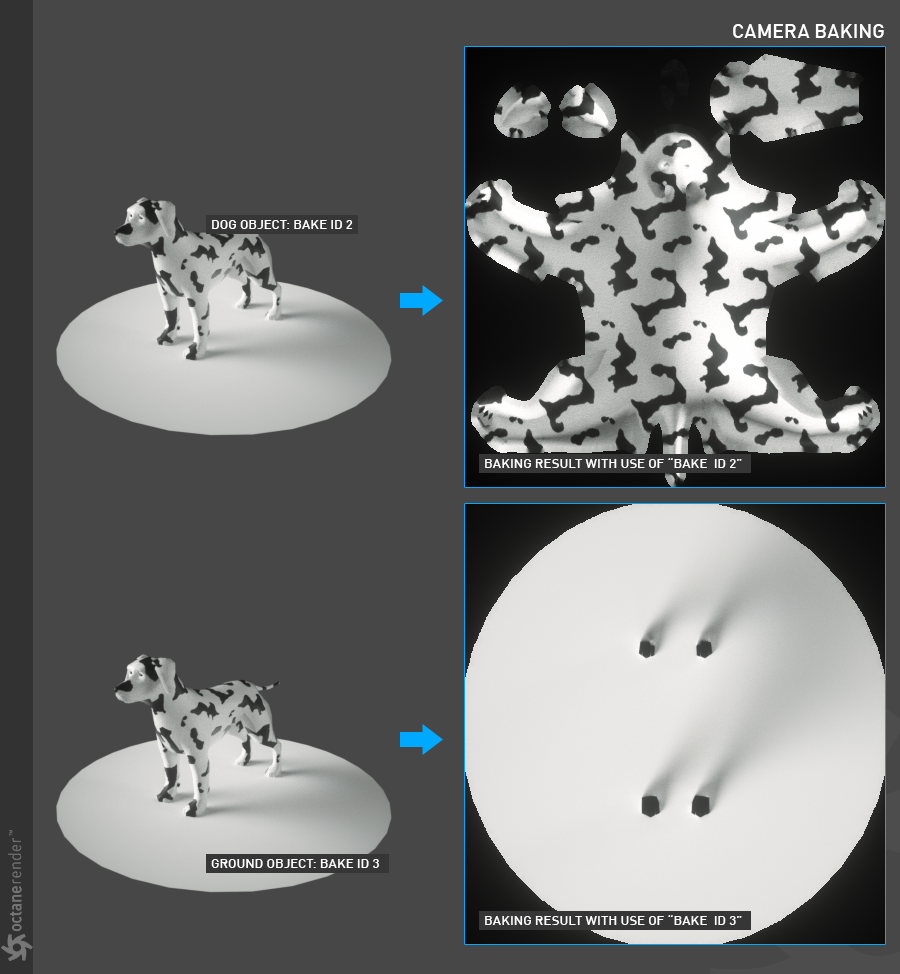
Now run Live Viewer. If you set "Bake Group ID" to 2 or 3 in the Octane Camera Tag / Baking options, you'll get the result you see in the picture below. You can save these baked textures and reuse them easily, for example in Unity or Unreal.
现在运行Live Viewer。 如果在“ Octane Camera Tag” /“烘焙”选项中将“烘焙组ID”设置为2或3,则会得到下图所示的结果。 您可以保存这些烘焙的纹理并轻松地重复使用它们,例如在Unity或Unreal中。
camera baking settings
相机烘焙设置
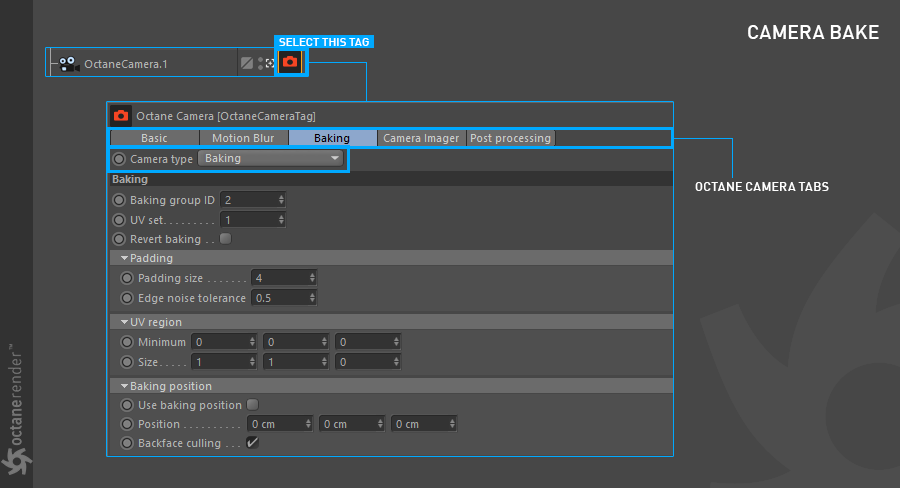
baking group id
Specifies which group ID should be baked. By default all objects belong to the default baking group number 1. If you do not define the Bake ID from the Octane object tag / Object layer menu to your objects in the scene, the bake ID of the whole scene will default to 1 and will bake the entire scene.
烘焙组ID
指定应该烘焙的组ID。 默认情况下,所有对象都属于默认的烘焙组编号1。如果未在场景中的对象中从Octane对象标签/对象层菜单定义烘焙ID,则整个场景的烘焙ID将默认为1,并且将 烘焙整个场景。
UV set
This determines the UV coordinates to use for baking. If you have more than one UV map in your object, you can change it here and use the corresponding UV map.
UV 选集
这确定了用于烘焙的UV坐标。 如果对象中有多个UV贴图,则可以在此处进行更改并使用相应的UV贴图。
Revert Baking
If checked, the camera directions are flipped.
恢复烘焙
如果选中,则相机方向将翻转。
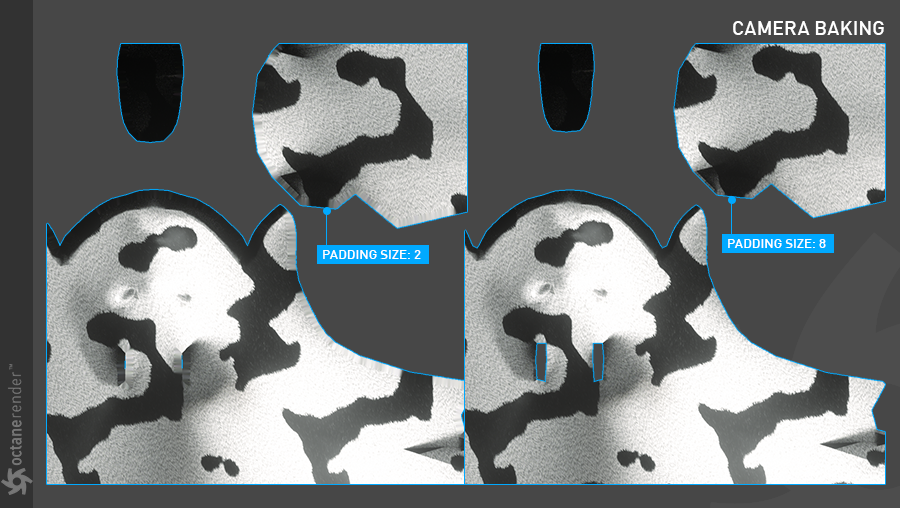
Padding Size
This is the number of pixels added to the UV map edges. The padding size is specified in pixels. The default padding size is set to 4 pixels, being 0 the minimum and 16 the maximum size.
填充尺寸
这是添加到UV贴图边缘的像素数。 填充大小以像素为单位指定。 默认的填充大小设置为4像素,最小为0,最大为16。
Edge Noise Tolerance
Optionally, an edge noise tolerance can be specified, which assists in removing hot pixels appearing near the UV edges. Values close to 1 do not remove any hot pixels while values near 0 will attempt to remove them all.
边缘噪点容差
可选地,可以指定边缘噪点容差,这有助于去除UV边缘附近出现的热像素。 接近1的值不会删除任何热像素,而接近0的值会尝试全部删除它们。
UV Region: Minimum & Size
This is the size in UV space of the bounding region for baking.
UV 区域:最小和尺寸
这是烘焙的边界区域在UV空间中的大小。
Baking Position
When enabled, the position for baking "position-dependent" artifacts is used. Position is the camera position for "position-dependent" artifacts such as reflections, etc. Backface culling determines whether to bake back-facing geometry.
烘焙位置
启用后,将使用烘焙“位置相关”伪像的位置。
位置是“位置相关”伪像(如反射等)的摄影机位置。
背面剔除确定是否烘焙背面几何。


赶快留个言打破零评论!~