Skin 皮肤
Introduction
引言
This shader simulates the scattering effect of skin. In real life, skin is made up of three distinct layers:
这个着色器模拟了皮肤的散射效果。在现实生活中,皮肤由三个不同的层组成:
- Epidermis - defines the skin tone and waterproof layer 表皮-界定皮肤色调和防水层
- Dermis - contains tough connective tissue 真皮-含有坚韧的结缔组织
- Subcutis (hypodermis) - made up of loose connective tissue, fat and blood vessels 皮下组织-由疏松结缔组织、脂肪和血管组成
To model this, the Redshift skin shader has three equivalent translucent, sub-surface scattering layers:
为了建立这个模型,红移皮肤着色器有三个等效的半透明的亚表面散射层:
- Shallow Scatter 浅层散布 - defines the pigment/skin tone of the skin - 决定皮肤的色素/肤色
- Mid Scatter 中期分散 - defines the dermis layer - 定义了真皮层
- Deep Scatter 深度散布 - defines the thick, subcutis layer 界定了厚,亚表皮层
Redshift also simulates the 'waterproof' oily property of the top-most epidermis layer by having a 'Primary Reflection' control. A 'Secondary Reflection' layer is also available for added sheen from, for example, oily cosmetic products, or for clear-coat effects.
红移也模拟了最上表皮层的“防水”油性特性,具有“主反射”控制。“二次反射”层也可用于增加光泽,例如,油性化妆品产品,或清洁外套的效果。
Note that as with all Redshift materials, the reflection layers are energy conserving, meaning with stronger reflection color and weights, the underlying diffuse scattering contribution will appear weaker.
注意,就像所有的红移材料一样,反射层是能量守恒的,这意味着反射颜色和权重越强,潜在的漫散射贡献就会显得越弱。
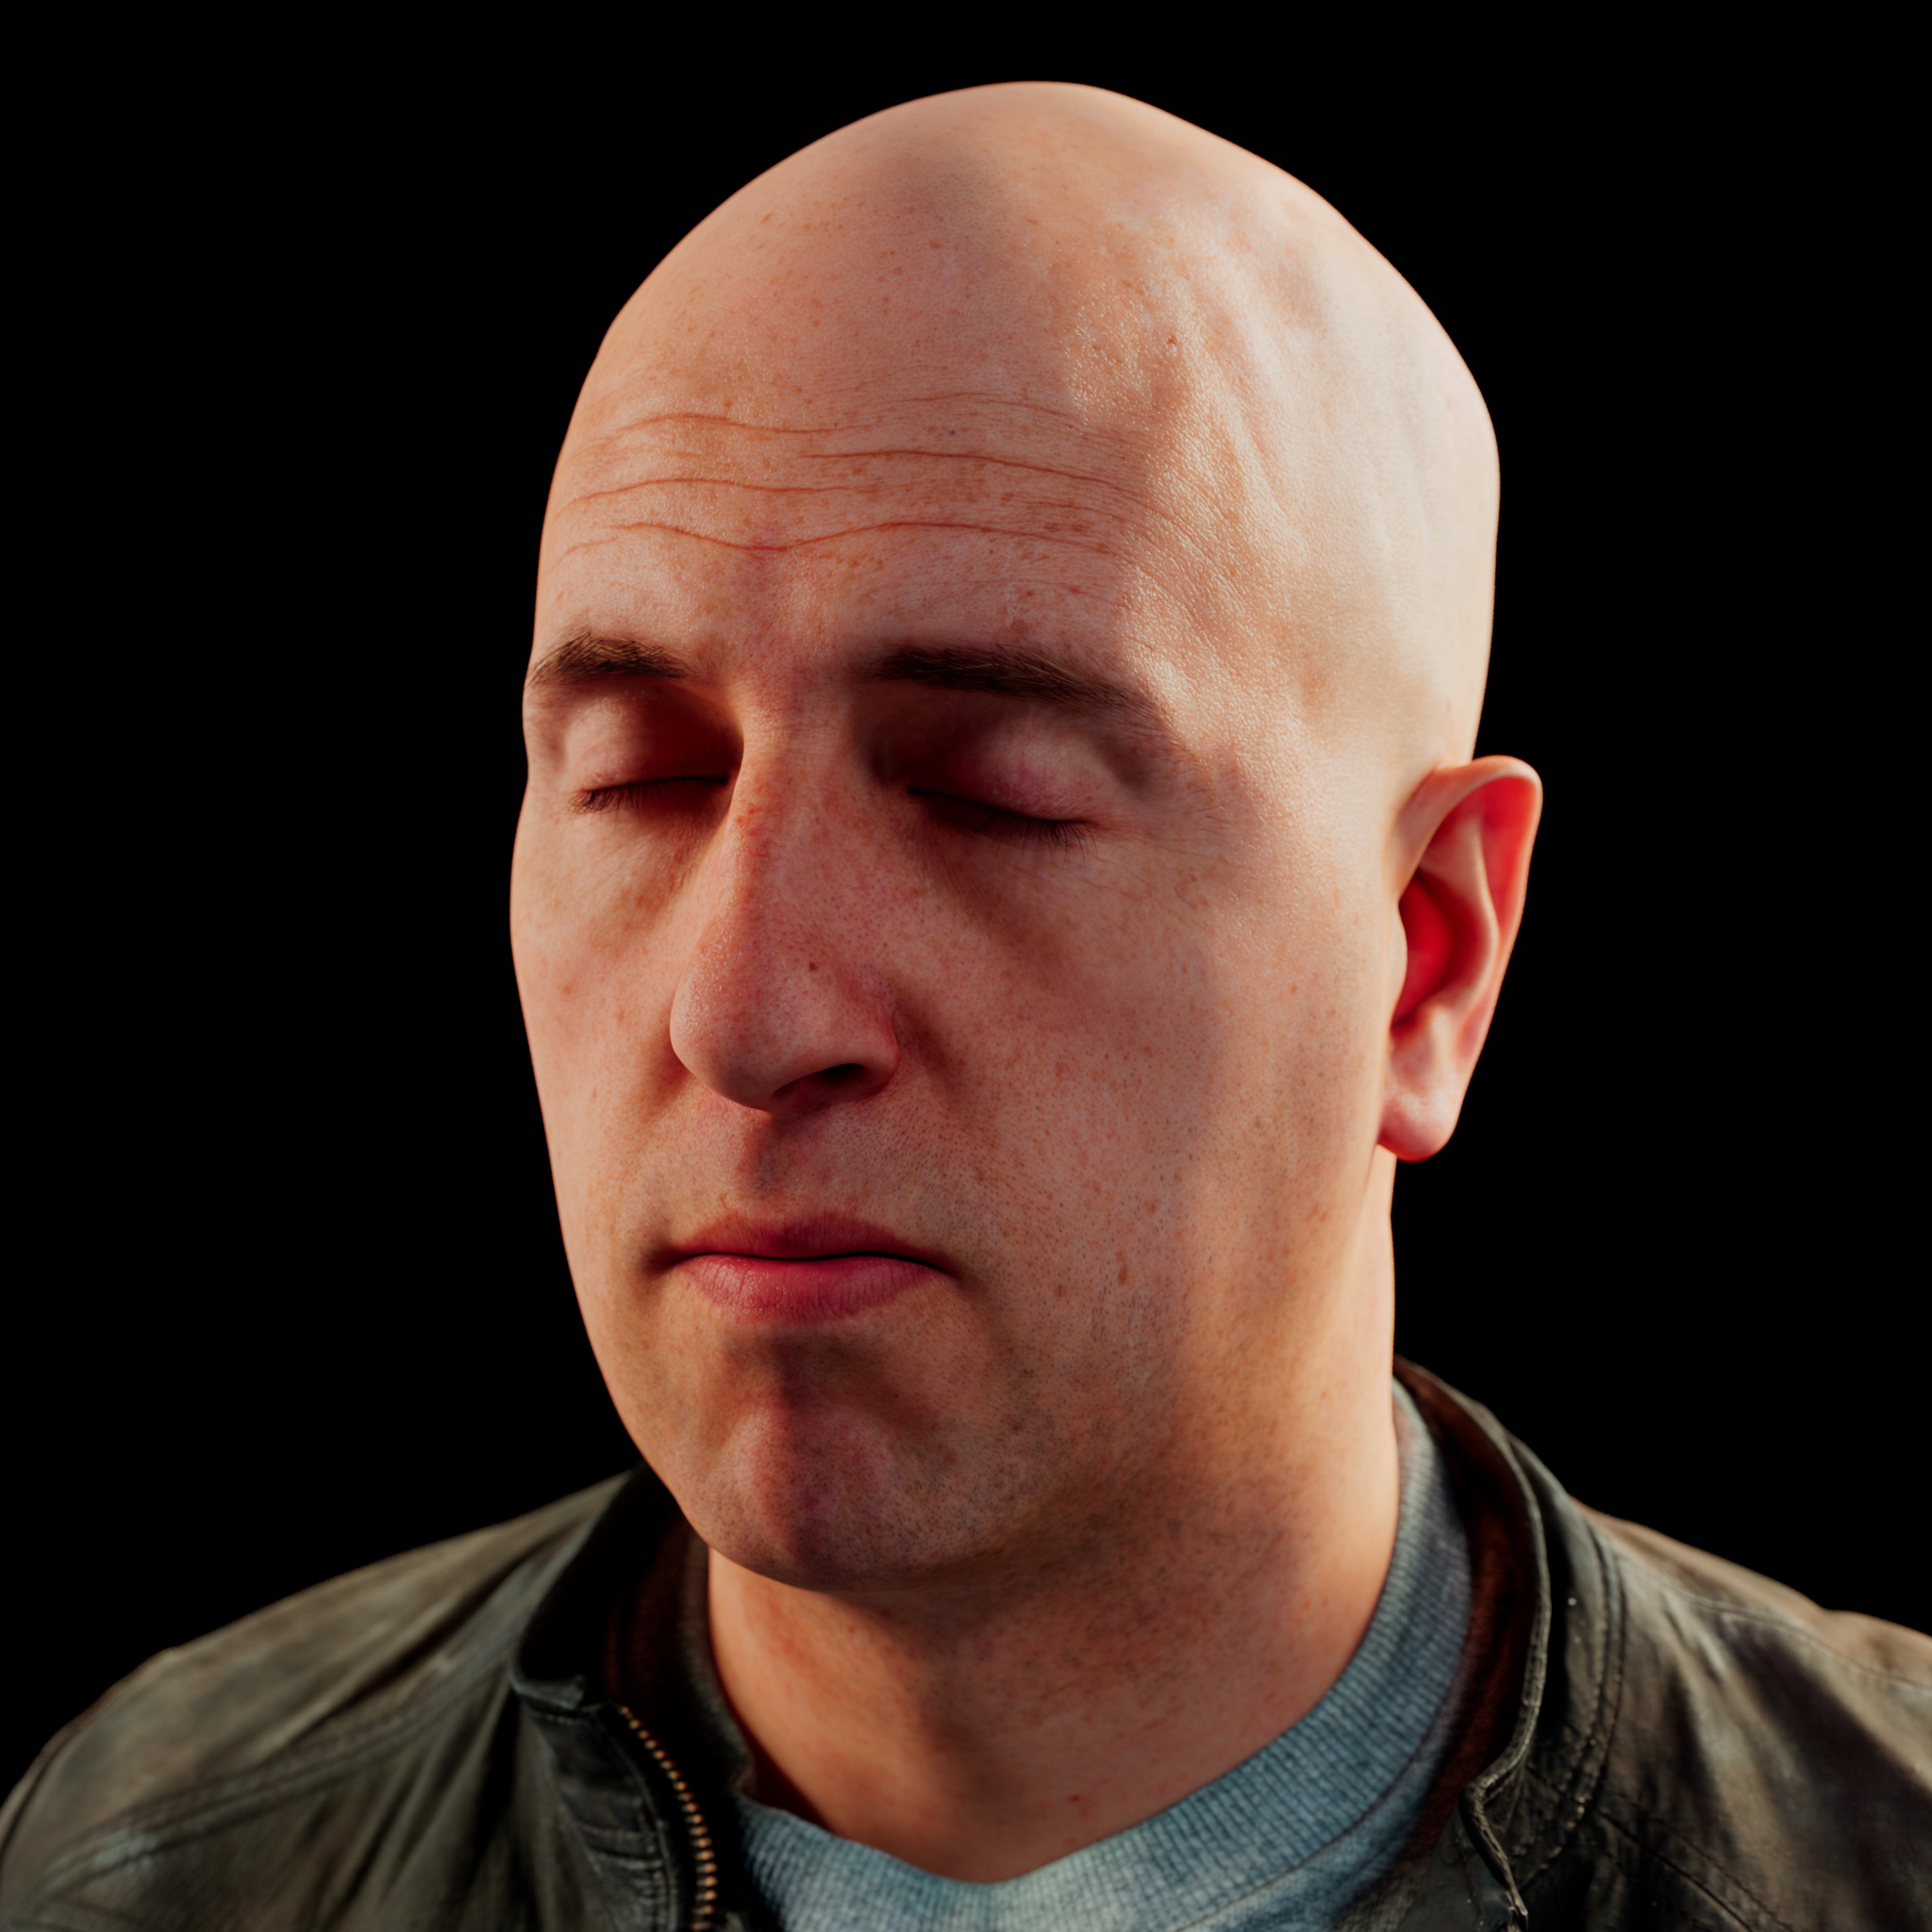
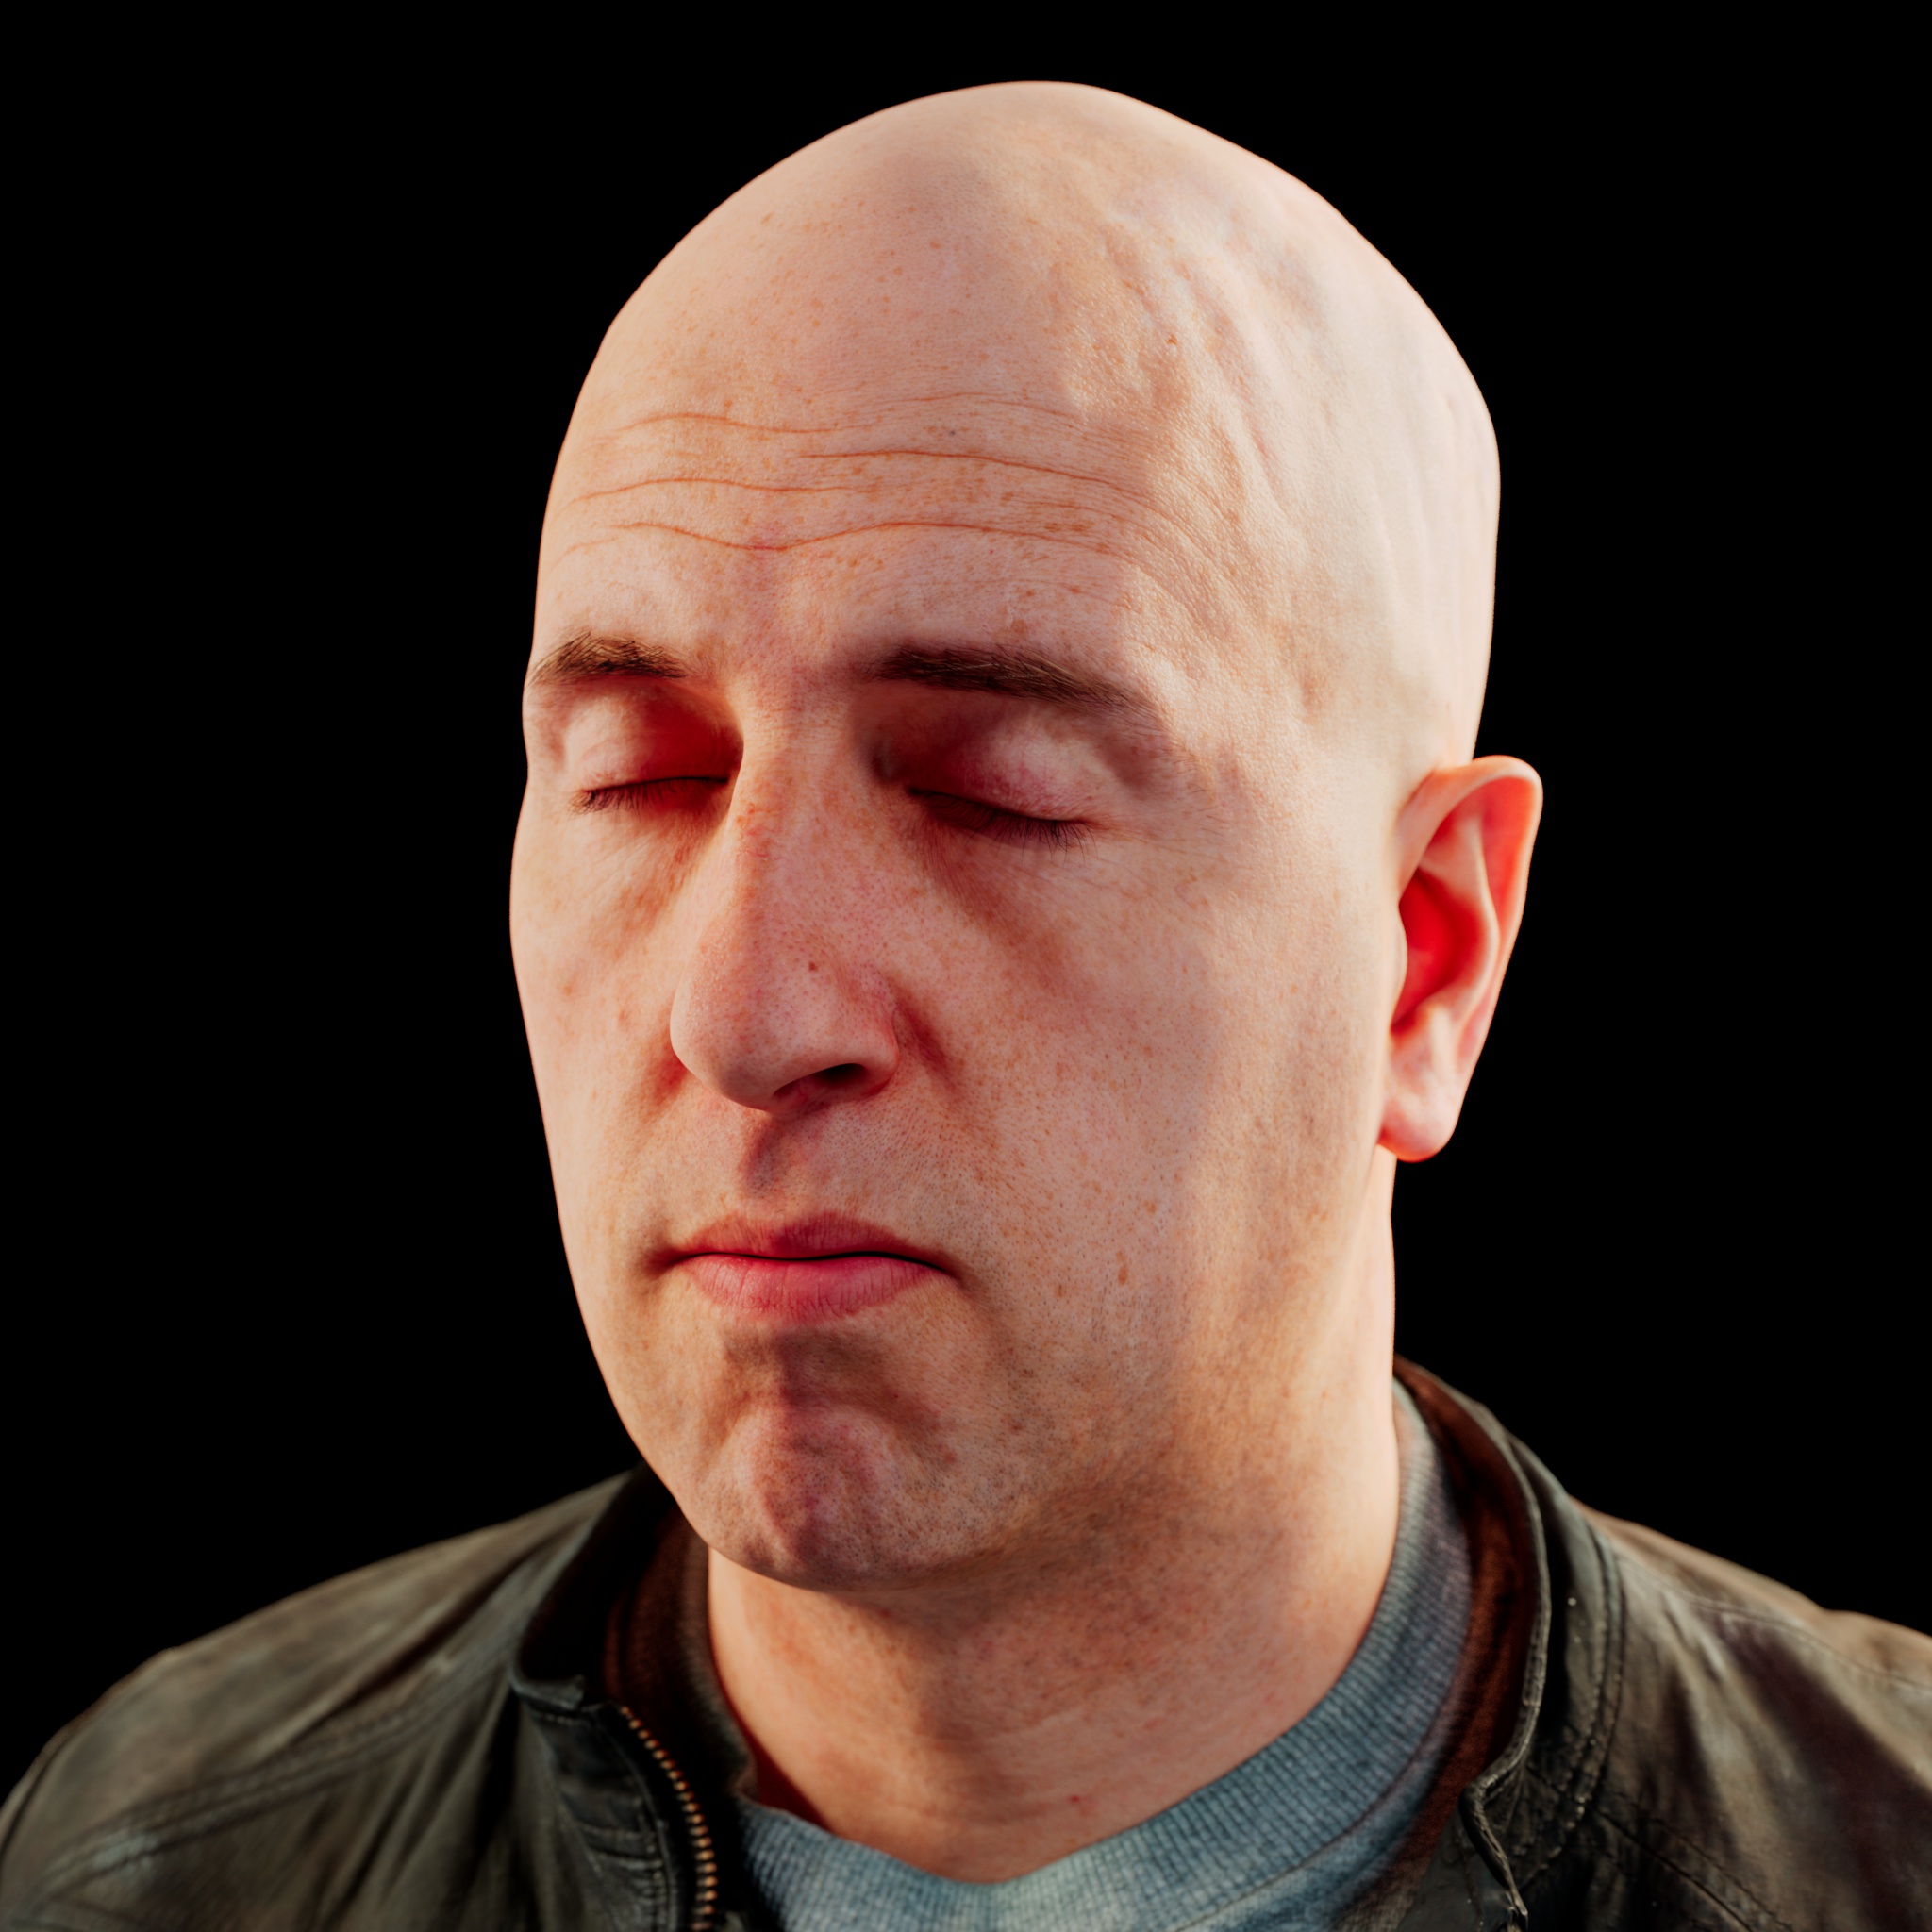
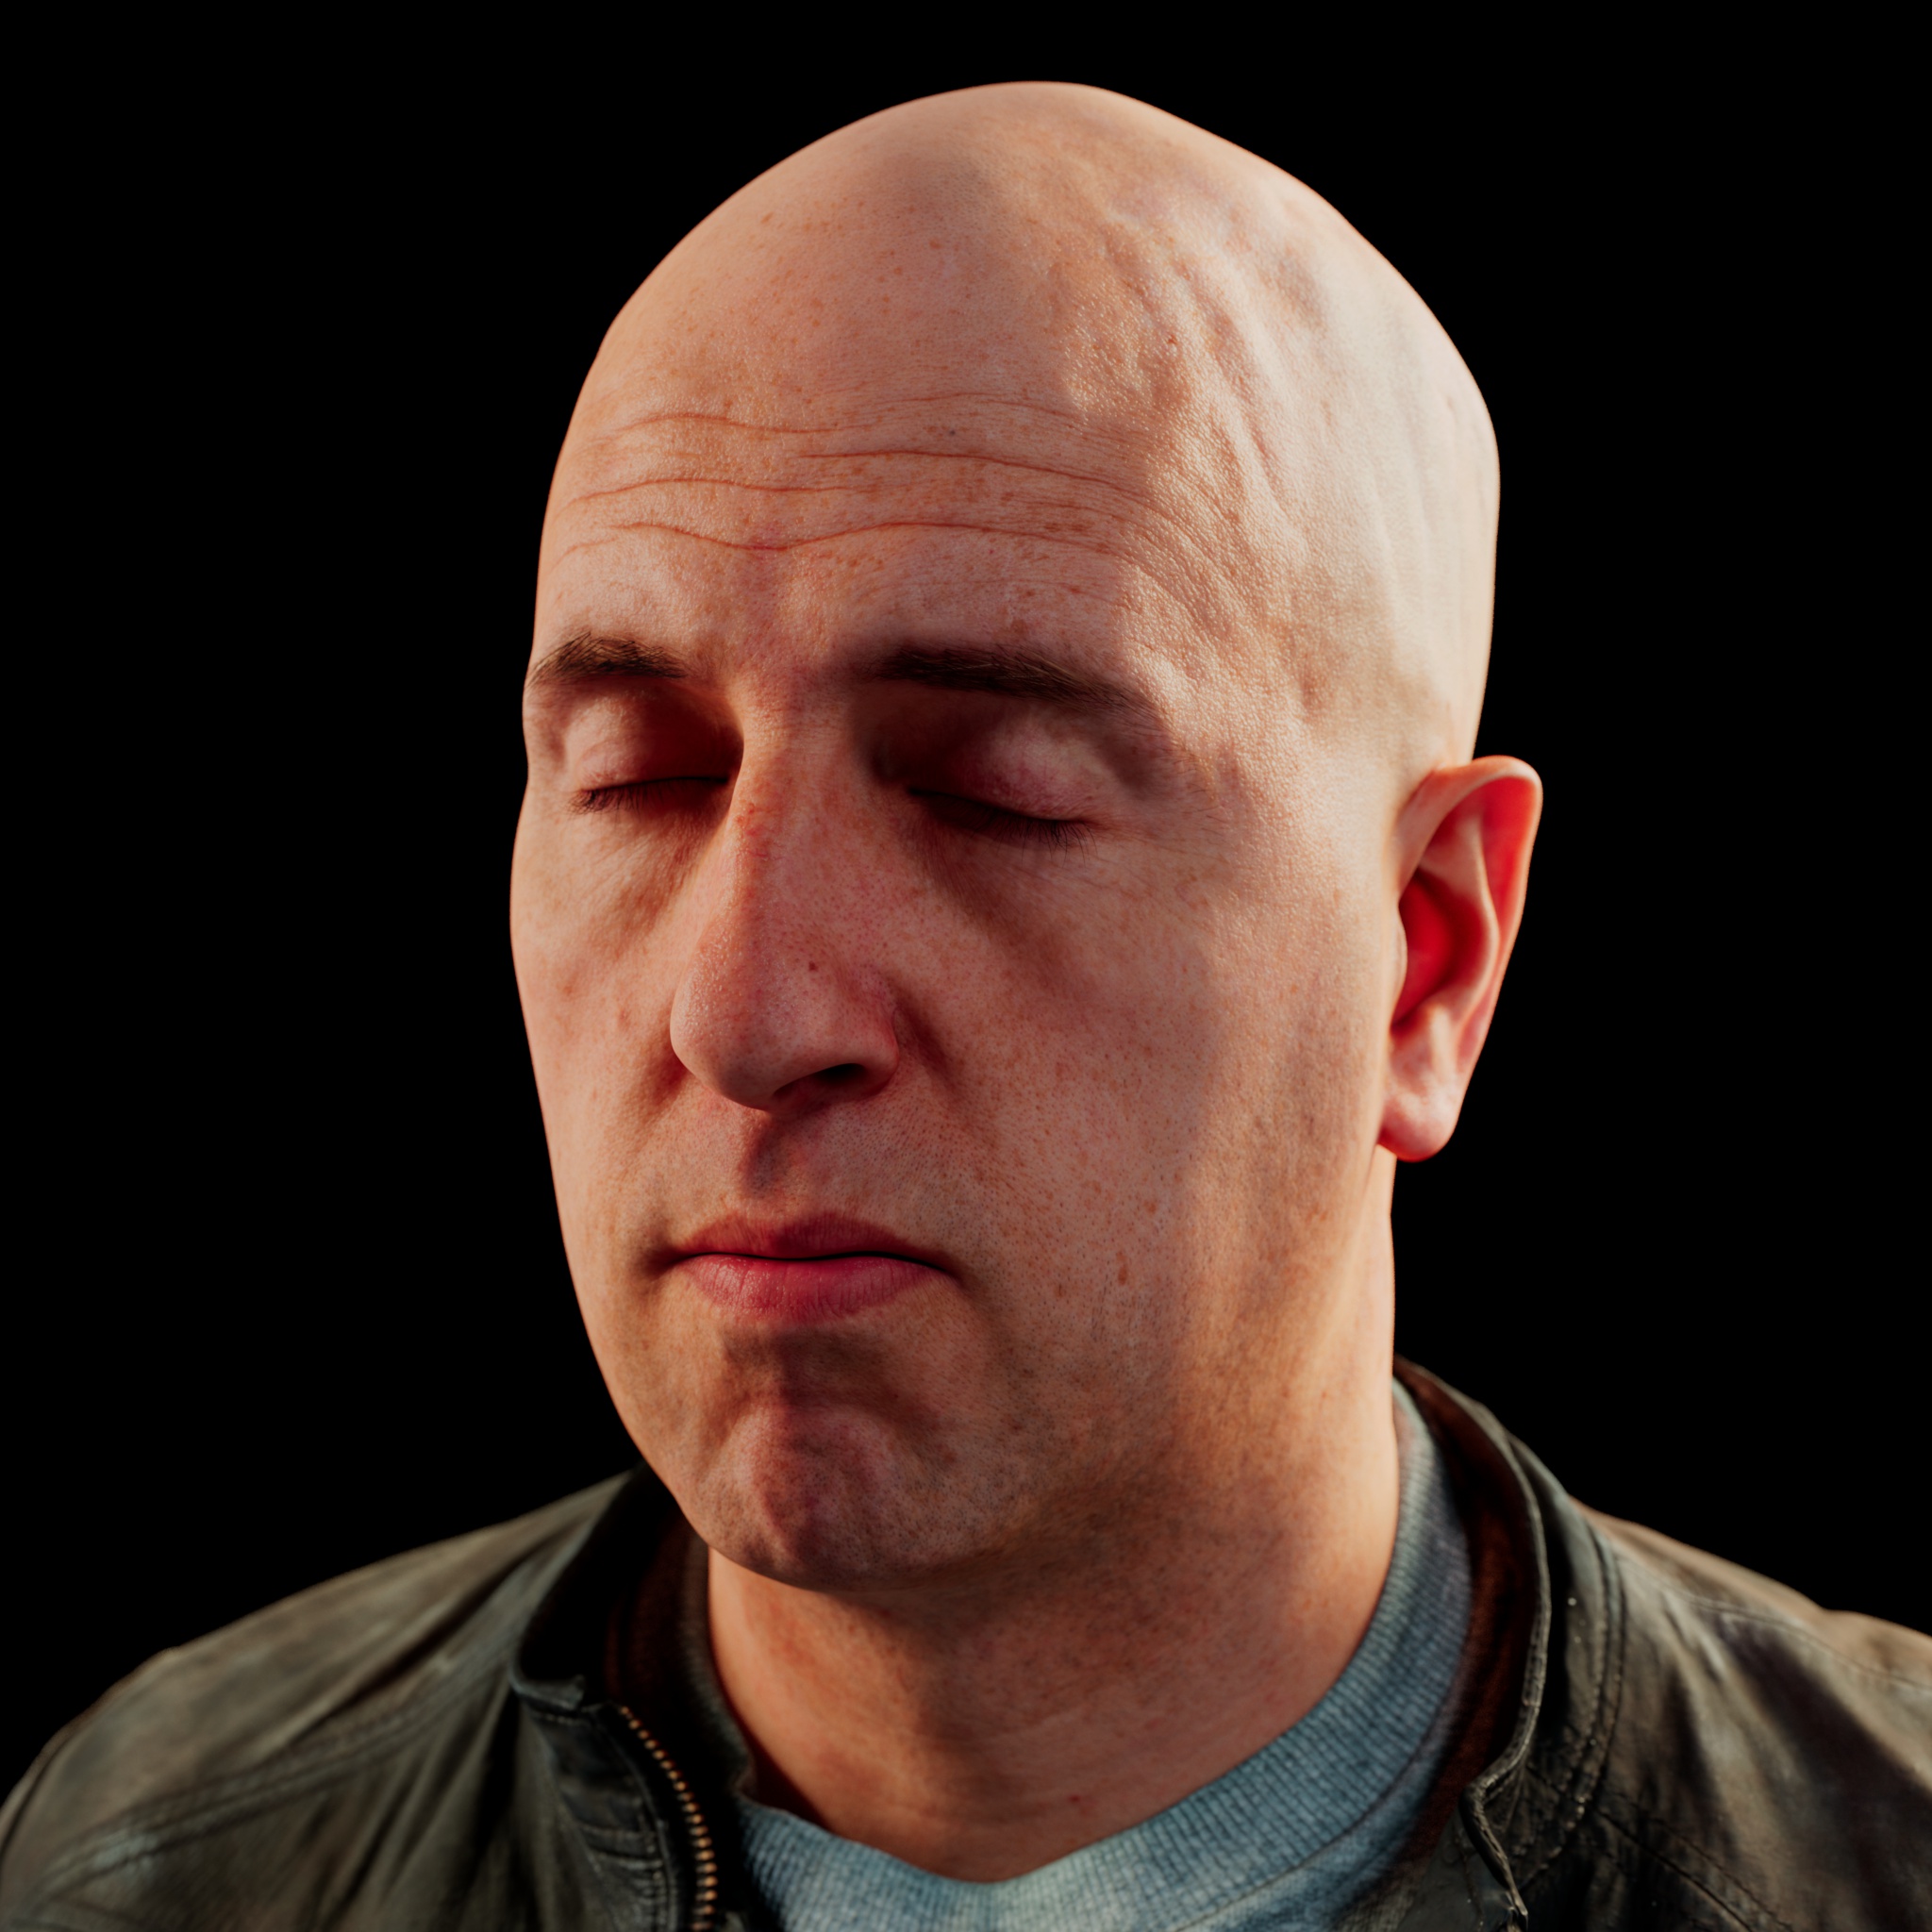
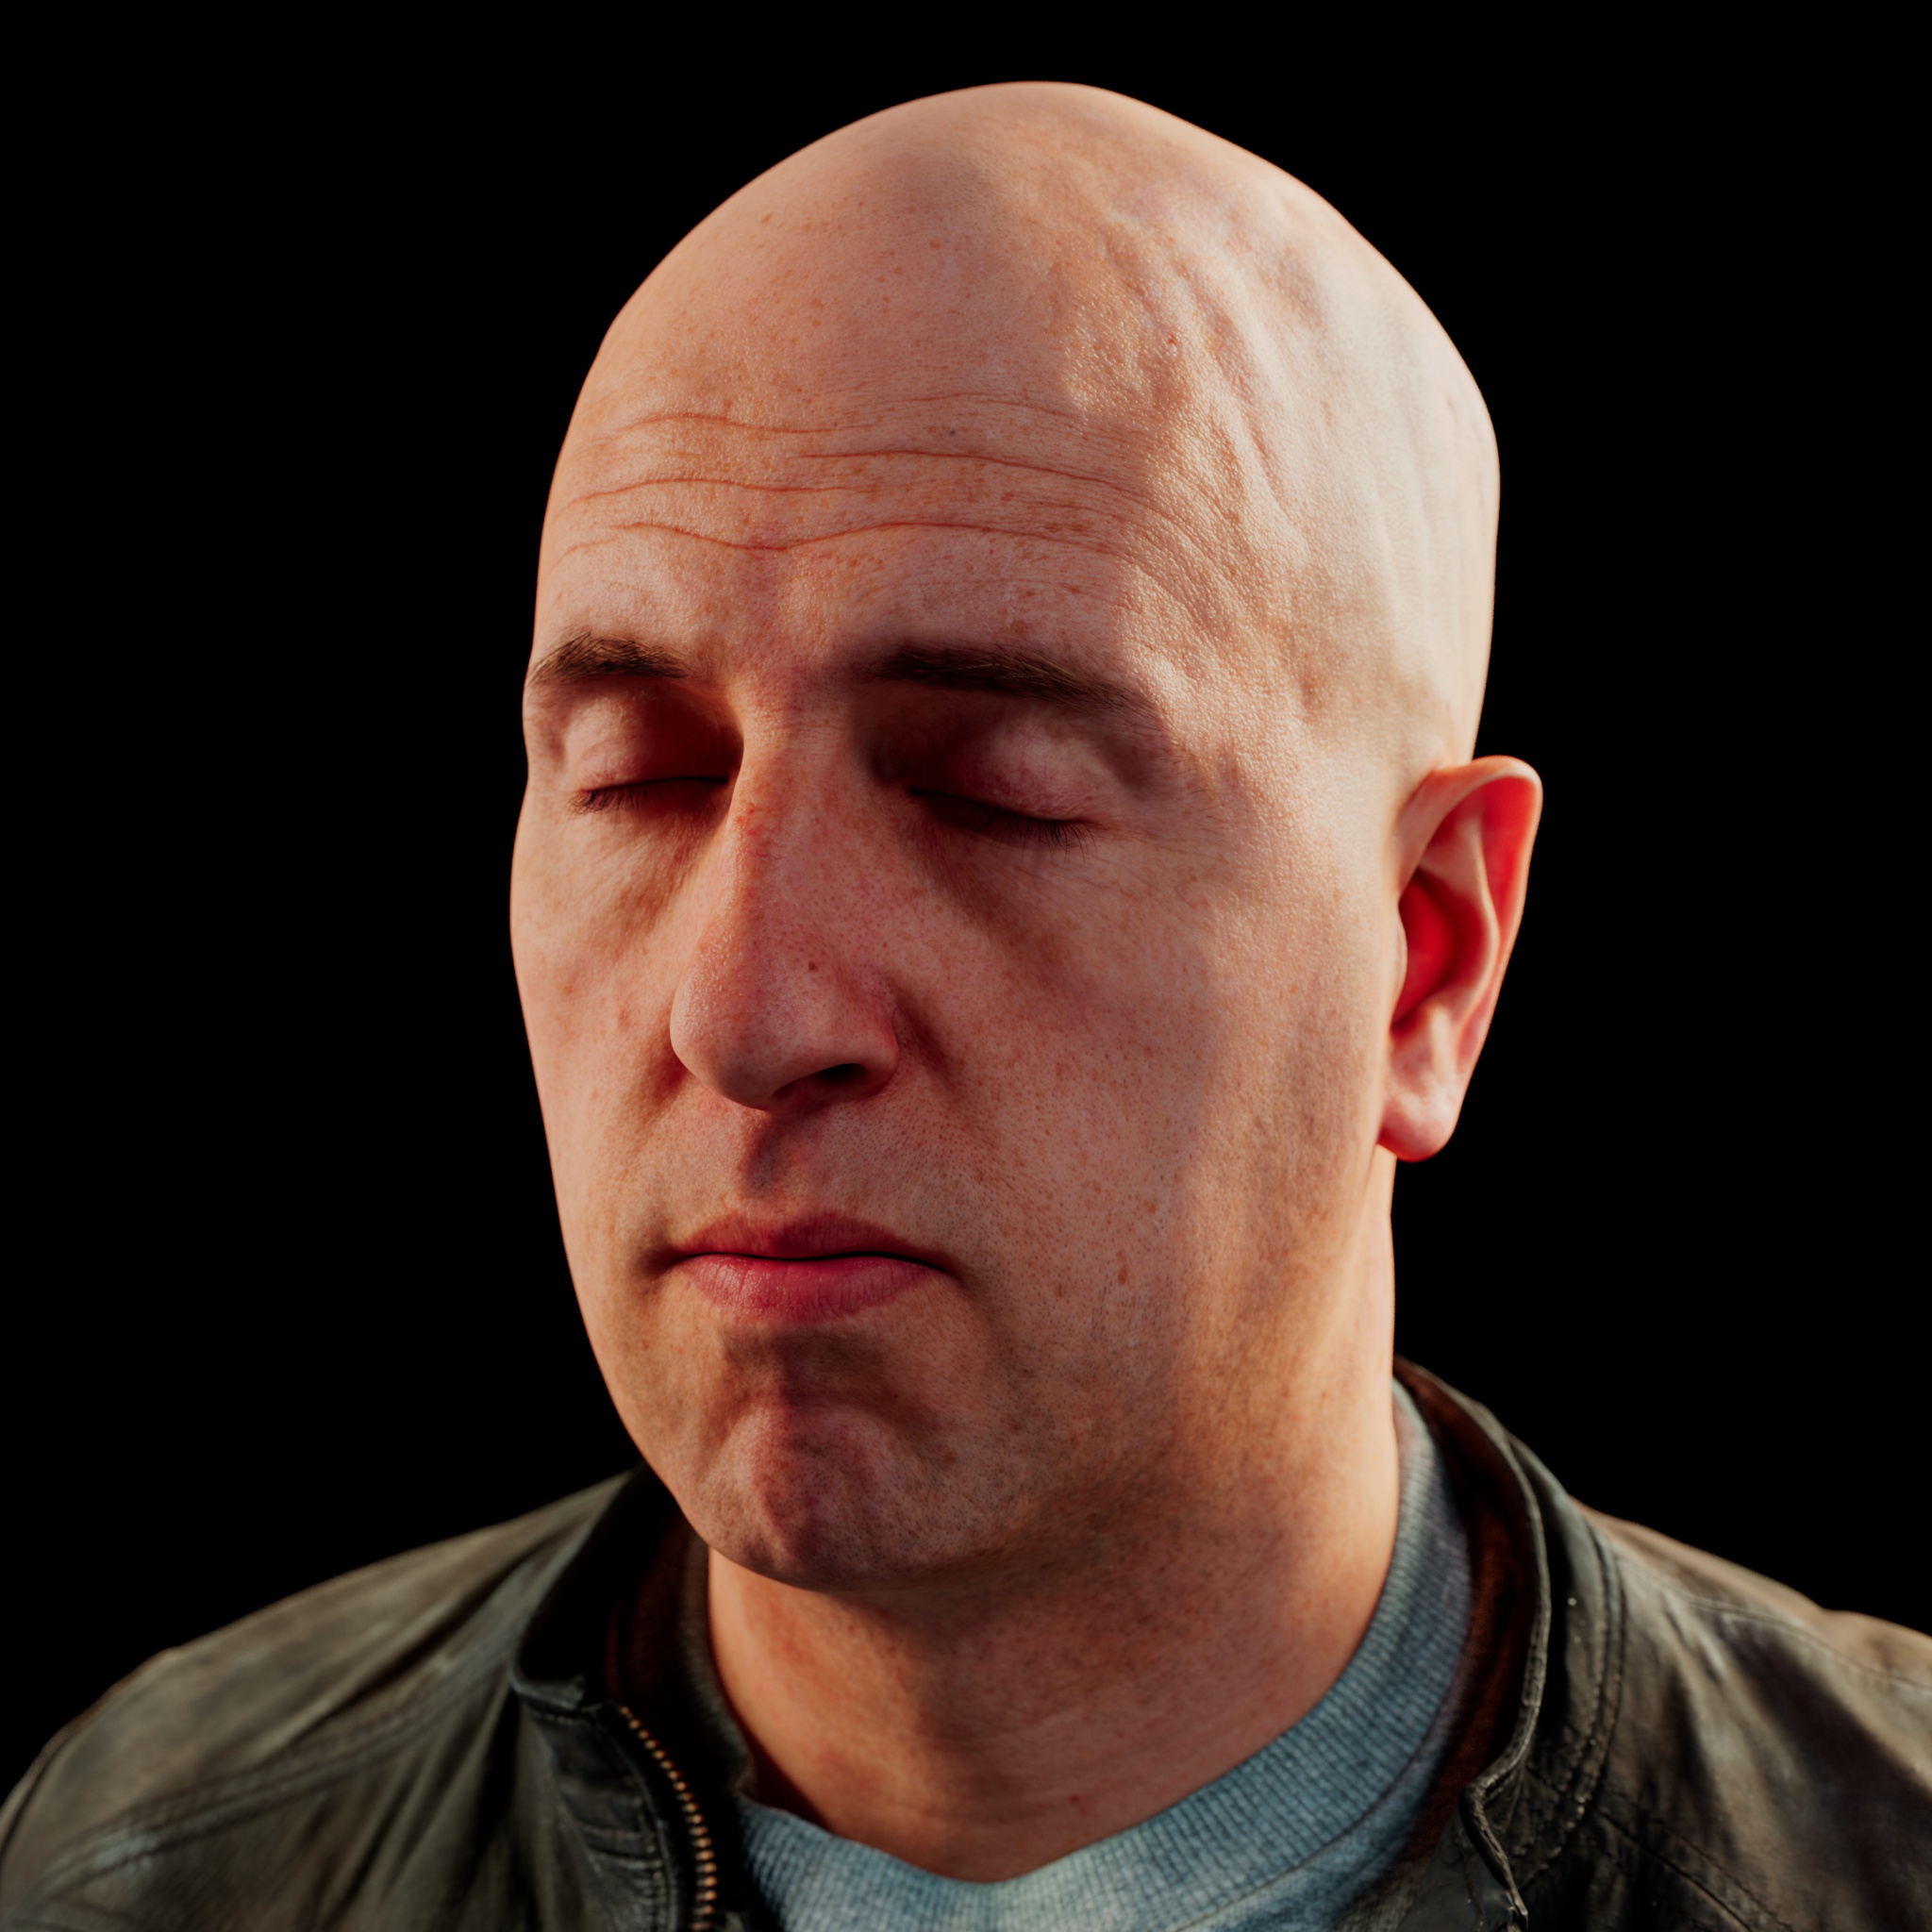
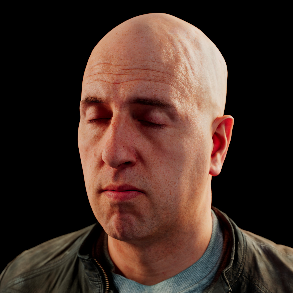
Free head model, courtesy of 3D Scan Store, with a textured skin shader material, illuminated by two area lights and a dome light
免费的头部模型,礼貌的3 d 扫描商店,质感的皮肤着色材料,照明两个区域灯和一个圆顶灯
You can see how sub-surface scattering of light affects thin parts of the model (the ear) versus the thick part of the model (the head).
你可以看到光的亚表面散射如何影响模型的薄部分(耳朵)和模型的厚部分(头部)。
Scattering Layers
散射层
Each layer uses sub-surface scattering to compute a diffuse lighting result and the results are blended together based on each layer's individual weight.
每一层使用次表面散射计算一个漫射照明结果和结果是混合在一起的基础上每一层的个别权重。
The Shallow Scatter layer is the thinnest, so it should have the smallest Radius, yielding an almost diffuse scattering response. The Deep Scatter layer is the thickest layer, so it should have the largest radius, adding the blood tone under the skin.
浅散射层是最薄的,所以它的半径应该最小,产生几乎漫散射的响应。深度散射层是最厚的一层,所以它应该有最大的半径,增加皮肤下的血液色调。
For physically correct results, the sum of the layers should not exceed 1.0 (see the 'Normalize Diffuse Weights' parameter). For more information about sub-surface scattering in general you can refer to the documentation on our sub-surface scattering material shader.
对于物理上正确的结果,各层之和不应超过1.0(参见“标准化扩散权重”参数)。关于亚表面散射的更多信息,一般你可以参考关于我们的亚表面散射材料着色器的文档。
Note that by setting the weights of the Mid and Deep Scatter layers to 0.0, this shader can be used as an alternative to the regular sub-surface scattering material shader.
注意,通过设置中深散射层的重量为0.0,这个着色器可以作为常规次表面散射材质着色器的替代品。
Common
常见问题
Radius Scale
半径比例尺
Allows you to adjust the strength of the scattering effect for all the layers. Lower values means scattered light is absorbed quicker, yielding a more diffuse look. Conversely, higher values yield a more translucent look.
允许你调整所有层的散射效果的强度。较低的数值意味着散射光吸收更快,产生更漫反射的外观。相反,较高的值会产生更透明的外观。
The sub-surface scattering effect is heavily dependent on object scale. Use this parameter to quickly tune the effect based on object scale until it is visually pleasing.
亚表面散射效应严重依赖于目标尺度。使用此参数可以根据对象比例快速调整效果,直到视觉效果令人满意为止。
|
|
|
|
|
Radius Scale: 1 半径: 1 |
0.1 |
10 图10 |
Overall Scale
整体比例
Allows you to adjust the overall brightness of all the scattering layers.
允许你调整所有散射层的整体亮度。
Normalize Diffuse Weights must be disabled in order to push SSS brightness above 1.0, otherwise you will see no brightness change.
为了使 SSS 亮度超过1.0,必须禁用正常化扩散权重,否则您将看不到亮度变化。
|
|
|
|
|
Overall Scale: 1 整体比例: 1 Normalize Diffuse Weights: Enabled 标准化扩散权重: 已启用 |
0.1 Enabled 启用 |
2.0 Disabled 残疾人士 |
Diffuse Amount
扩散量
Controls how much of the SSS effect you get. A value of 0.0 means that you'll only get subsurface scattering. On the other hand, a value of 1.0 will make this surface behave as a perfectly diffuse surface without any SSS. This parameter is useful for materials that need a weaker SSS effect.
控制你获得多少 SSS 效果。值为0.0意味着你只能得到次表面散射。另一方面,值为1.0将使这个表面表现为一个完全漫反射表面没有任何 SSS。这个参数对于需要较弱 SSS 效应的材料是有用的。
|
|
|
|
|
Diffuse Amount: 0.1 扩散量: 0.1 |
0.5 |
1 |
Disable Diffuse Bump Mapping
禁用漫反射凹凸贴图
This option allows you to switch to using the default un-bumped surface normals for diffuse lighting calculations.
此选项允许您切换到使用默认的非颠簸表面法线漫射照明计算。
In the examples images below note how when this option is enabled the overall SSS effect is smoothed out since the geometry is much smoother than when the diffuse bump map is used when disabled.
在下面的例子图像中,注意当这个选项被启用时,整体的 SSS 效果是平滑的,因为几何形状比使用漫反射凹凸贴图时要平滑得多。
|
|
|
|
Disable Diffuse Bump Mapping: Disabled 禁用漫反射凹凸贴图: 禁用 |
Enabled 启用 |
Normalize Diffuse Weights
标准化扩散权重
In order to be physically correct, by default Redshift shaders conserve energy by not emitting more light than they receive. When this parameter is checked, we apply physical correctness by ensuring the sum of the weights of each layer do not exceed 1.0.
为了在物理上正确,默认情况下,红移着色器通过不发出比接收到更多的光来保存能量。当这个参数被检查时,我们应用物理正确性通过确保每一层的权重之和不超过1.0。
When this option is un-checked we leave the weights alone, which can result in brighter, but not physically correct results.
如果取消选中此选项,我们将不使用权重,这可能导致更明亮的结果,但不能从物理上纠正结果。
Even with Normalize Diffuse Weights disabled you can manually keep the scatter weights below 1 in order to conserve energy.
即使关闭了正常化分散权重,为了节省能量,您也可以手动将分散权重控制在1以下。
In the examples below notice how in the 2nd group of images with scatter weights of 0.5 / 0.15 / 0.35 the results look identical because the combined weight does not exceed 1. However in the 1st group of images, with Normalize Diffuse Weights disabled the SSS is noticably brighter since the scatter weight exceeds 1.
在下面的例子中,注意在第二组散布权重为0.5/0.15/0.35的图像中,结果看起来是一样的,因为合并权重不超过1。然而,在第一组图像中,由于正常化扩散权重禁用了 SSS,因为分散权重超过1,SSS 明显更亮。
|
|
|
|
Normalize Diffuse Weights: Enabled 标准化扩散权重: 已启用 Shallow / Mid / Deep Weights: 1 / 0.3 / 0.7 (= 2) 浅/中/深砝码: 1/0.3/0.7(= 2) |
Disabled 残疾人士 1 / 0.3 / 0.7 (= 2) 1/0.3/0.7 |
|
|
|
|
Normalize Diffuse Weights: Enabled 标准化扩散权重: 已启用 Shallow / Mid / Deep Weights: 0.5 / 0.15 / 0.35 (= 1) 浅/中/深砝码: 0.5/0.15/0.35(= 1) |
Disabled 残疾人士 0.5 / 0.15 / 0.35 (= 1) 0.5/0.15/0.35(= 1) |
Mode
模式
- Point-Based 基于点的
- Point-Based (Legacy) 基于点的(遗留)
- Ray-Traced 射线追踪
You can use either point-based or ray-traced multiple sub-surface scattering in Redshift and both have their own advantages and disadvantages. In quite a few cases the techniques should look similar to each other but there are situations where the differences will be readily apparent, this is primarily due to the normalization of light that occurs when using point-based mode. Ray-traced mode does not normalize the light which can lead to differences that are most notable on thin objects or objects with more surface detail.
在红移中,可以使用基于点的多次子表面散射或者光线跟踪的多次子表面散射,这两种方法各有优缺点。在相当多的情况下,这些技术应该看起来彼此相似,但是在有些情况下,差异会很明显,这主要是由于在使用基于点的模式时发生的光的正常化。光线追踪模式并不能使光正常化,这会导致在薄物体或表面细节更多的物体上最显著的差异。
Point-Based (Legacy) mode is not recommended, especially if you’re planning on switching between ray-traced and point-based SSS techniques for the Redshift Skin shader.
基于点(遗留)模式是不推荐的,特别是如果您计划在红移皮肤着色器的光线跟踪和基于点的 SSS 技术之间进行切换。
Prior to adding ray-traced SSS to Redshift (before v2.5.57) a bug with the “Redshift Skin” shader was discovered that made parts of the lighting overly saturated and, in some cases, harsh. The “legacy” point based technique has no ray traced equivalent and it provided only as a means of compatibiliby with older scenes that made use of it.
在将光线追踪的 SSS 添加到红移(在 v2.5.57之前)之前,一个使用“红移皮肤”着色器的 bug 被发现,它使部分光线过于饱和,在某些情况下,很刺眼。“遗留”的基于点的技术没有光线追踪等价物,它只提供了一种手段,与旧的场景使用它的兼容。
If your scene is setup to use point-based SSS shaders and you render in progressive mode it will automatically use ray-traced SSS during progressive renders. This way you can actually see the SSS effect in progressive mode (and not just the diffuse texture) and tweak settings interactively - while still using point-based for the final (bucket) rendering.
如果你的场景设置为使用基于点的 SSS 着色器,并且你在渐进模式下渲染,它会自动在渐进渲染期间使用光线跟踪 SSS。这样你就可以在渐进模式下看到 SSS 效果(不仅仅是漫反射纹理) ,交互式地调整设置,同时仍然使用基于点的最终(桶)渲染。
Please note that due to the differences in the two modes that the final result can differ when comparing progressive ray-traced SSS to the bucket rendered point-based SSS.
请注意,由于两种模式的差异,在比较渐进射线跟踪的 SSS 和基于桶渲染点的 SSS 时,最终结果可能不同。
Point-Based
基于点的
-
Faster and smoother
更快更流畅
-
Less detailed / accurate
不够详细/准确
-
Does not work in progressive mode
不在渐进模式下工作
-
Requires a “prepass” stage
需要一个“准备阶段”
-
Higher chance of flickering in difficult lighting situations.
在光线困难的情况下闪烁的几率更高。
-
Not possible to isolate SSS effect on a particular object which can result in unnecessary “light bleeding” artifacts.
不可能隔离 SSS 效应的一个特定的对象,可能会导致不必要的“光出血”伪影。
Ray-Traced
射线追踪
-
Slower and noisier
更慢更吵
-
More detailed / accurate
更详细/更准确
-
Works in progressive mode
以渐进模式工作
-
The higher the scatter radius the more samples are needed for clean results.
散射半径越大,清洁结果需要的样本就越多。
-
Possible to isolate SSS effect between objects or have it affect all objects. Please see here for more info.
可能隔离 SSS 效果之间的对象或有它影响所有的对象。请看这里的更多信息。
|
|
|
|
|
Mode: Ray-Traced 模式: 射线追踪 |
Point-Based 基于点的 |
Point-Based Legacy 基于点的遗产 |
Samples
样本
This controls the number of samples cast for Multiple Sub-Surface Scattering rays. Higher numbers will reduce noise issues but will take longer to render.
这控制了多次亚表面散射射线的采样数量。更高的数字会减少噪音问题,但渲染时间会更长。
Ray-Traced only
光线追踪
In the images below the sample difference is most noticable in the ear.
在下面的图片中,样品的差异在耳朵中是最明显的。
|
|
|
|
|
Samples: 4096 样本: 4096 |
128 |
512 |
Include Mode 包含模式
- All Objects : All other objects participate in the SSS effect. 所有对象: 所有其他对象都参与 SSS 效应
- Only Self : Contain the SSS effect in the same object only. 只有自我: 只在同一个物体中包含 SSS 效果
Ray-Traced only.
光线追踪。
Point-Based SSS mode will always more closely resemble Ray-Traced mode in All Objects Include mode. It is not currently possible to separate SSS objects from one another in when using a Point-Based SSS mode. The Point-Based image below is provided as an example for comparison.
基于点的 SSS 模式在所有对象包含模式下总是更接近于光线追踪模式。在使用基于点的 SSS 模式时,目前不可能将 SSS 对象彼此分离。下面的基于点的图像是一个比较的例子。
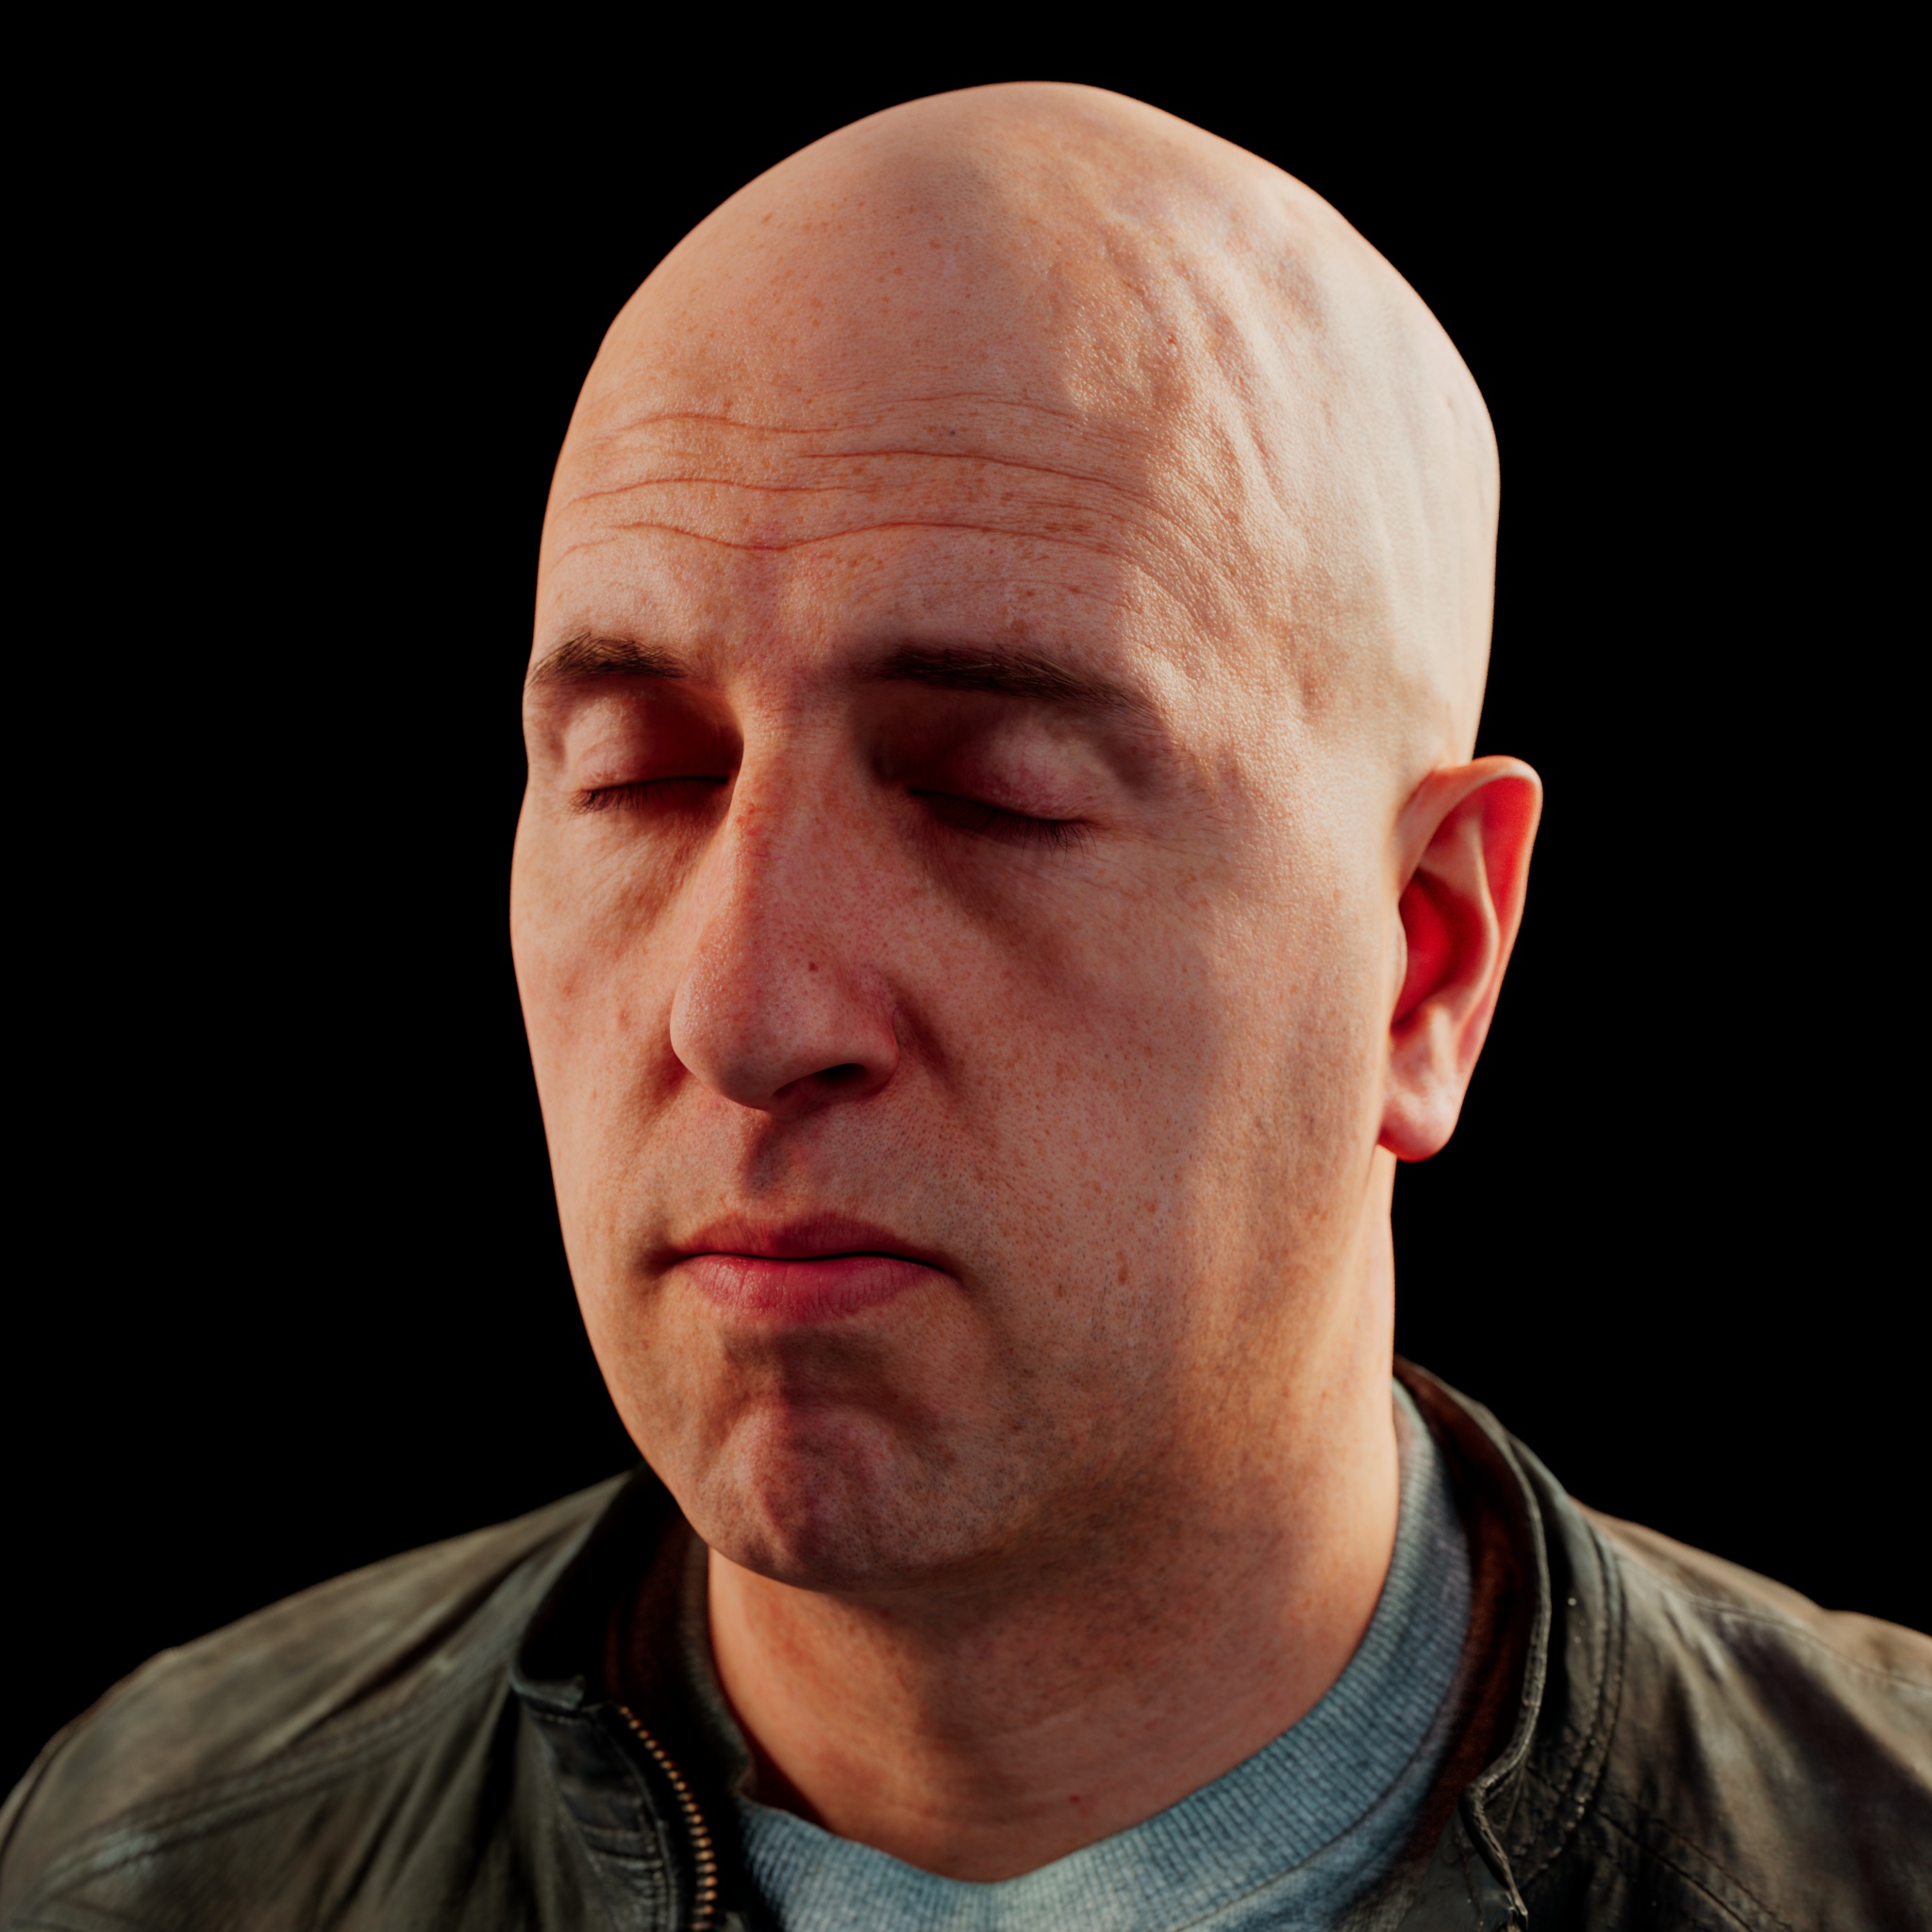
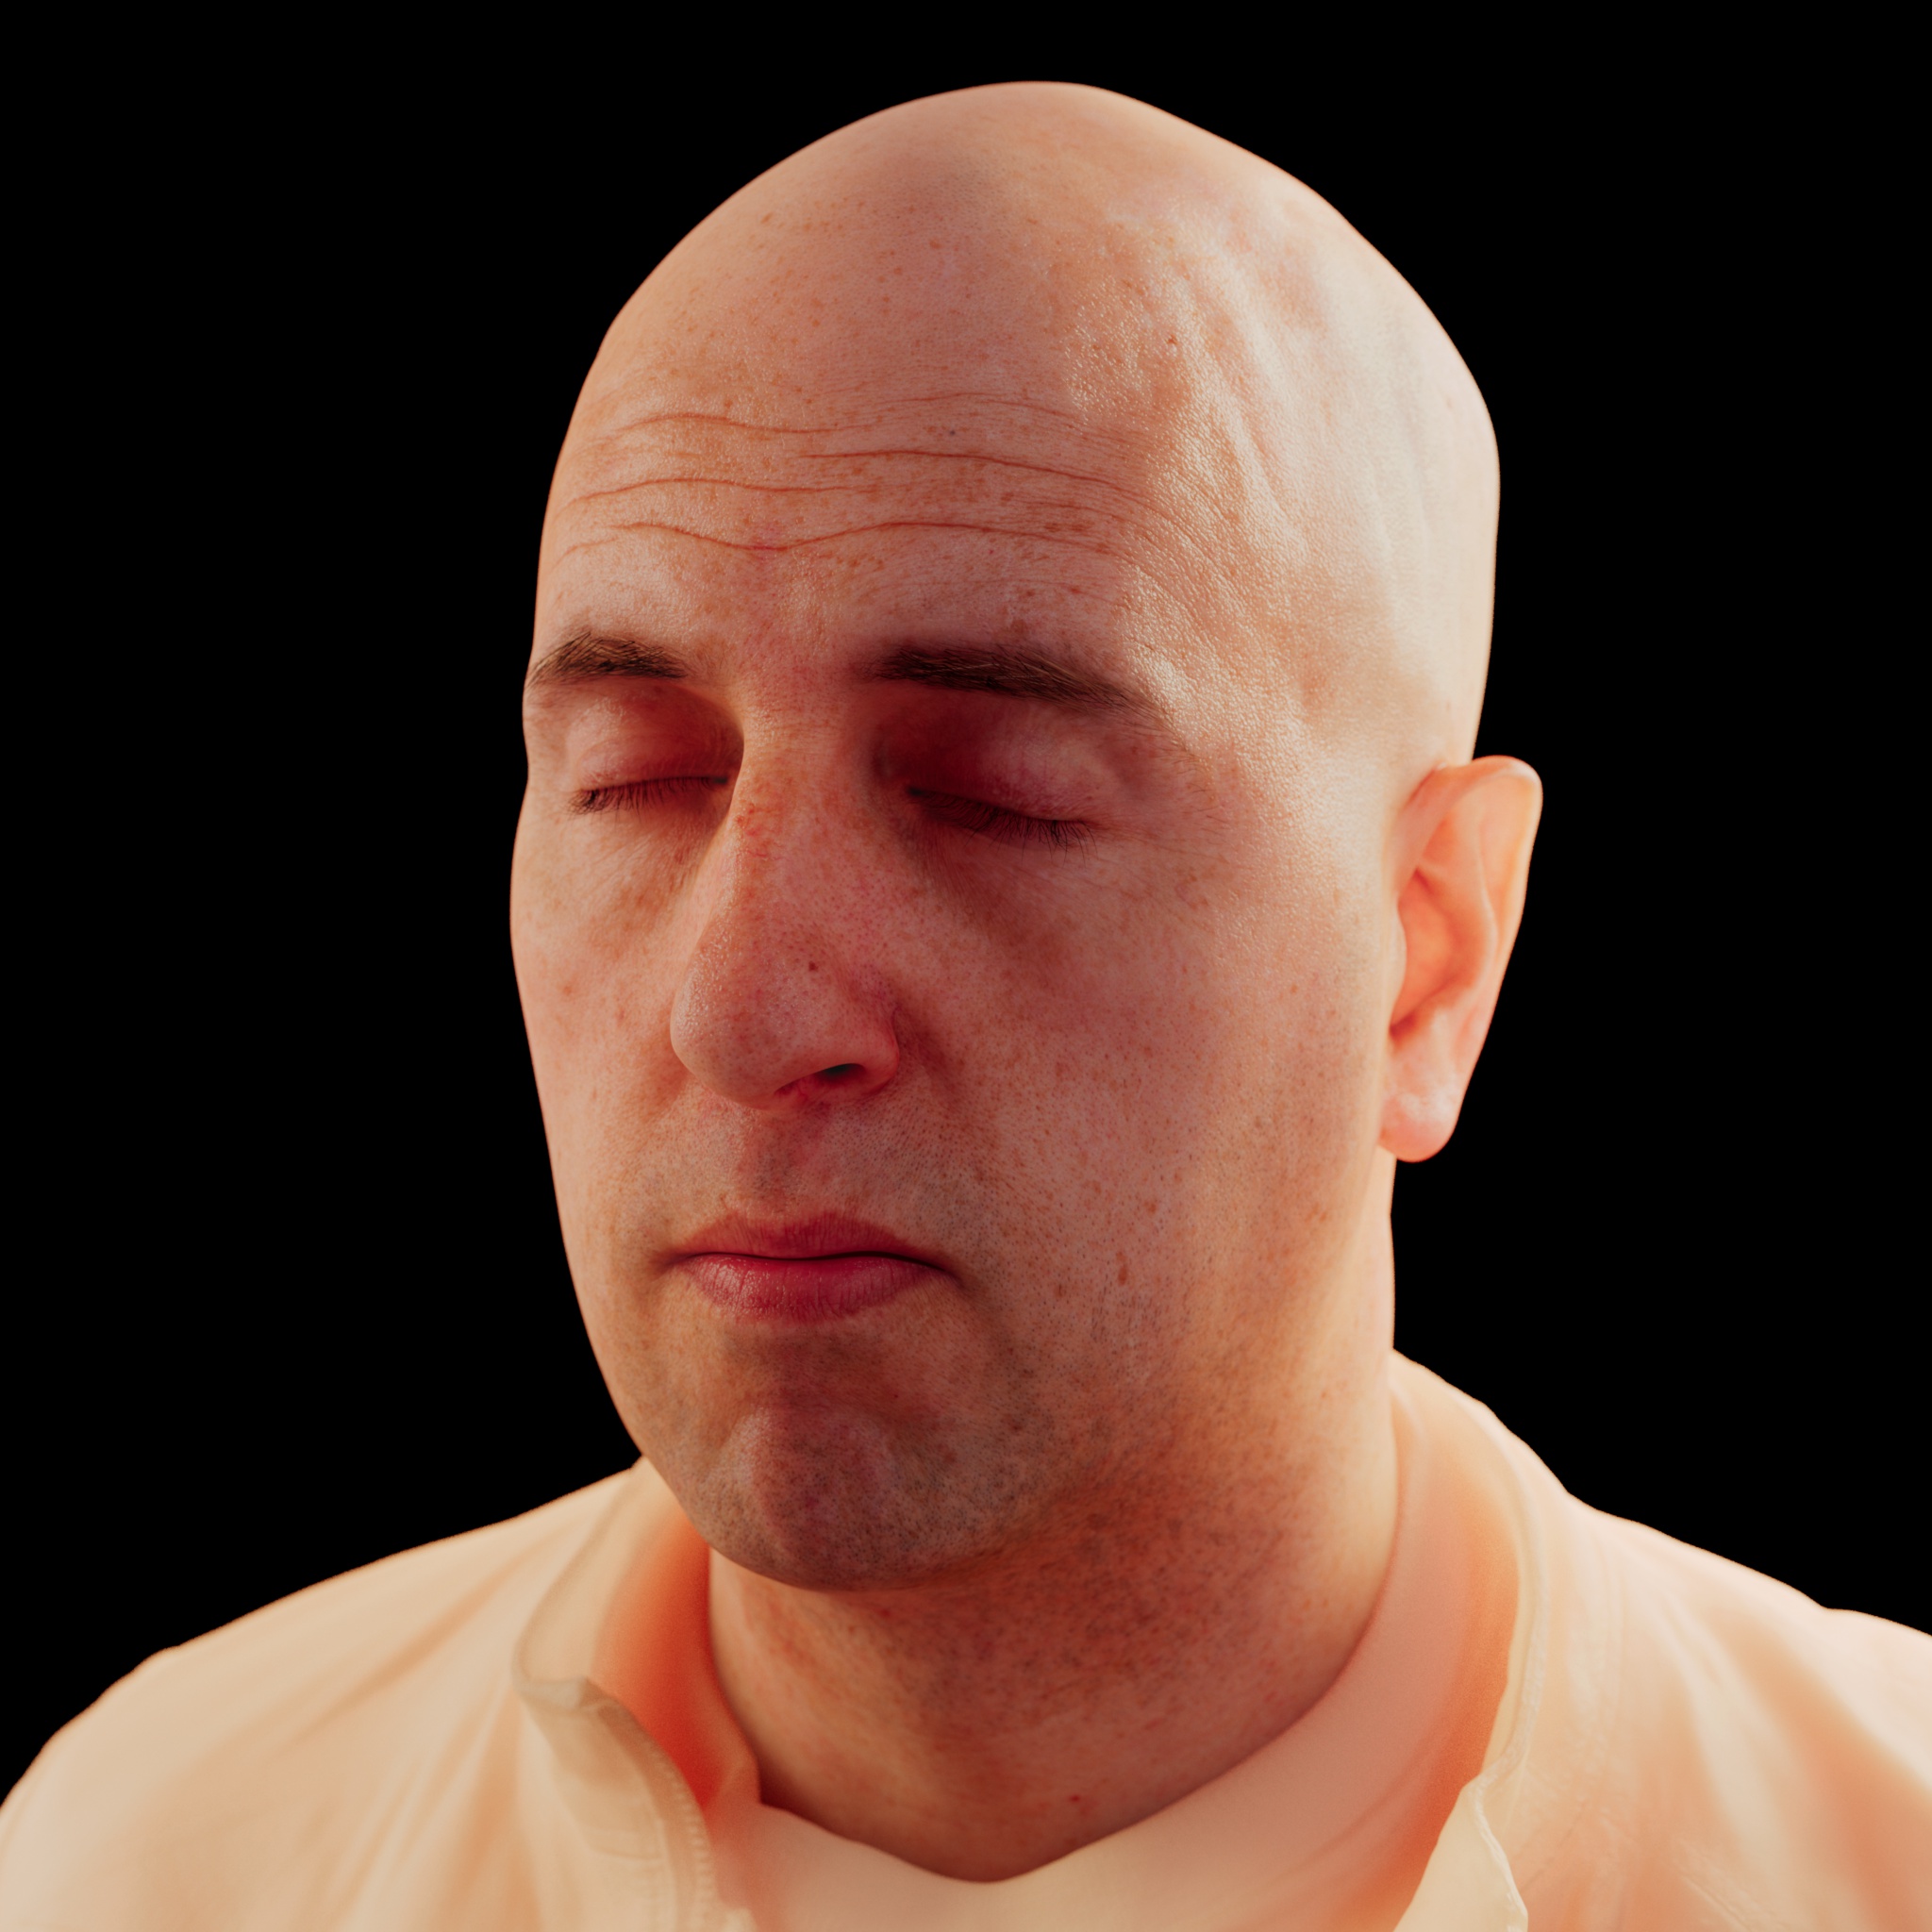
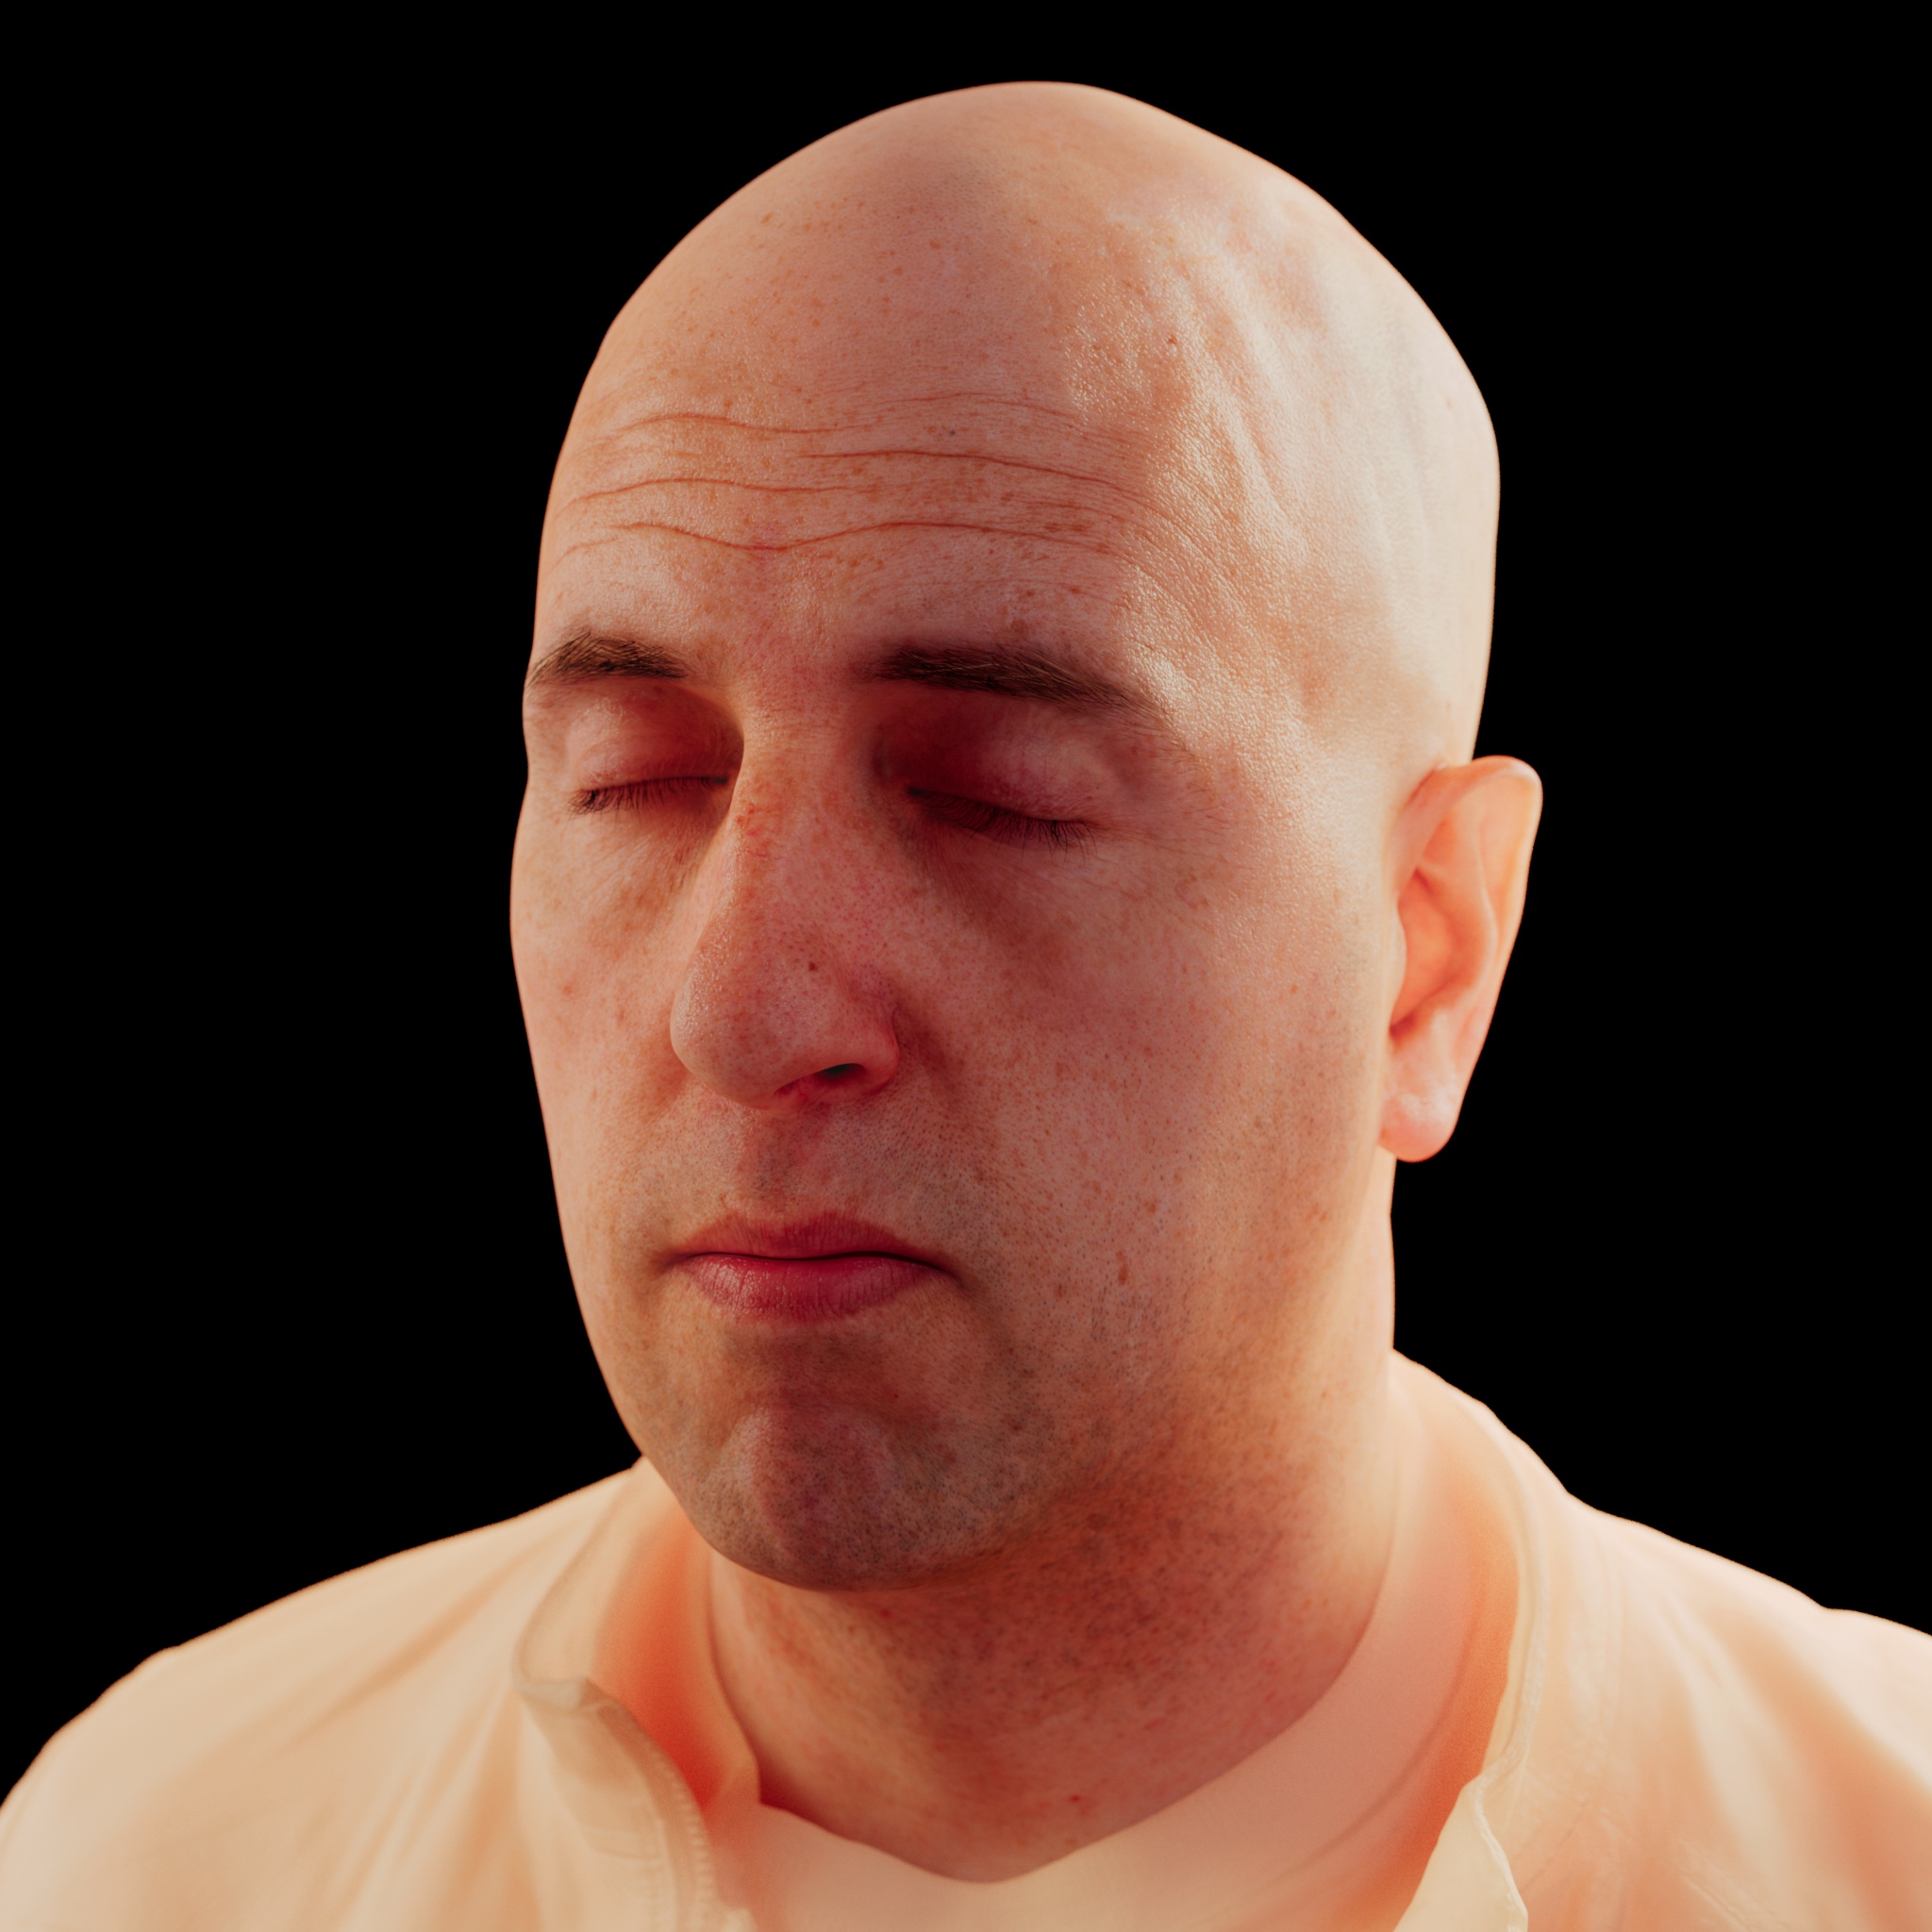
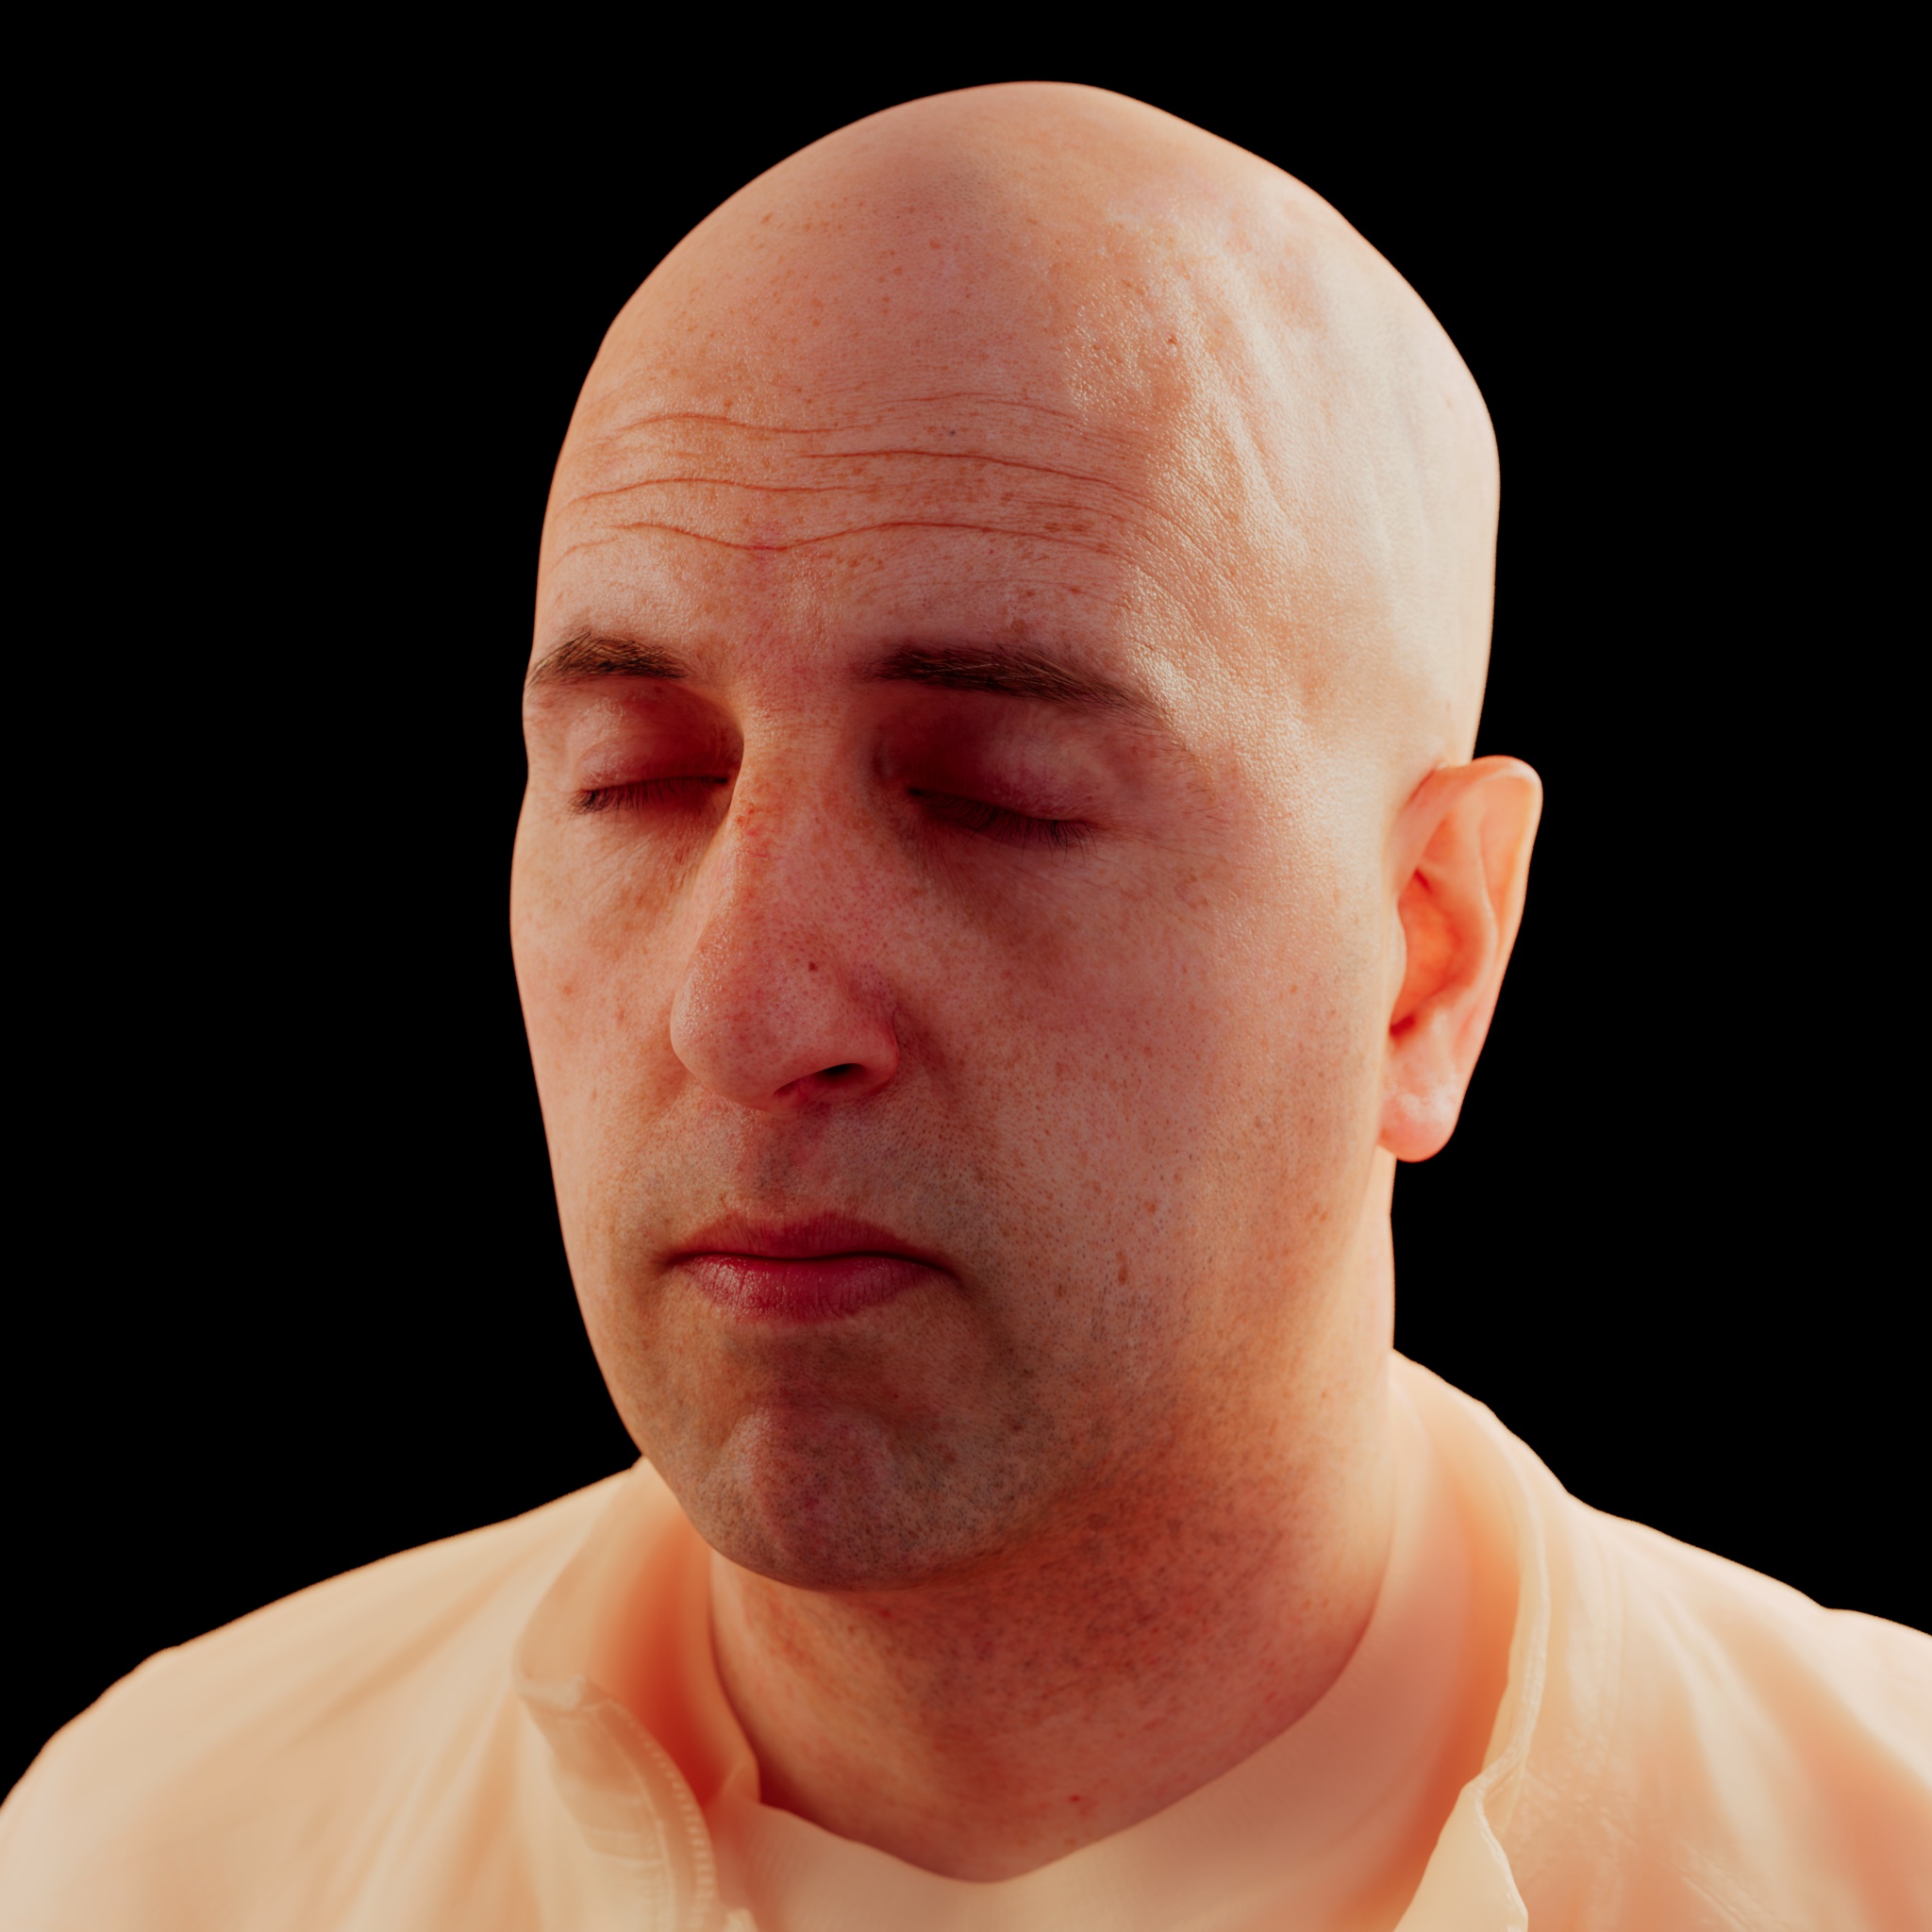
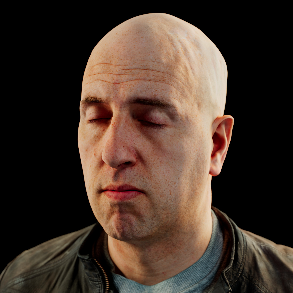
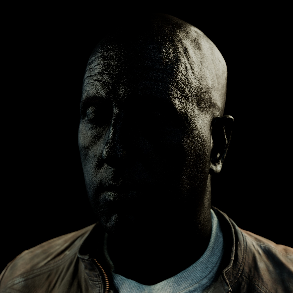
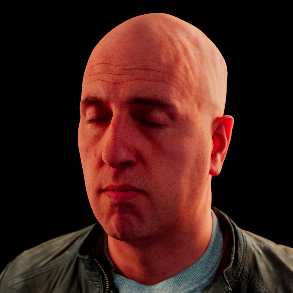
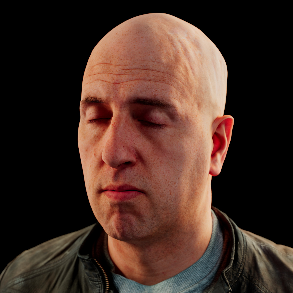
Notice the difference between the different methods around the collar and neck in the images below. To make the difference more prominent a Redshift Skin shader is applied to the jacket part of the model and the Radius Scale for both the head and jacket shaders has been increased to 10.
请注意下面图片中围绕衣领和脖子的不同方法之间的区别。为了使差异更加突出,红移皮肤着色器应用到模型的夹克部分,头部和夹克着色器的半径缩放已经增加到10。
|
|
|
|
|
Include Mode: Only Self 包含模式: 只有自我 SSS Mode: Ray-Traced SSS 模式: 射线追踪 |
All Objects 所有对象 Ray-Traced 射线追踪 |
(Not Applicable) (不适用) Point-Based 基于点的 |
Shallow / Mid / Deep Scatter Layers
浅层/中层/深层散射层
Color
颜色
This is the color of the scatter layer.
这是分散层的颜色。
The final blended color of all 3 layers depends on the weight and radius of each layer.
所有3层的最终混合颜色取决于每层的重量和半径。
|
|
|
|
|
|
Shallow Scatter 浅层散布 Color: Red 颜色: 红色 Weight: 0.33 重量: 0.33 |
Mid Scatter 中期分散 Color: Green 颜色: 绿色 Weight: 0.33 重量: 0.33 |
Deep Scatter 深度散布 Color: Blue 颜色: 蓝色 Weight: 0.33 重量: 0.33 |
Combined Result 综合成绩 Scatter Colors: Red / Green / Blue 散点颜色: 红/绿/蓝 Weights: 0.33 / 0.33 / 0.33 重量: 0.33/0.33/0.33 |
Weight
重量
This is a multiplier of the scatter layer color and can be used to adjust the brightness / strength of the layer.
这是一个分散层颜色的倍增器,可以用来调整图层的亮度/强度。
This value is multiplied by the 'Overall Scale' parameter.
这个值乘以“总体规模”参数。
|
|
|
|
|
|
Scatter Colors: Red / Green / Blue 散点颜色: 红/绿/蓝 Weights: 0.0 / 0.0 / 0.01 重量: 0.0/0.0/0.01 |
Scatter Colors: Red / Green / Blue 散点颜色: 红/绿/蓝 Weights: 0.0 / 0.0 / 0.1 重量: 0.0/0.0/0.1 |
Scatter Colors: Red / Green / Blue 散点颜色: 红/绿/蓝 Weights: 0.0 / 0.2 / 0.1 重量: 0.0/0.2/0.1 |
Scatter Colors: Red / Green / Blue 散点颜色: 红/绿/蓝 Weights: 0.6 / 0.2 / 0.1 重量: 0.6/0.2/0.1 |
Radius
半径
This parameter is scene-scale related. It controls how deep light can travel within this surface. If the value is high, light can go deeper which creates a softer effect. Smaller values, on the other hand, mean that the light reaches extinction early which creates a harder more diffuse effect.
这个参数与场景尺度有关。它控制着光在这个表面的传播深度。如果数值很高,光线可以变得更深,从而产生更柔和的效果。另一方面,较小的数值意味着光线很早就会消失,从而产生更难扩散的效果。
This value is multiplied by the 'Radius Scale' parameter.
此值乘以“半径缩放”参数。
|
|
|
|
|
|
|
Scatter Colors: Red / Green / Blue 散点颜色: 红/绿/蓝 Radius: 0.1 / 0.1 / 0.1 半径: 0.1/0.1/0.1 Weights: 0.33 / 0.33 / 0.33 重量: 0.33/0.33/0.33 |
Scatter Colors: Red / Green / Blue 散点颜色: 红/绿/蓝 Radius: 0.1 / 0.1 / 0.5 半径: 0.1/0.1/0.5 |
Scatter Colors: Red / Green / Blue 散点颜色: 红/绿/蓝 Radius: 1.0 / 0.1 / 0.5 半径: 1.0/0.1/0.5 |
Scatter Colors: Red / Green / Blue 散点颜色: 红/绿/蓝 Radius: 1.0 / 2.0 / 0.5 半径: 1.0/2.0/0.5 |
Scatter Colors: Red / Green / Blue 散点颜色: 红/绿/蓝 Radius: 2.0 / 2.0 / 2.0 半径: 2.0/2.0/2.0 |
Single Scattering
单次散射
Transmittance 透射率
Describes the sub-surface attenuation color. A color of black means full light absorption, yielding a solid material, while a color of white means light rays will pass right through without being absorbed. Dark colors can be used to describe denser materials.
描述了次表面的衰减颜色。黑色意味着充分的光吸收,产生固体材料,而白色意味着光线会直接穿过而不被吸收。深色可以用来描述密度更大的材料。
Thickness 厚度
This acts as a scale of the absorption effect, with a value of 0.0 meaning no absorption and larger values meaning stronger absorption and thus denser-looking materials.
这就像一个吸收效应的尺度,0.0的值意味着没有吸收,更大的值意味着更强的吸收,因此密度更大的材料。
Scatter Amount 分散数量
Acts as a scale of the scattering effect, with a value of 0.0 meaning no scattering and larger values meaning more scattering and thus denser-looking materials.
作为散射效应的一个尺度,0.0的值意味着没有散射,更大的值意味着更多的散射,因此更密集的材料。
Samples
样本
This is the maximum number of samples shot for single scattering rays. More samples will mean less noisy looking single scattering, but can affect rendering performance.
这是单次散射射线的最大采样数。更多的样本将意味着更少的噪声看起来单一散射,但会影响渲染性能。
Phase
第二阶段
This describes the anisotropy of the scattering effect, for forward and back scattering. Forward scattering requires values between 0 and 1, which means rays will scatter away from the light source. Back scattering requires values between -1 and 0 which means rays will scatter back towards the light source.
这描述了前向和后向散射的散射效应的各向异性。前向散射要求值在0到1之间,这意味着光线会从光源散射开来。后向散射要求值在 -1和0之间,这意味着光线会向后散射到光源。
Scattering Options in Detail
详细的散射选项
The 'Overall Scale' allows you to adjust the brightness of all the layers together, so you can quickly fine tune the intensity your diffuse lighting for the overall material.
“整体比例”可以让你调整所有层的亮度在一起,所以你可以快速调整整体材质的漫射照明的强度。
Note that the 'Overall Scale' is applied prior to any layer weight normalization (see 'Normalize Diffuse Weights'). This means if your layer weights sum to a value greater than 1.0, you may need lower 'Overall Scale' values than expected in order to see a difference.
请注意,“总体标度”是在任何层权重正常化之前应用的(参见“标准化扩散权重”)。这意味着如果你的图层权重和大于1.0,你可能需要低于预期的“整体规模”值,以查看差异。
|
|
|
|
|
This is an example of dimming the overall diffuse lighting effect using an 'Overall Scale' value of 0.05. The sub-surface scatter effect is still visible, but much darker. 这是一个使用0.05的“全局缩放”值调整整体漫射照明效果的例子。亚表面的散射效应仍然可见,但是要暗得多。 |
'Overall Scale' set to 0.3. 「整体比例」设定为0.3。 |
'Overall Scale' set to 1.0 「整体比例」设定为1.0 |
The 'Radius Scale' allows you to adjust the strength of the scattering effect for all the layers. Since sub-surface scattering is heavily dependent on the scale of the object, you can use this option to quickly adjust the scattering effect until it is visually pleasing. Smaller values mean quicker absorption of light, resulting in less scattering effect and a more diffuse look. With larger values you get a more translucent look.
“半径比例尺”允许你调整所有层的散射效果的强度。由于子表面散射是严重依赖于规模的对象,您可以使用这个选项,以迅速调整散射效果,直到它是视觉赏心悦目。较小的数值意味着更快的光吸收,导致较少的散射效果和更漫反射的外观。使用较大的值,可以得到更透明的外观。
|
|
|
|
|
This is an example of lower the overall sub-surface scatter lighting effect using an 'Radius Scale' value of 0.01. The sub-surface scatter effect is almost completely absent, leaving an almost entirely diffuse result. 这是一个使用“半径缩放”值0.01来降低整个亚表面散射照明效果的例子。亚表面散射效应几乎完全消失,留下一个几乎完全漫反射的结果。 |
'Radius Scale' set to 4.0 半径比例设置为4.0 |
'Radius Scale' set to 20.0 半径比例设置为20.0 |
For physical correctness, the 'Normalize Diffuse Weights' should be left enabled. This will ensure the material does not reflect more light than it receives. However, if you want better control over the overall layers brightness or want your material to be more emissive than physically correct, you can disable this option.
对于物理正确性,应该启用“标准化分散权重”。这将确保材料不会反射比接收到更多的光线。然而,如果你想更好地控制整个图层的亮度,或者想要你的材质更加发射而不是物理上正确,你可以禁用这个选项。
Below is a side-by-side example showing the difference in lighting with the 'Normalize' option disabled, using the default layer weights of the material.
下面是一个并排的例子,显示了禁用“标准化”选项后照明的差异,使用材料的默认层权重。
|
|
|
| With 'Normalize Diffuse Weights' enabled, the weights are proportionally re-balanced, so we are guaranteed 'physically correct' lighting. 启用“标准化扩散权重”后,权重按比例重新平衡,因此我们保证了“物理正确”的照明 | With 'Normalize Diffuse Weights' disabled, the lighting is brighter, but may no longer be 'physically correct' if the sum of the layers is greater than 1.0 as it is in this example. 当“标准化扩散权重”被禁用时,灯光会更明亮,但是如果图层总和大于1.0,就可能不再是“物理正确的”,就像这个例子中一样 |
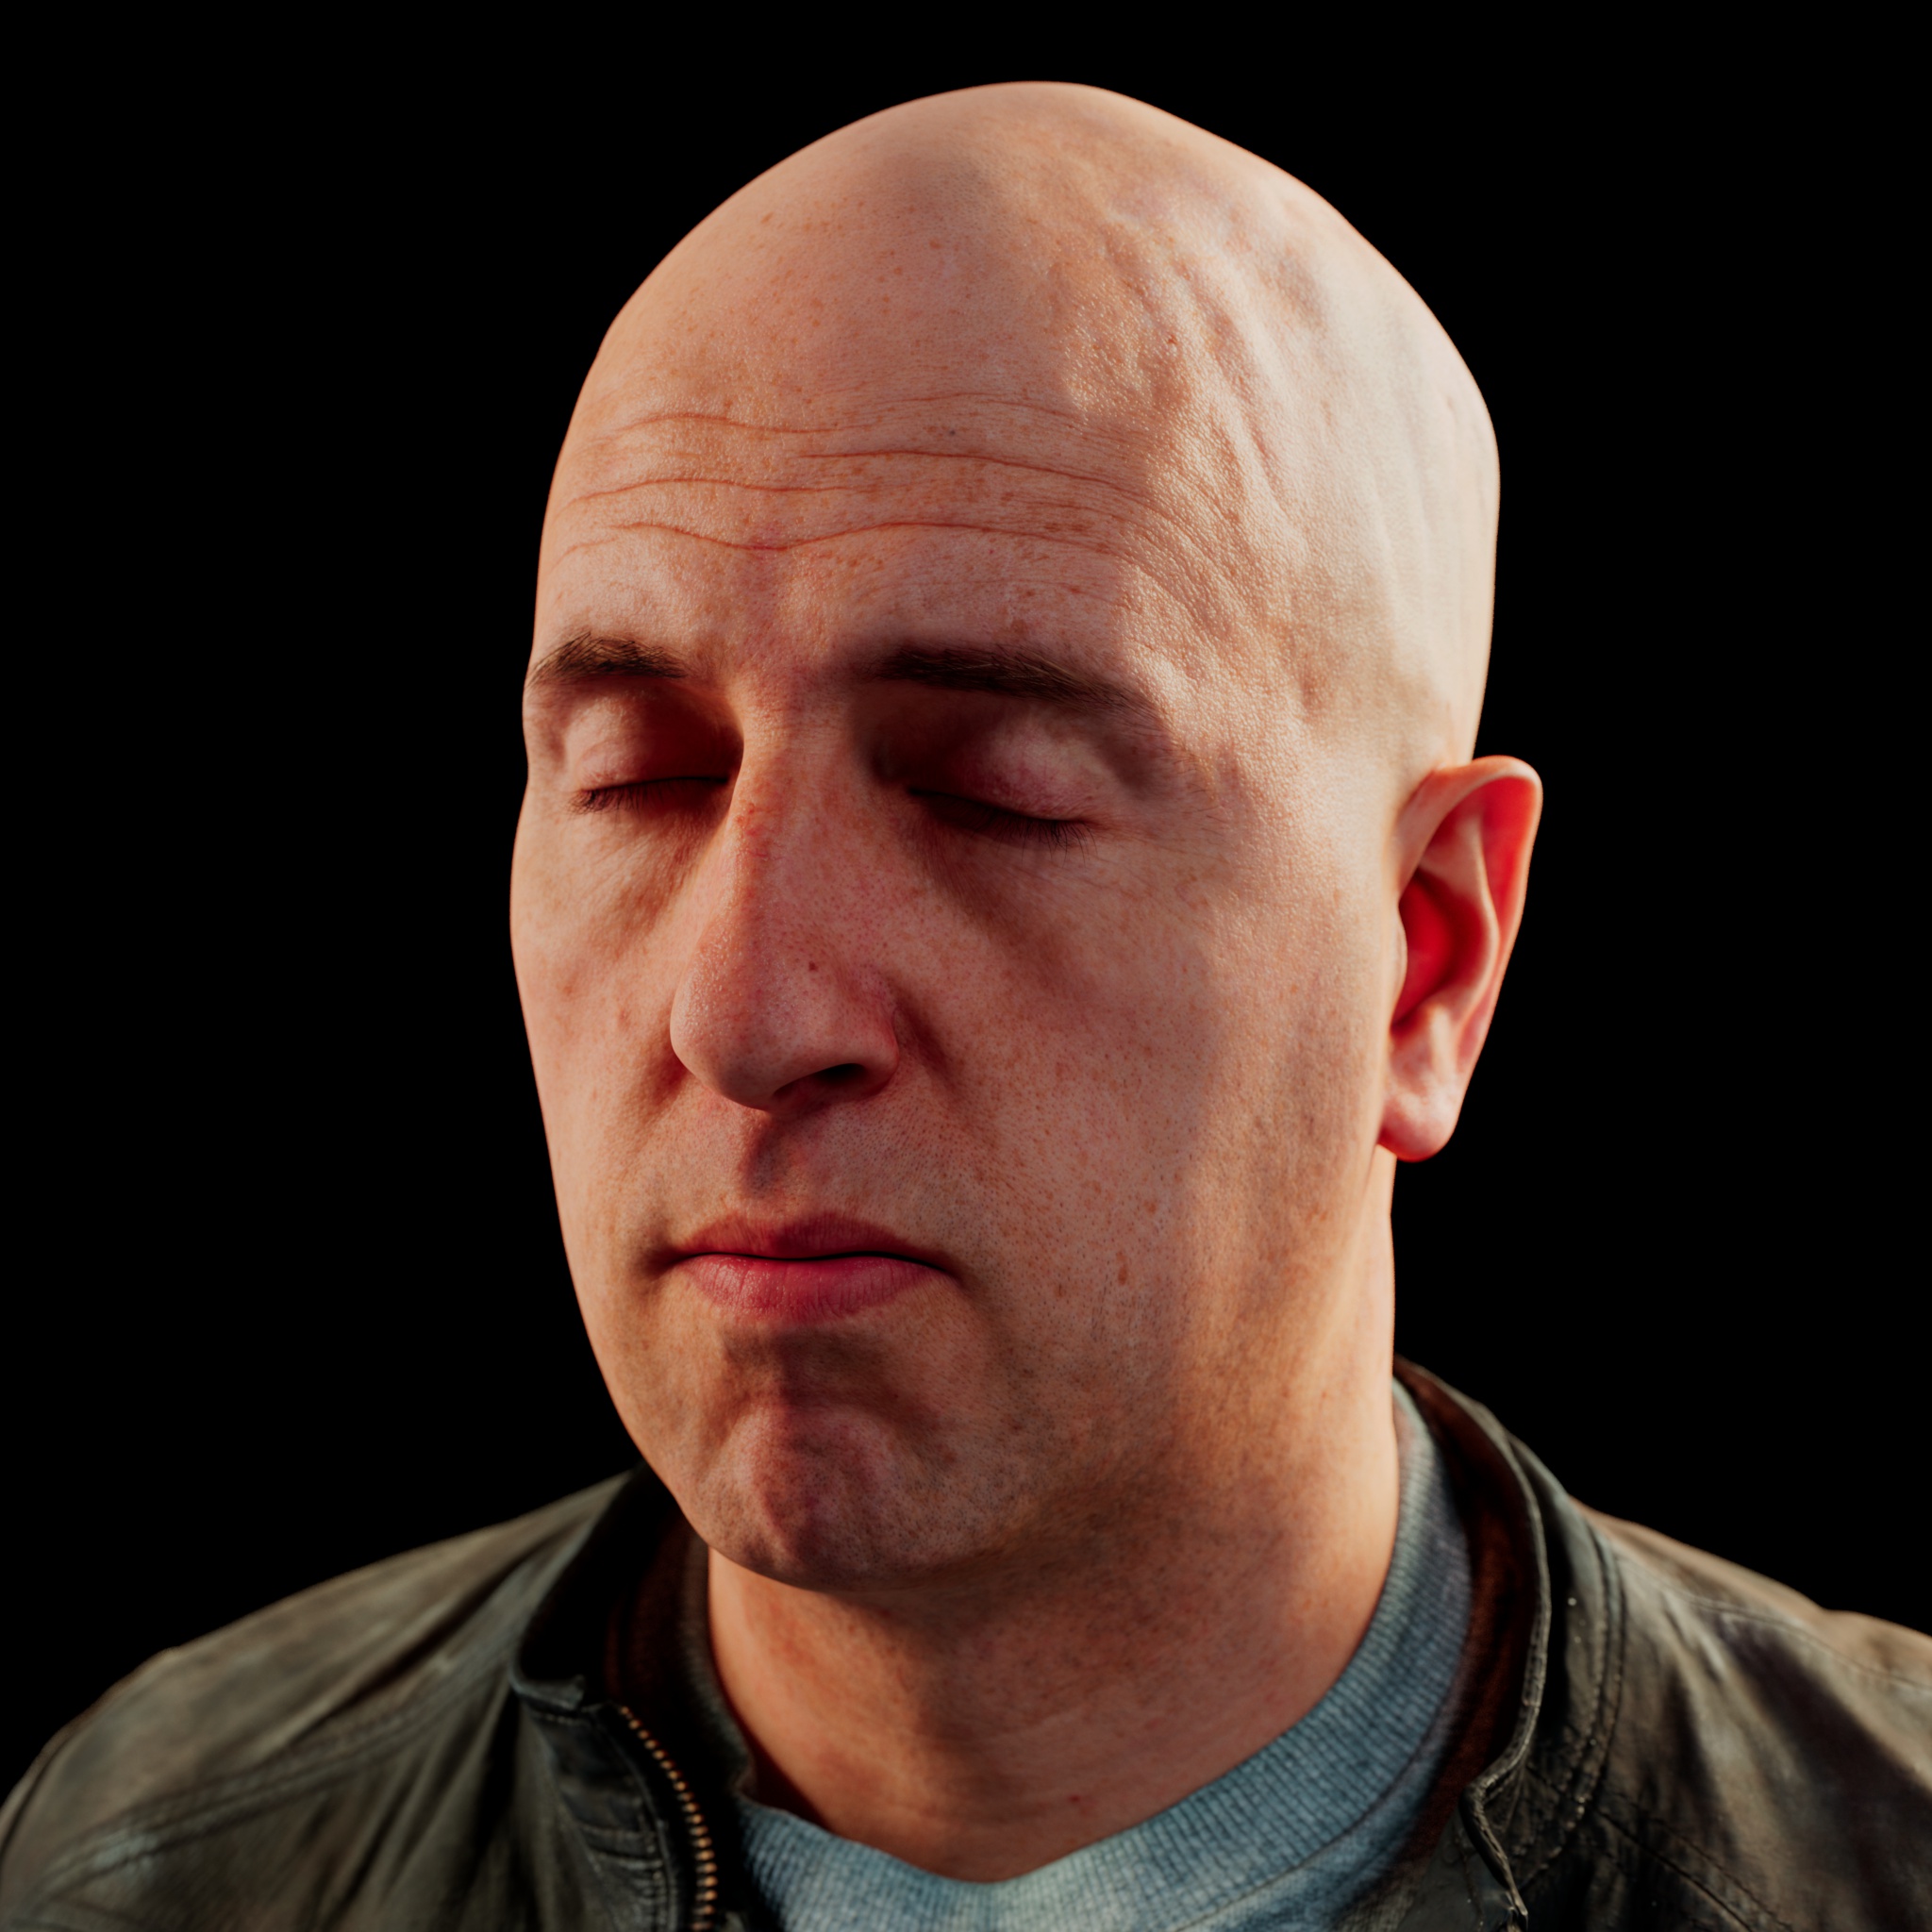
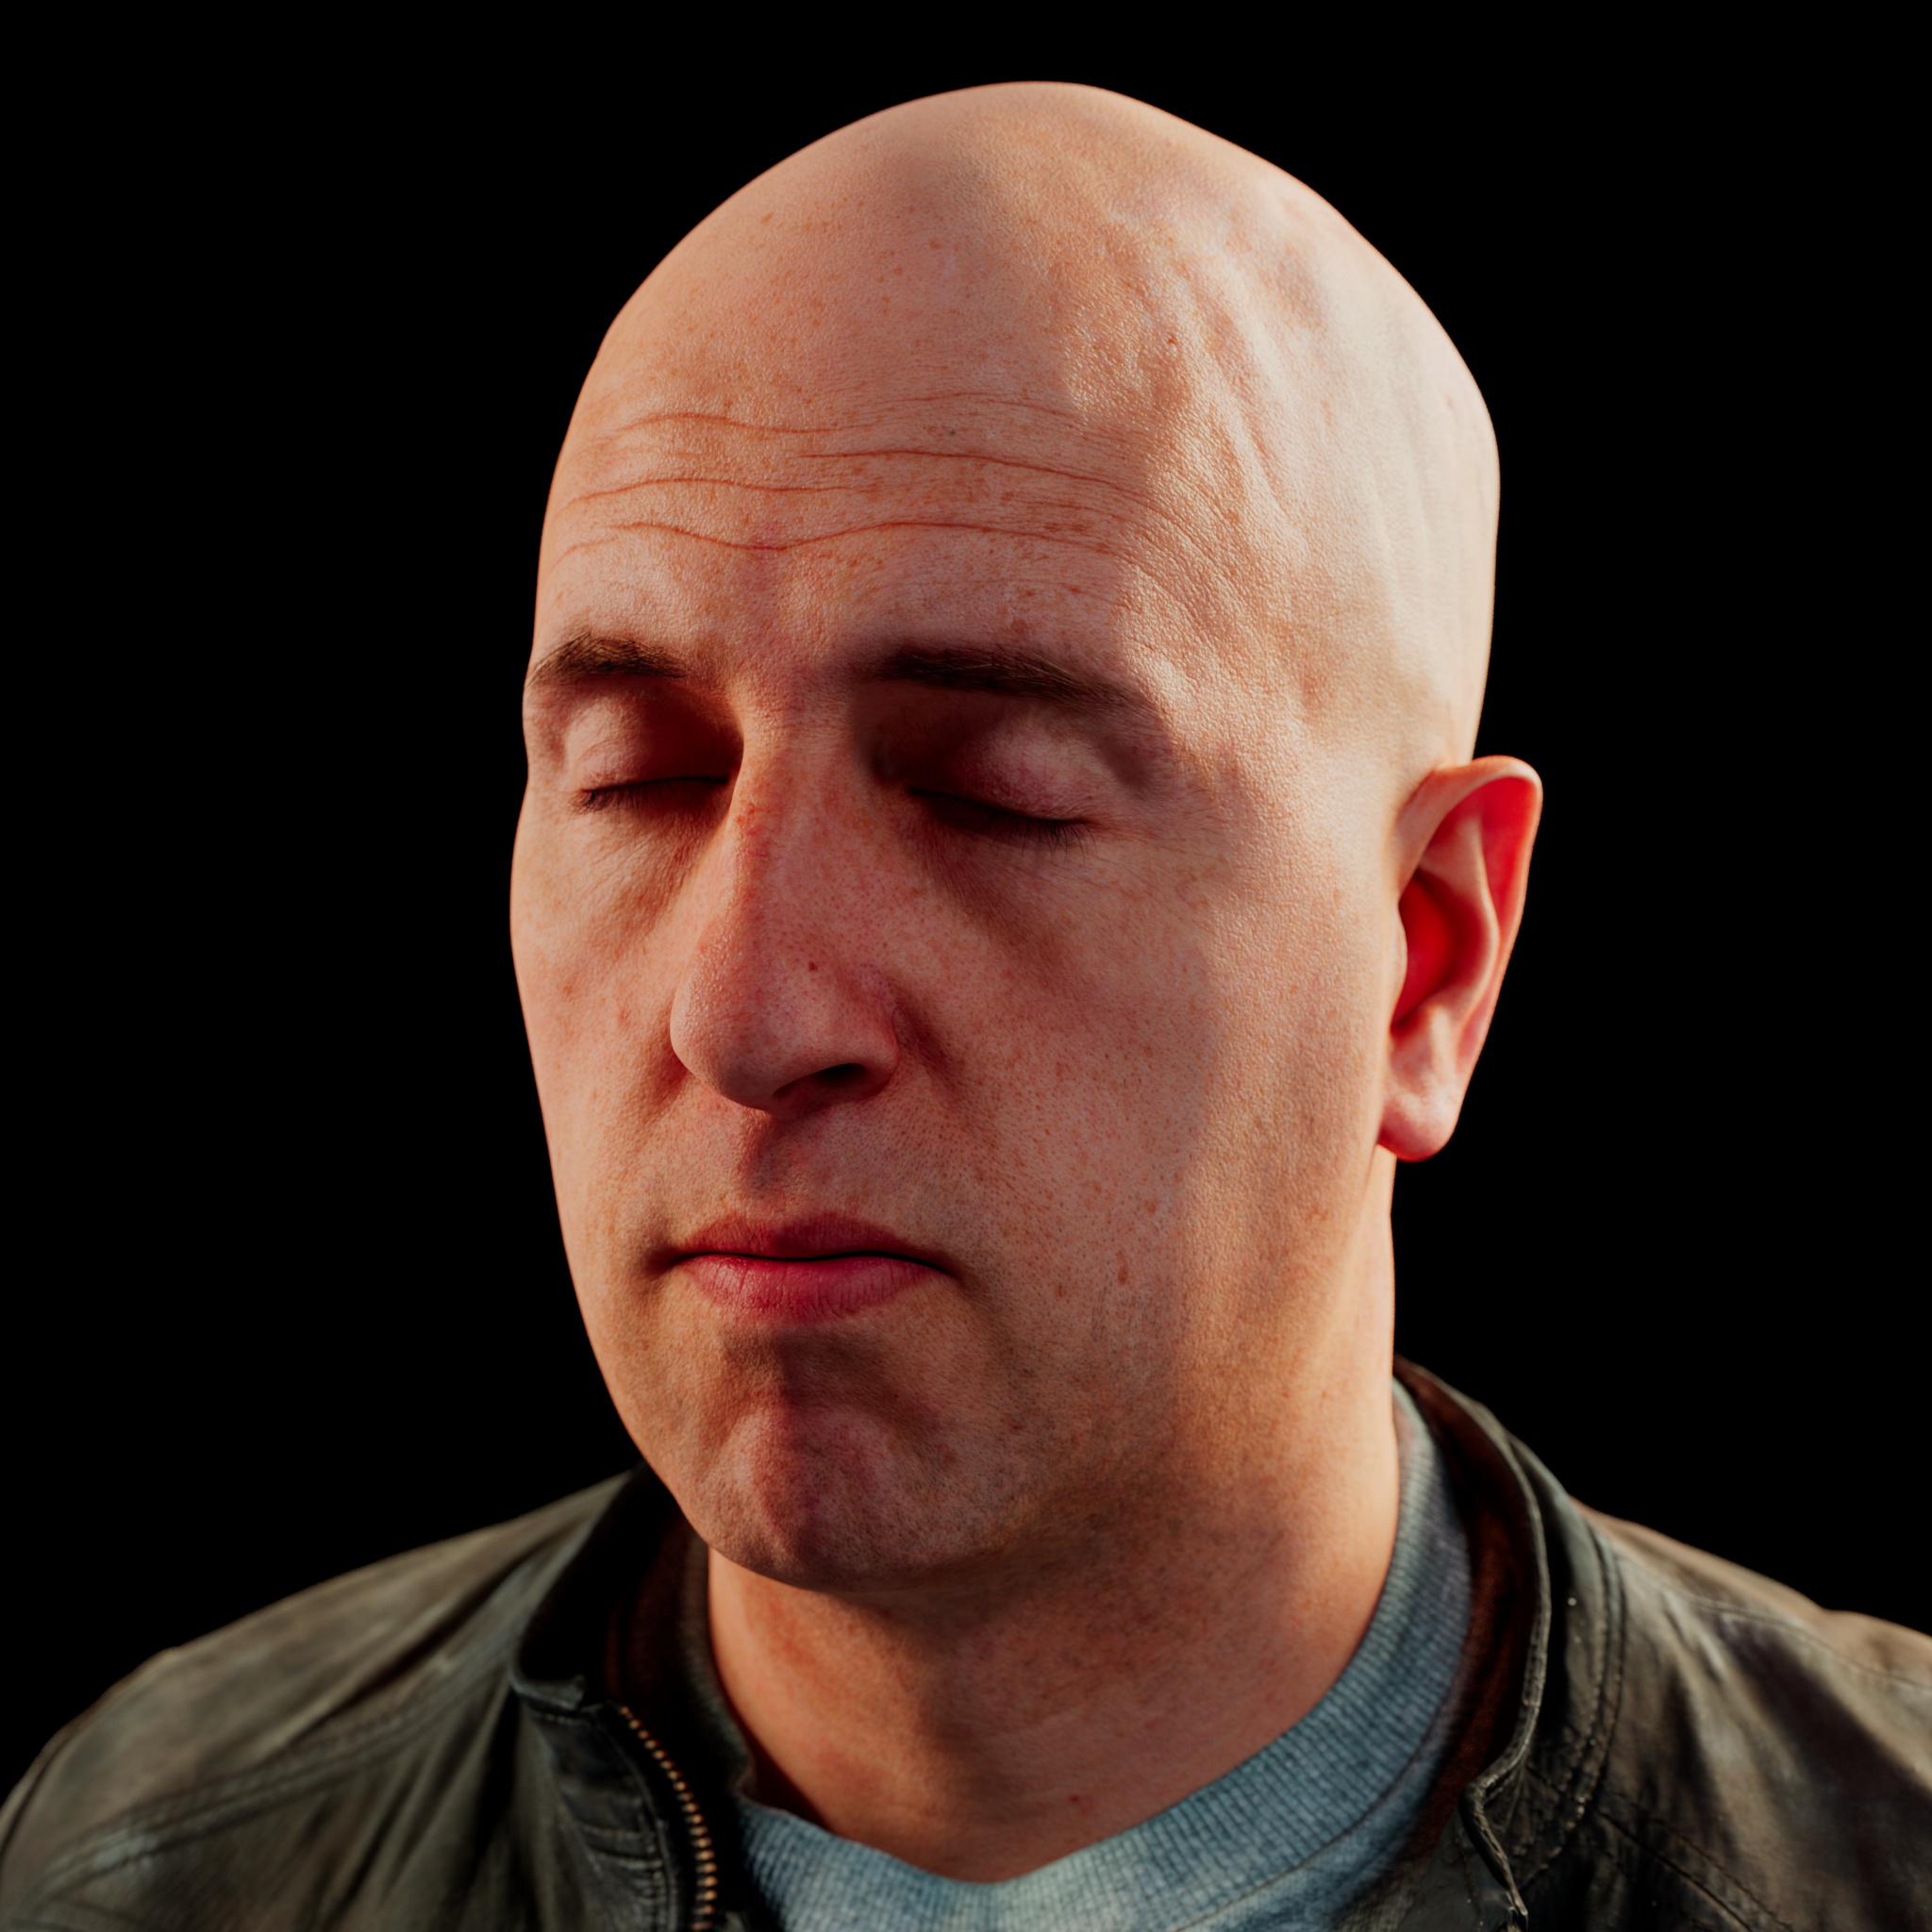
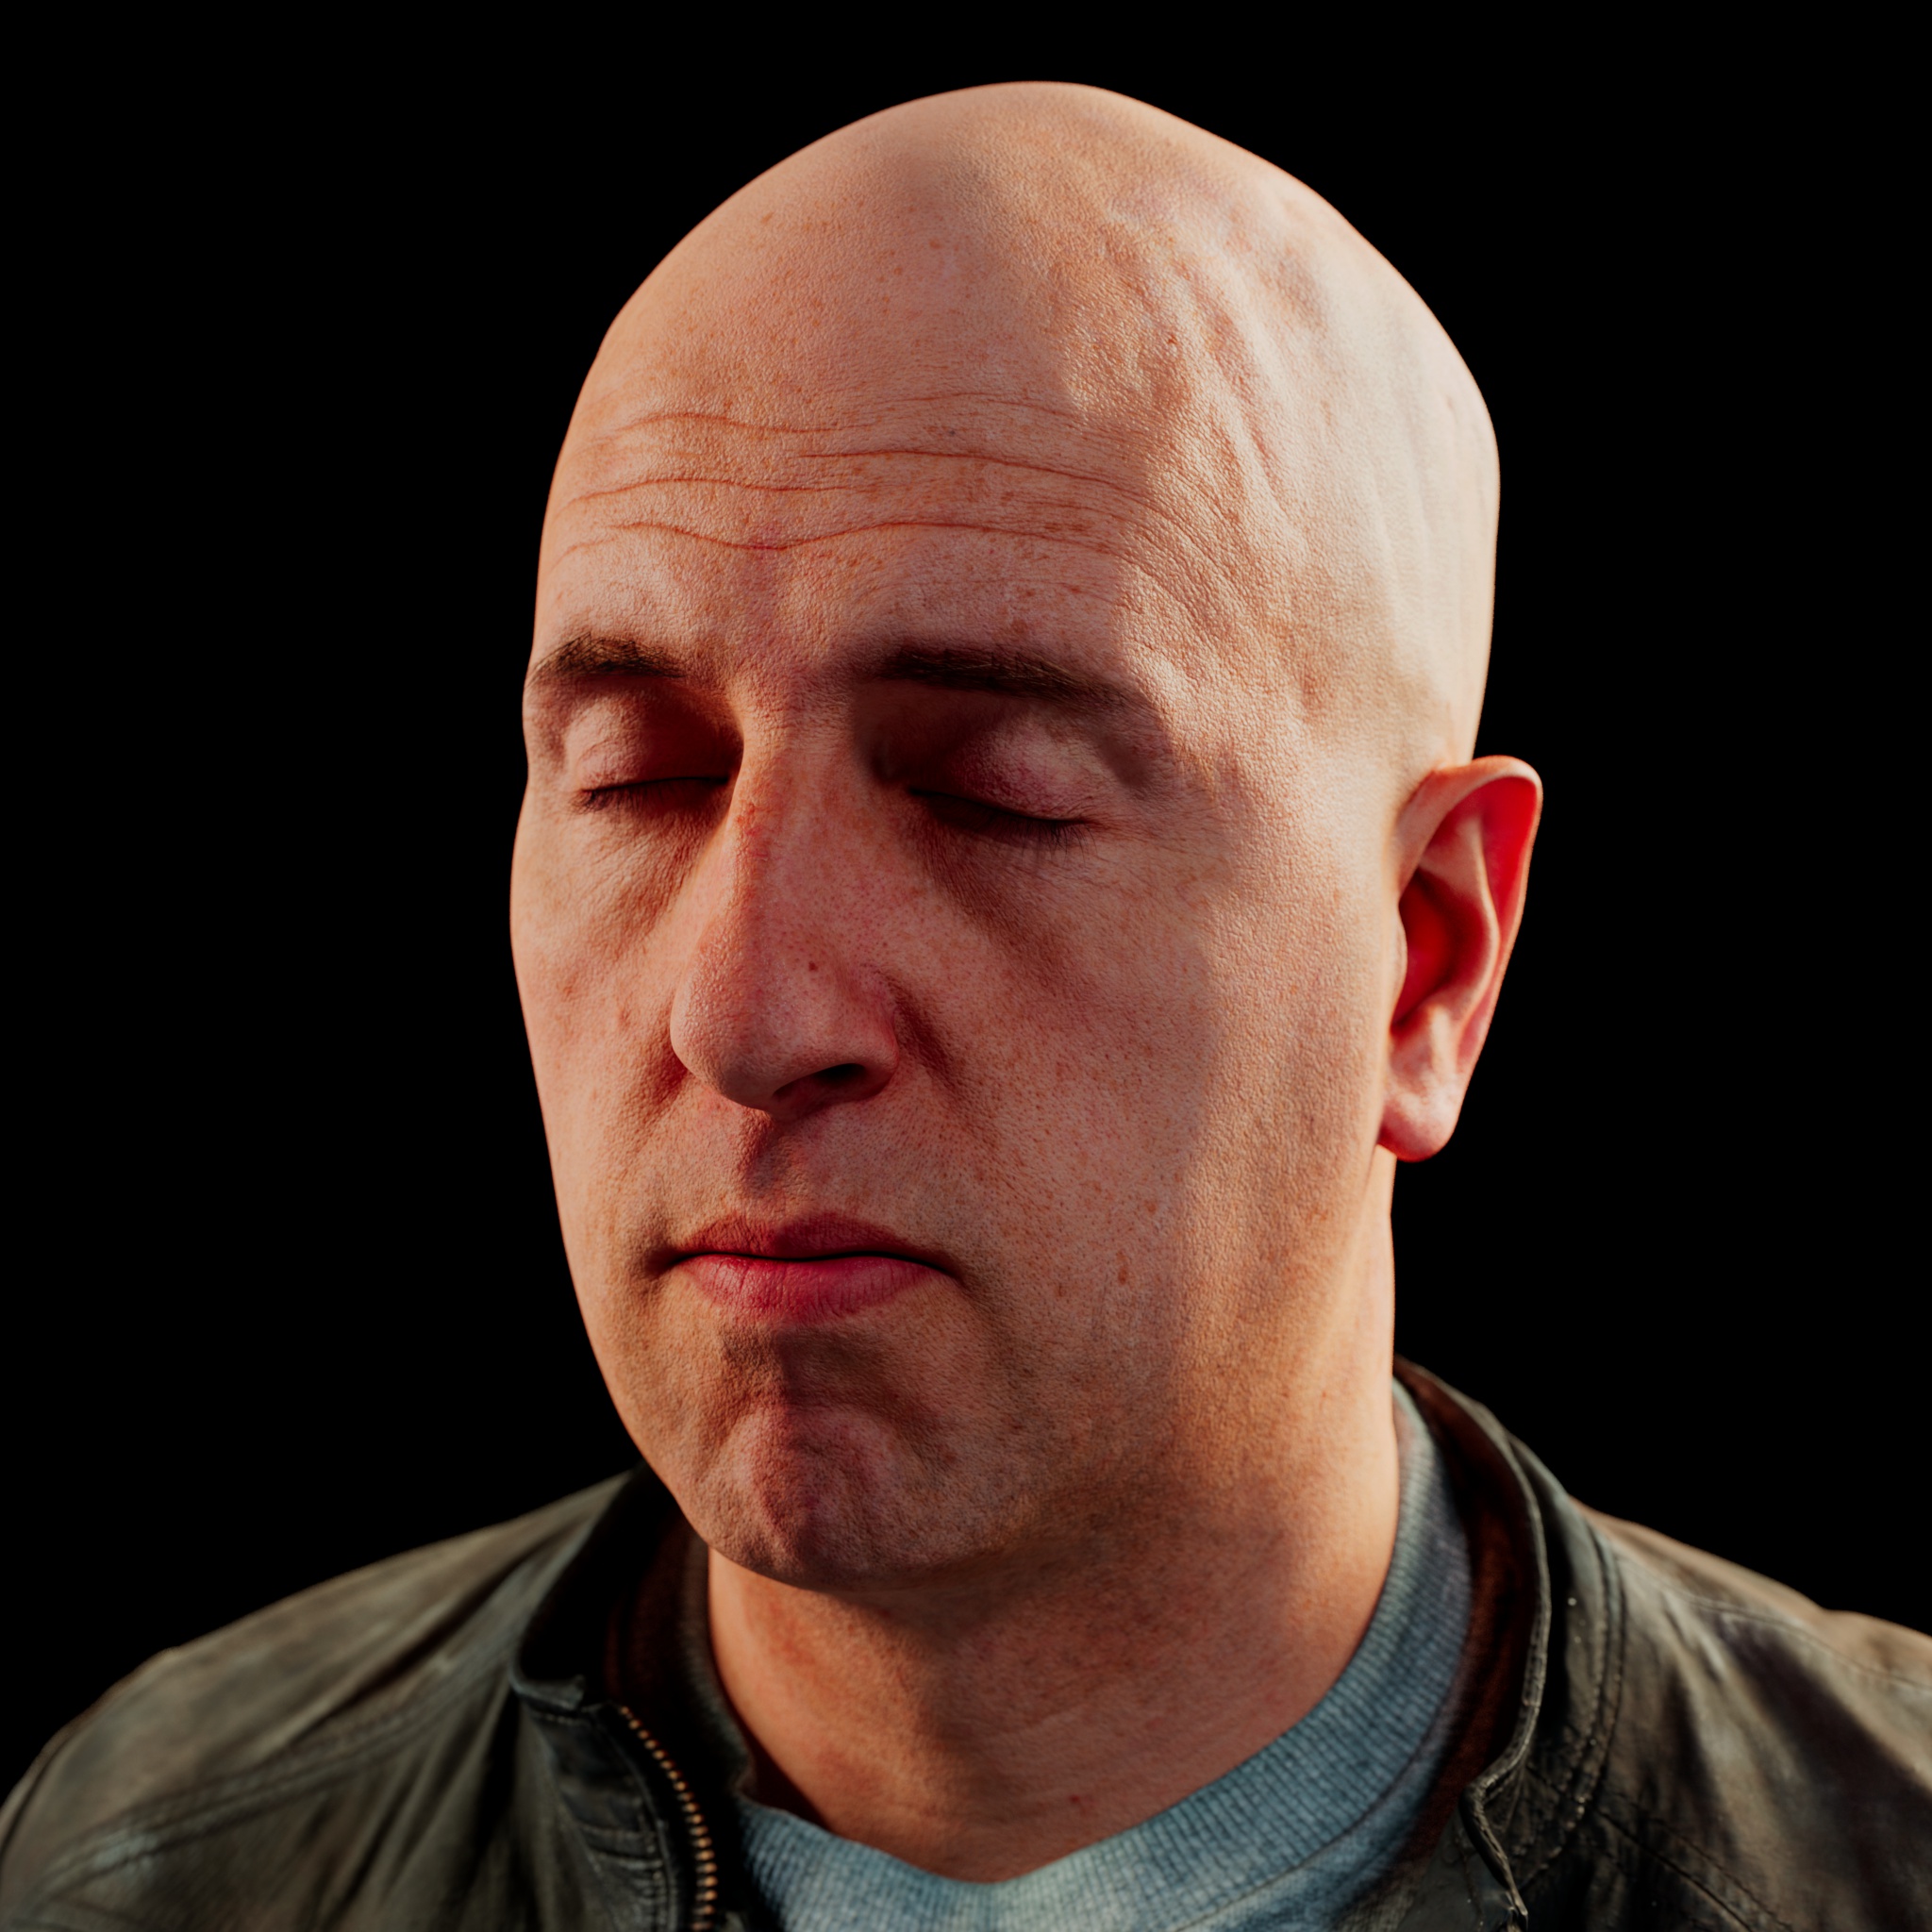
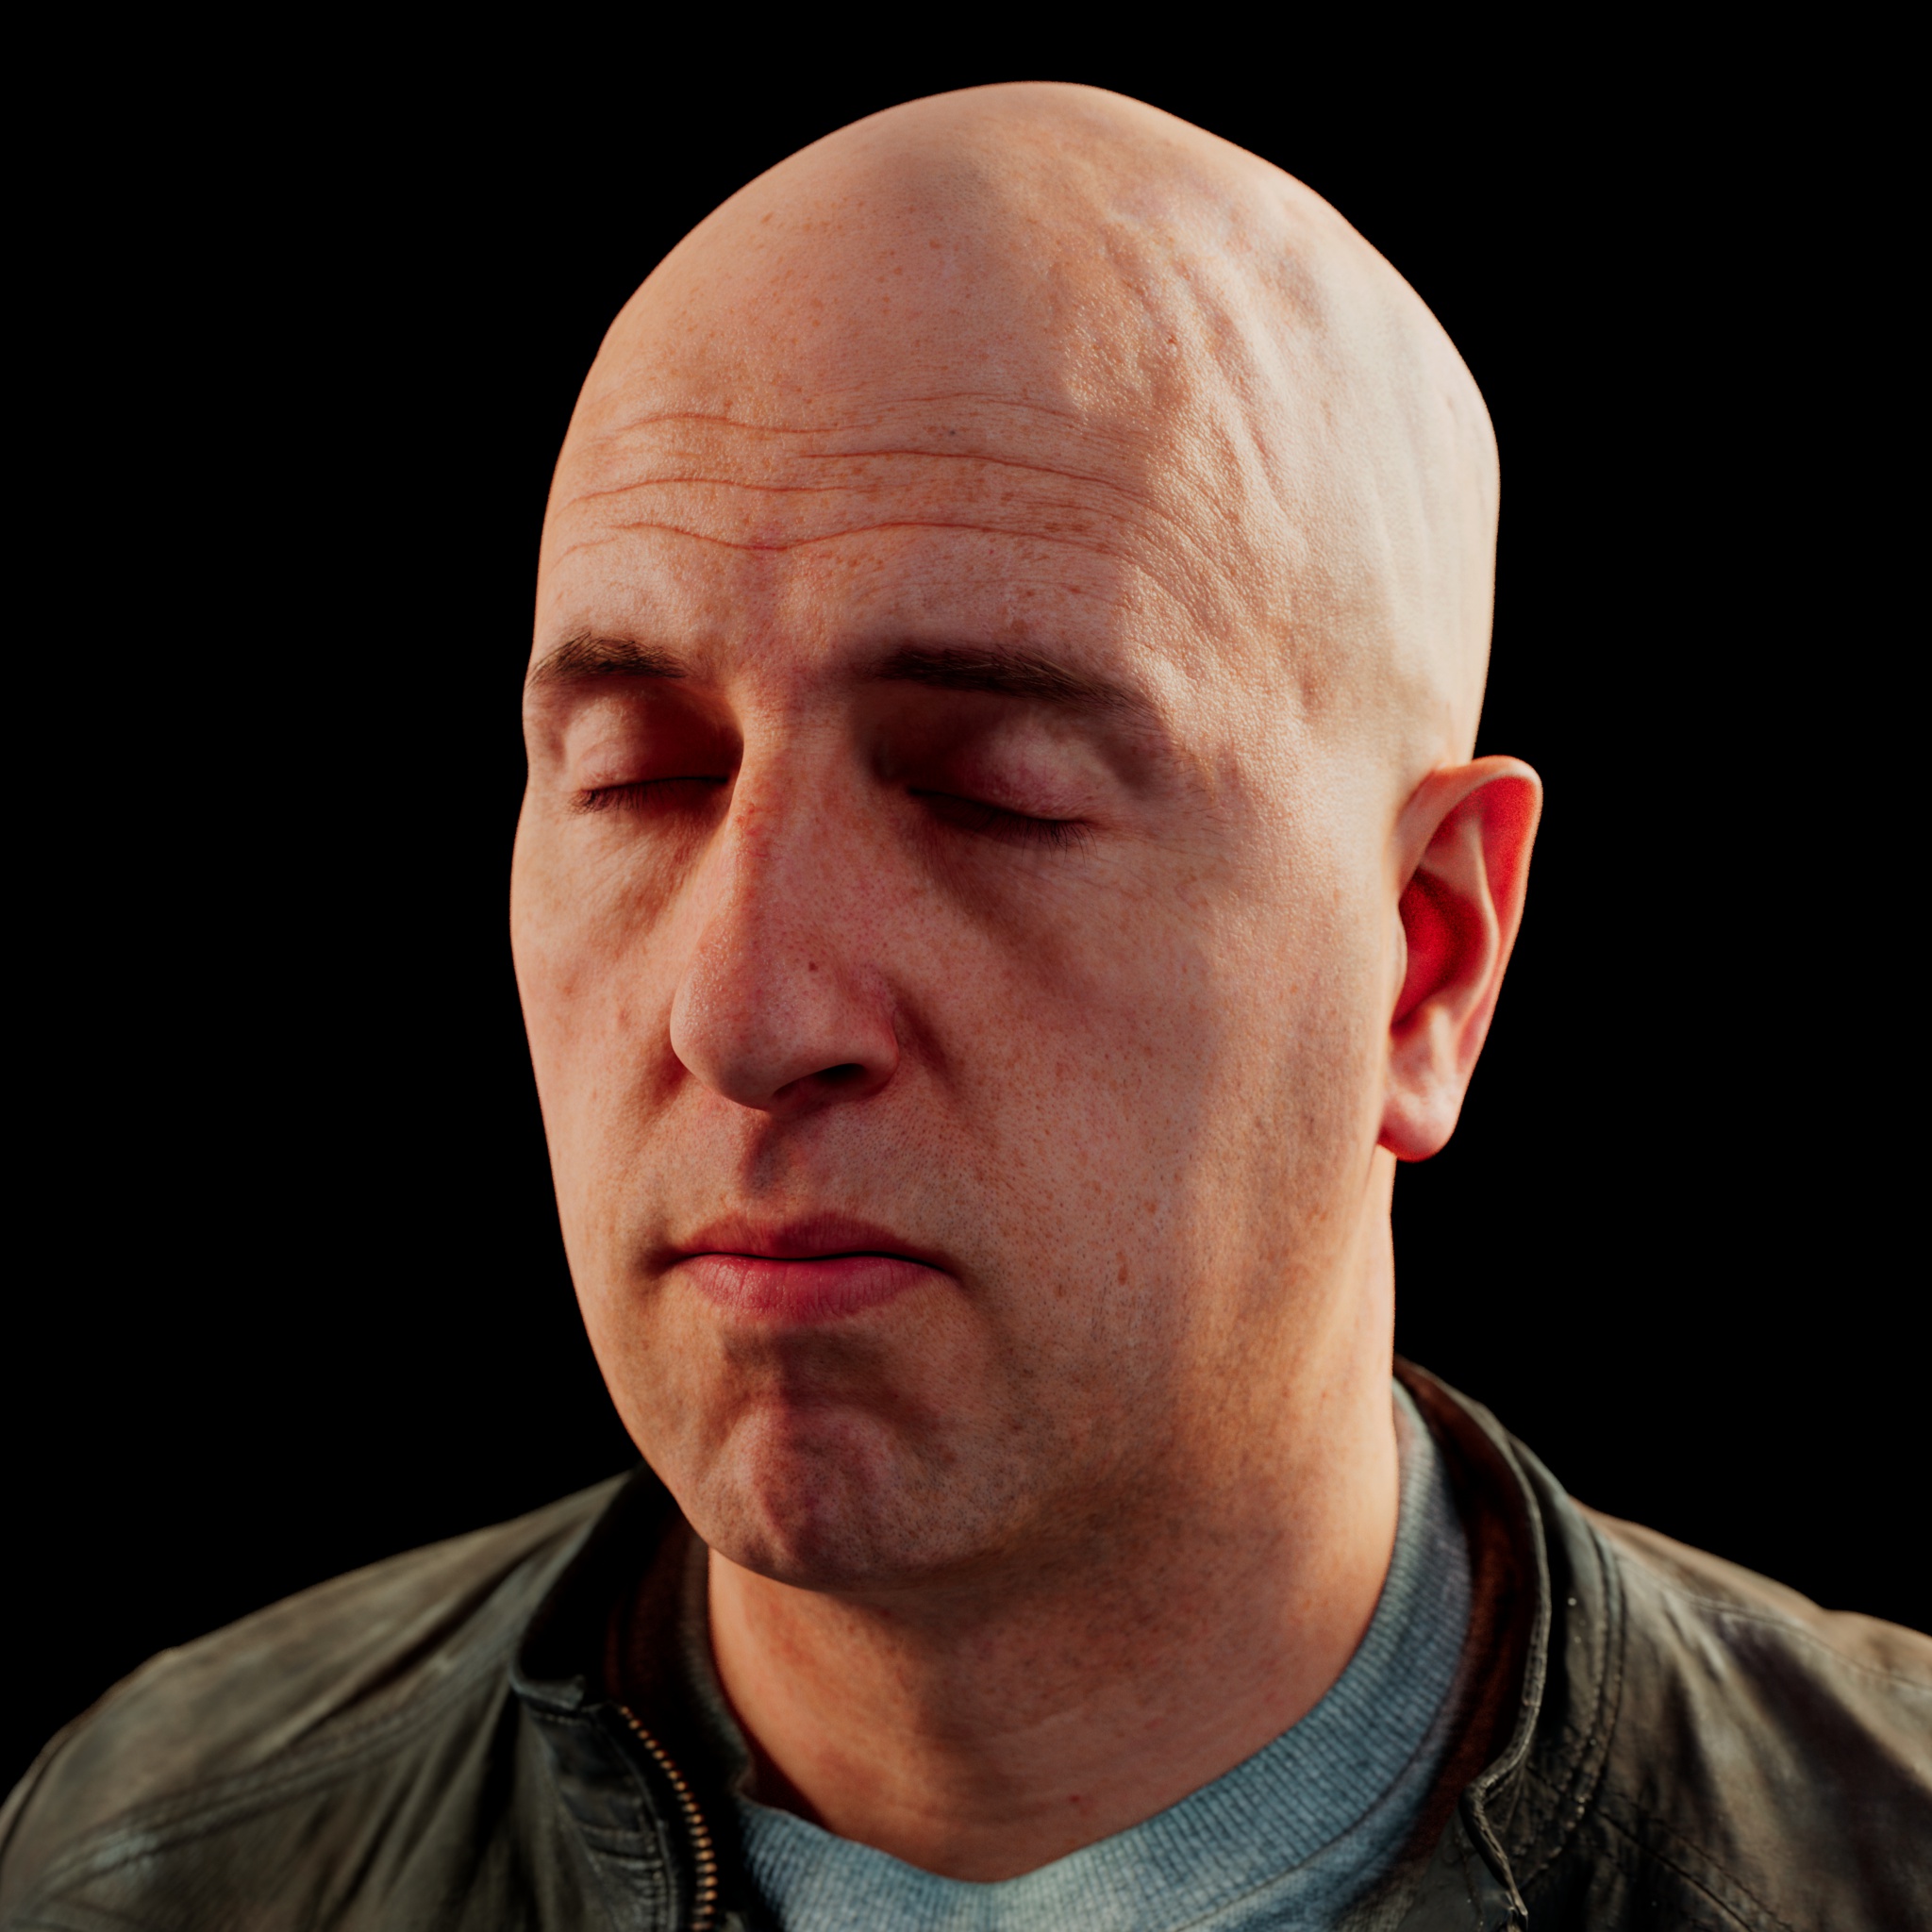
The 'Diffuse Amount' lets you control how much of the overall sub-surface scatter effect you want, versus pure diffuse lighting. When the 'Diffuse Amount' is set to 1.0, there will be no sub-surface scattering. Equally, when set to 0.0, there will be only sub-surface scattering.
“漫反射量”可以让你控制多少整体亚表面散射效果,你想要的,而不是纯粹的漫反射照明。当“漫射量”设置为1.0,将不会有次表面散射。同样,当设置为0.0时,将只有亚表面散射。
|
|
|
|
|
With 'Diffuse Amount' set to 0.0. 漫反射量设置为0.0。 |
With 'Diffuse Amount' set to 0.5. Half the amount of light can be scattered and penetrate through. 漫射量设置为0.5。一半的光线可以被散射和穿透。 |
With 'Diffuse Amount' set to 1.0. The head is now purely diffuse and appears solid, as no light can penetrate through. 漫反射量设置为1.0。头部现在是完全漫反射的,看起来是固体的,因为没有光线可以穿透。 |
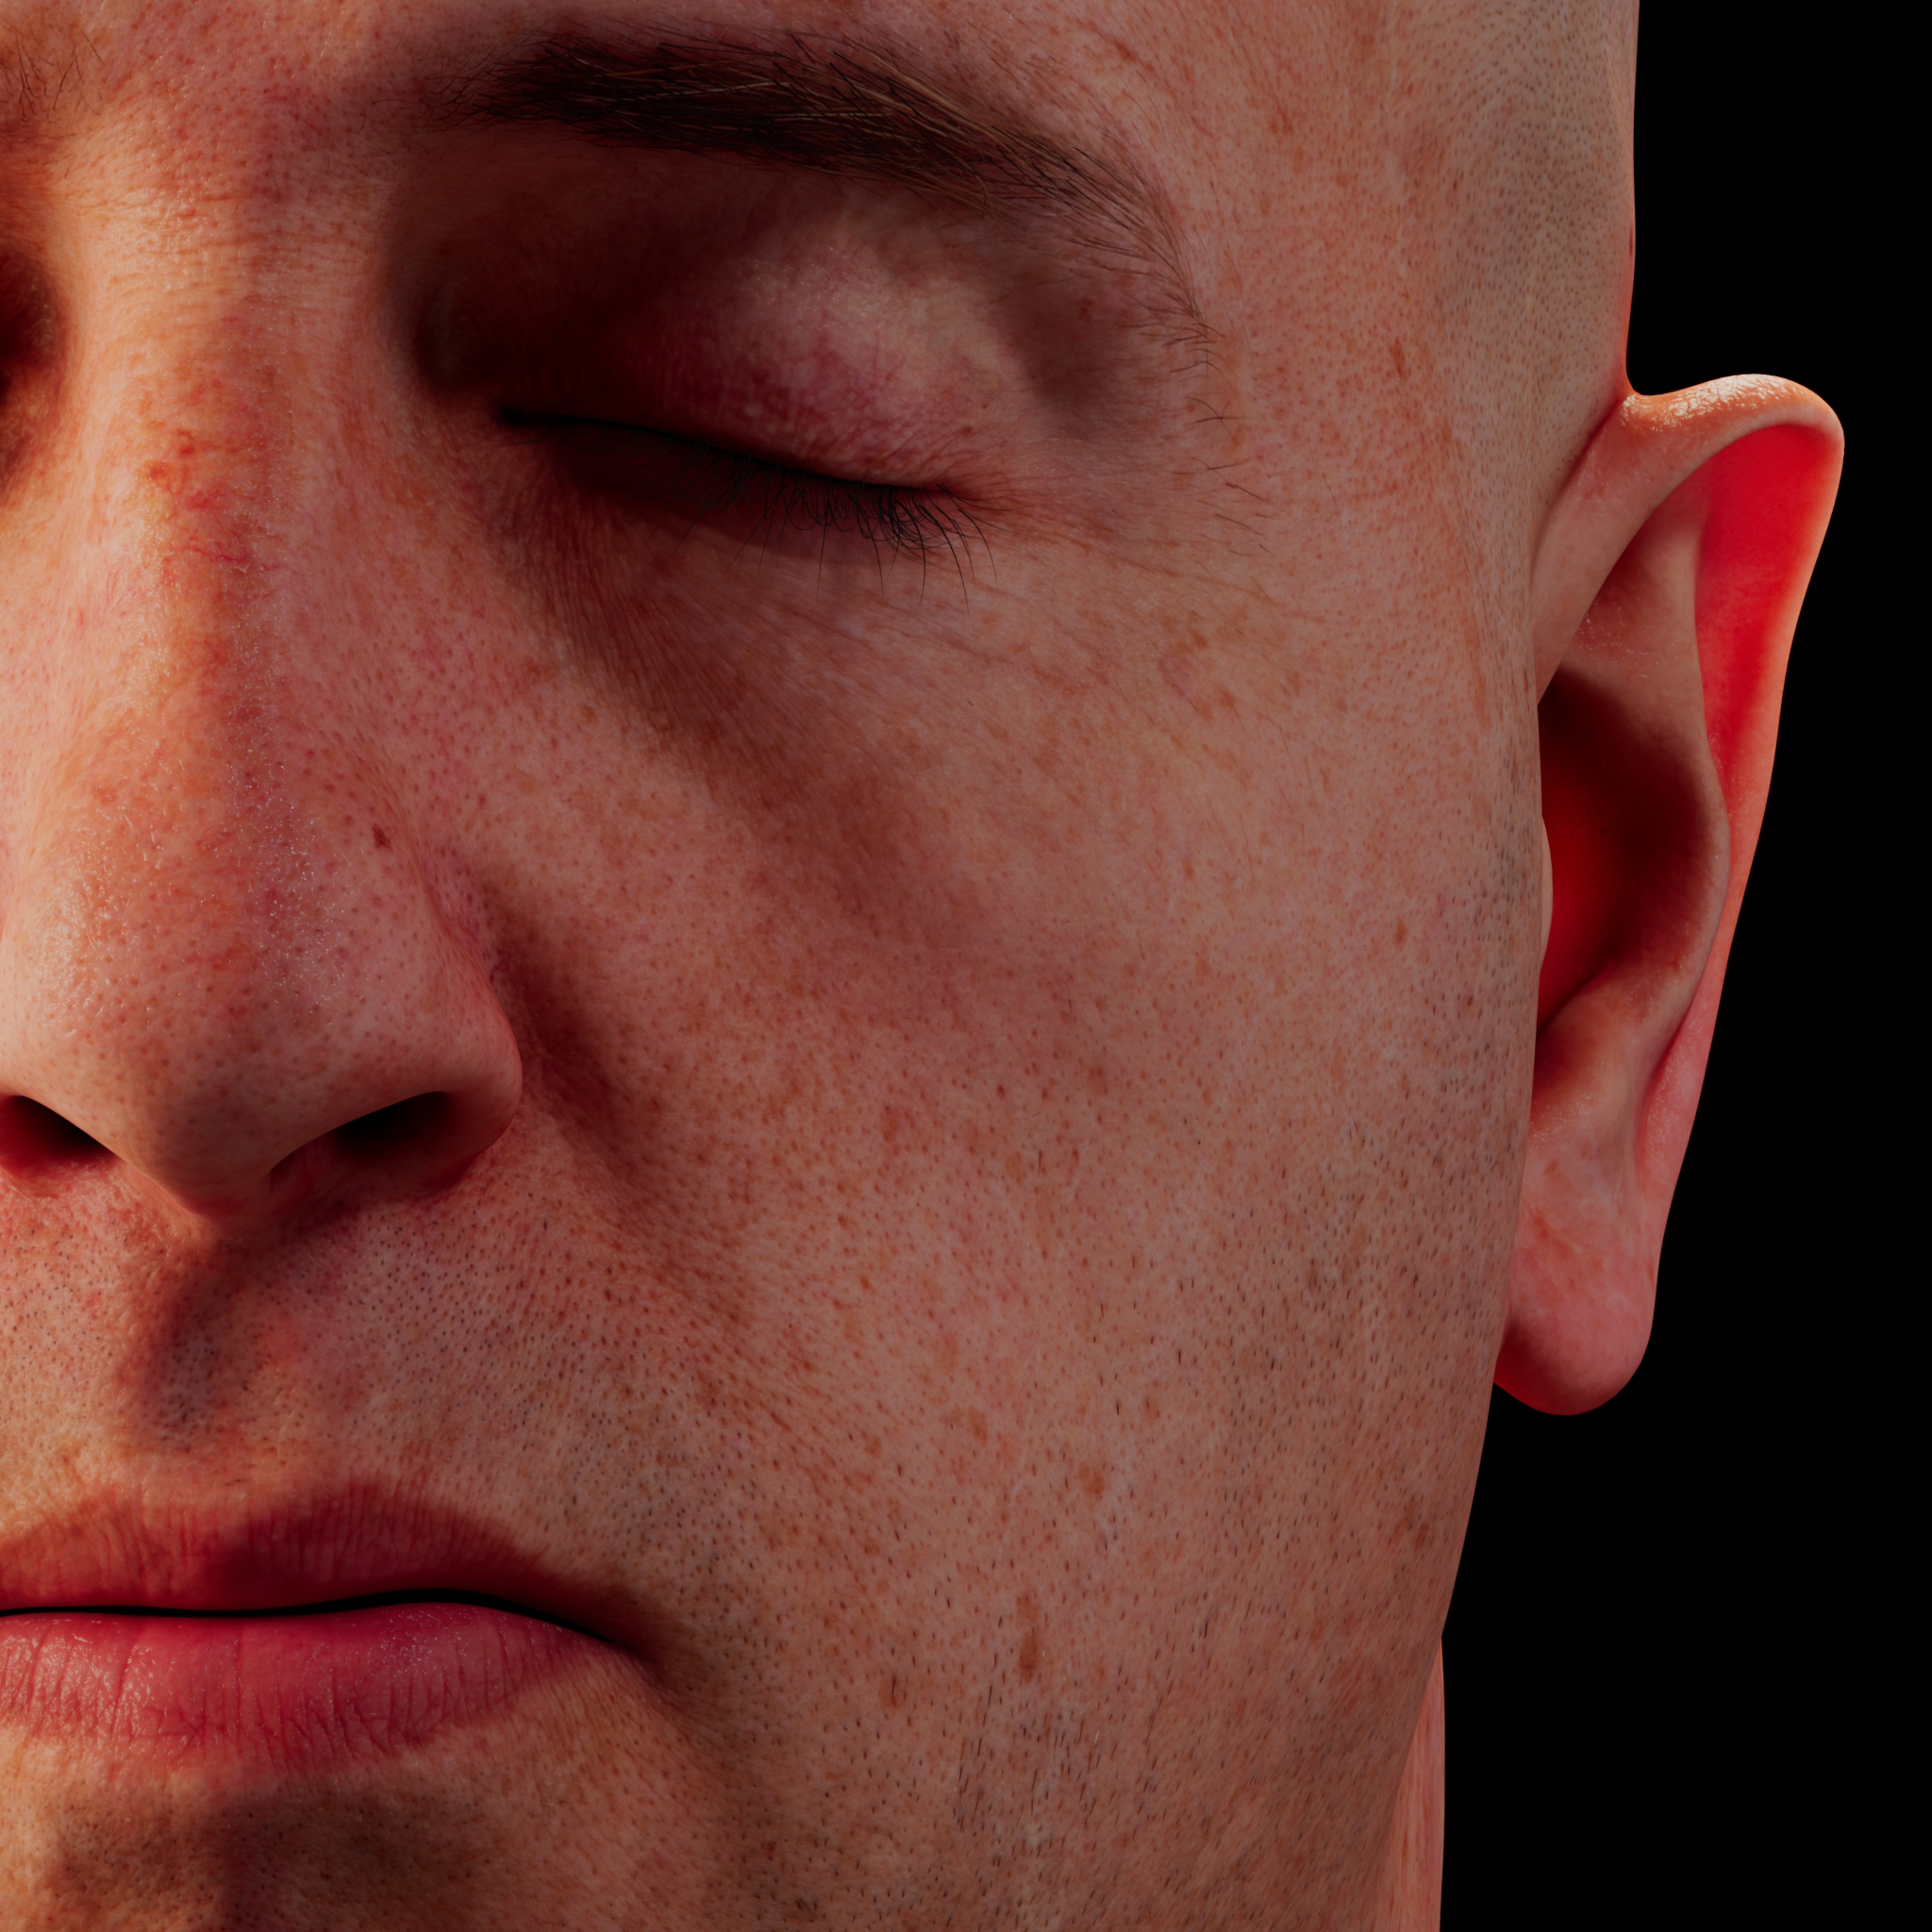
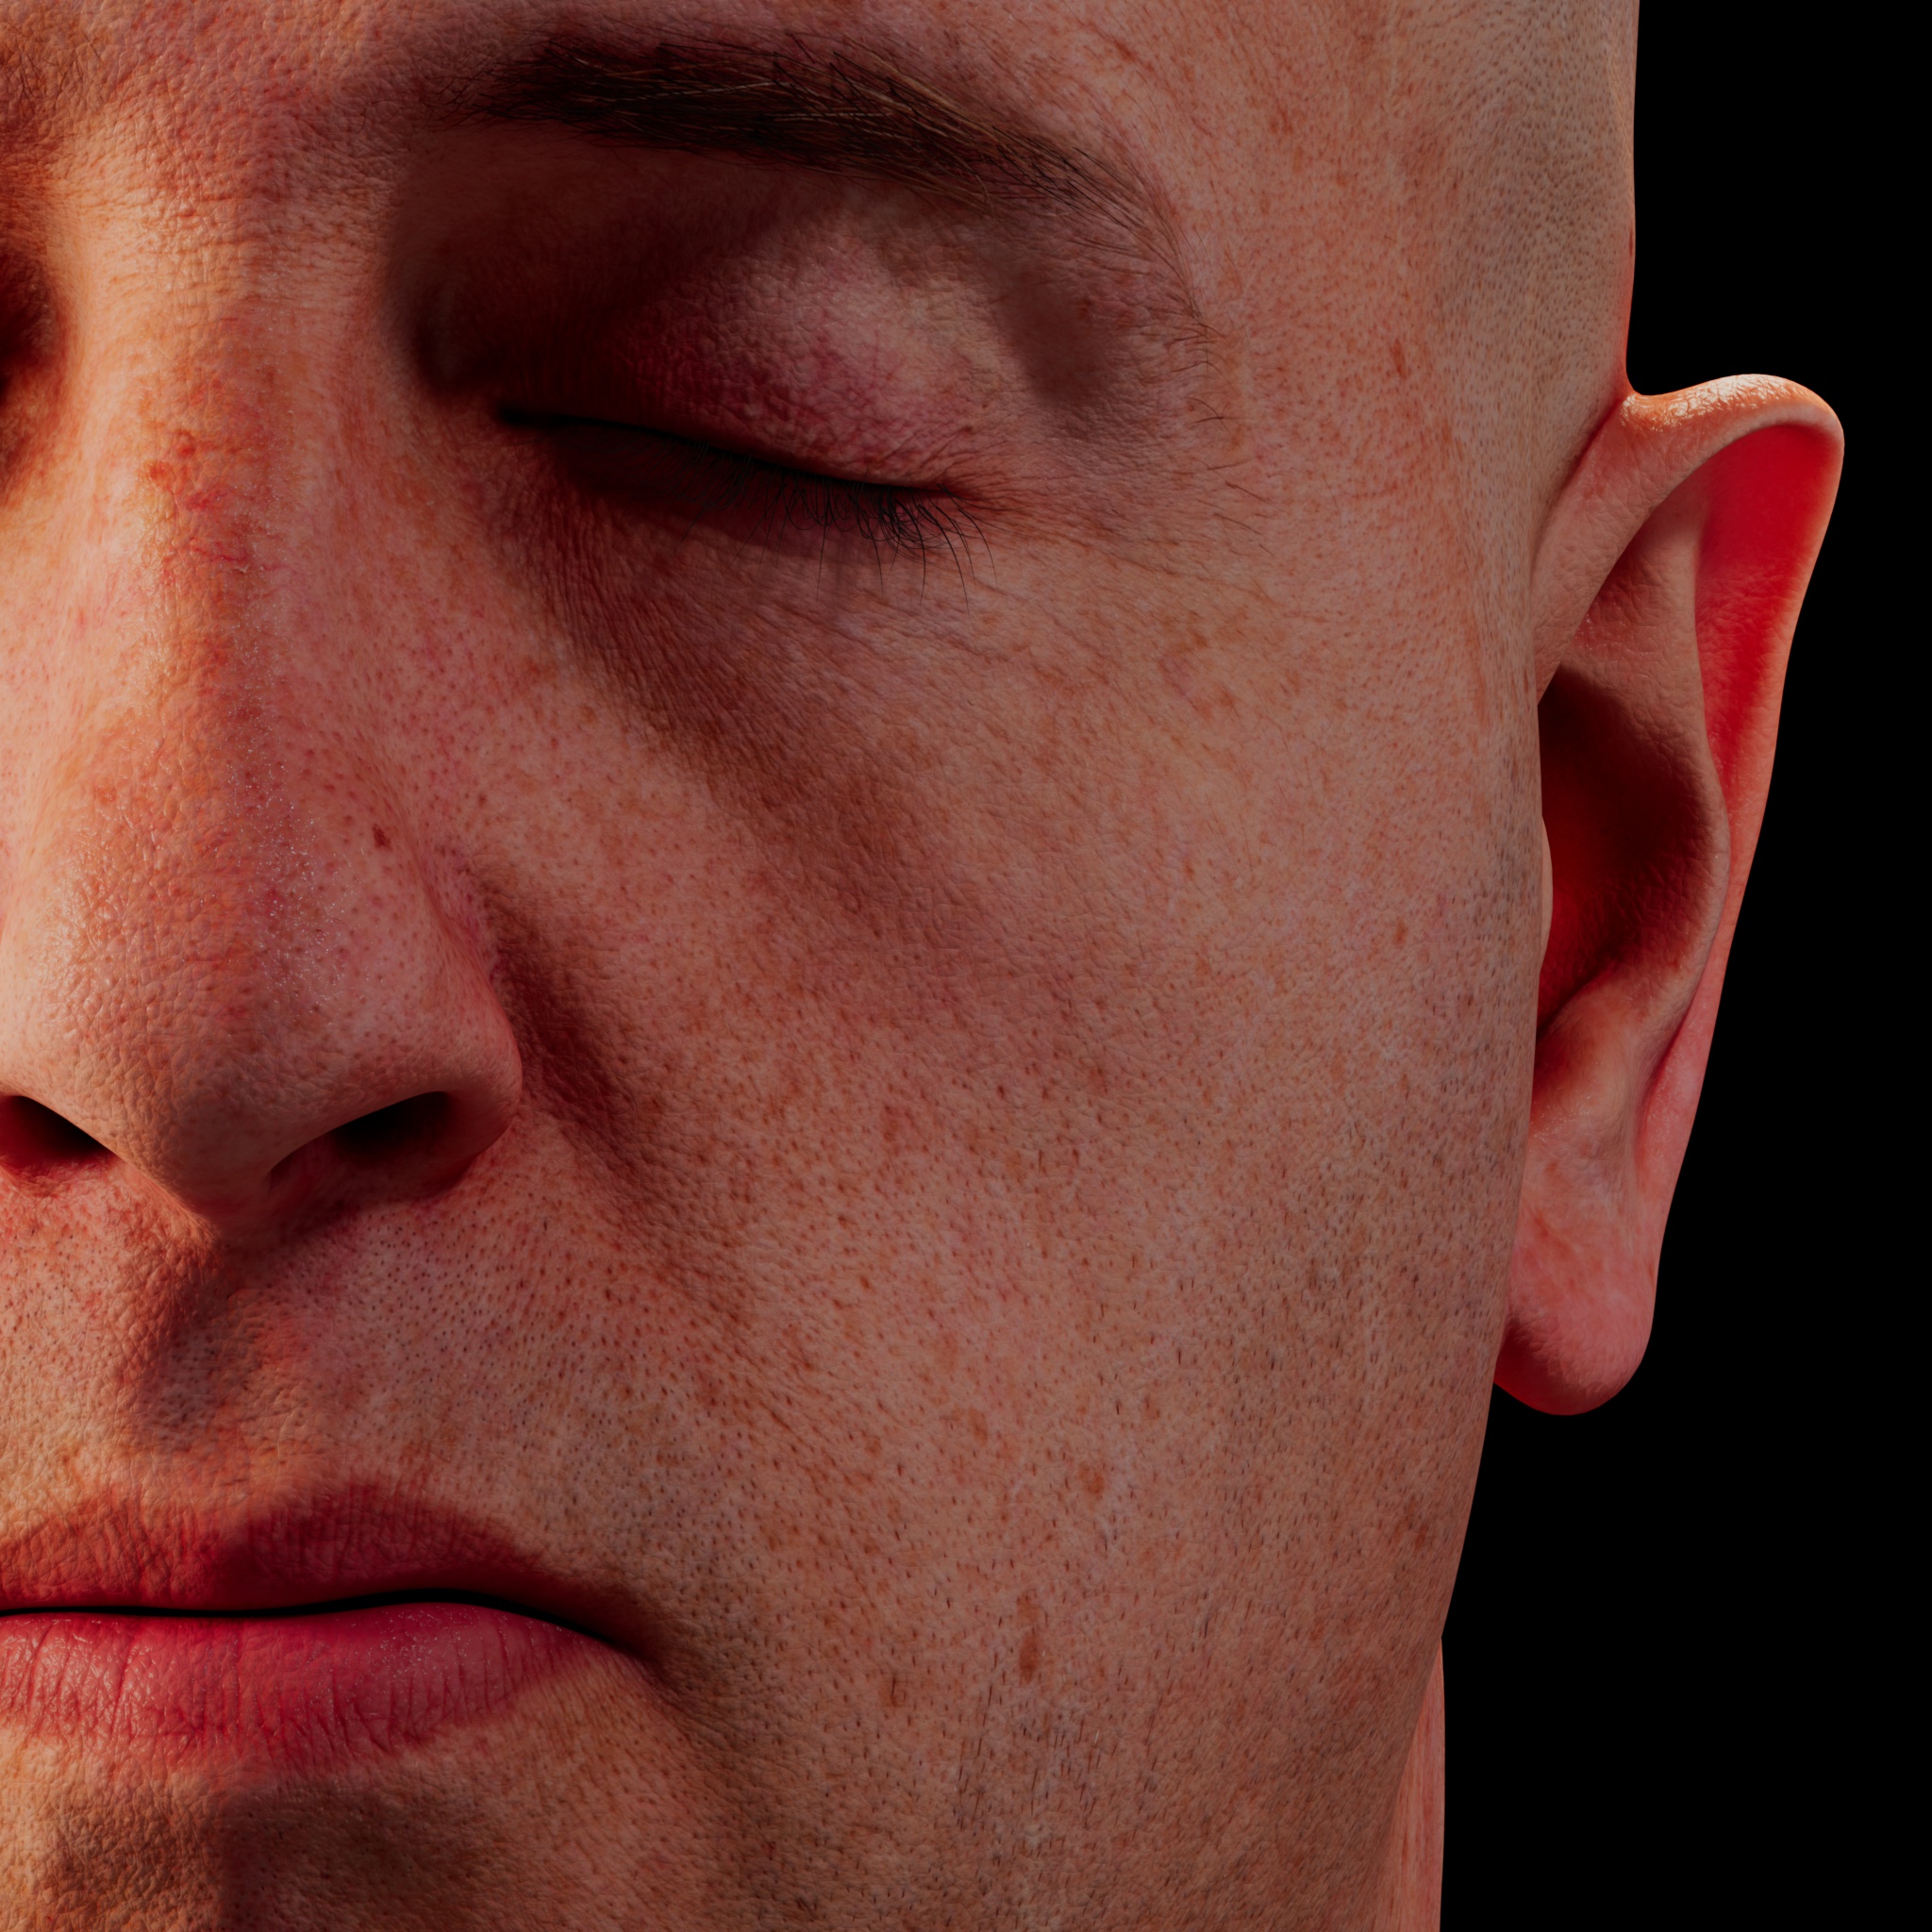
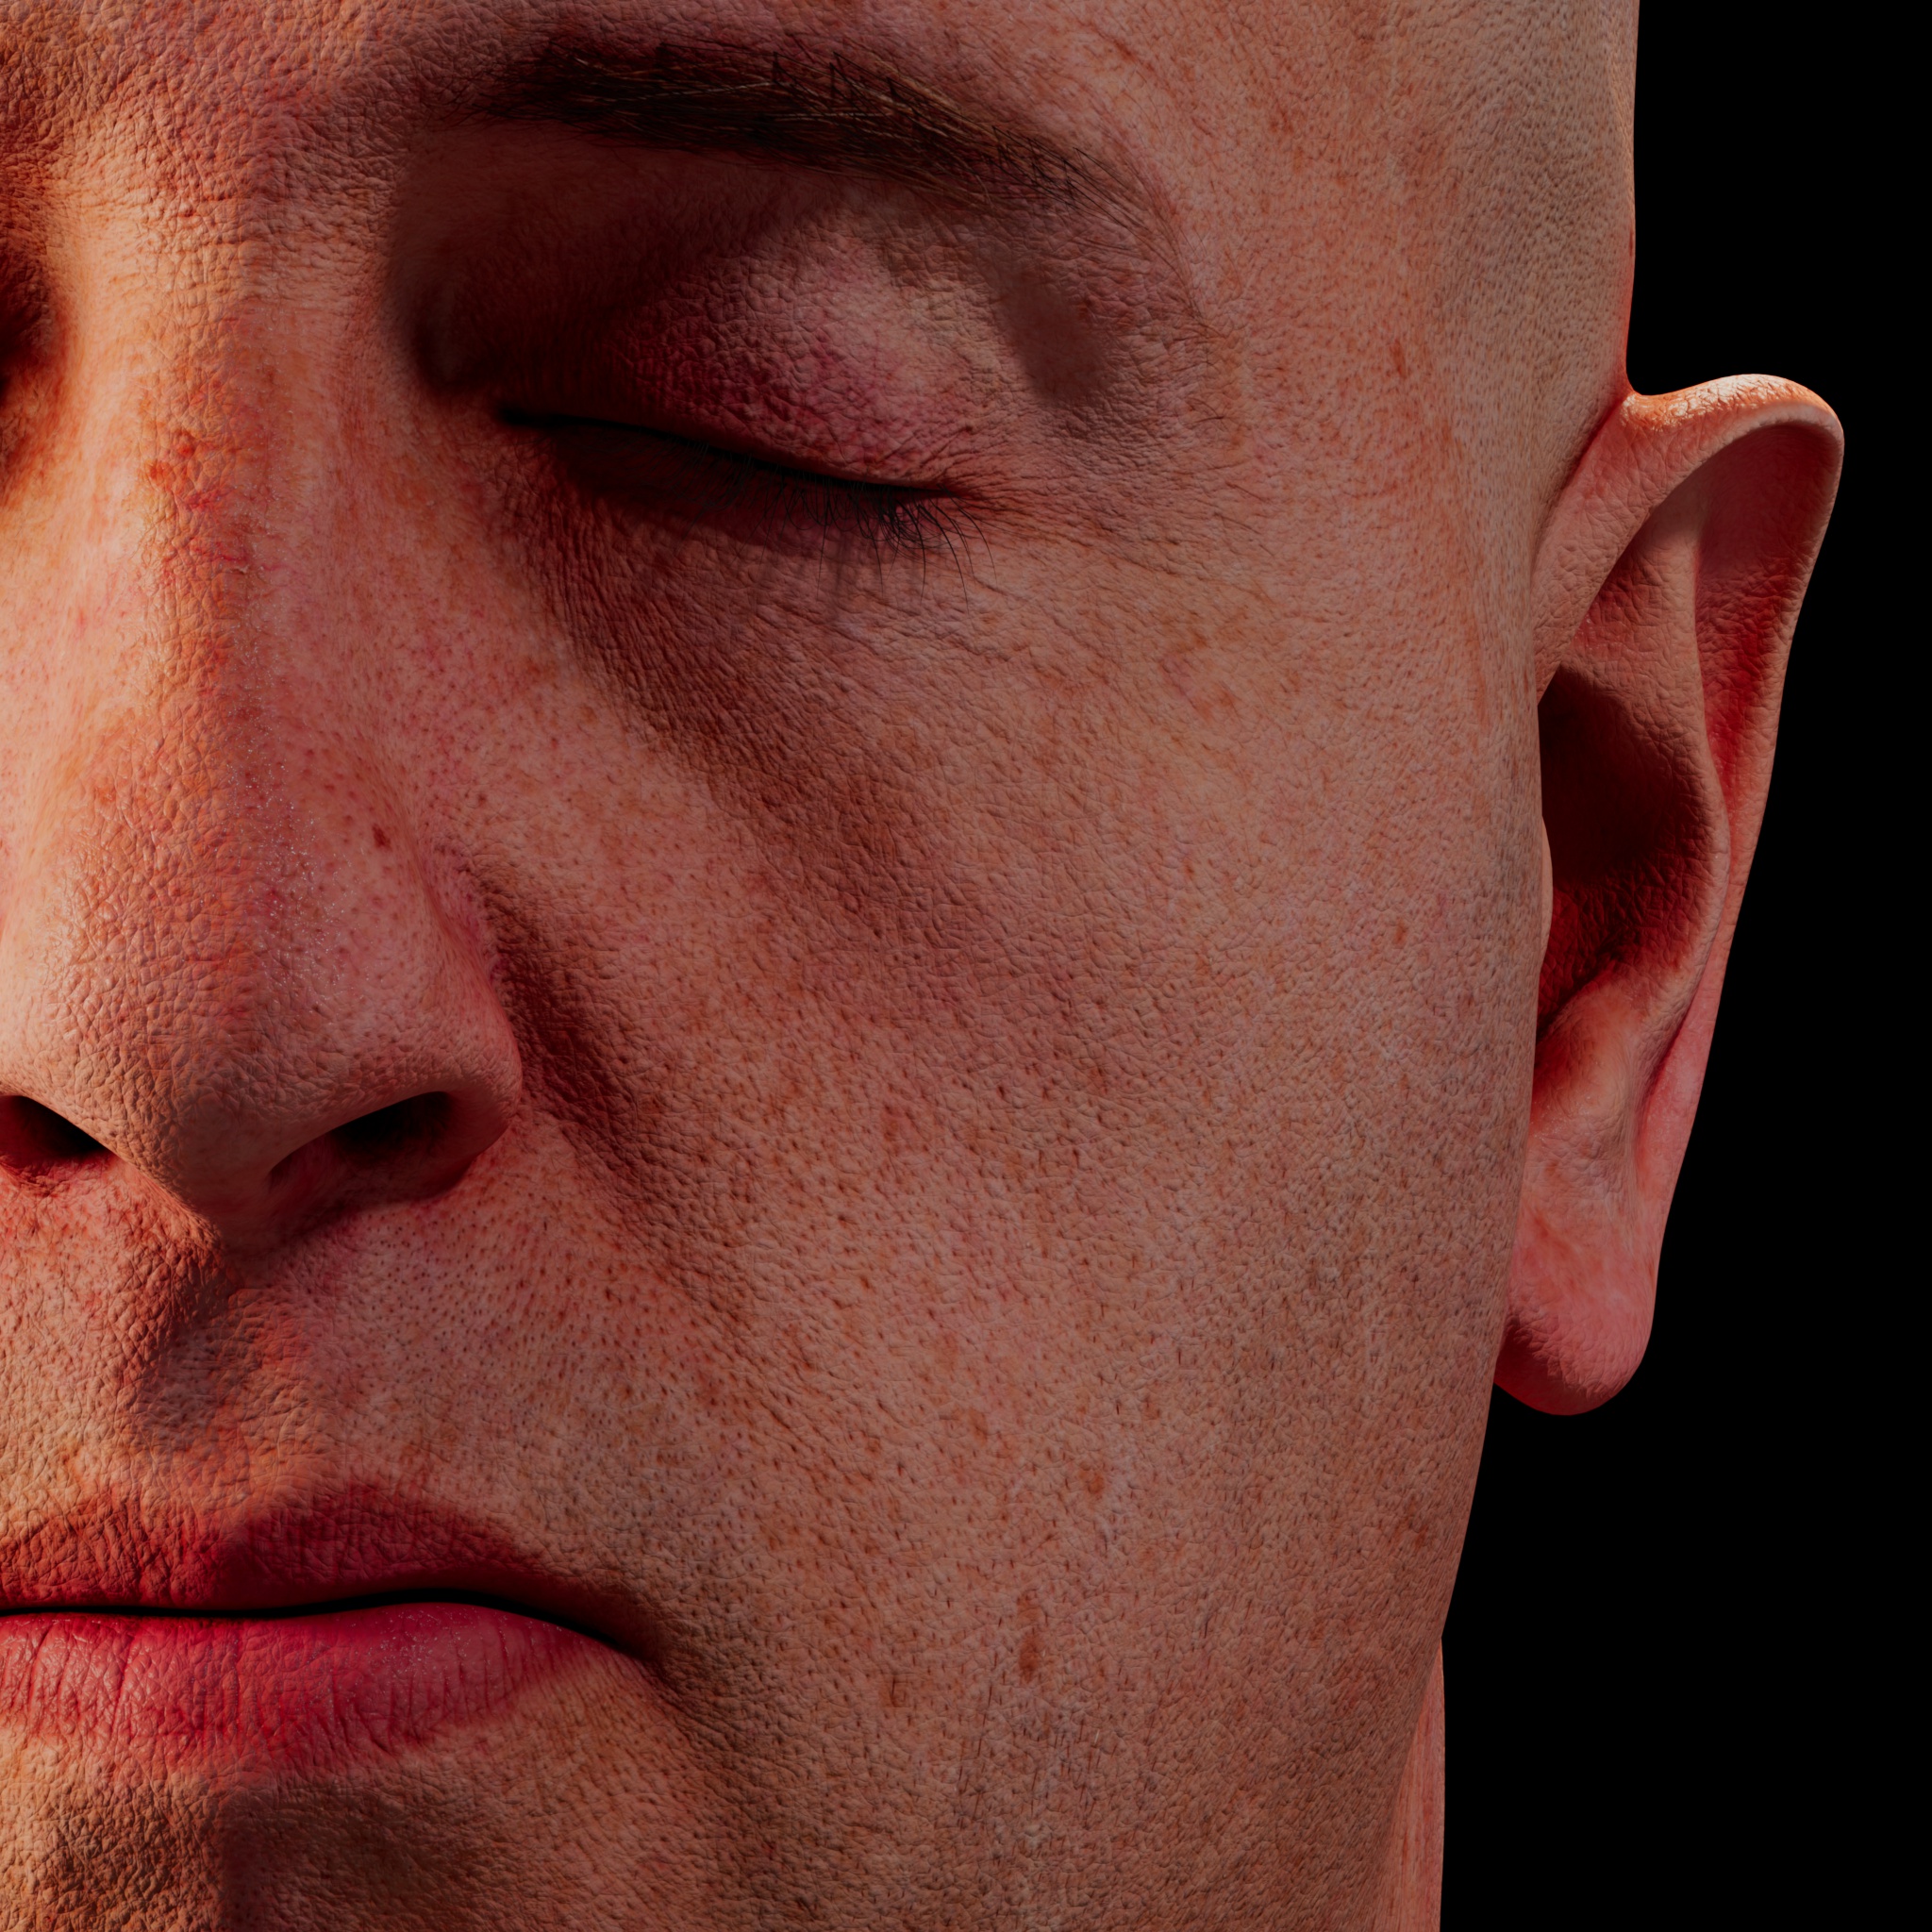
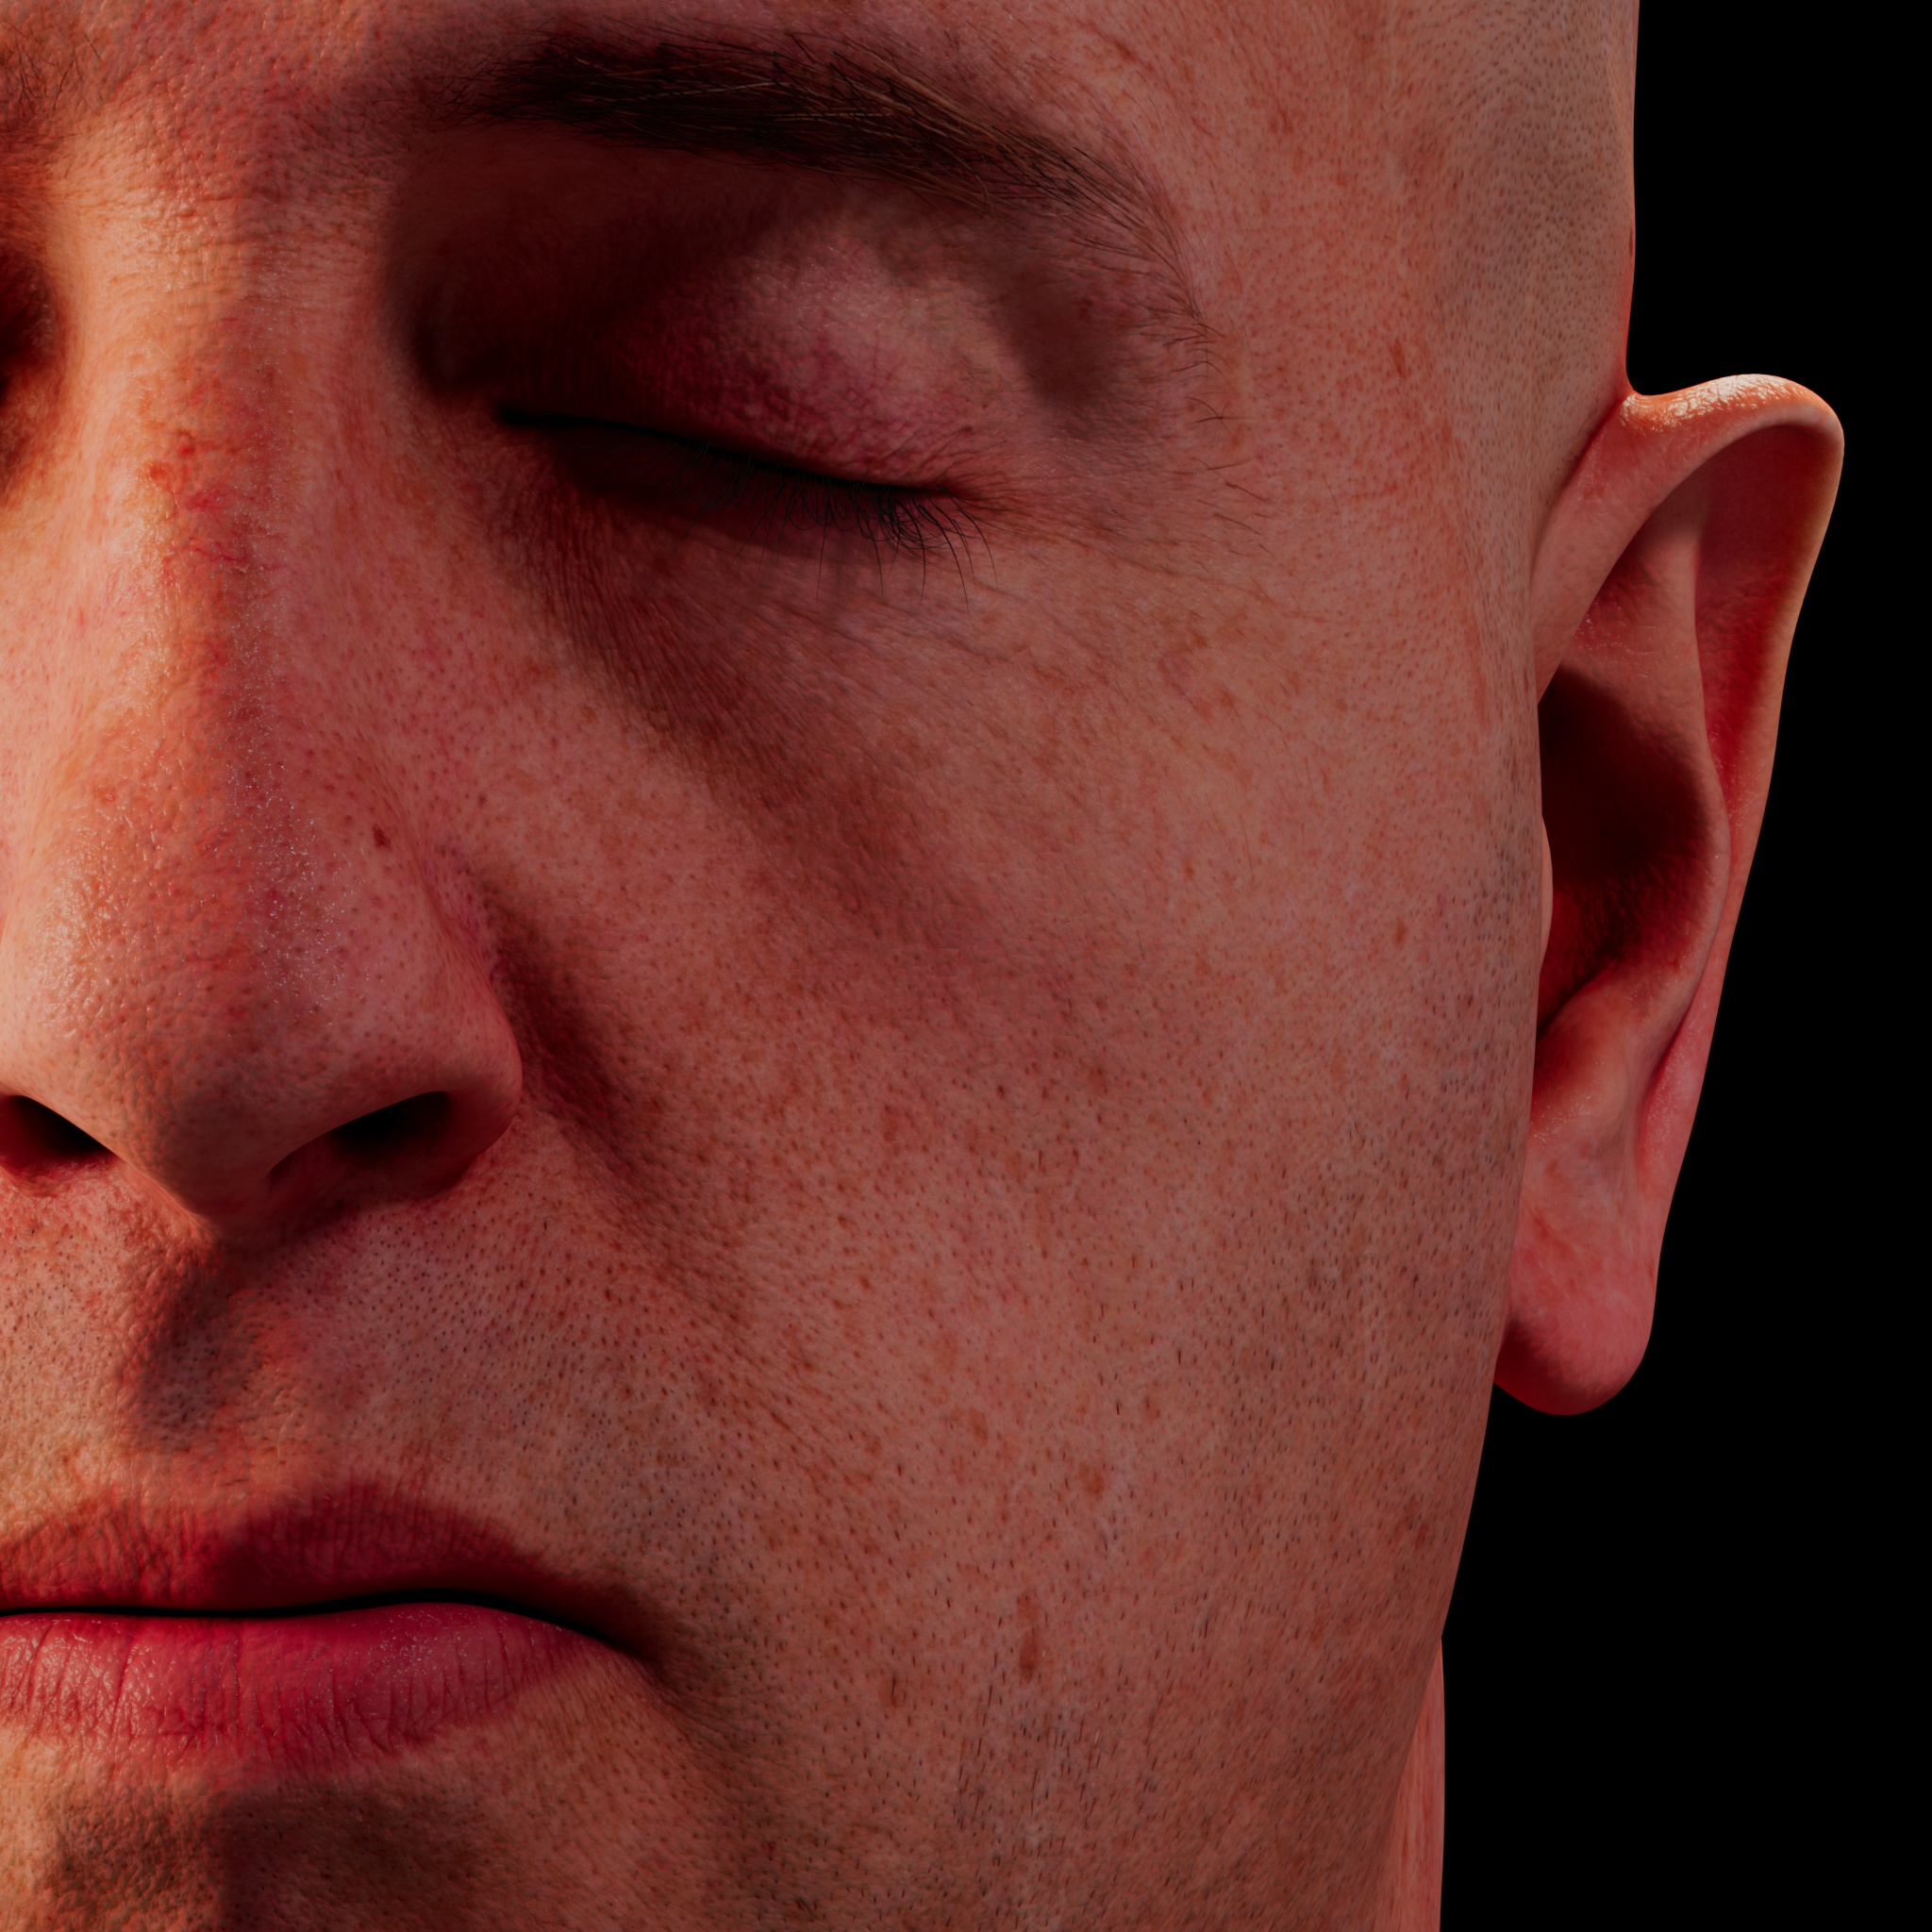
Now let's take a look at how each layer can contribute to the scattering effect. While the differences can be subtle at times, they are noticeable.
现在让我们来看看每一层是如何对散射效果做出贡献的。虽然这些差异有时是微妙的,但是是显而易见的。
|
|
|
|
|
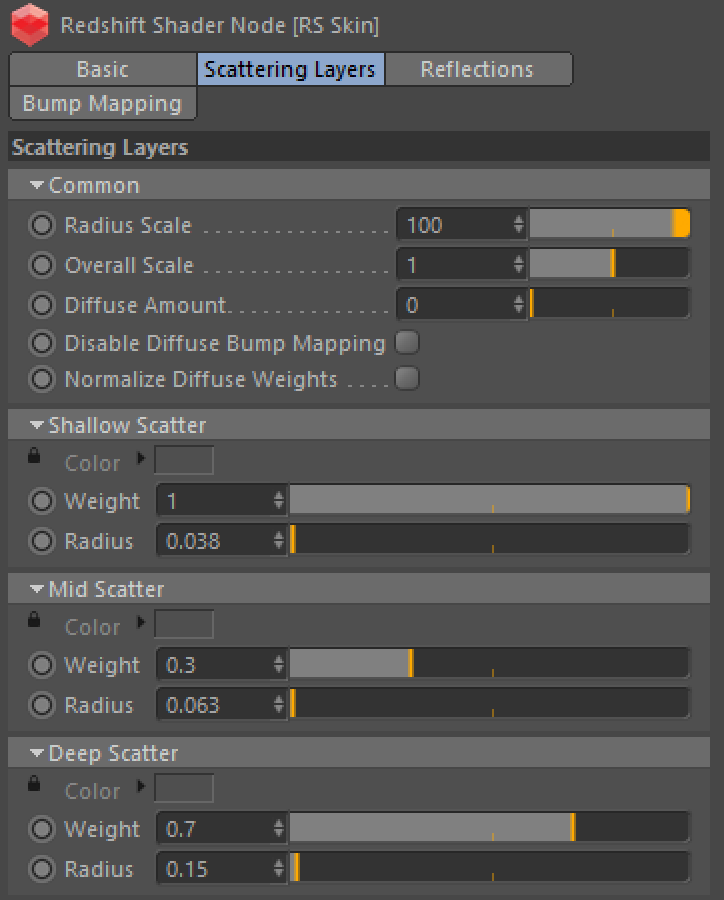
Initially, the mid and deep scattering layers have a radius of 0.0. The shallow layer effect can be seen here with a radius of 0.038. 最初,中深散射层的半径为0.0。这里可以看到半径为0.038的浅层效应。 |
Now adding the middle scattering layer radius (0.063), the face is starting to look less red, more neutral and realistic. 现在增加中间散射层半径(0.063) ,脸部开始看起来不那么红,更中性和现实。 |
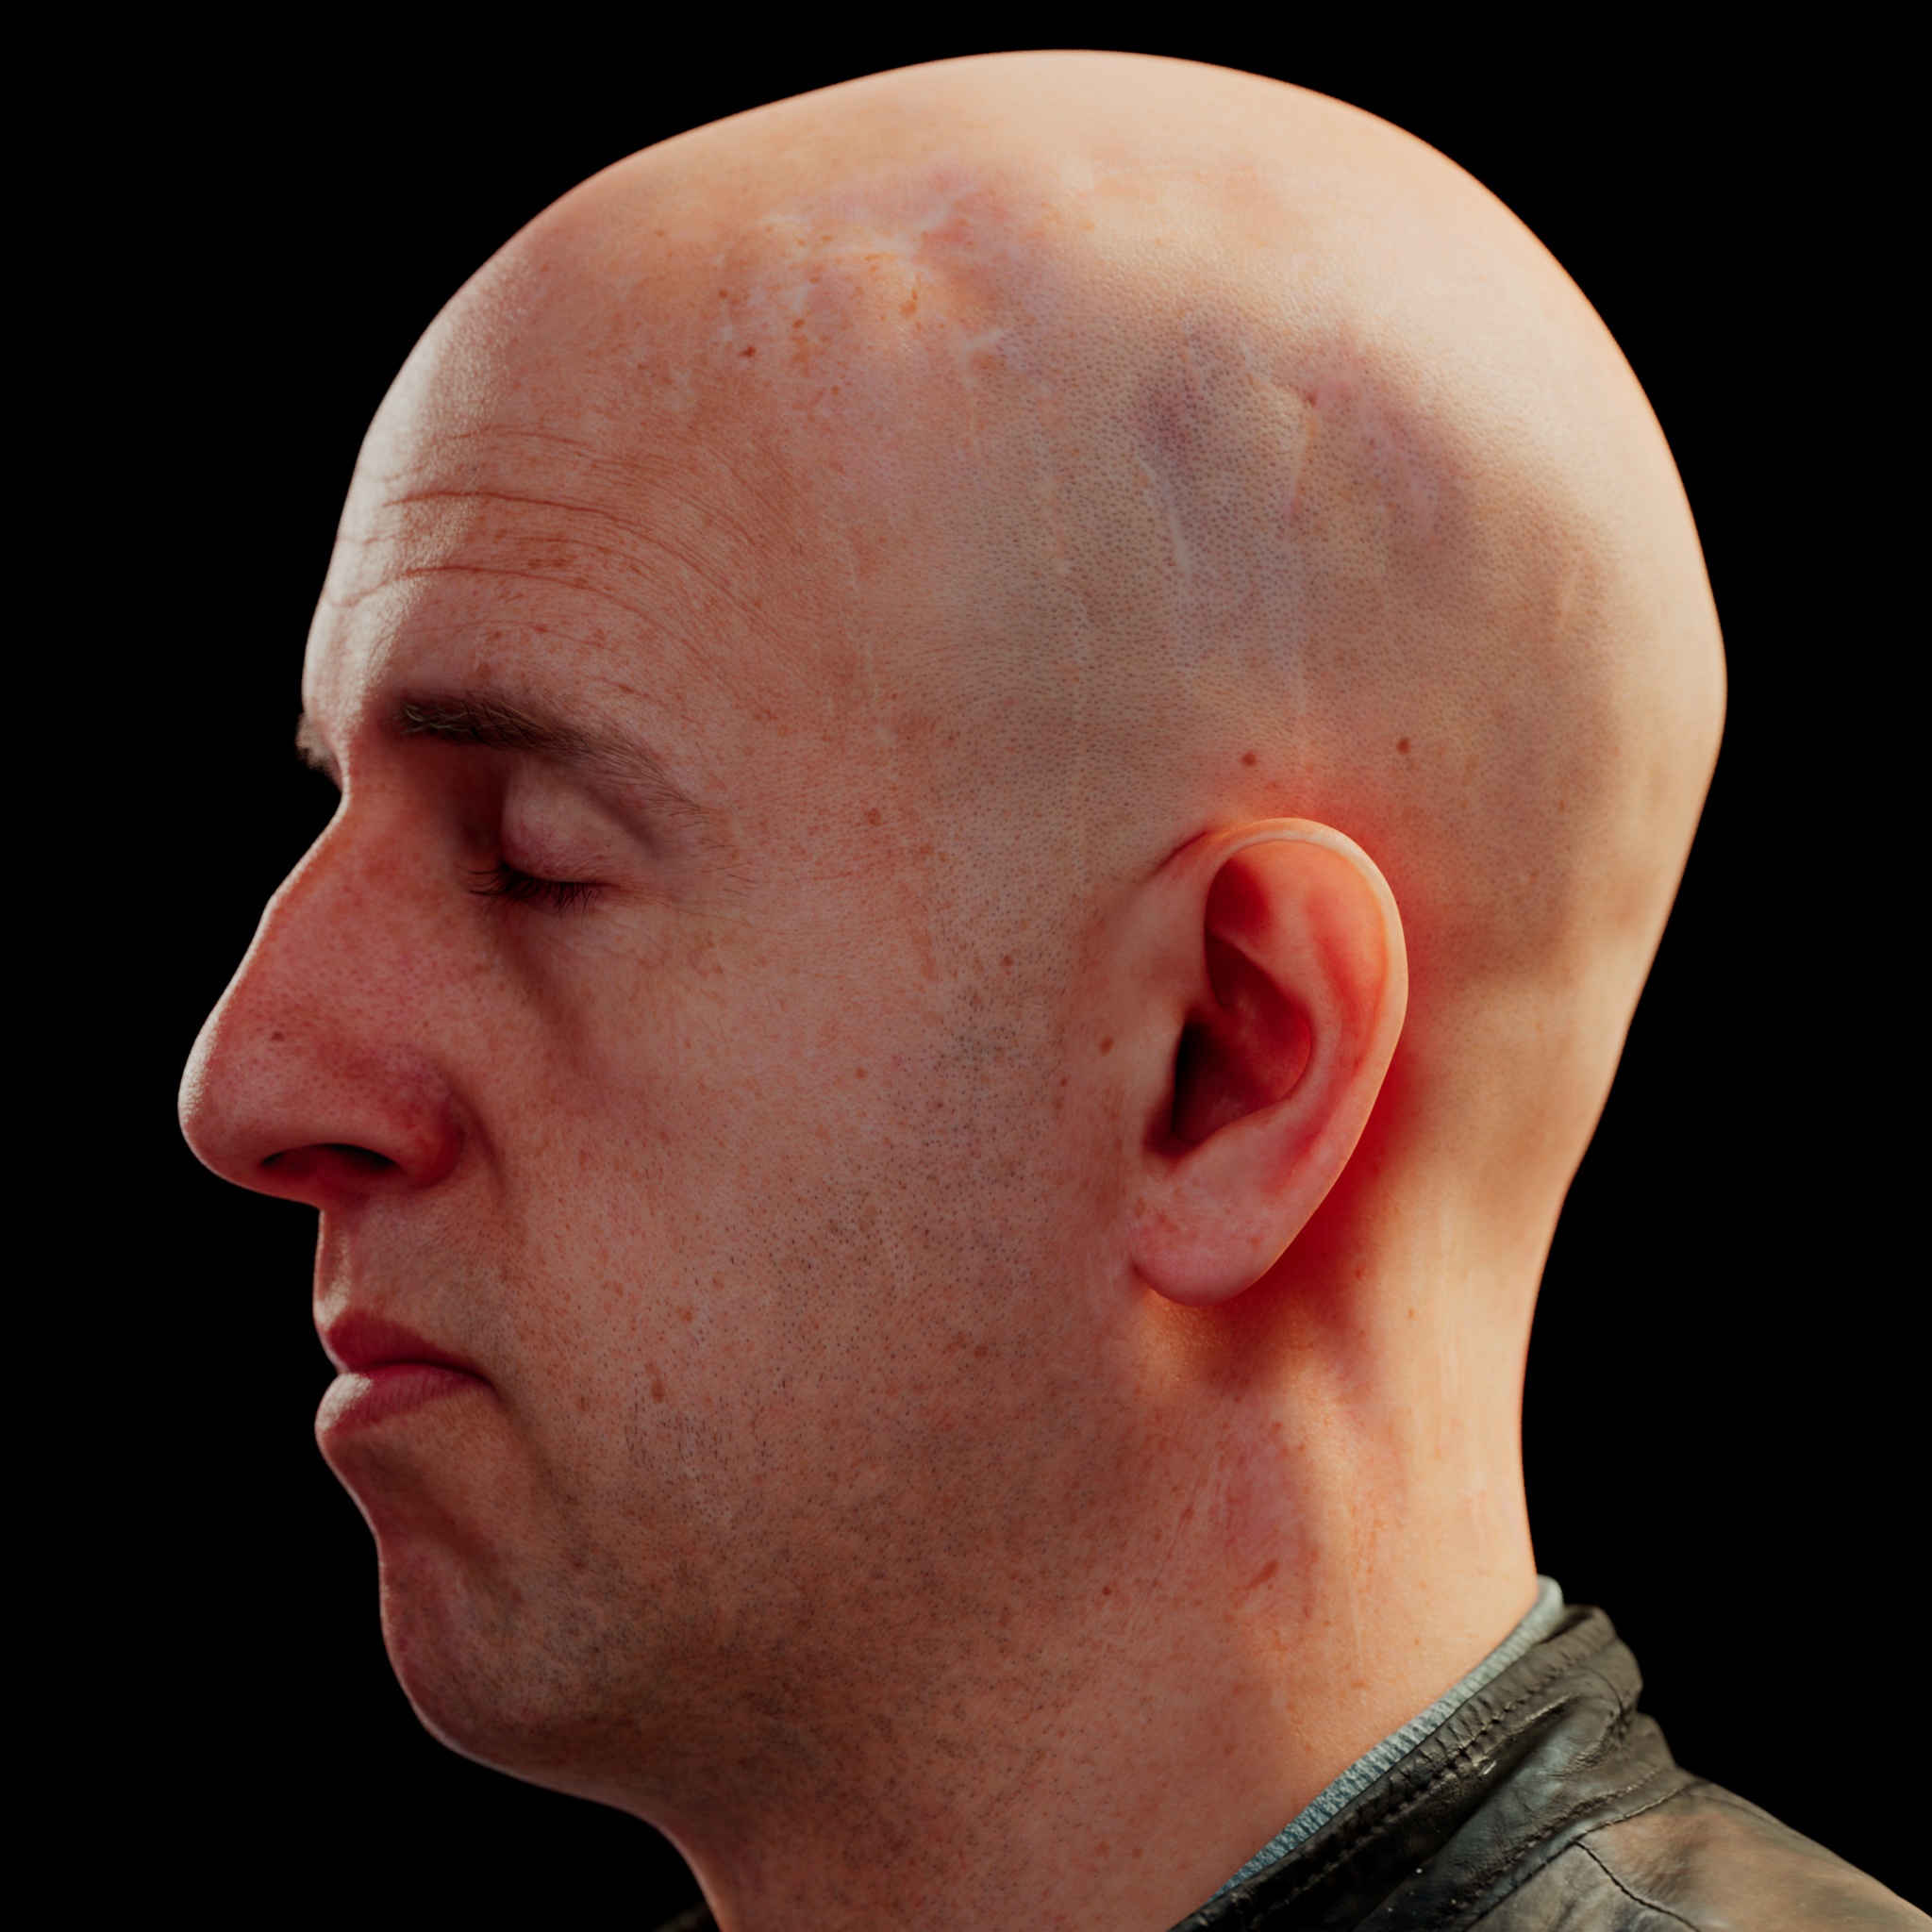
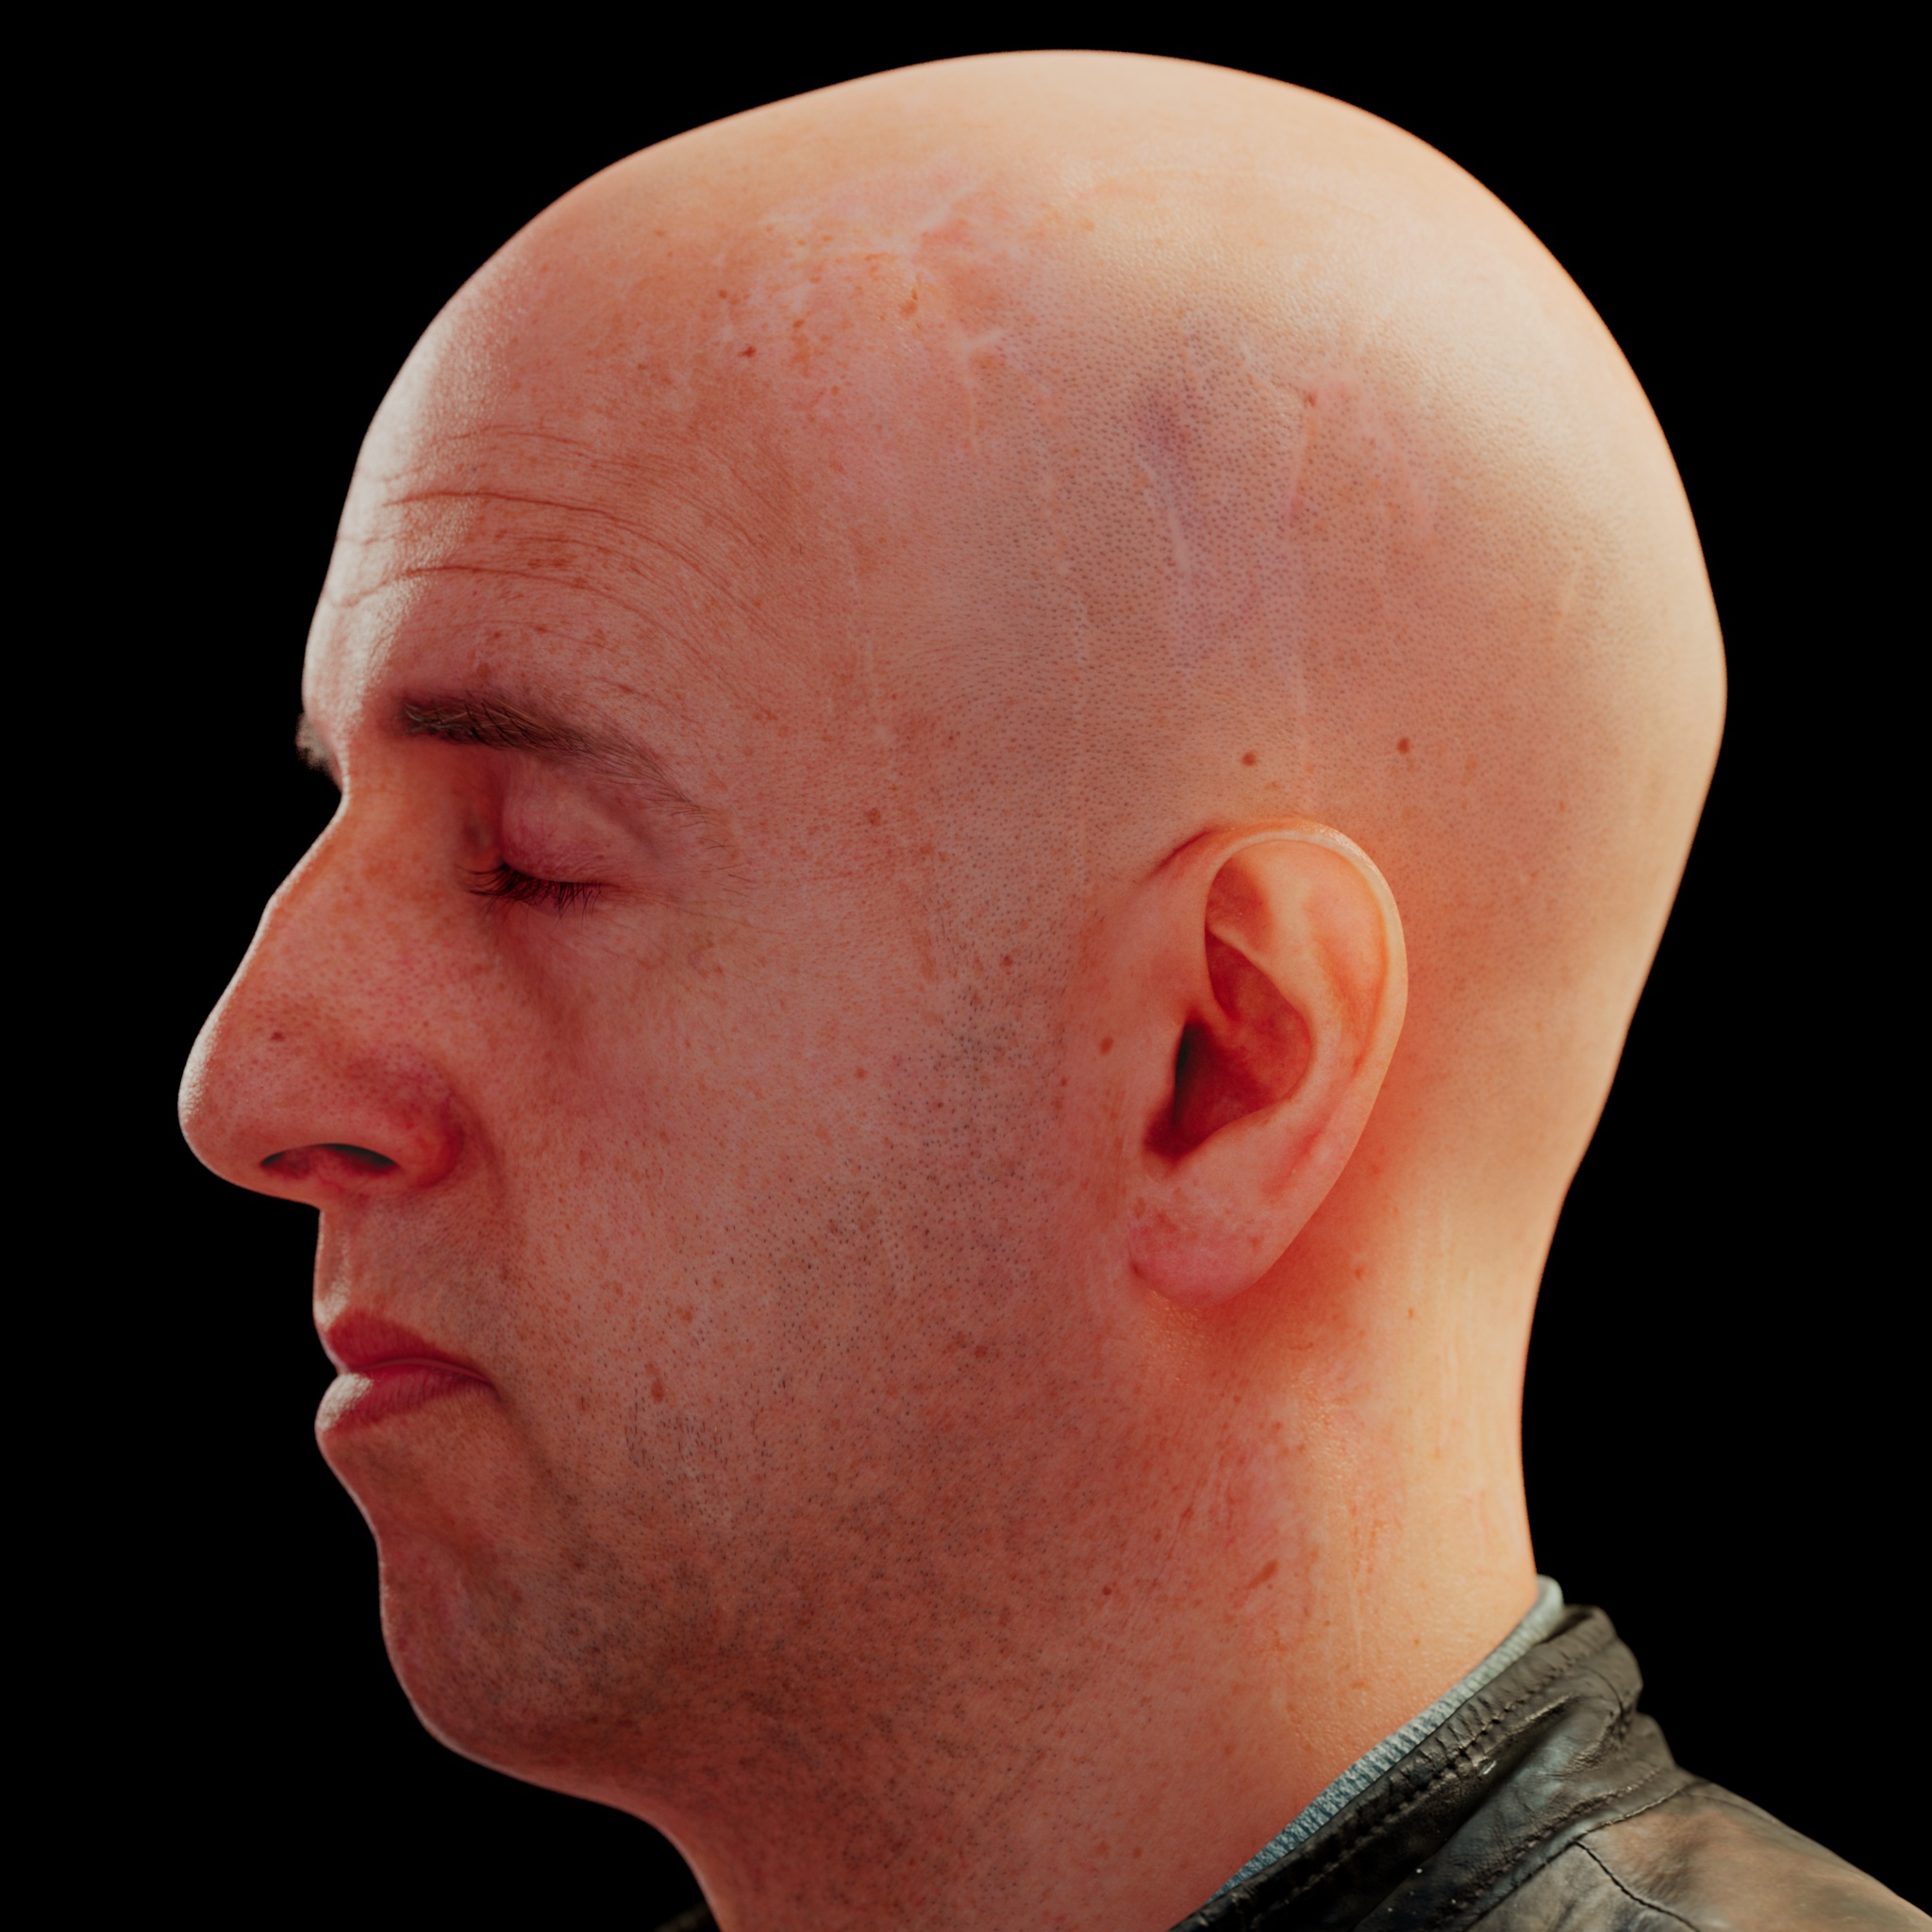
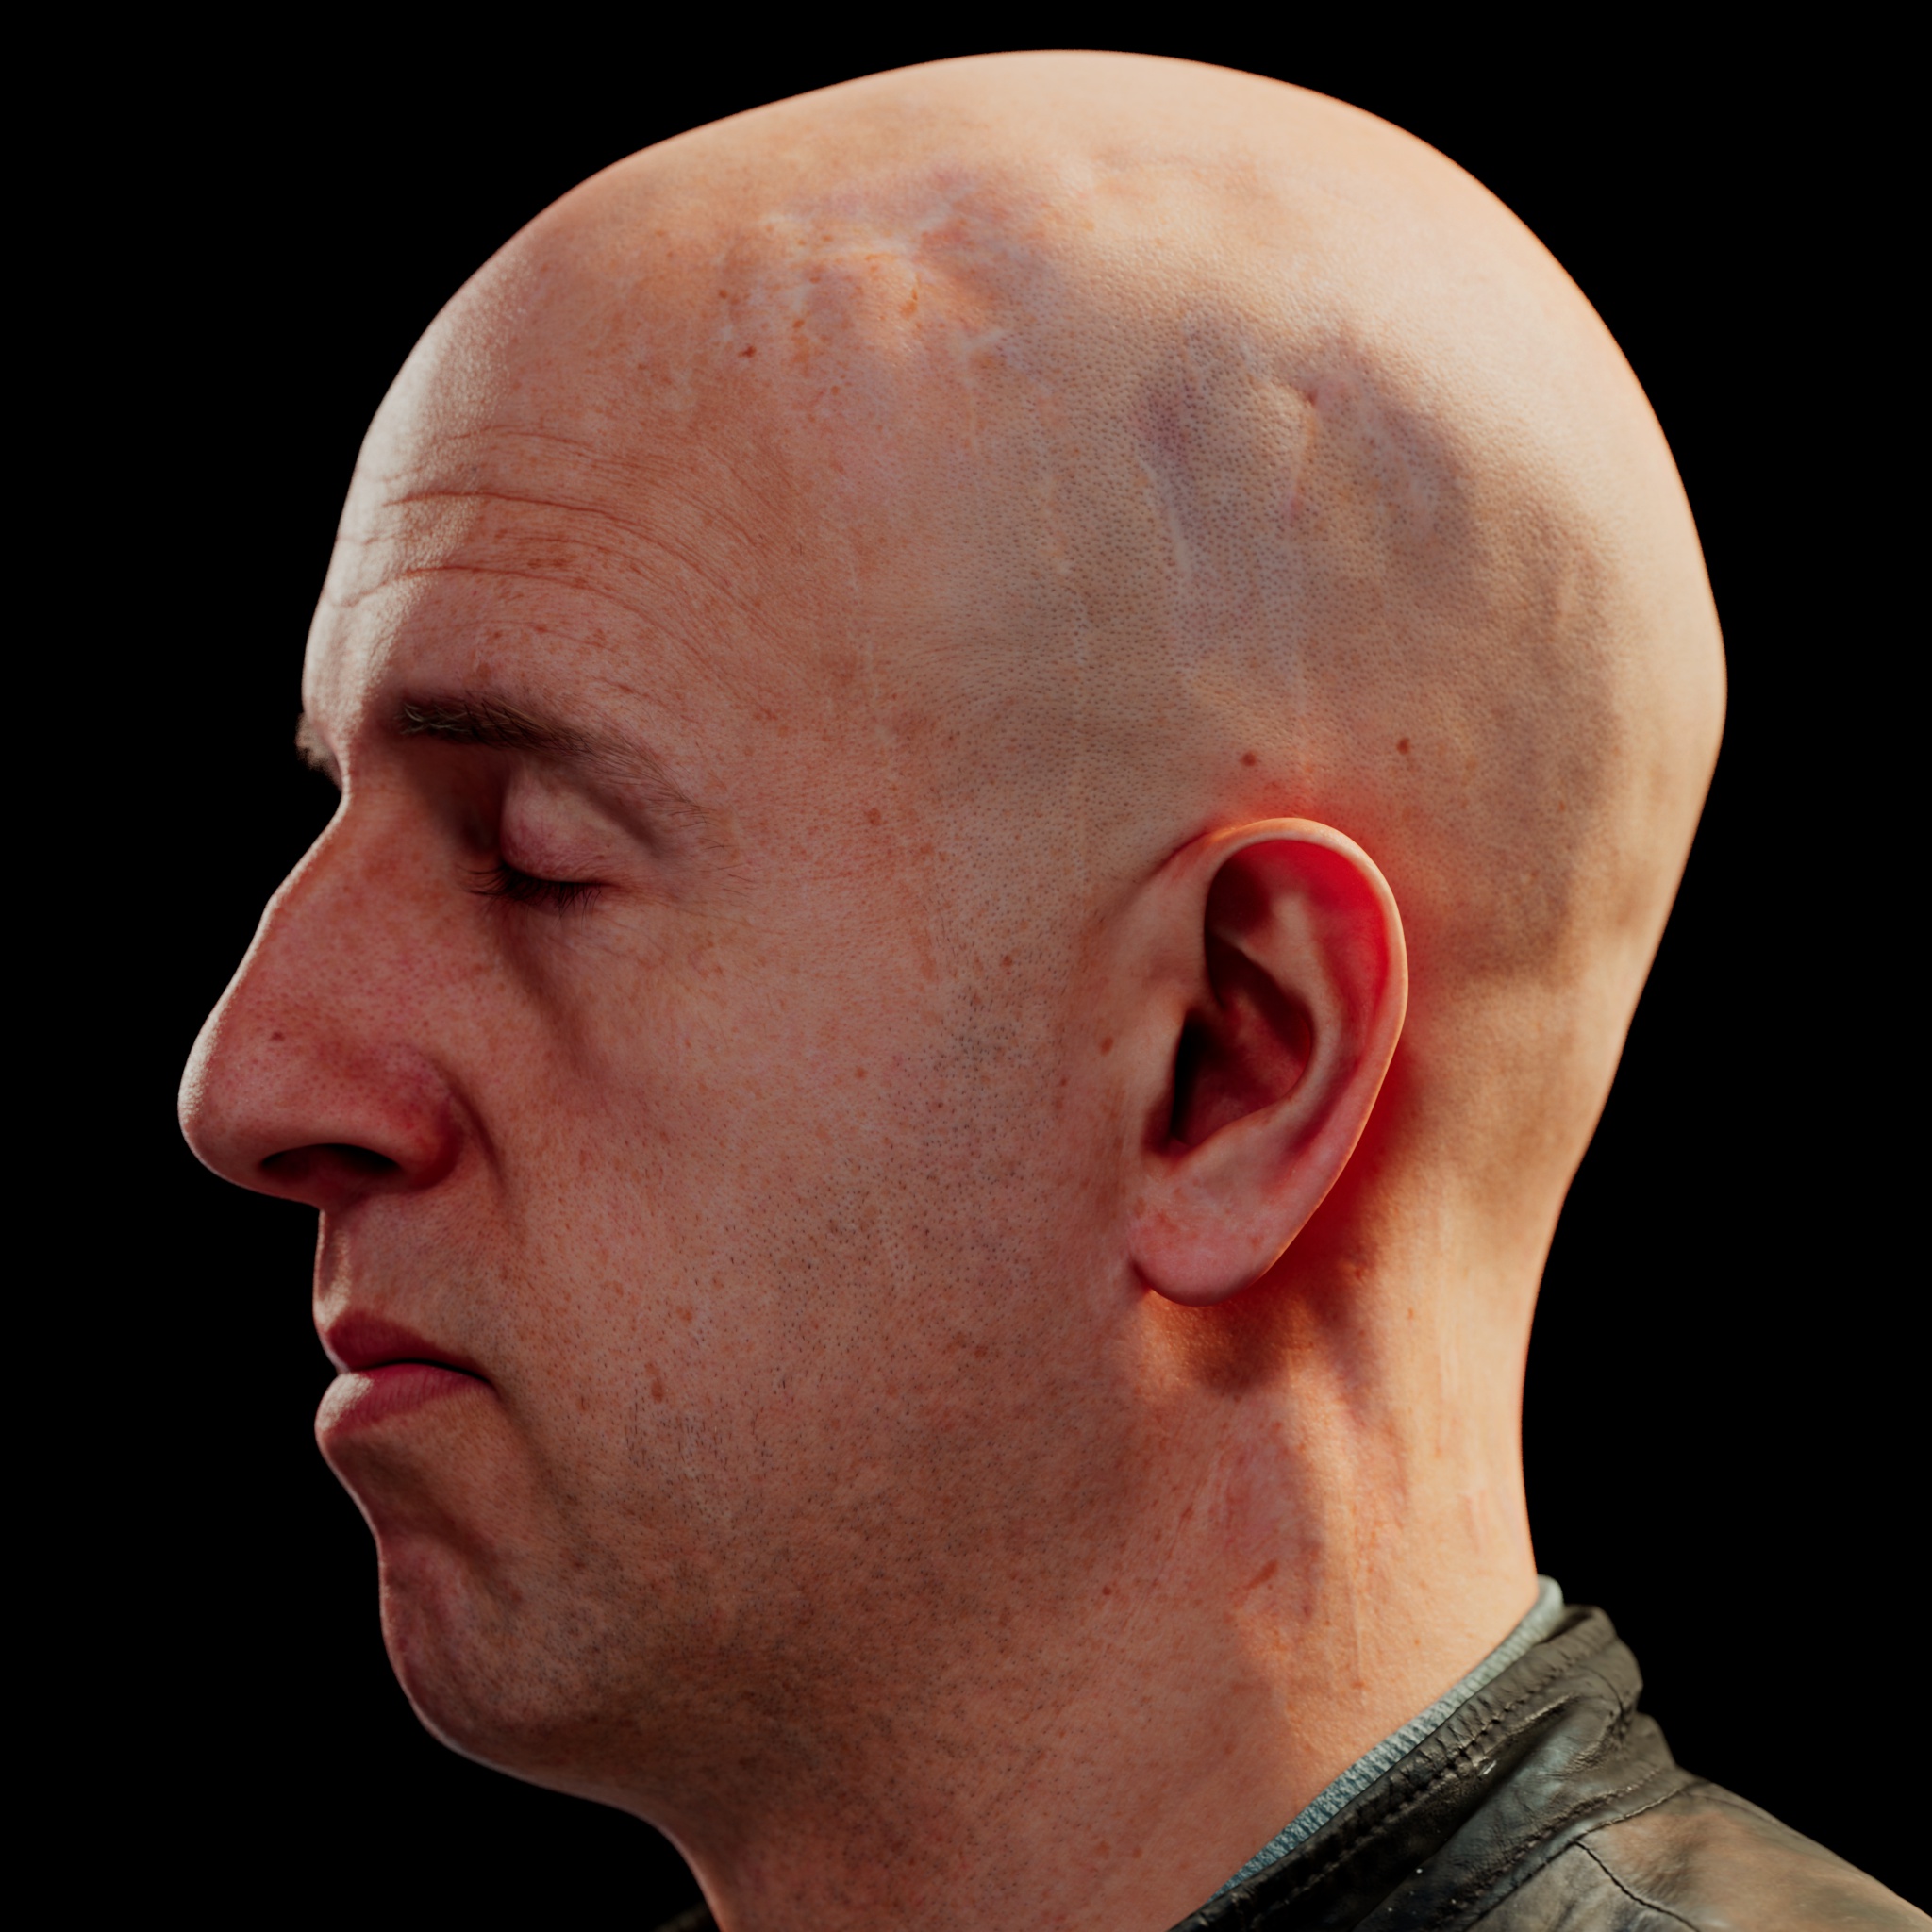
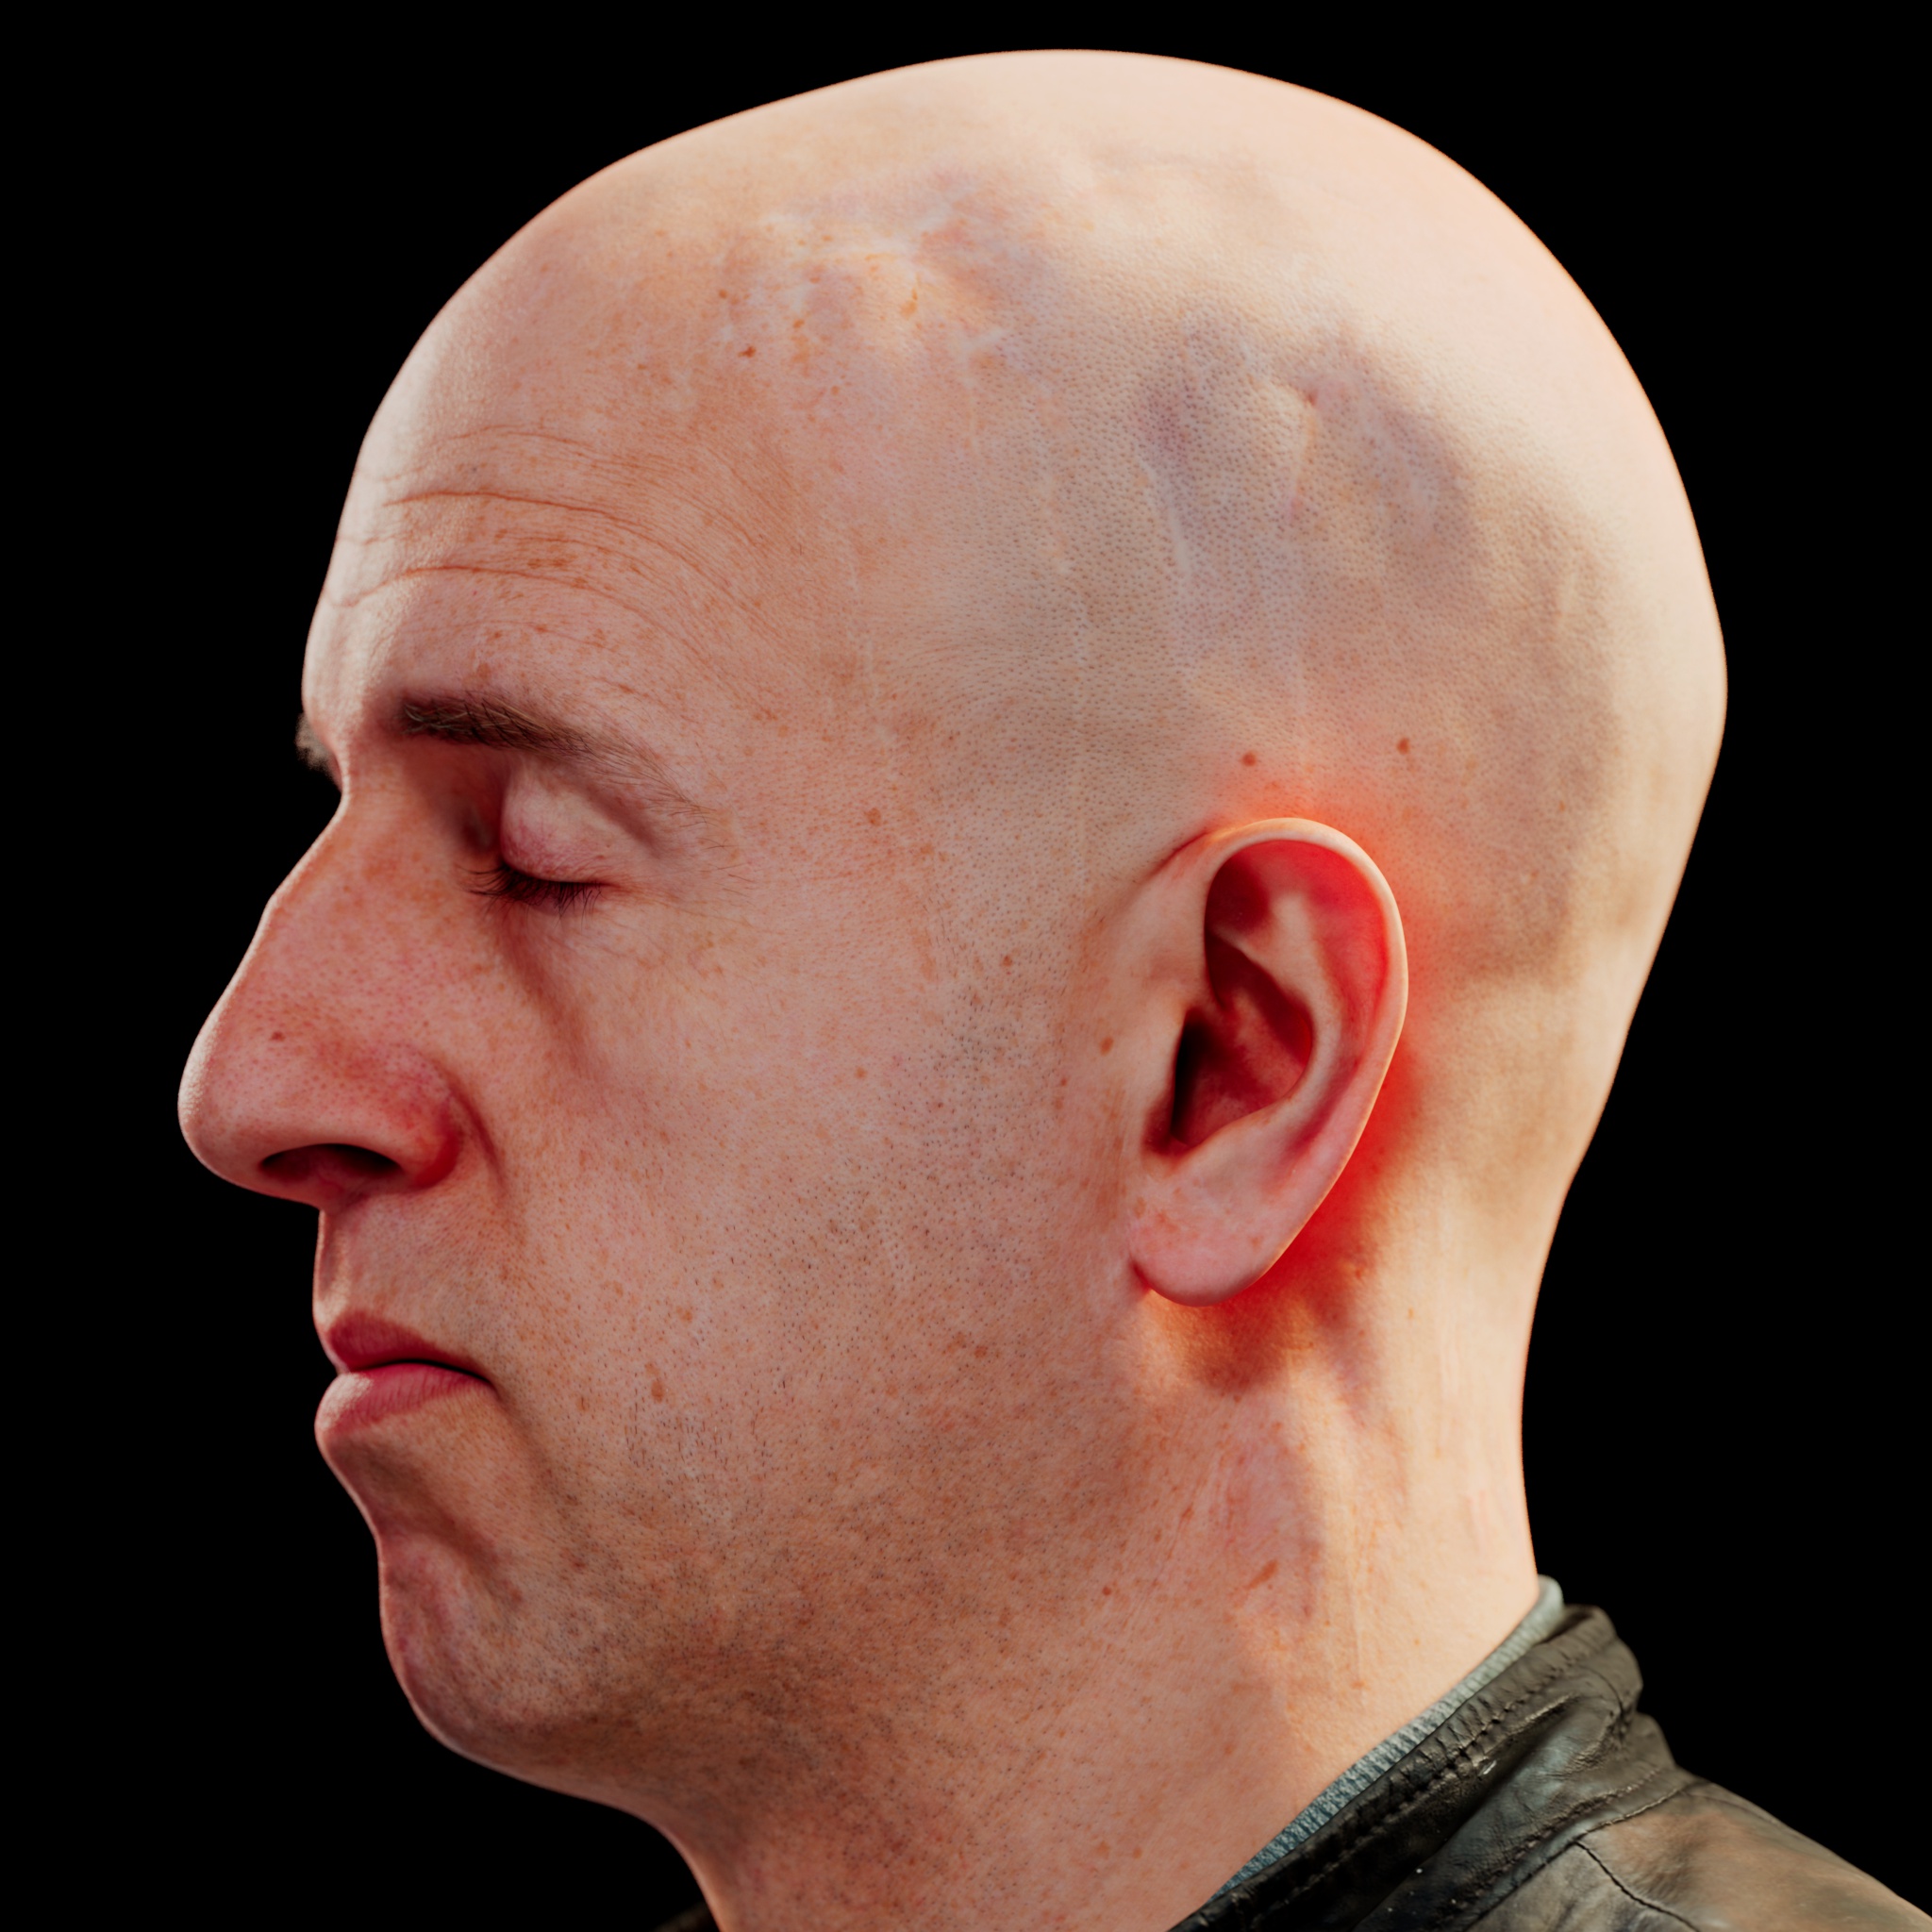
Adding the deep scattering radius (0.15) completes the look, giving us a much softer feel overall and adding in the backlit ear effect. 添加深度散射半径(0.15)完成的外观,给我们一个更柔和的感觉总体和增加背光耳朵效果。 |
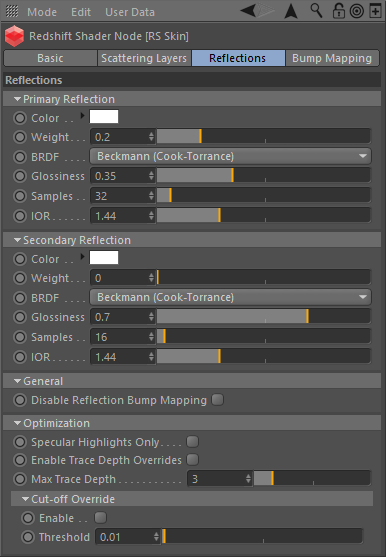
Reflections
反思
Primary / Secondary Reflection
主/次级反射
Color
颜色
This defines the color of the reflection.
这定义了反射的颜色。
Weight
重量
This scales the overall amount of the reflection.
这可以缩放反射的总量。
BRDF
Allows you to choose the technique for simulating physically correct rough reflections. Beckmann is generally considered the standard for a good range of materials, but GGX has a wide specular tail, which is good for chrome materials.
允许您选择模拟物理上正确的粗糙反射的技术。贝克曼通常被认为是一个很好的材料范围的标准,但 GGX 有一个广泛的镜面尾巴,这是很好的铬材料。
- Beckmann (Cook-Torrance) 贝克曼(库克-托伦斯)
- GGX
- Ashikhmin-Shirley
Glossiness
光泽度
This controls the glossiness, or roughness, of the reflection. A glossiness of 1 means almost mirror reflection, while a glossiness of 0 means very rough, almost diffuse reflection.
这控制了反射的光泽度或粗糙度。光泽度为1意味着几乎是镜面反射,而光泽度为0意味着非常粗糙,几乎是漫反射。
Samples
样本
This defines the number of samples to use for the reflection. More samples means less noise.
这定义了用于反射的样本数量。更多的样本意味着更少的噪声。
IOR
返回抑制
The index of refraction which is used to compute the view-dependent Fresnel reflectivity effect. Reflections with an IOR value closer to 1.0 will have less facing reflectivity. The recommended default value is 1.44.
用于计算视场相关菲涅耳反射效应的折射率。返回抑制值接近1.0的反射面反射率较低。推荐的默认值是1.44。
General
将军
Disable Reflection Bump Mapping
禁用反射凹凸映射
This option allows you to switch to using the default un-bumped surface normals for direct and indirect reflection rays.
此选项允许您切换到使用直接和间接反射射线的默认非碰撞表面法线。
Optimization
优化
Specular Highlights Only
镜面高光
This optimization option will disable indirect reflection ray tracing of the environment and just capture specular reflections of lights.
这个优化选项将禁用间接反射射线追踪的环境,只是捕捉镜面反射光。
Enable Trace Depth Overrides
启用跟踪深度重写
This enables the Max Reflection Trace Depth parameter. When not enabled, the global trace depth will be used.
这启用了最大反射跟踪深度参数。当没有启用时,将使用全局跟踪深度。
Max Trace Depth
最大追踪深度
This parameter controls the trace depth for reflection rays shot from this material. If the reflections of a material are not very defined (meaning: they are blurry because of the glossiness parameter or have a low weight), then multiple reflection bounces can be a waste of rendering time. This parameter allows the user to reduce the trace depth and speed up rendering.
这个参数控制从这种材料射出的反射光的跟踪深度。如果一个材质的反射没有很好的定义(意思是: 它们因为光泽度参数而变得模糊或者重量很轻) ,那么多次反射反射就会浪费渲染时间。此参数允许用户减少跟踪深度并加快呈现速度。
Cut-off Override Enable
切断重写启用
This parameter allows you to override the global cut-off setting for reflections.
此参数允许您覆盖反射的全局截止设置。
Cut-off Override Threshold
截止覆盖阈值
When the reflections of a material are very dark (because of low "Weight" or "Color" values) they contribute very little to the final image. This parameter defines what is considered "very dark" at which point no more reflection rays will be shot - which will speed up rendering. Scenes containing very strong lights might need this parameter set to very low values such as 0.0001 in order to avoid early termination of tracing which can produce a grain-like effect.
当一个材质的反射非常暗(因为低的“重量”或“颜色”值) ,它们对最终图像的贡献很小。这个参数定义了什么被认为是“非常黑暗”,在这一点上没有更多的反射射线将被拍摄-这将加速渲染。包含非常强光的场景可能需要将这个参数设置为非常低的值,如0.0001,以避免过早终止跟踪,因为跟踪会产生类似颗粒的效果。
Reflection Settings in Detail
反射设置的细节
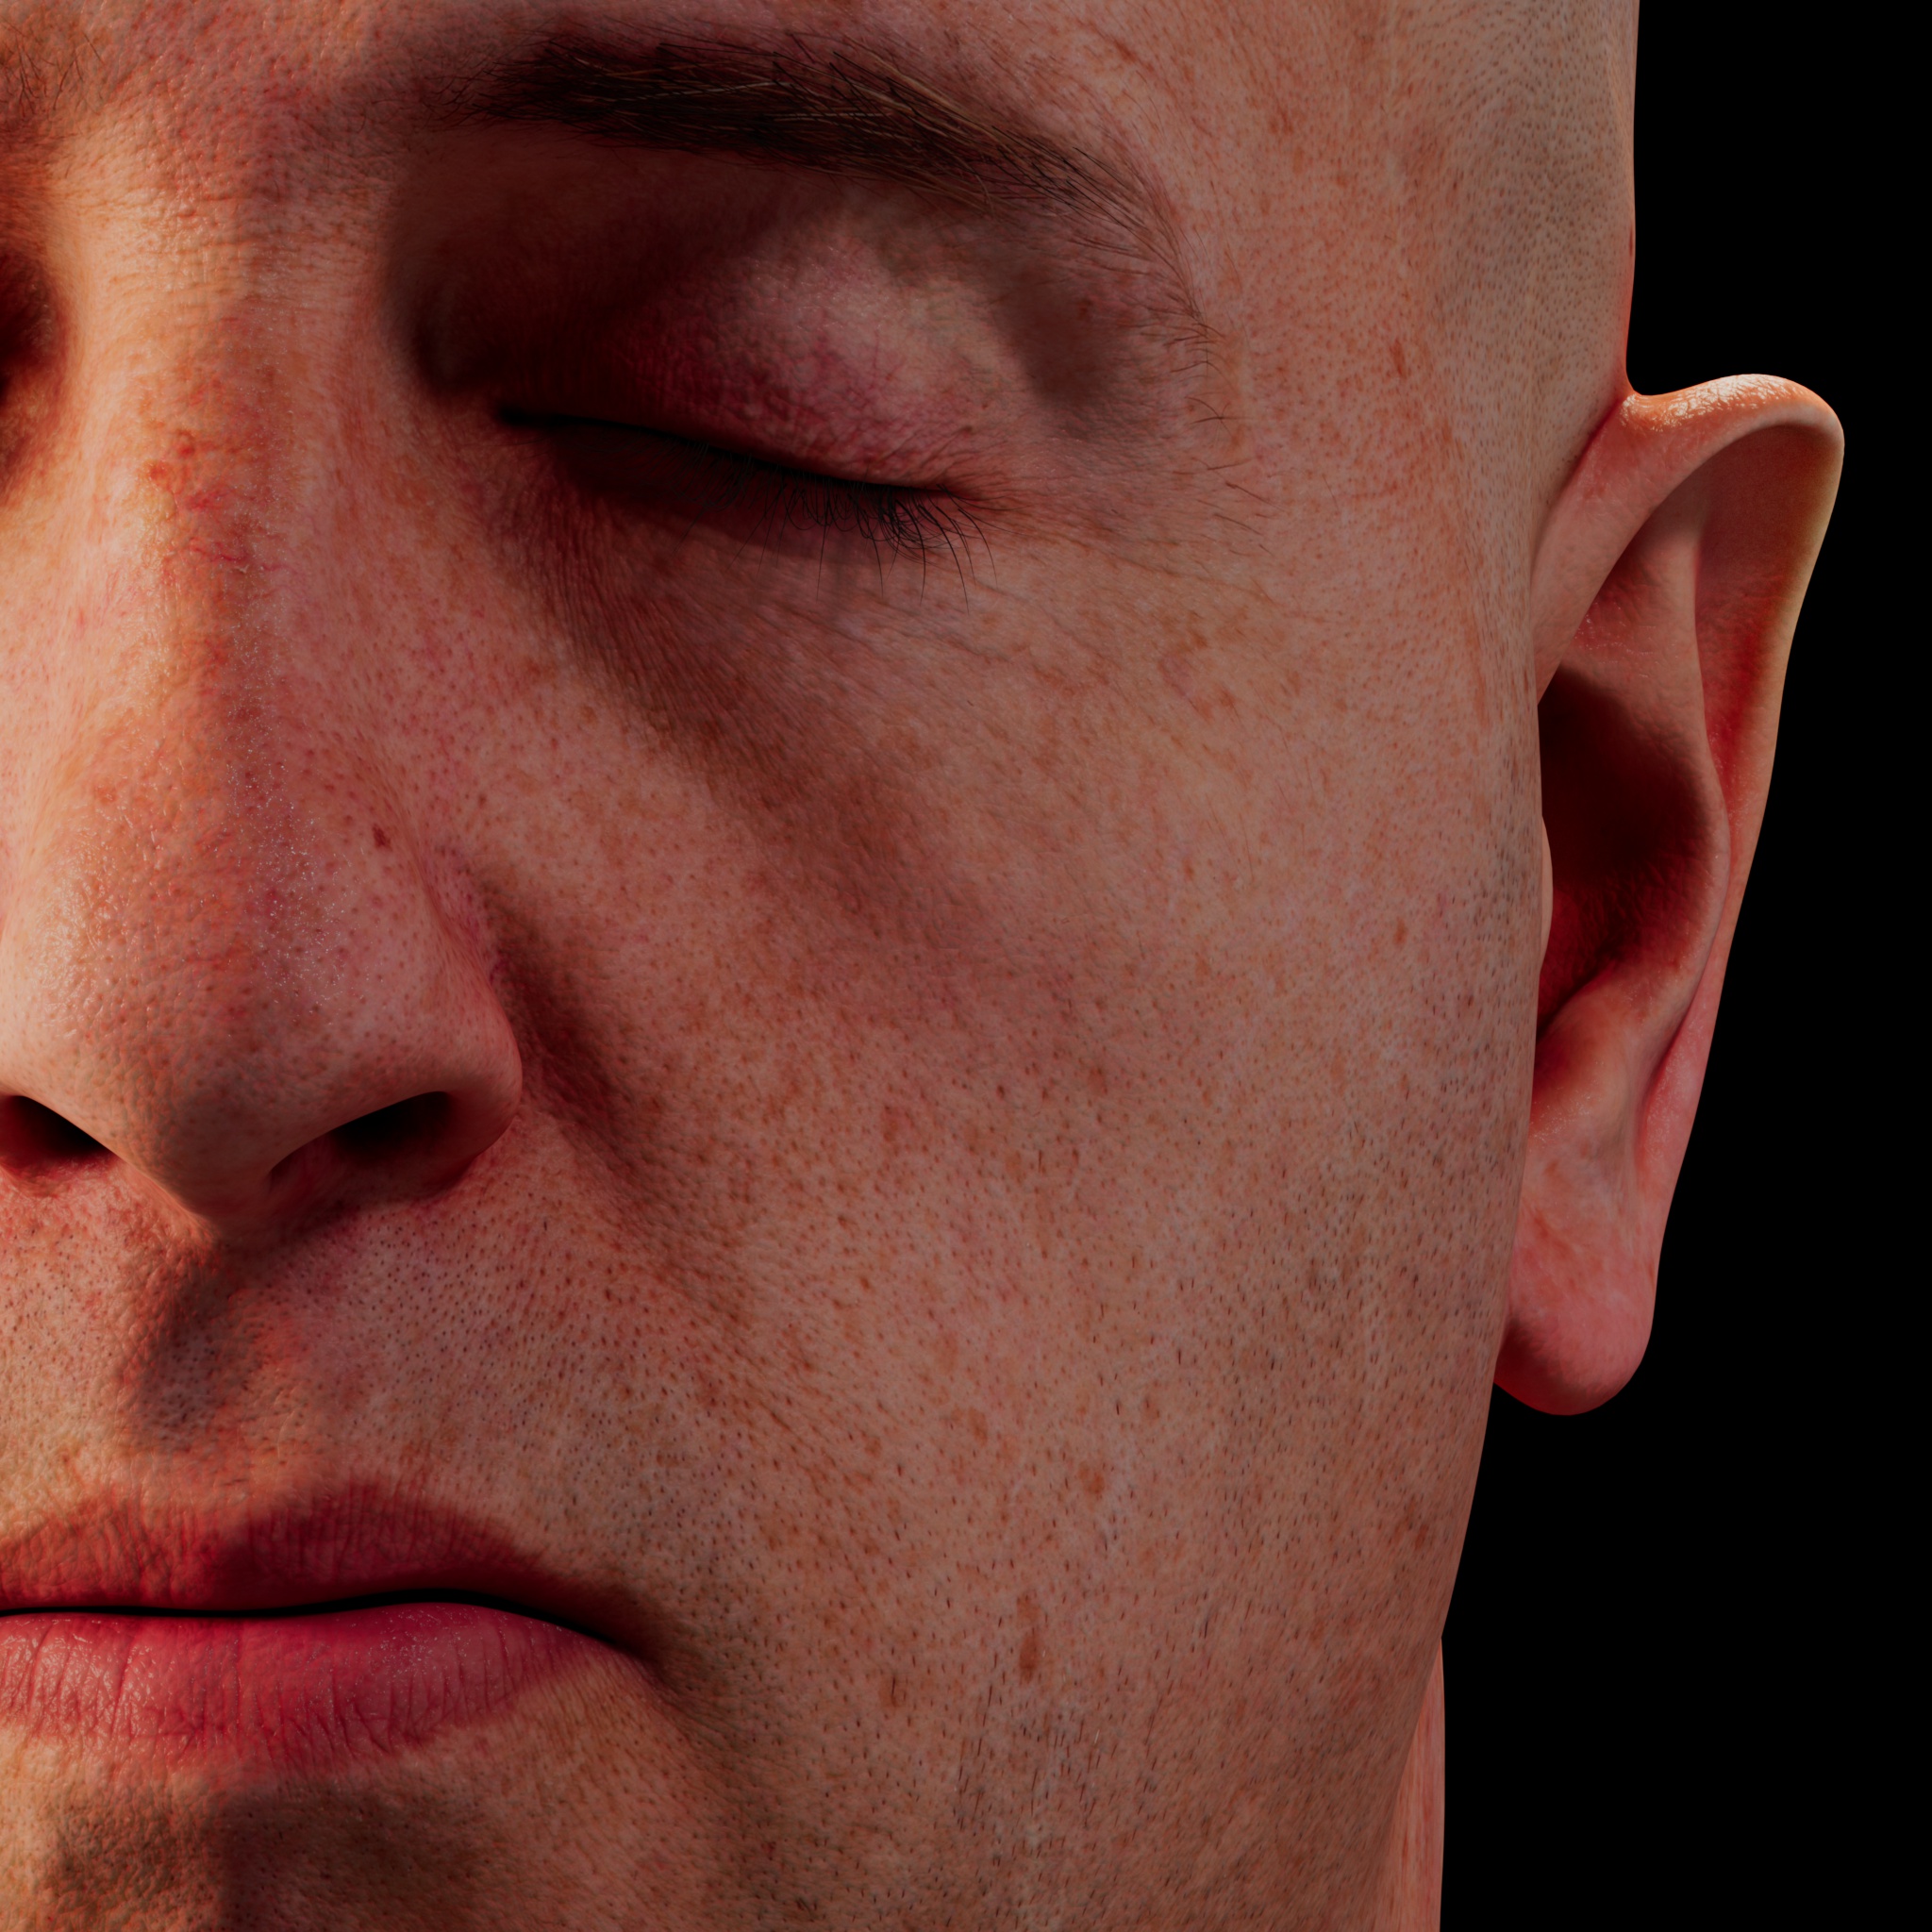
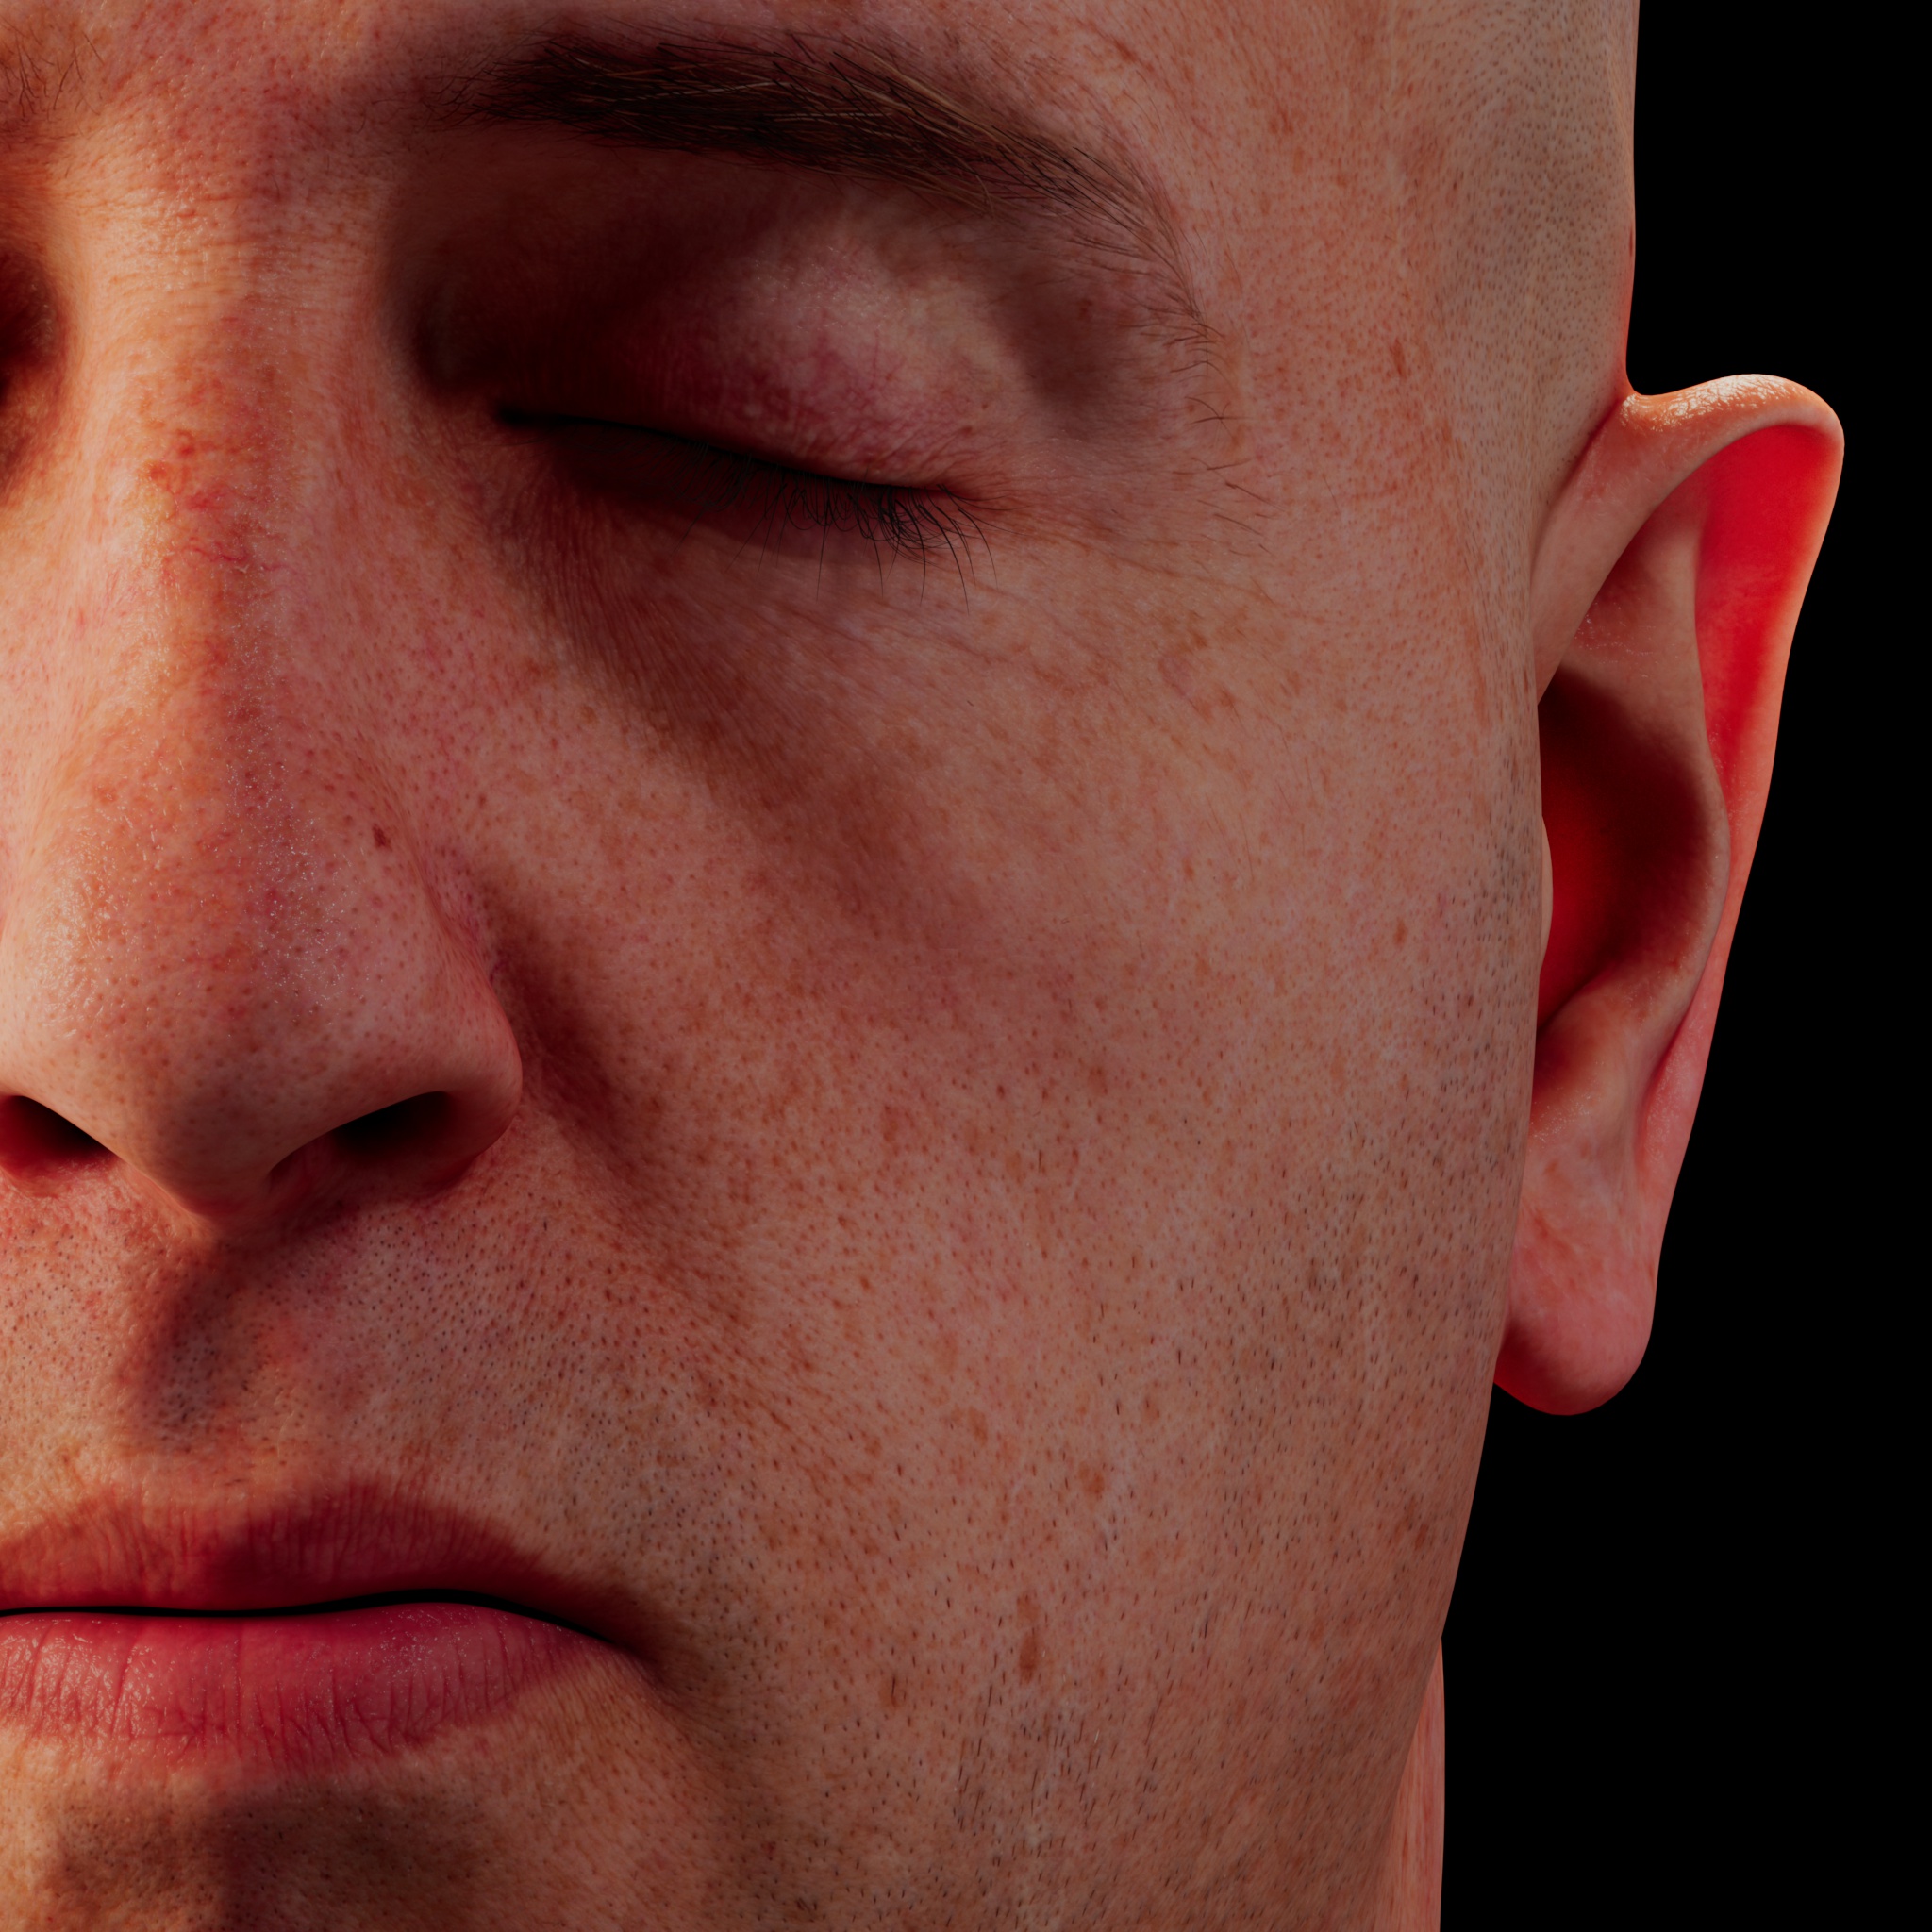
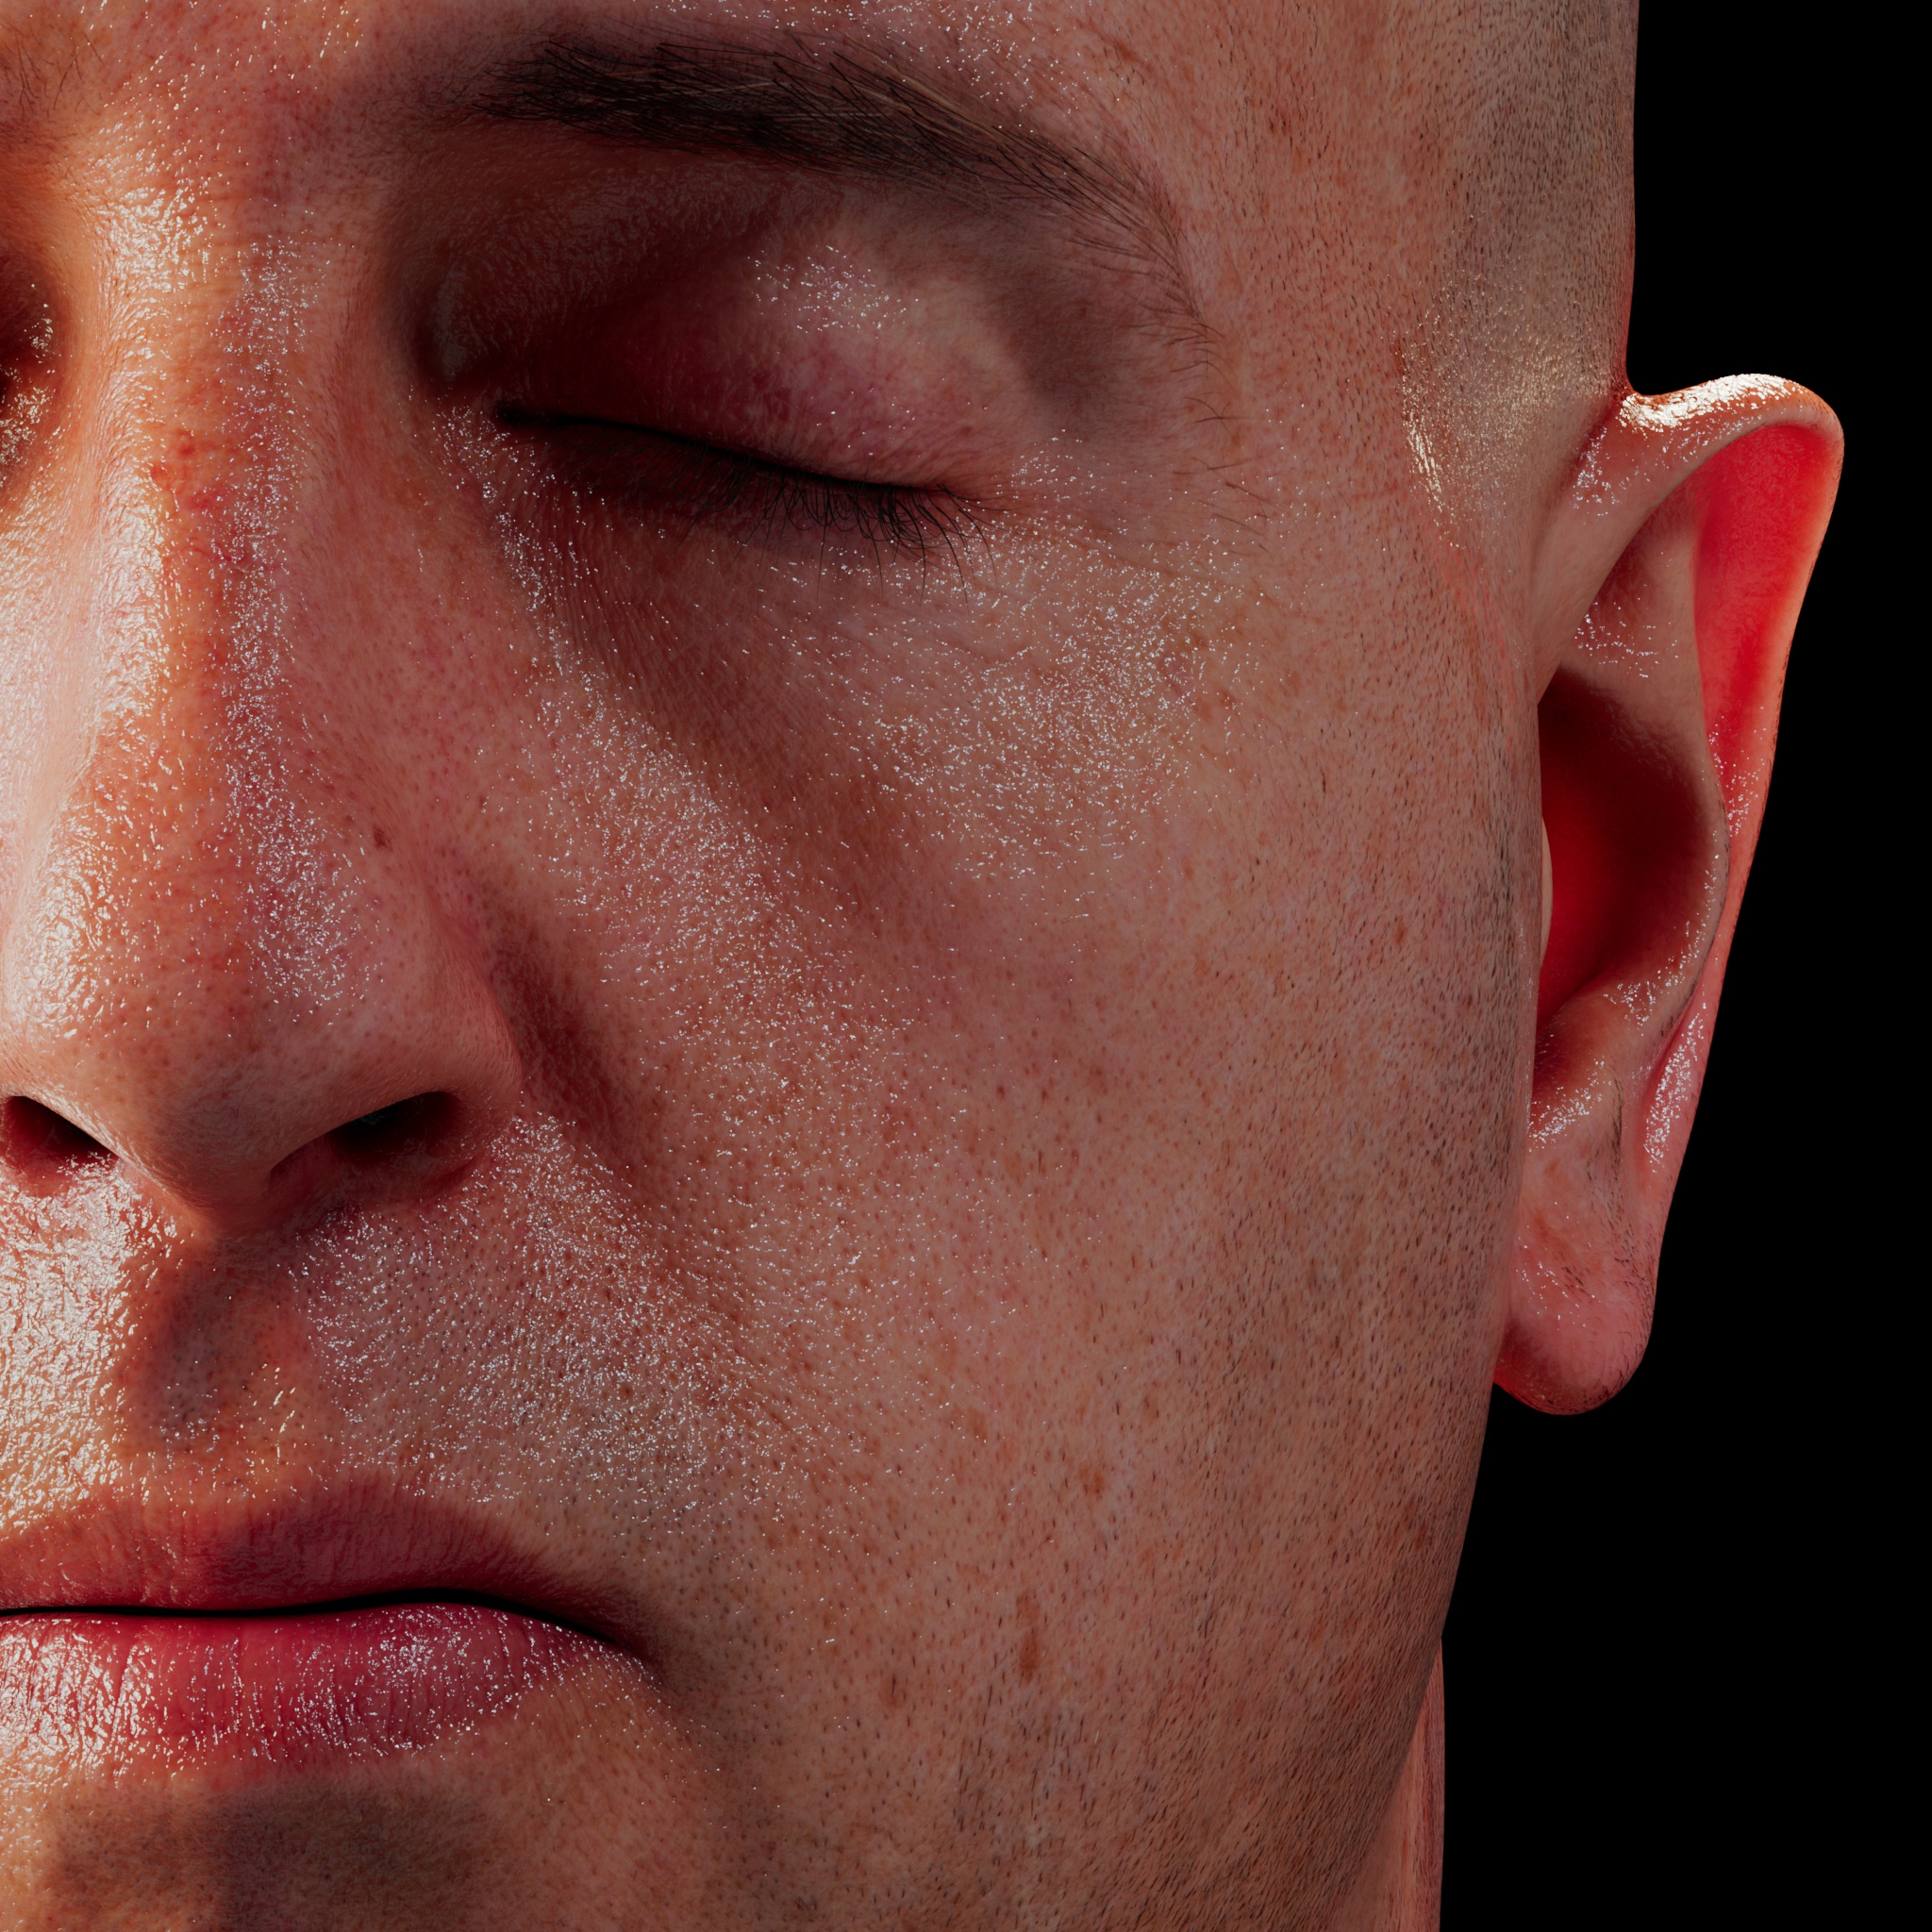
Below are some examples of how different reflection settings can affect the look of the material.
下面是一些不同的反射设置如何影响材质外观的例子。
|
|
|
|
|
When the 'Glossiness' is set to 1.0, you will get a perfectly specular mirror reflection. This is an extreme example and not recommended for realistic looking skin. It can be used however for clear coat, oily effects on various translucent materials. 当光泽度设置为1.0时,你会得到一个完美的镜面反射。这是一个极端的例子,不推荐用于真实的皮肤。它可以用于清晰的外壳,油性的影响,对各种半透明材料。 |
Lowering the IOR to 1.2 shows reduced facing reflectivity strength. 降低 IOR 到1.2表示面反射率强度降低。 |
Lowering the IOR to 1.0 kills the reflectivity altogether. 将 IOR 降低到1.0完全扼杀了反射率。 |
Bump Mapping
凹凸贴图
Add Bump Input To Material Bump
添加凹凸输入到材质凹凸
Skin Example
皮肤例子
There are various tutorials on the web for different renderers that describe how to use texture maps for the sub-surface scattering layers. The tutorials that describe how to map three sub-surface layers also apply reasonably well to the Redshift skin material.
在网上有各种各样的教程,为不同的渲染器,描述如何使用纹理地图的次表面散射层。描述如何映射三个子表面层的教程也适用于红移皮肤材质。
Although the best results can be gotten using dedicated textures for the layers and reflections, here we show a simplified example, using a single diffuse texture that can be manipulated to add color detail to the shader, while still maintaining the sub-surface effect.
虽然最好的效果可以通过使用层和反射的专用纹理得到,这里我们给出一个简化的例子,使用一个单一的漫反射纹理,可以添加颜色细节到着色器,同时仍然保持亚表面效果。
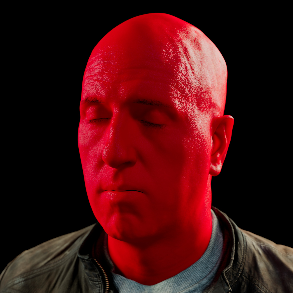
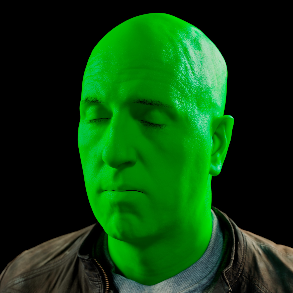
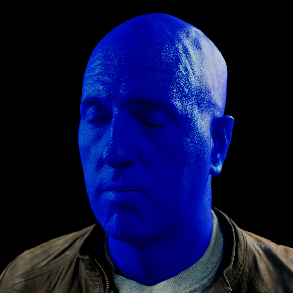
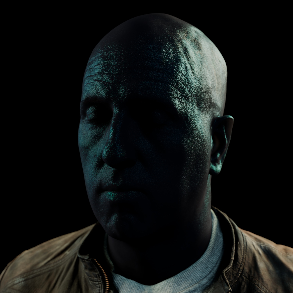
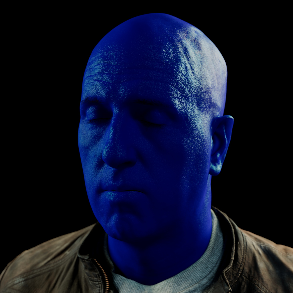
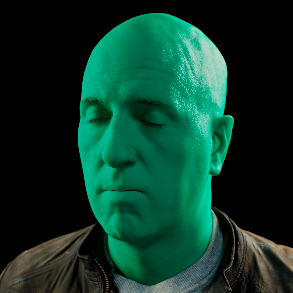
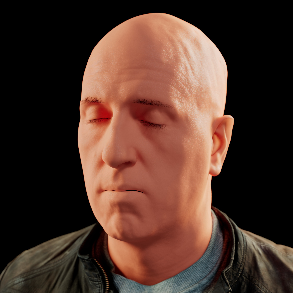
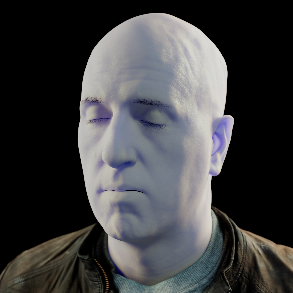
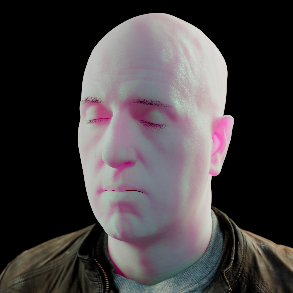
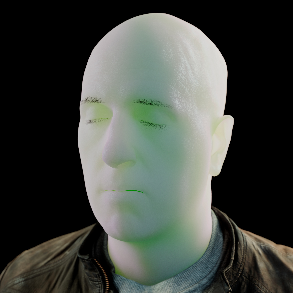
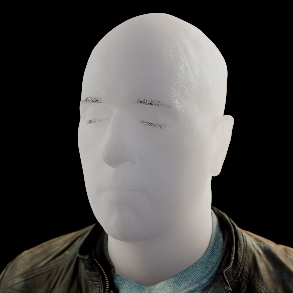
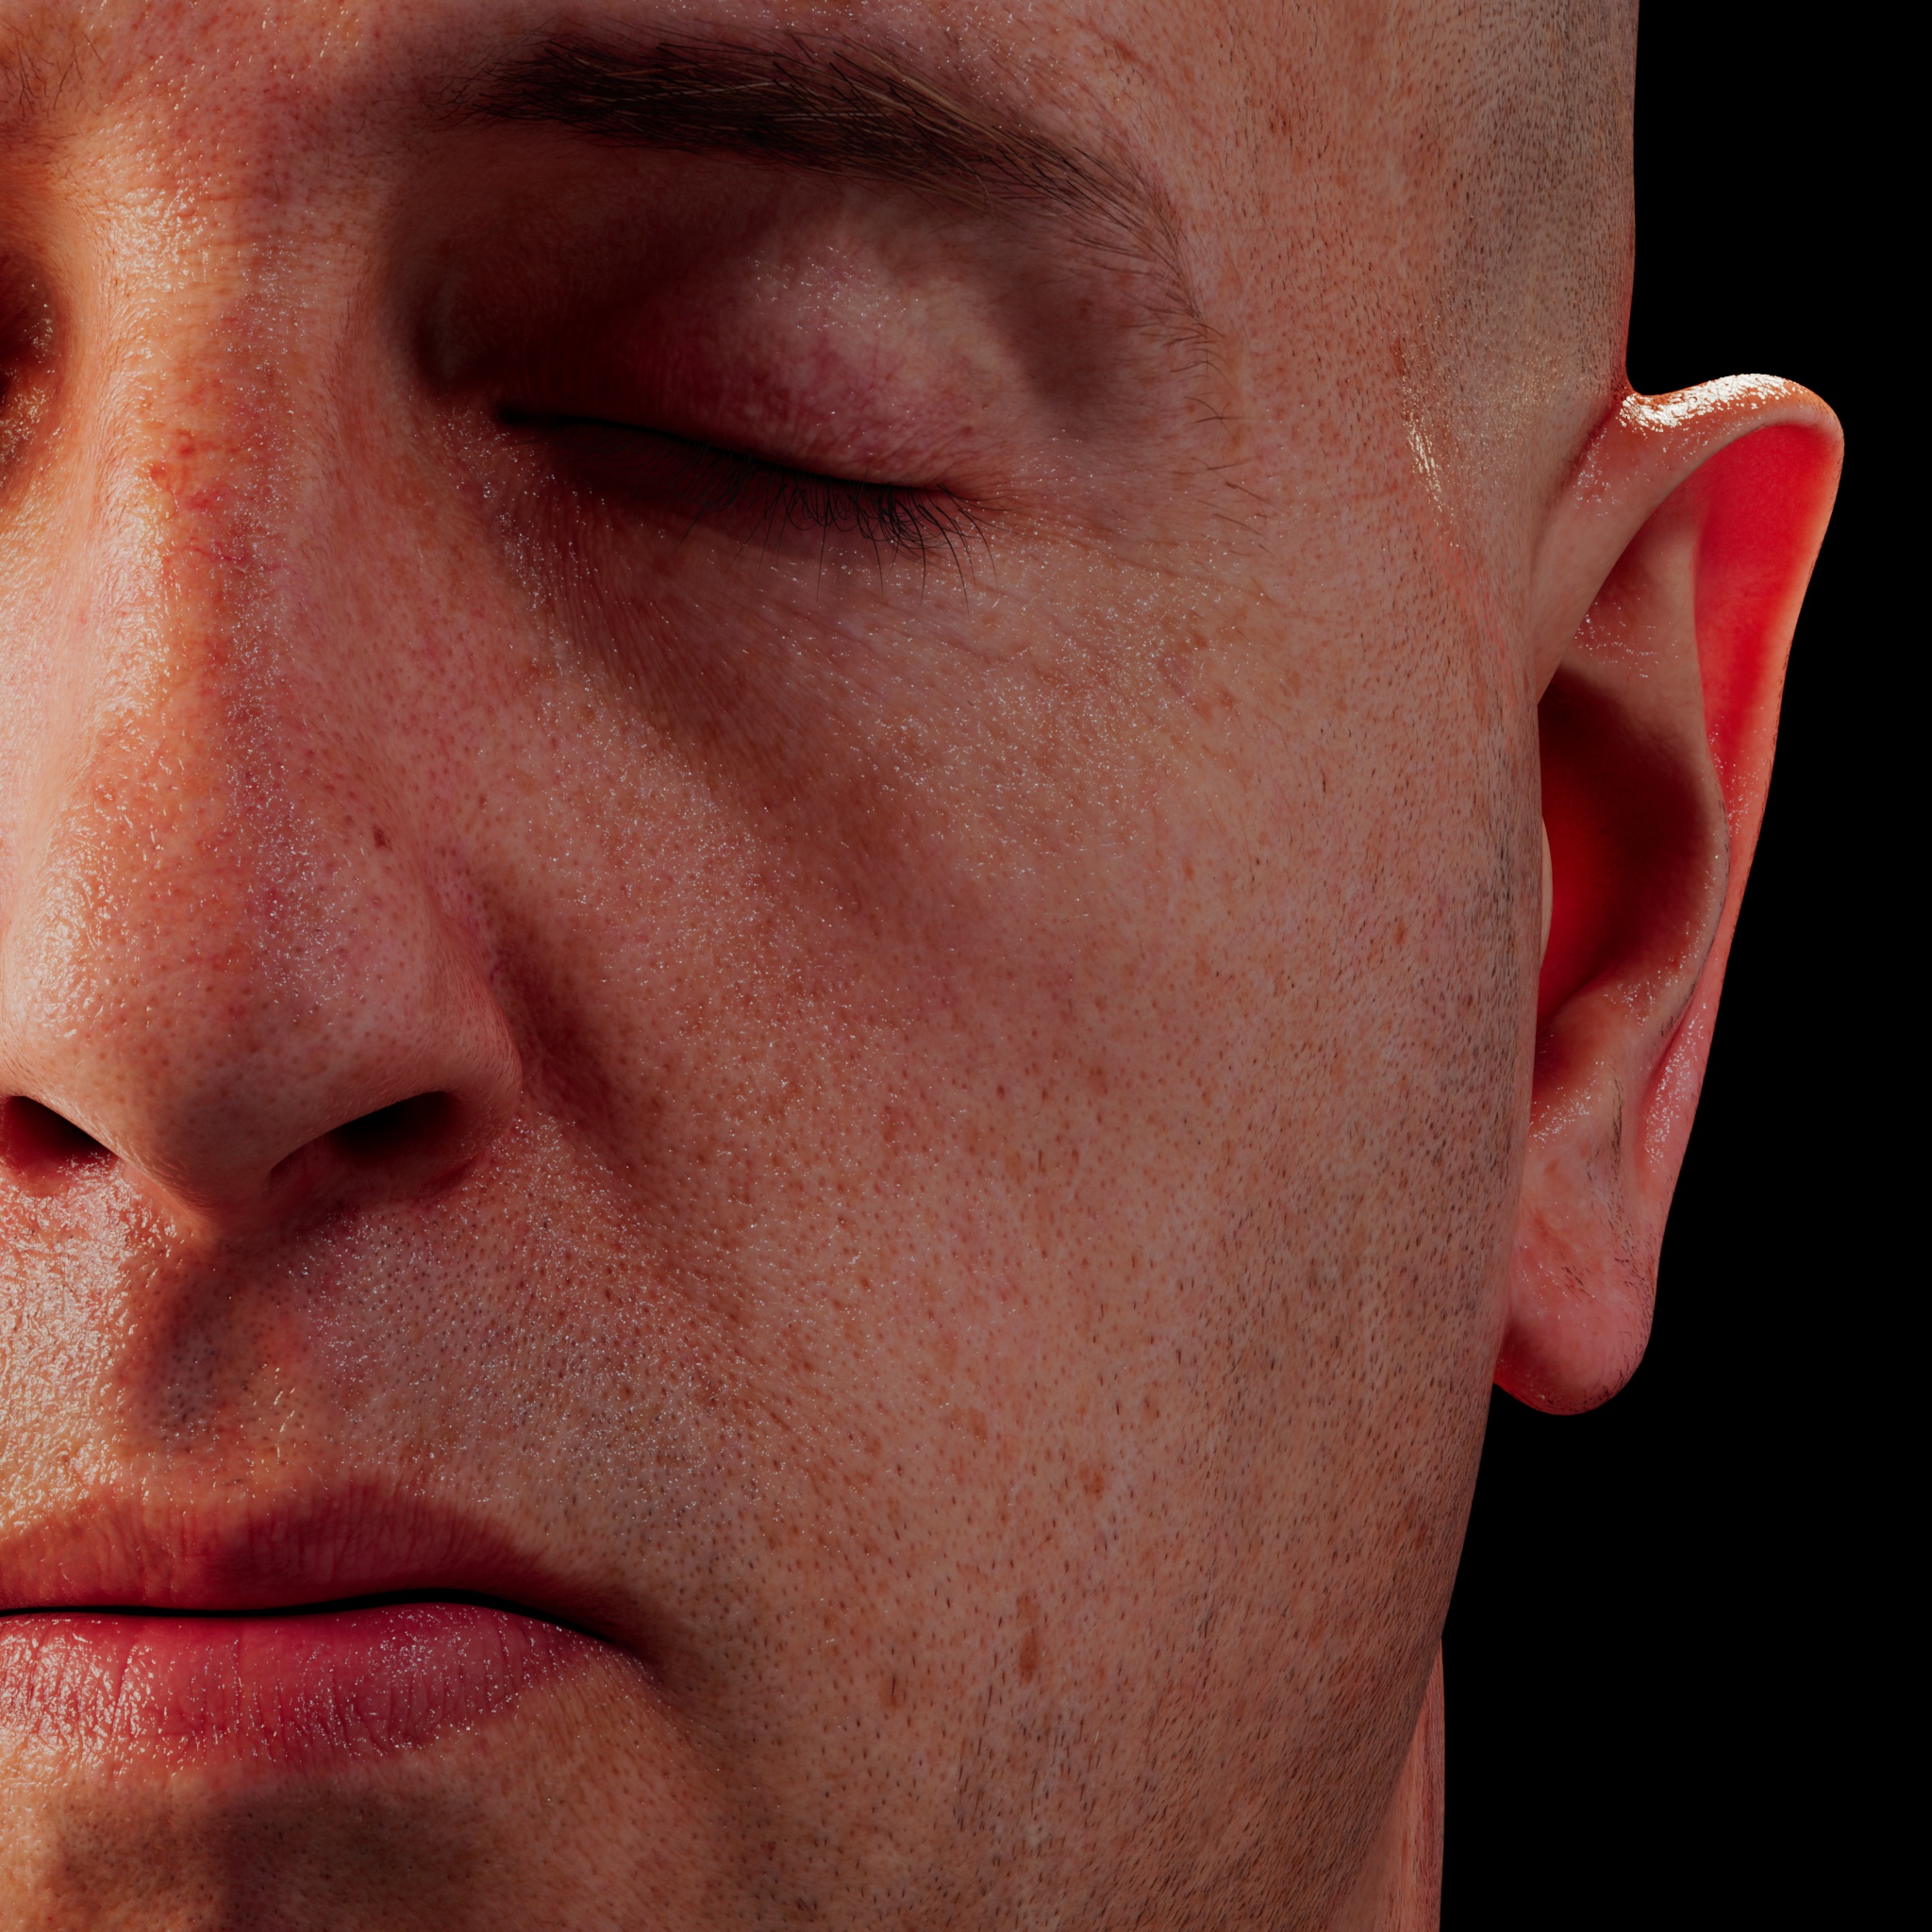
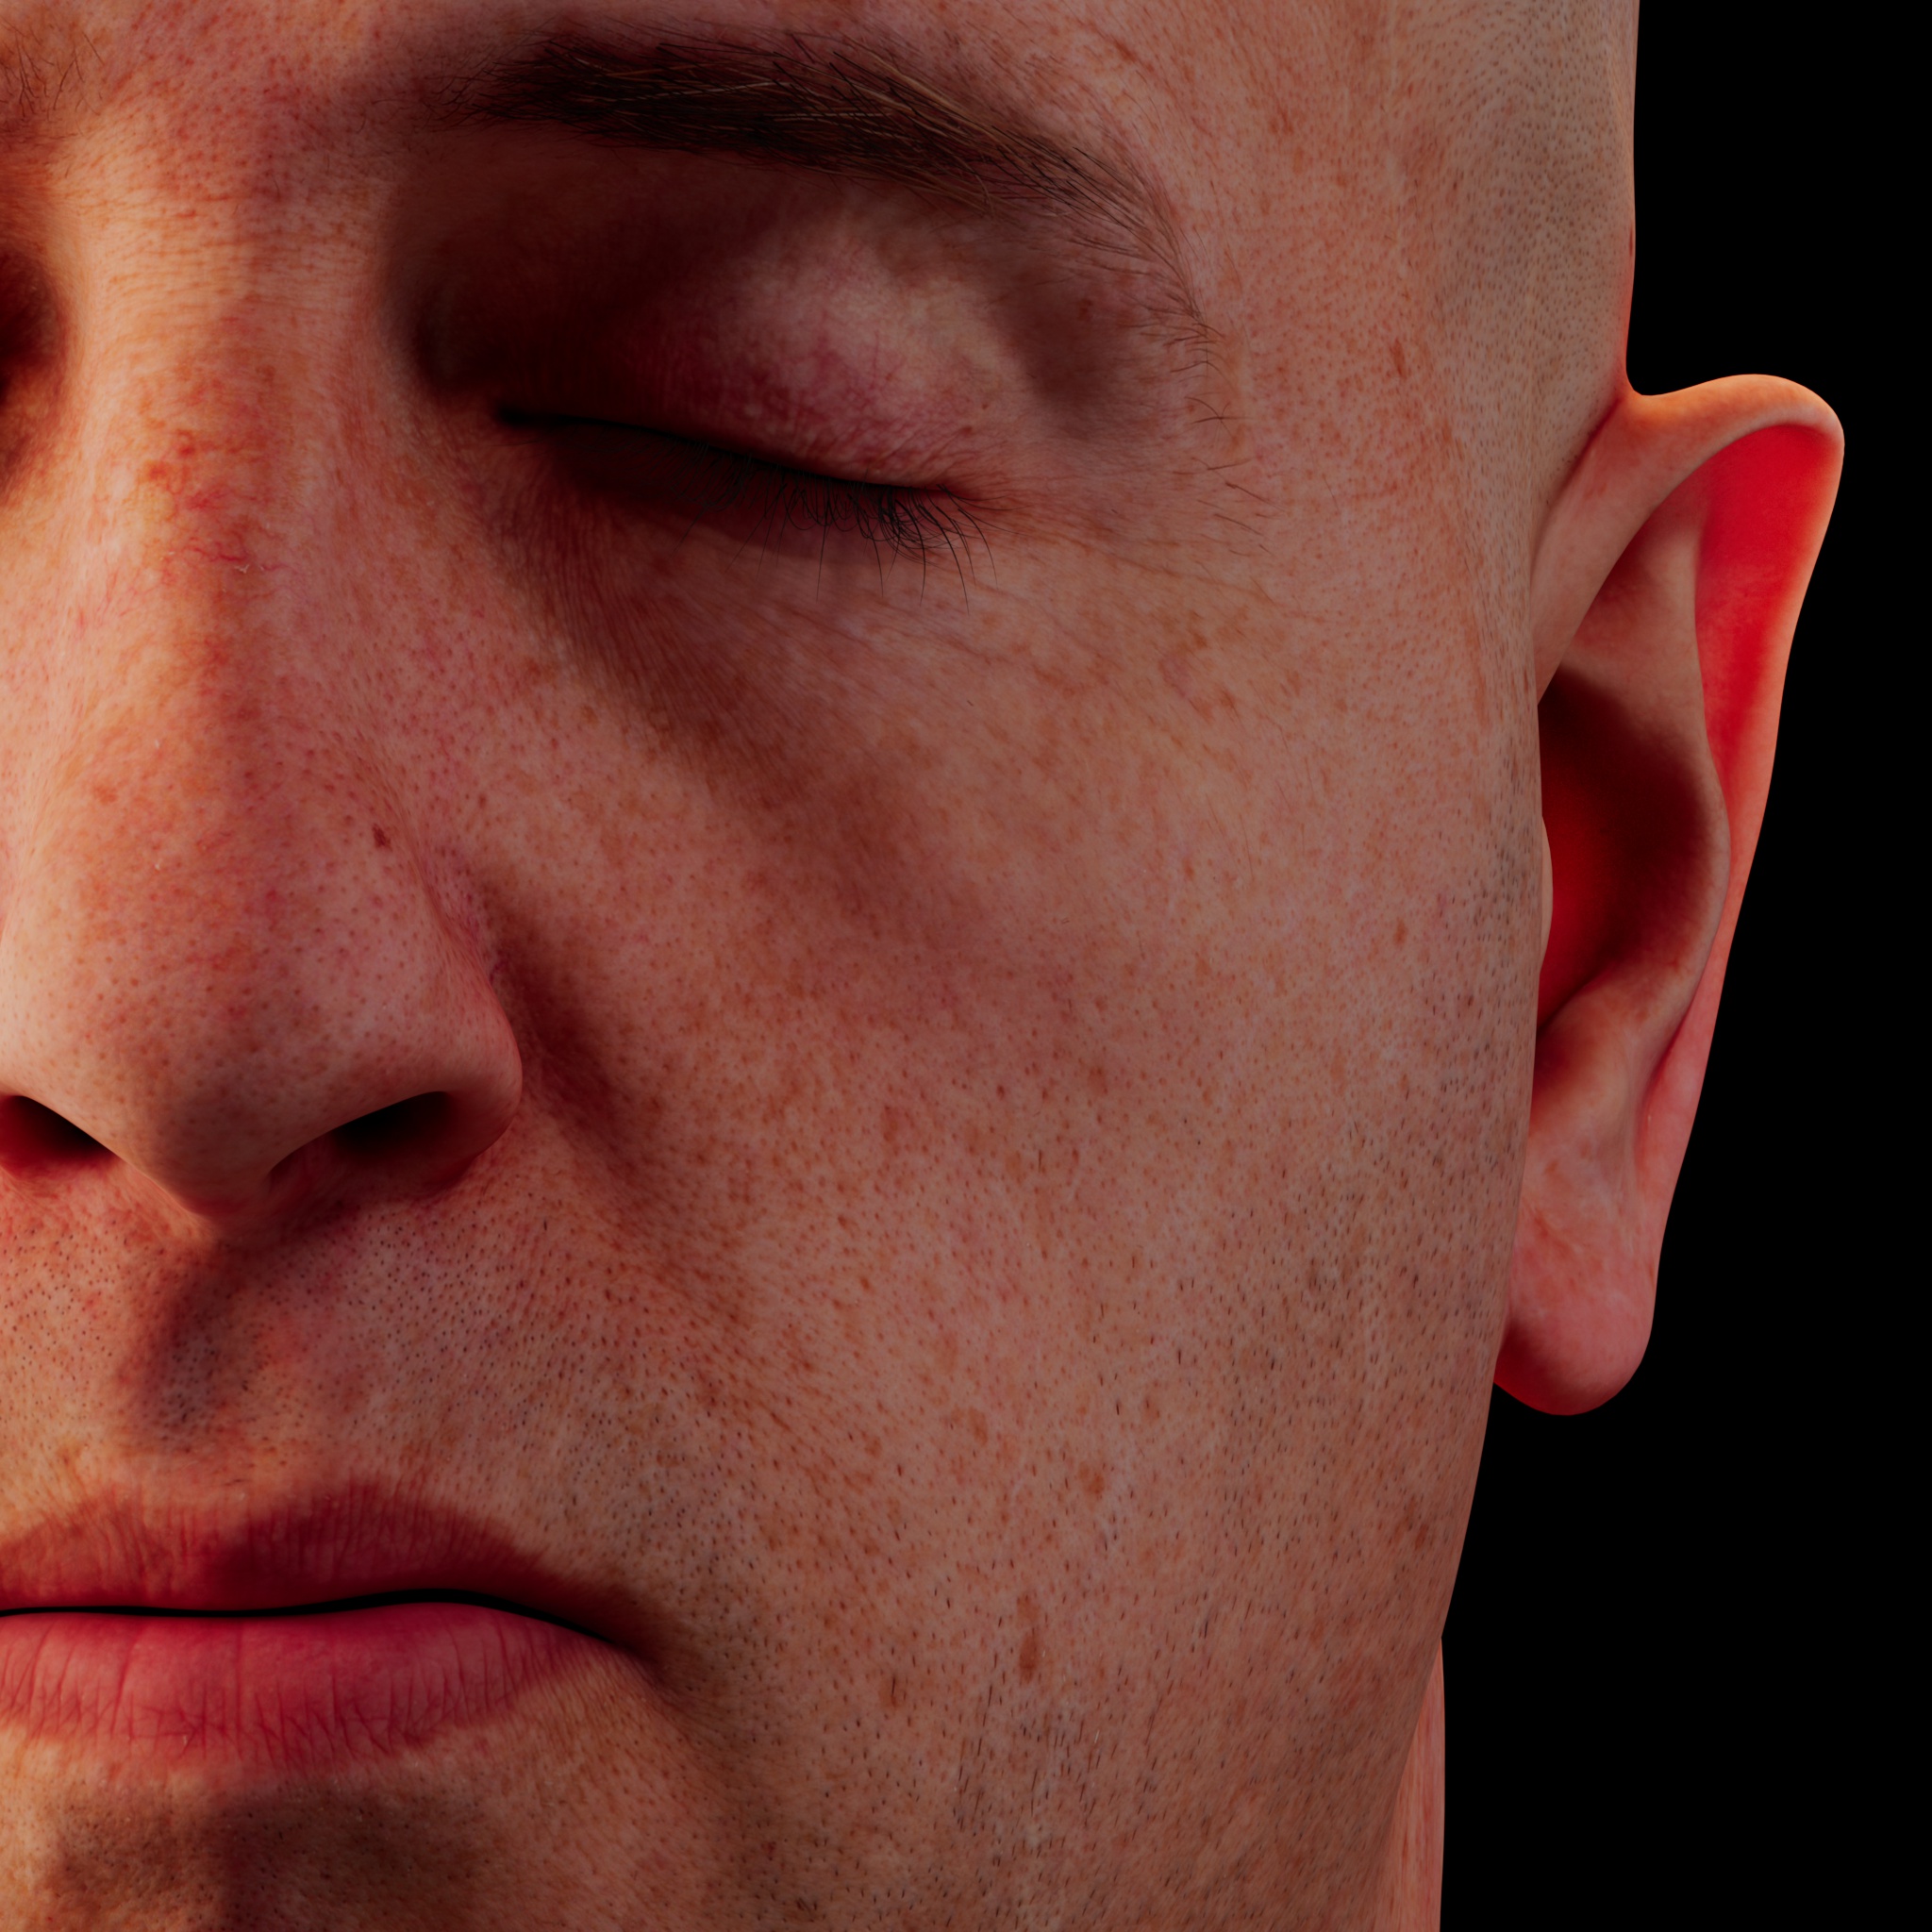
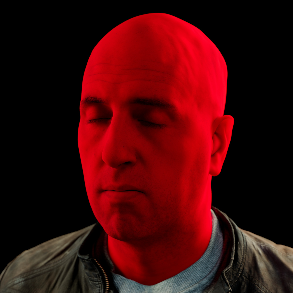
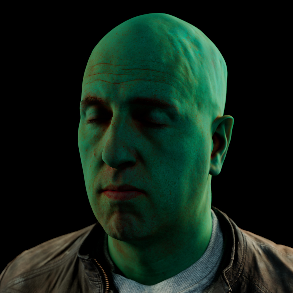
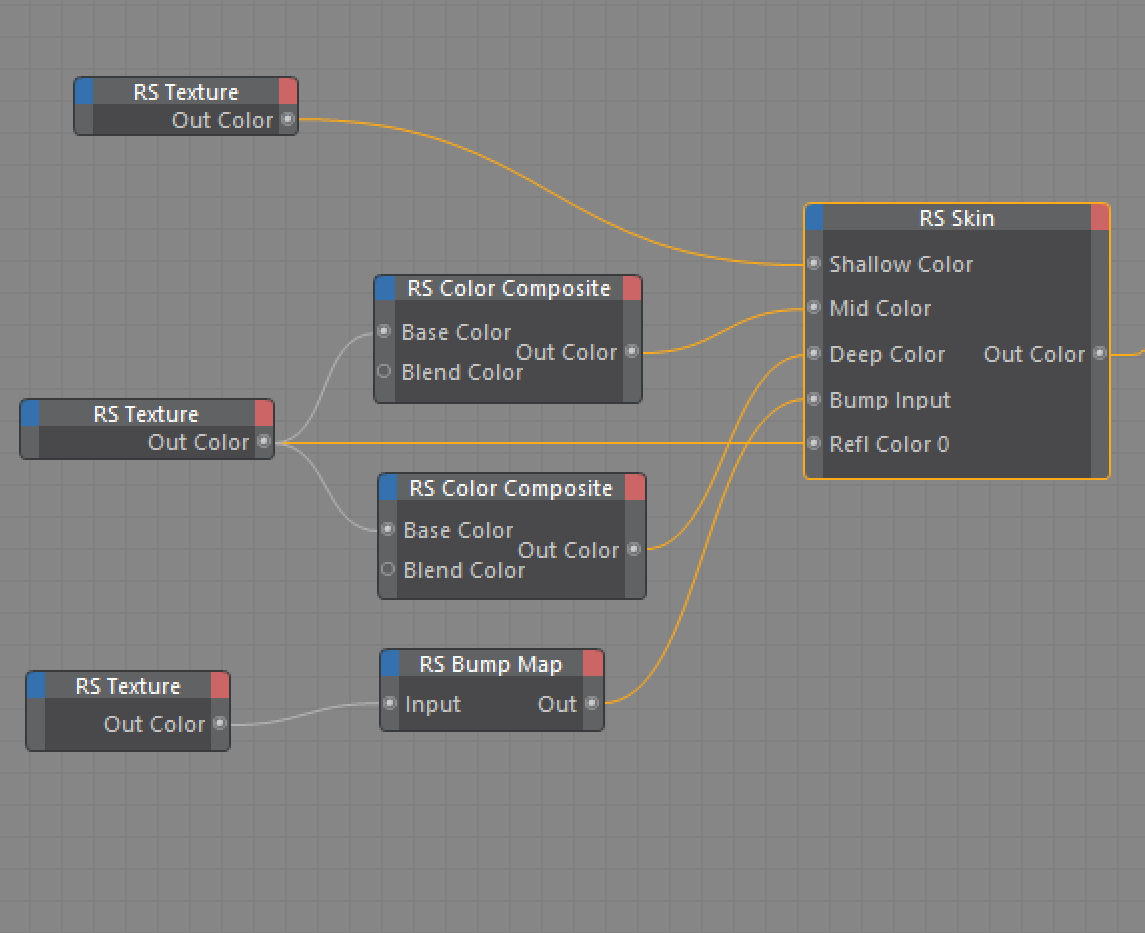
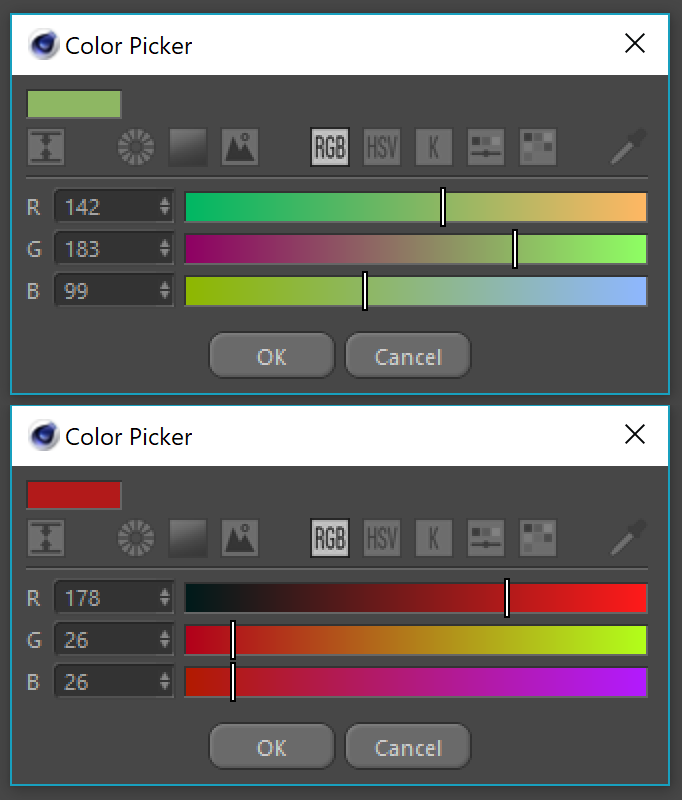
The first step is to de-saturate the texture, then adjust its contrast to darken the dark details (such as facial hair). Once you have that texture you apply a red tint for the deep scatter color, a green-ish tint for the mid scatter color (so the sum of which becomes a deep orange) and simply use the diffuse texture for the shallow scatter layer. You can also use the de-saturated texture for the reflection color.
第一步是去掉纹理的饱和度,然后调整它的对比度,使黑色的细节变暗(比如面部毛发)。一旦你有了这个纹理,你就可以为深度散射颜色应用一个红色的色调,为中度散射颜色应用一个绿色的色调(所以它的总和变成了深橙色) ,然后简单地为浅度散射层使用漫射纹理。你也可以使用去饱和纹理作为反射颜色。
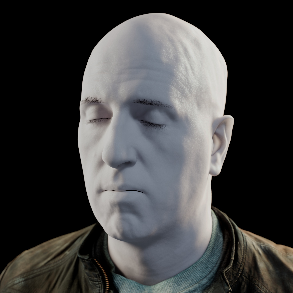
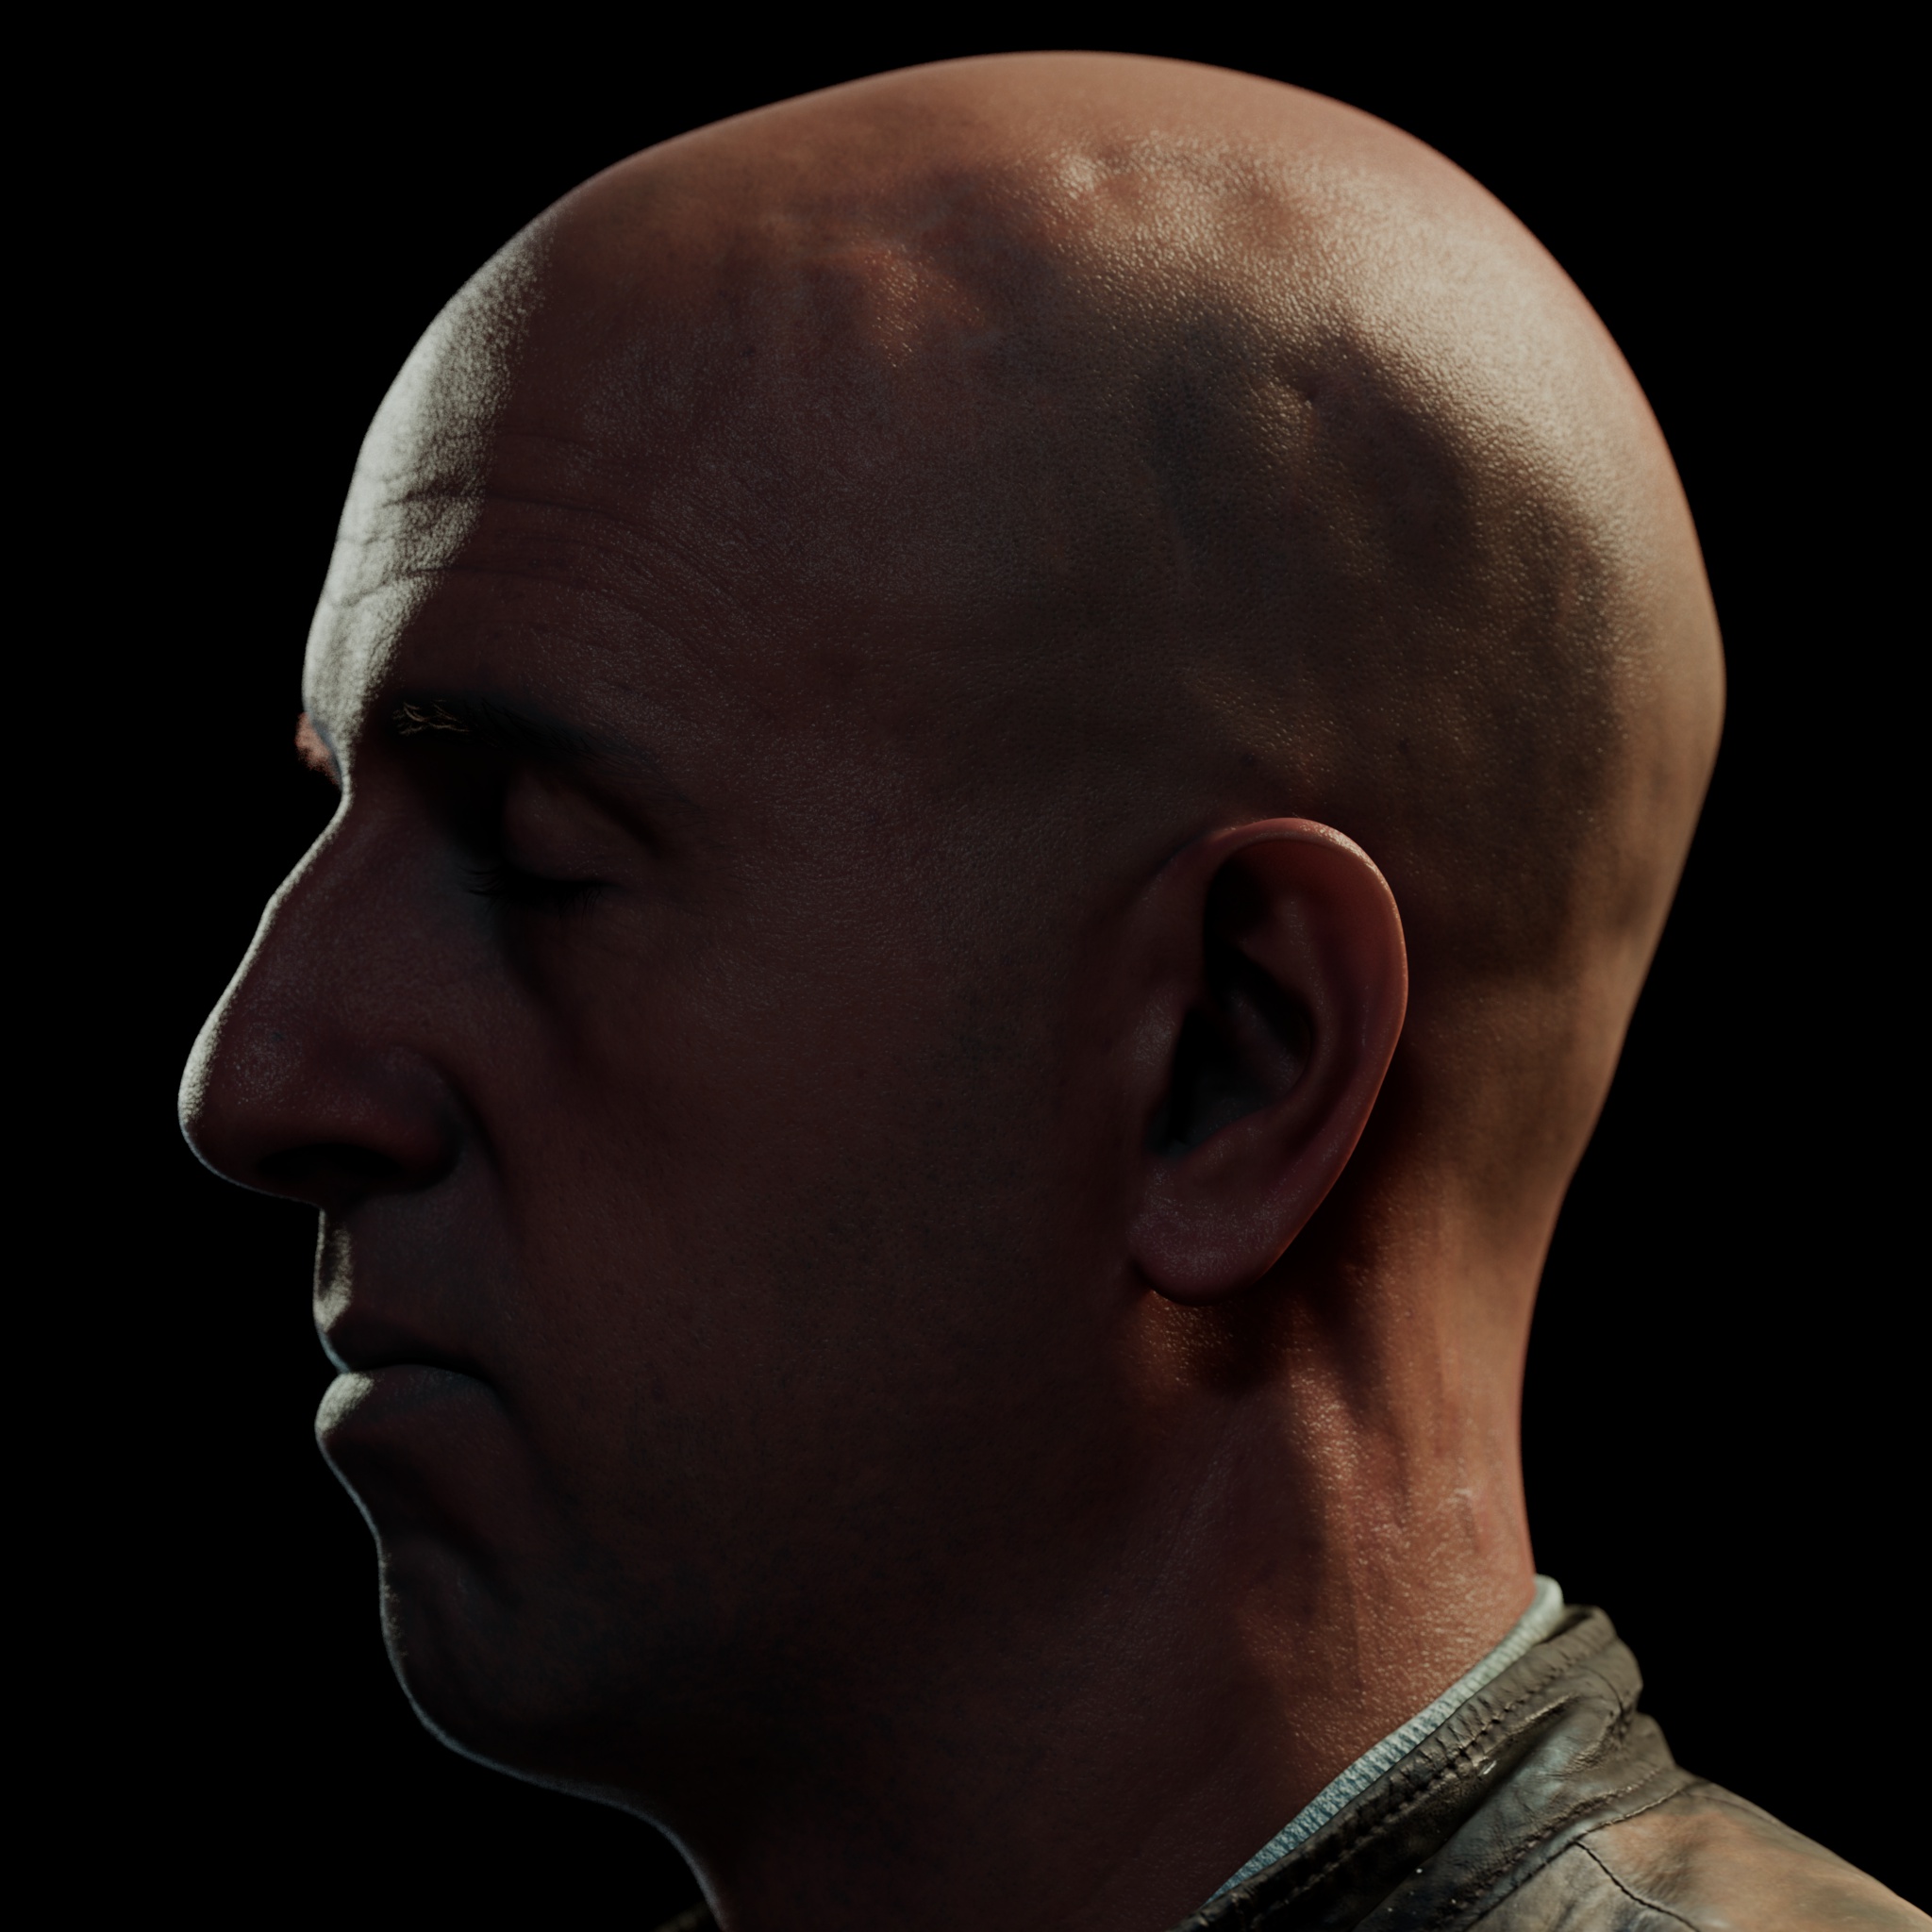
Below is an example showing the different layers, with its appropriate weight, and the other layers having a weight of 0.0.
下面是一个示例,显示了不同的层,其适当的重量,和其他层的重量为0.0。
|
|
|
|
|
|
Deep layer, tinted red. 深色,红色。 |
Mid layer, tinted green. 中间层,浅绿色。 |
Shallow layer, containing the diffuse pigment color. 浅层,含有漫反射色素。 |
Reflection layer. 反射层。 |
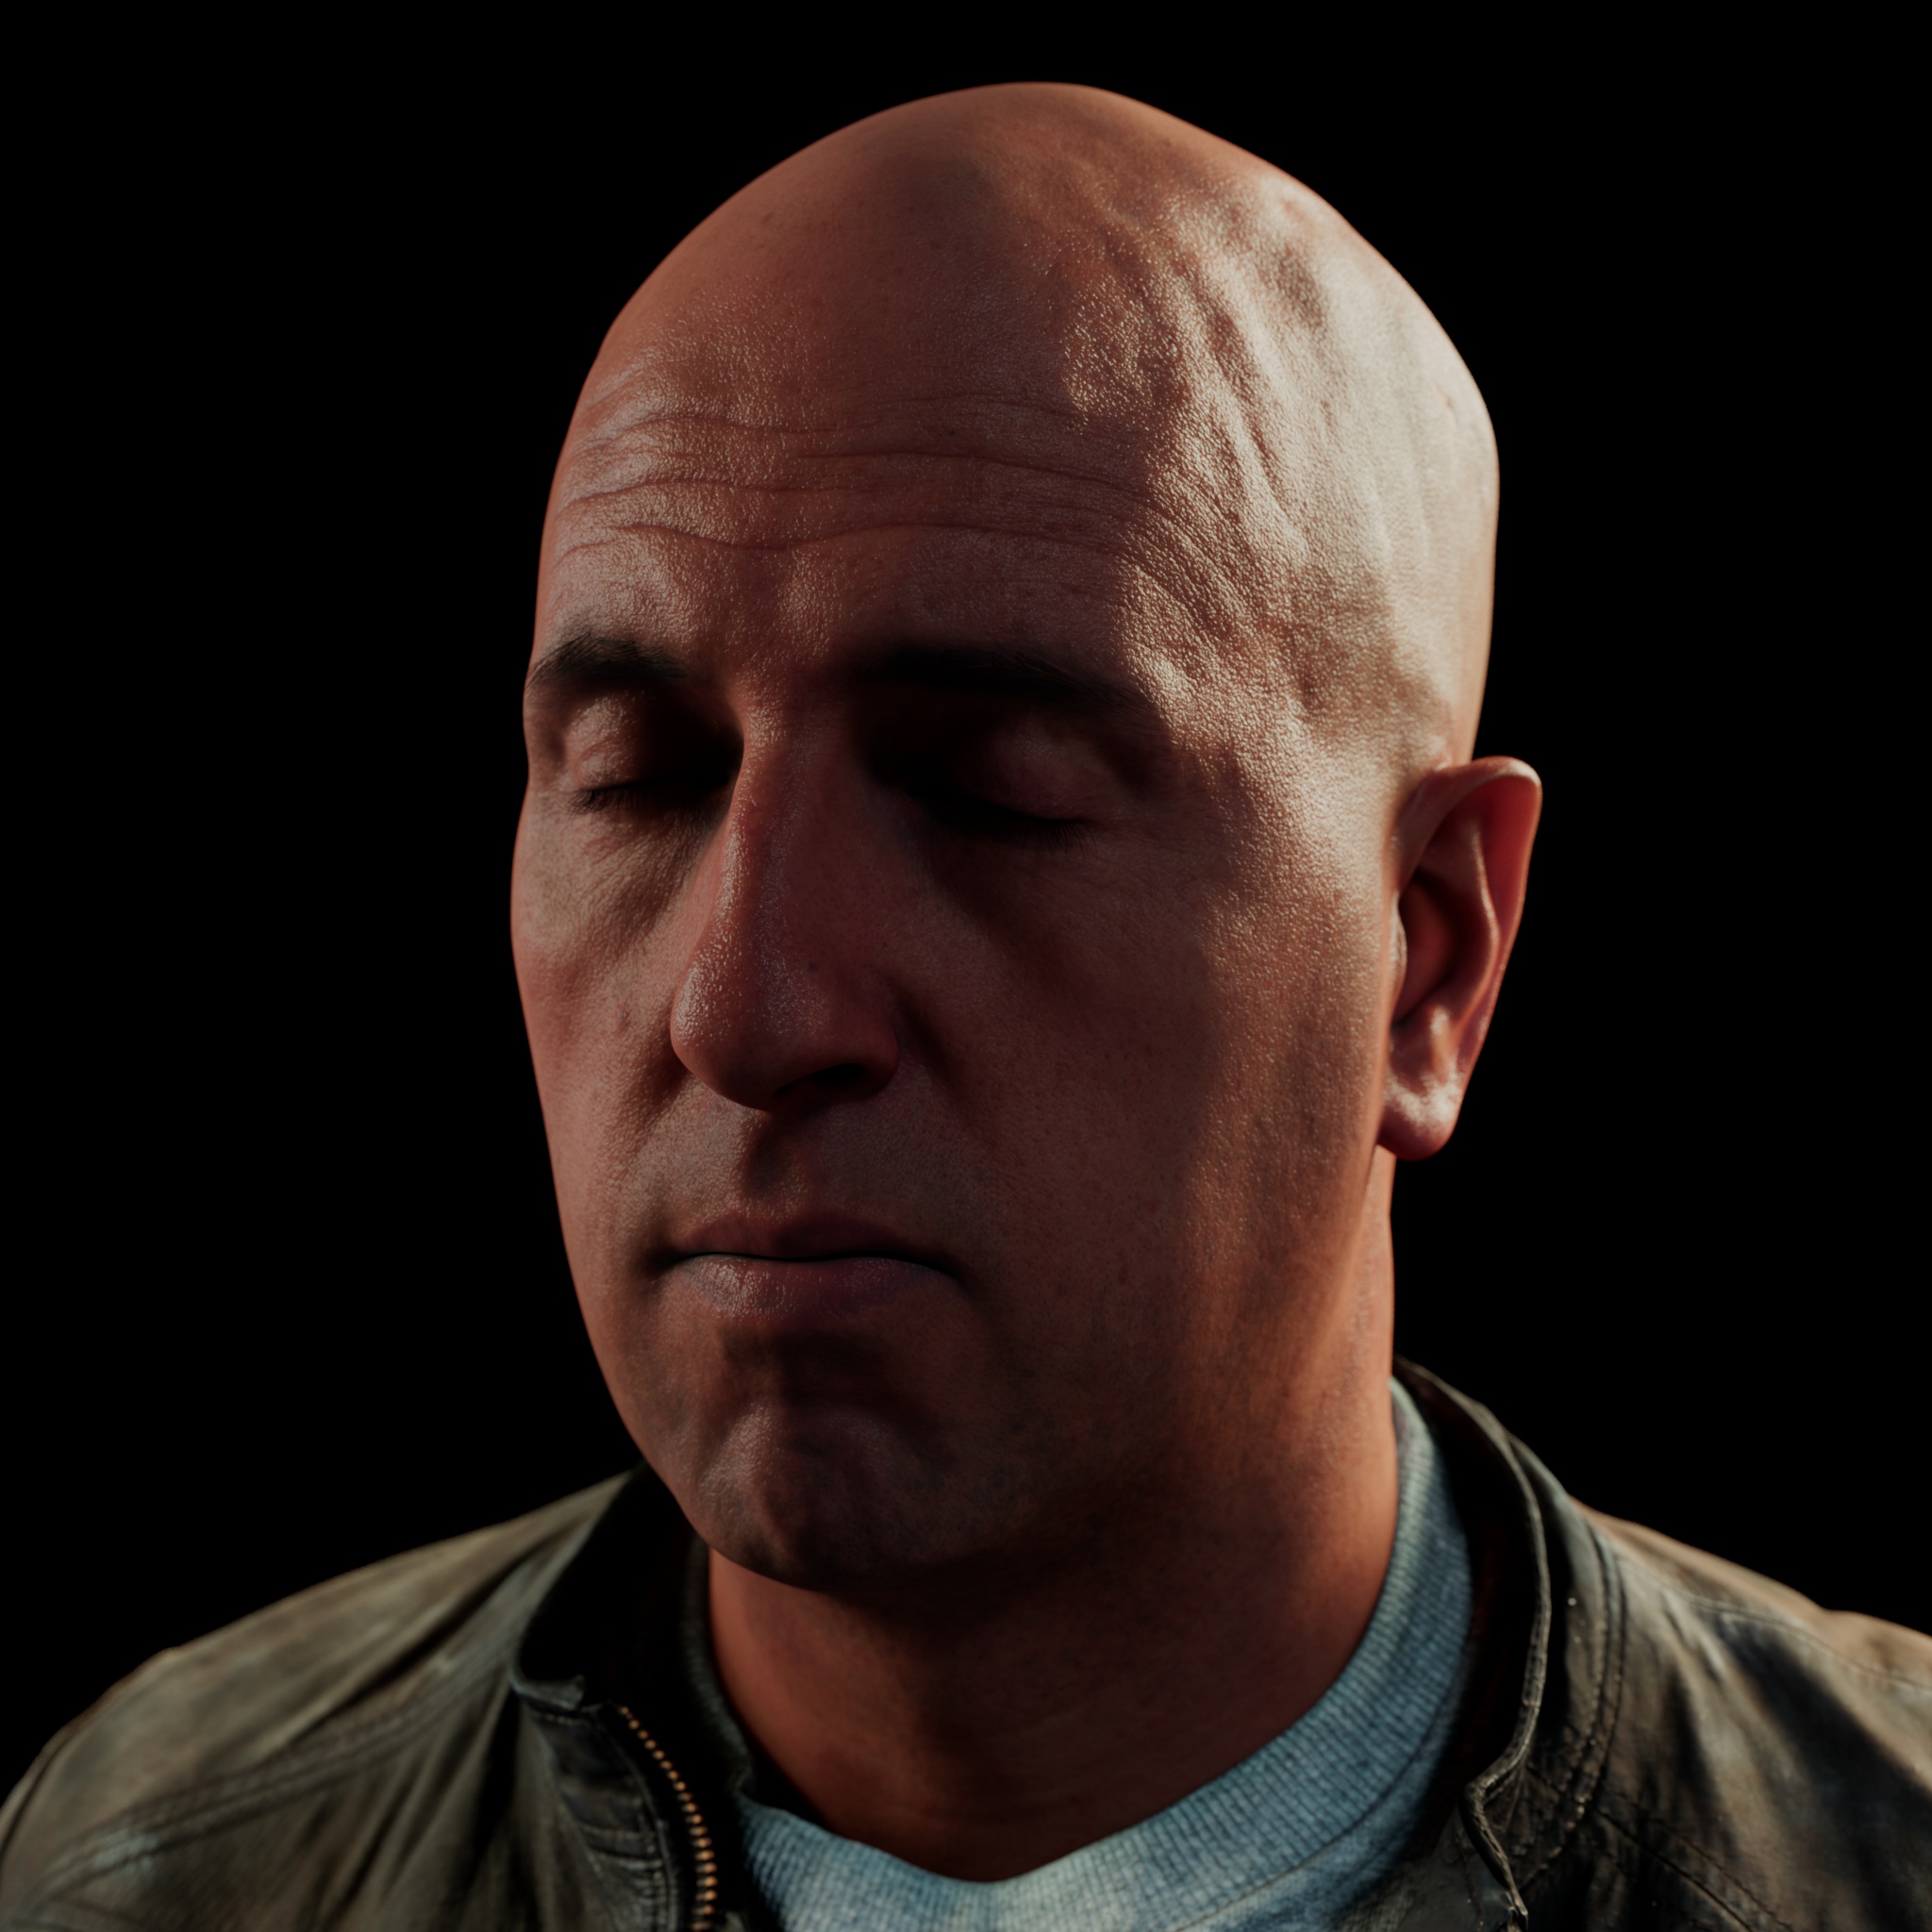
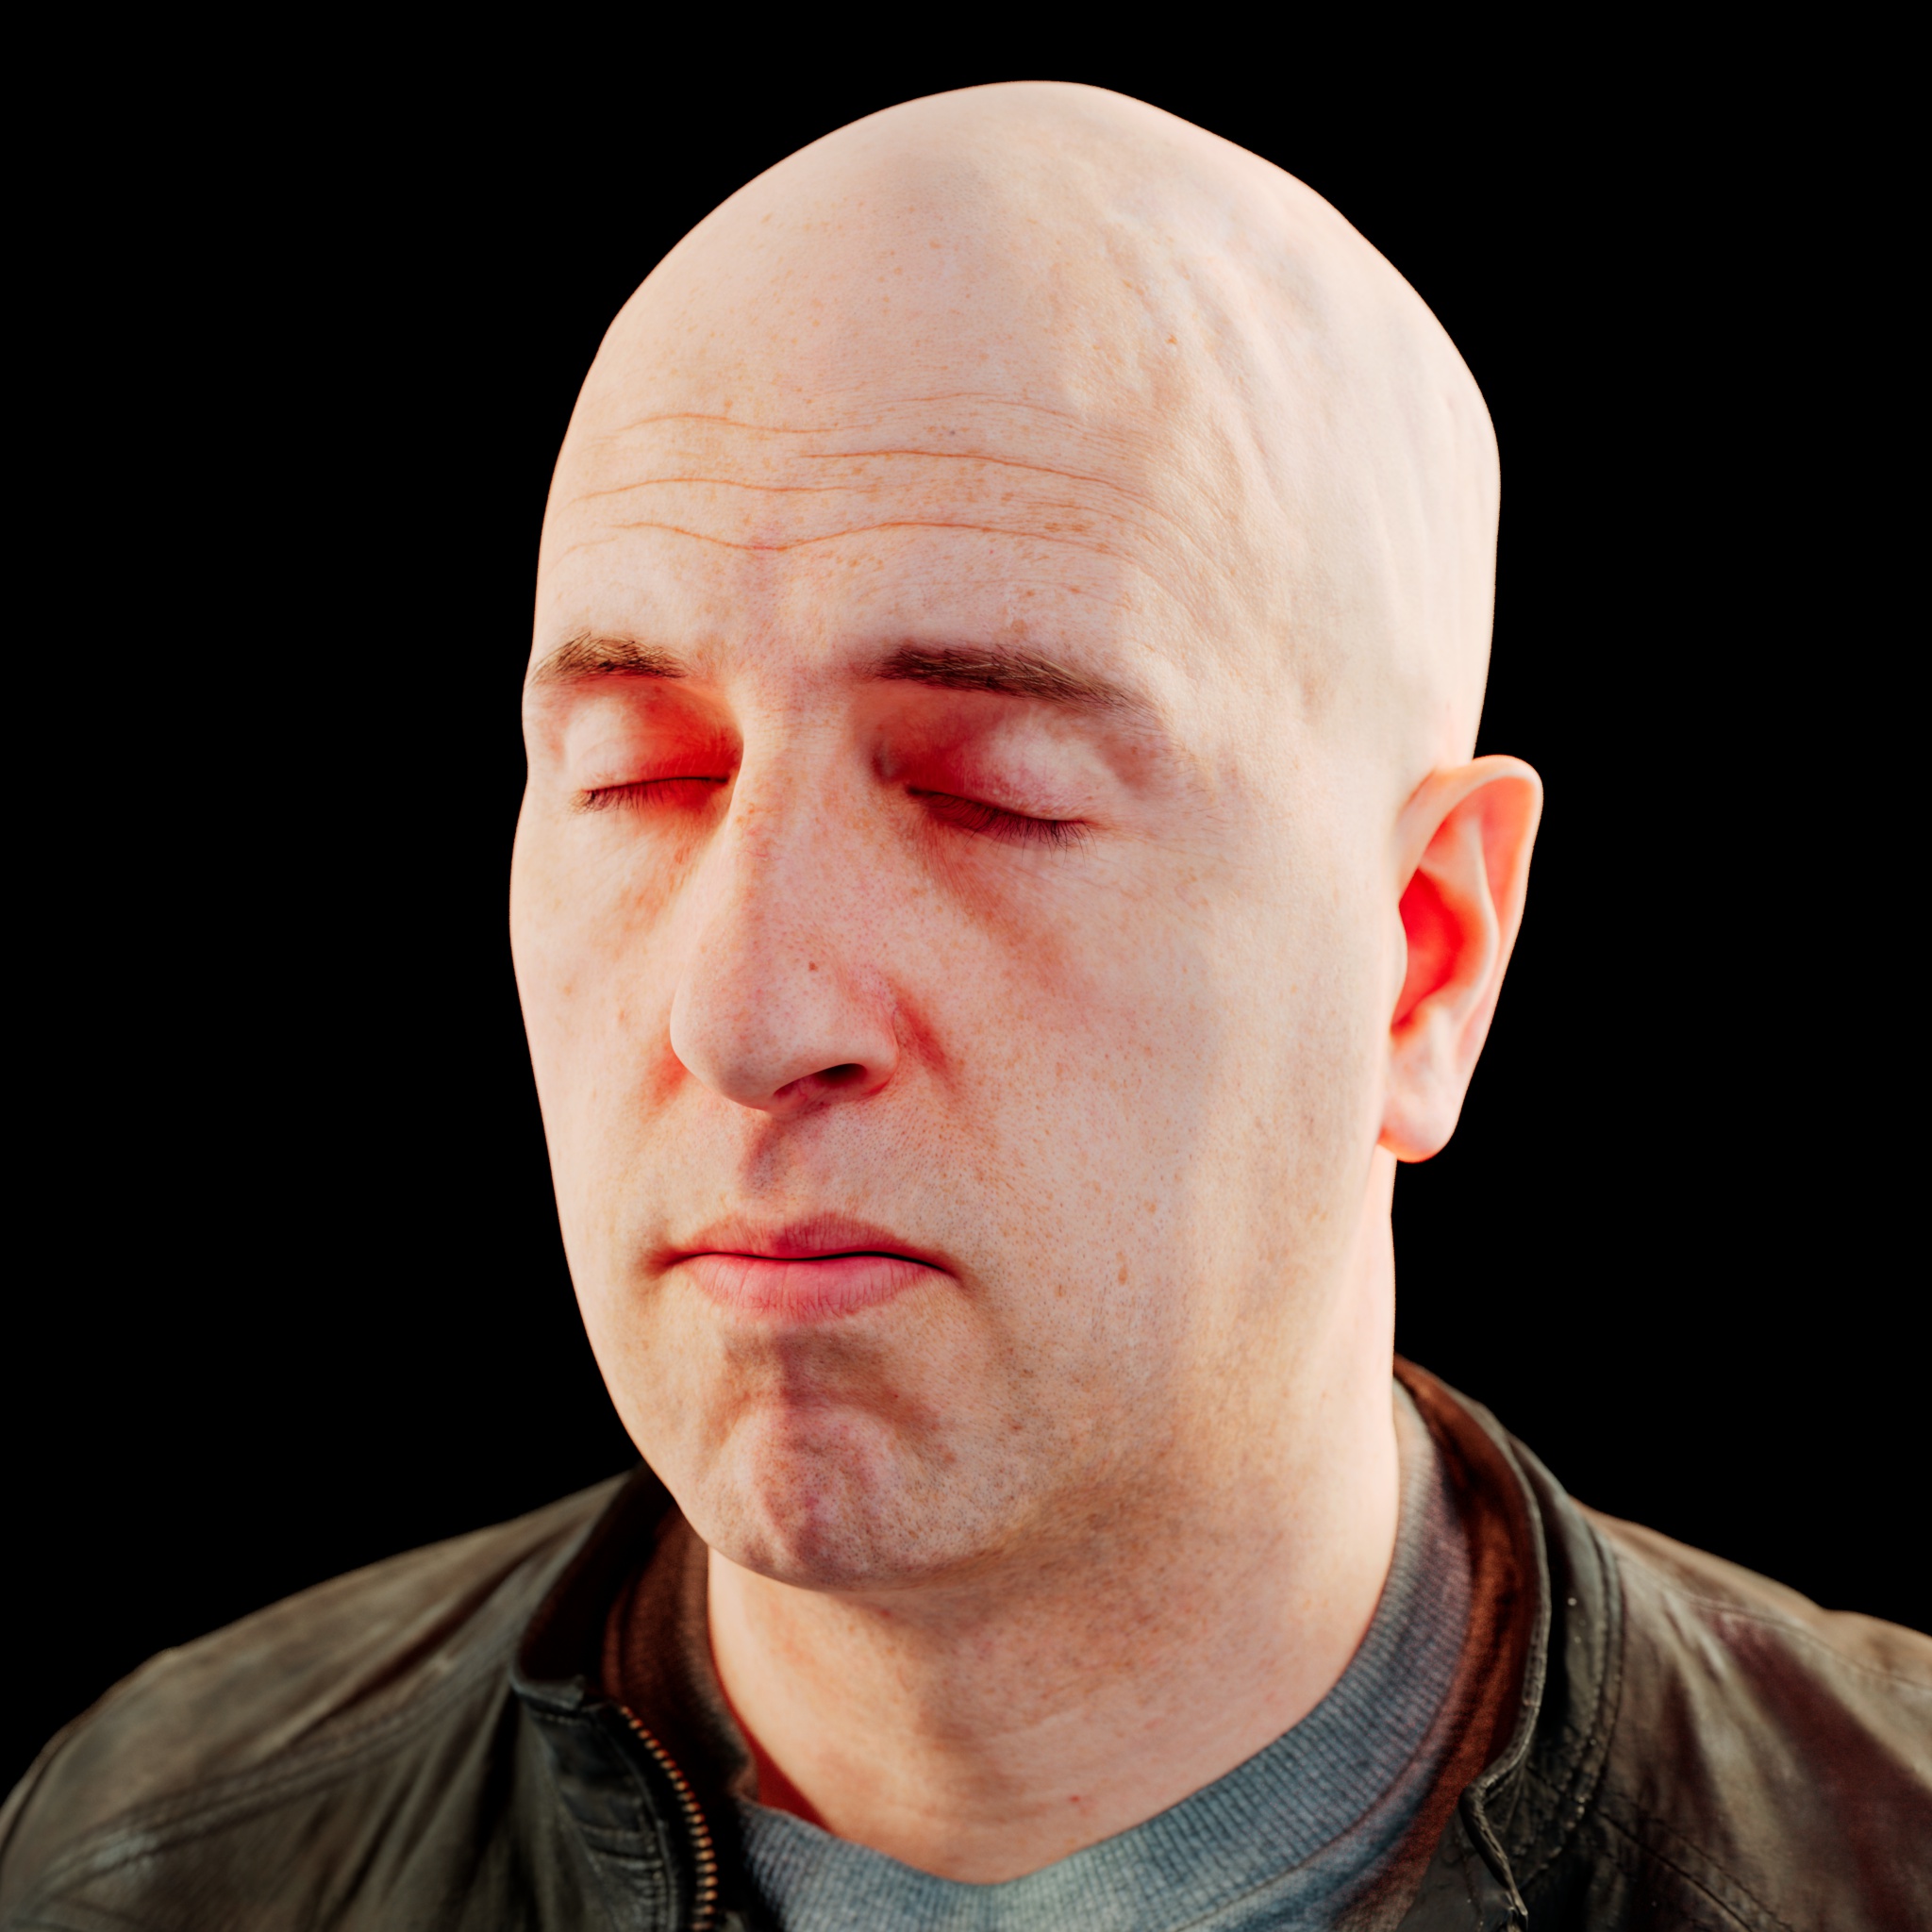
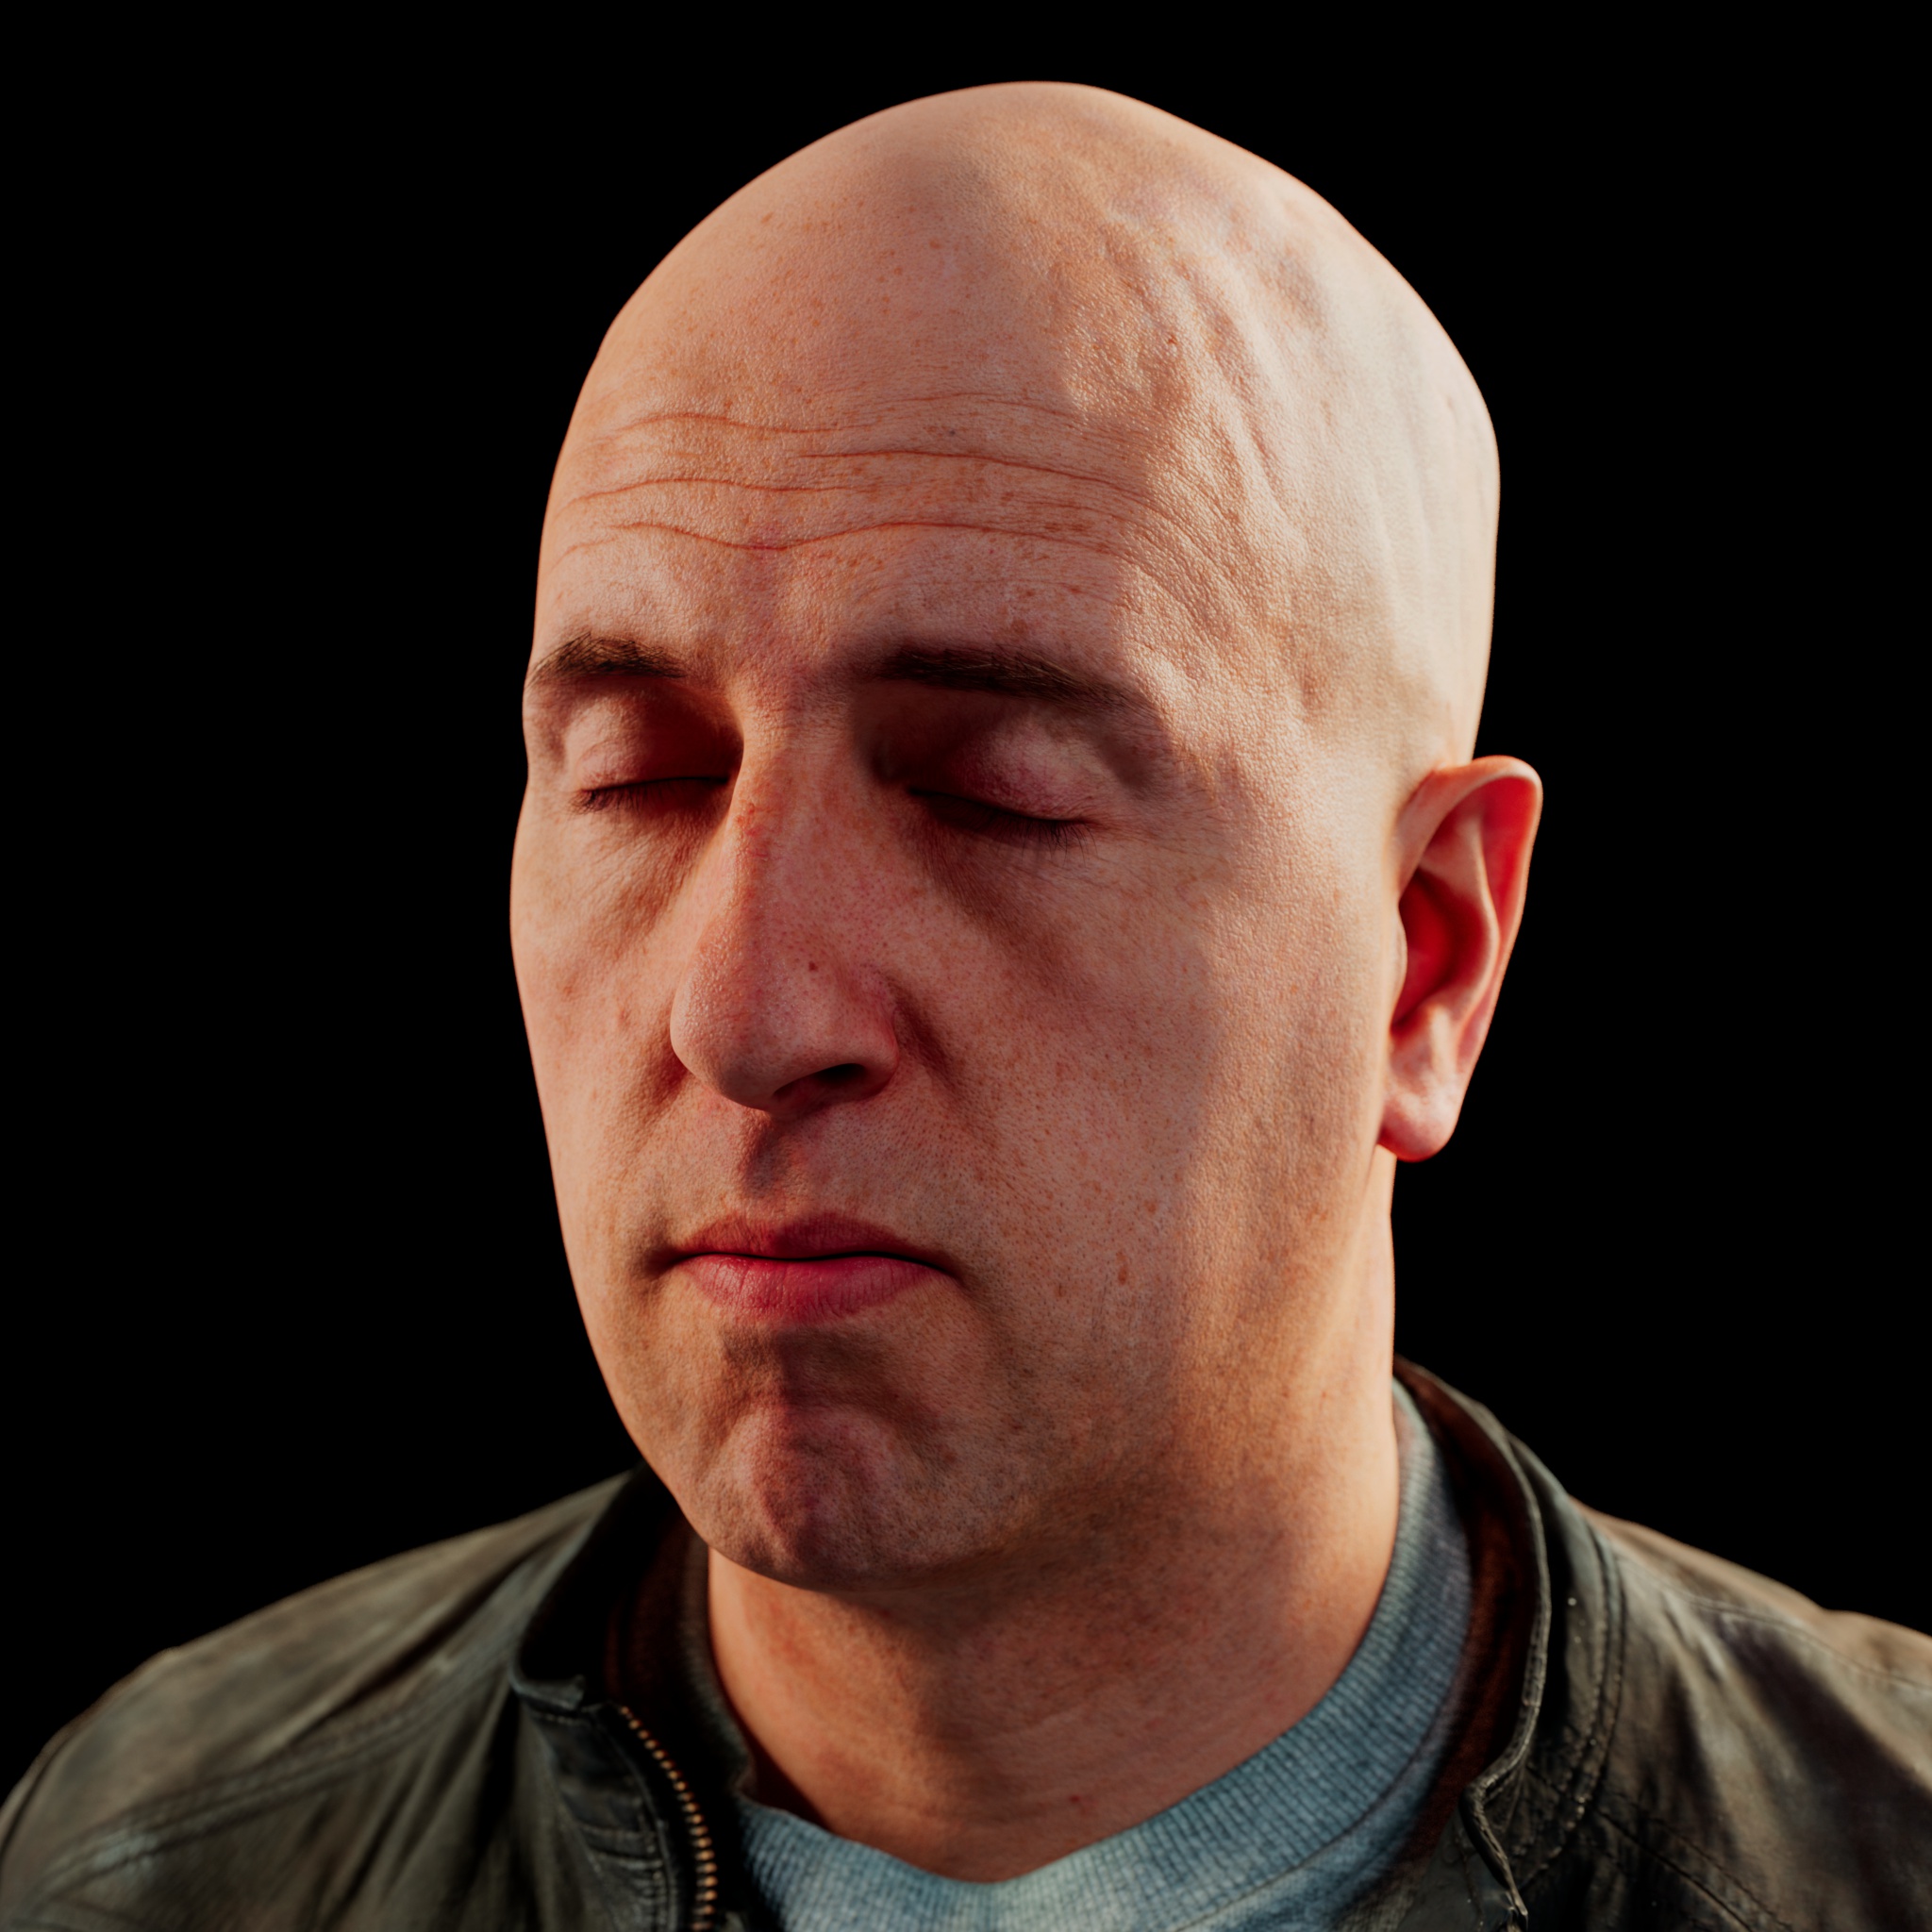
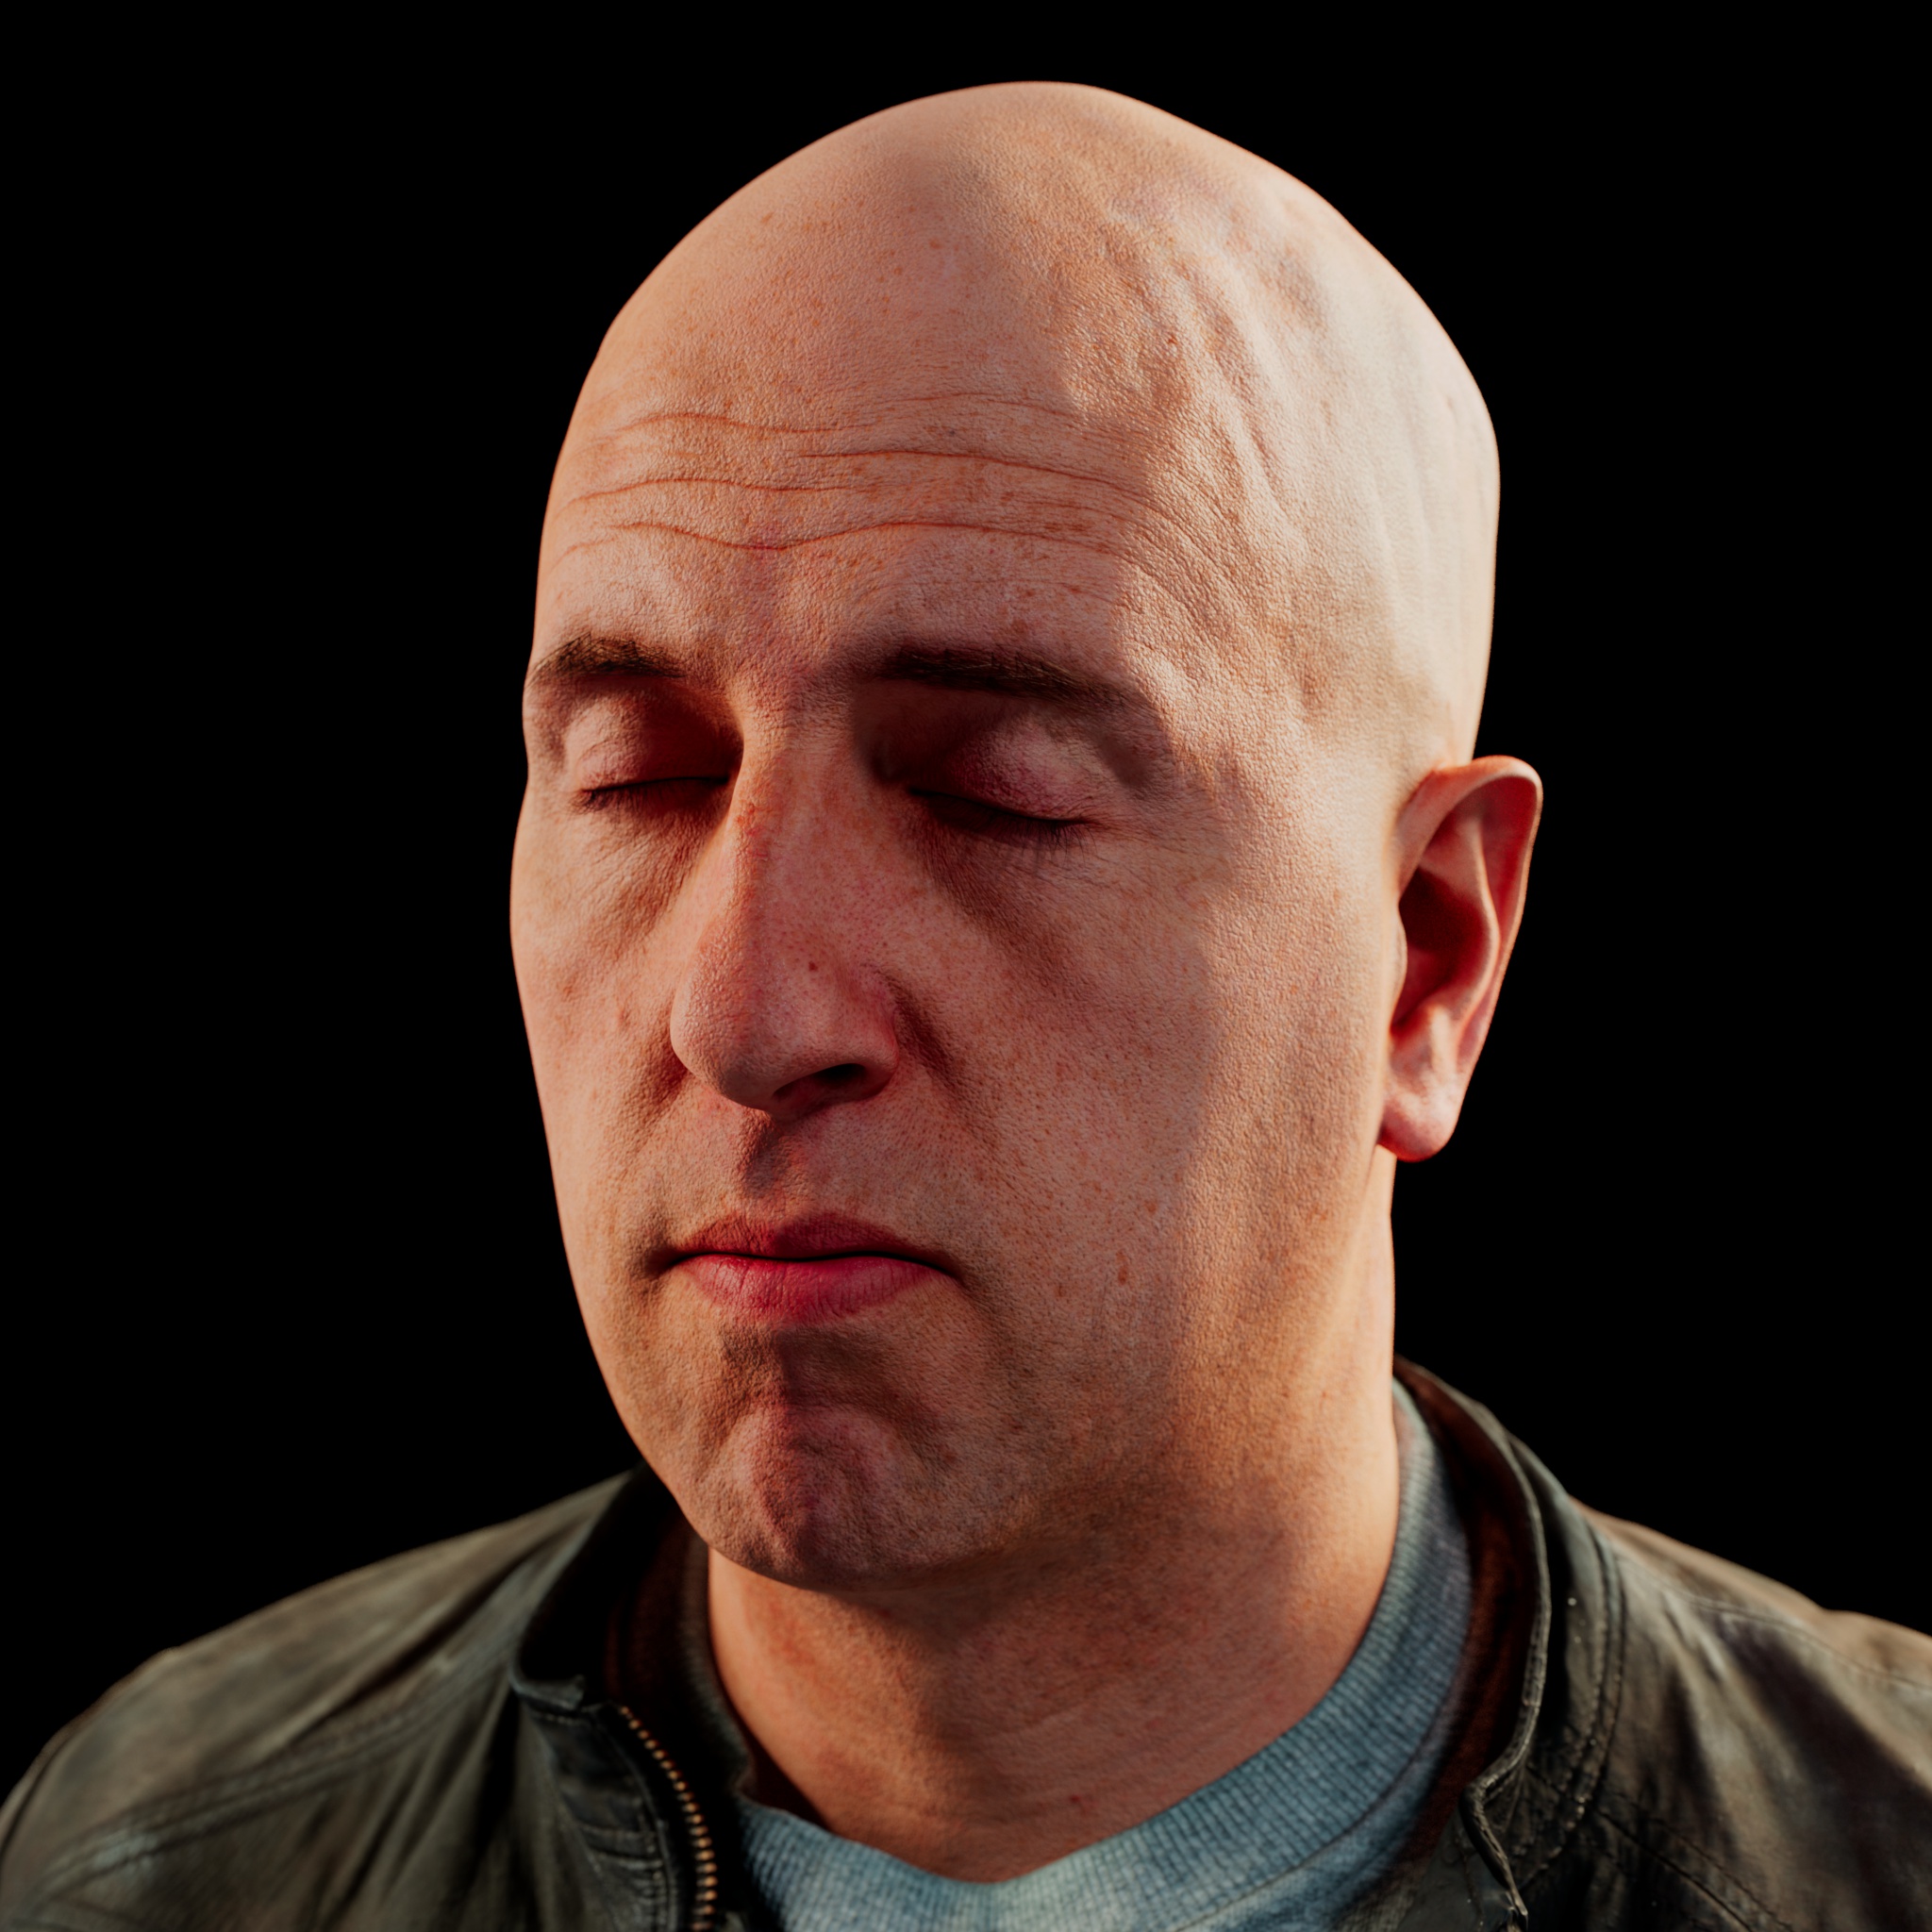
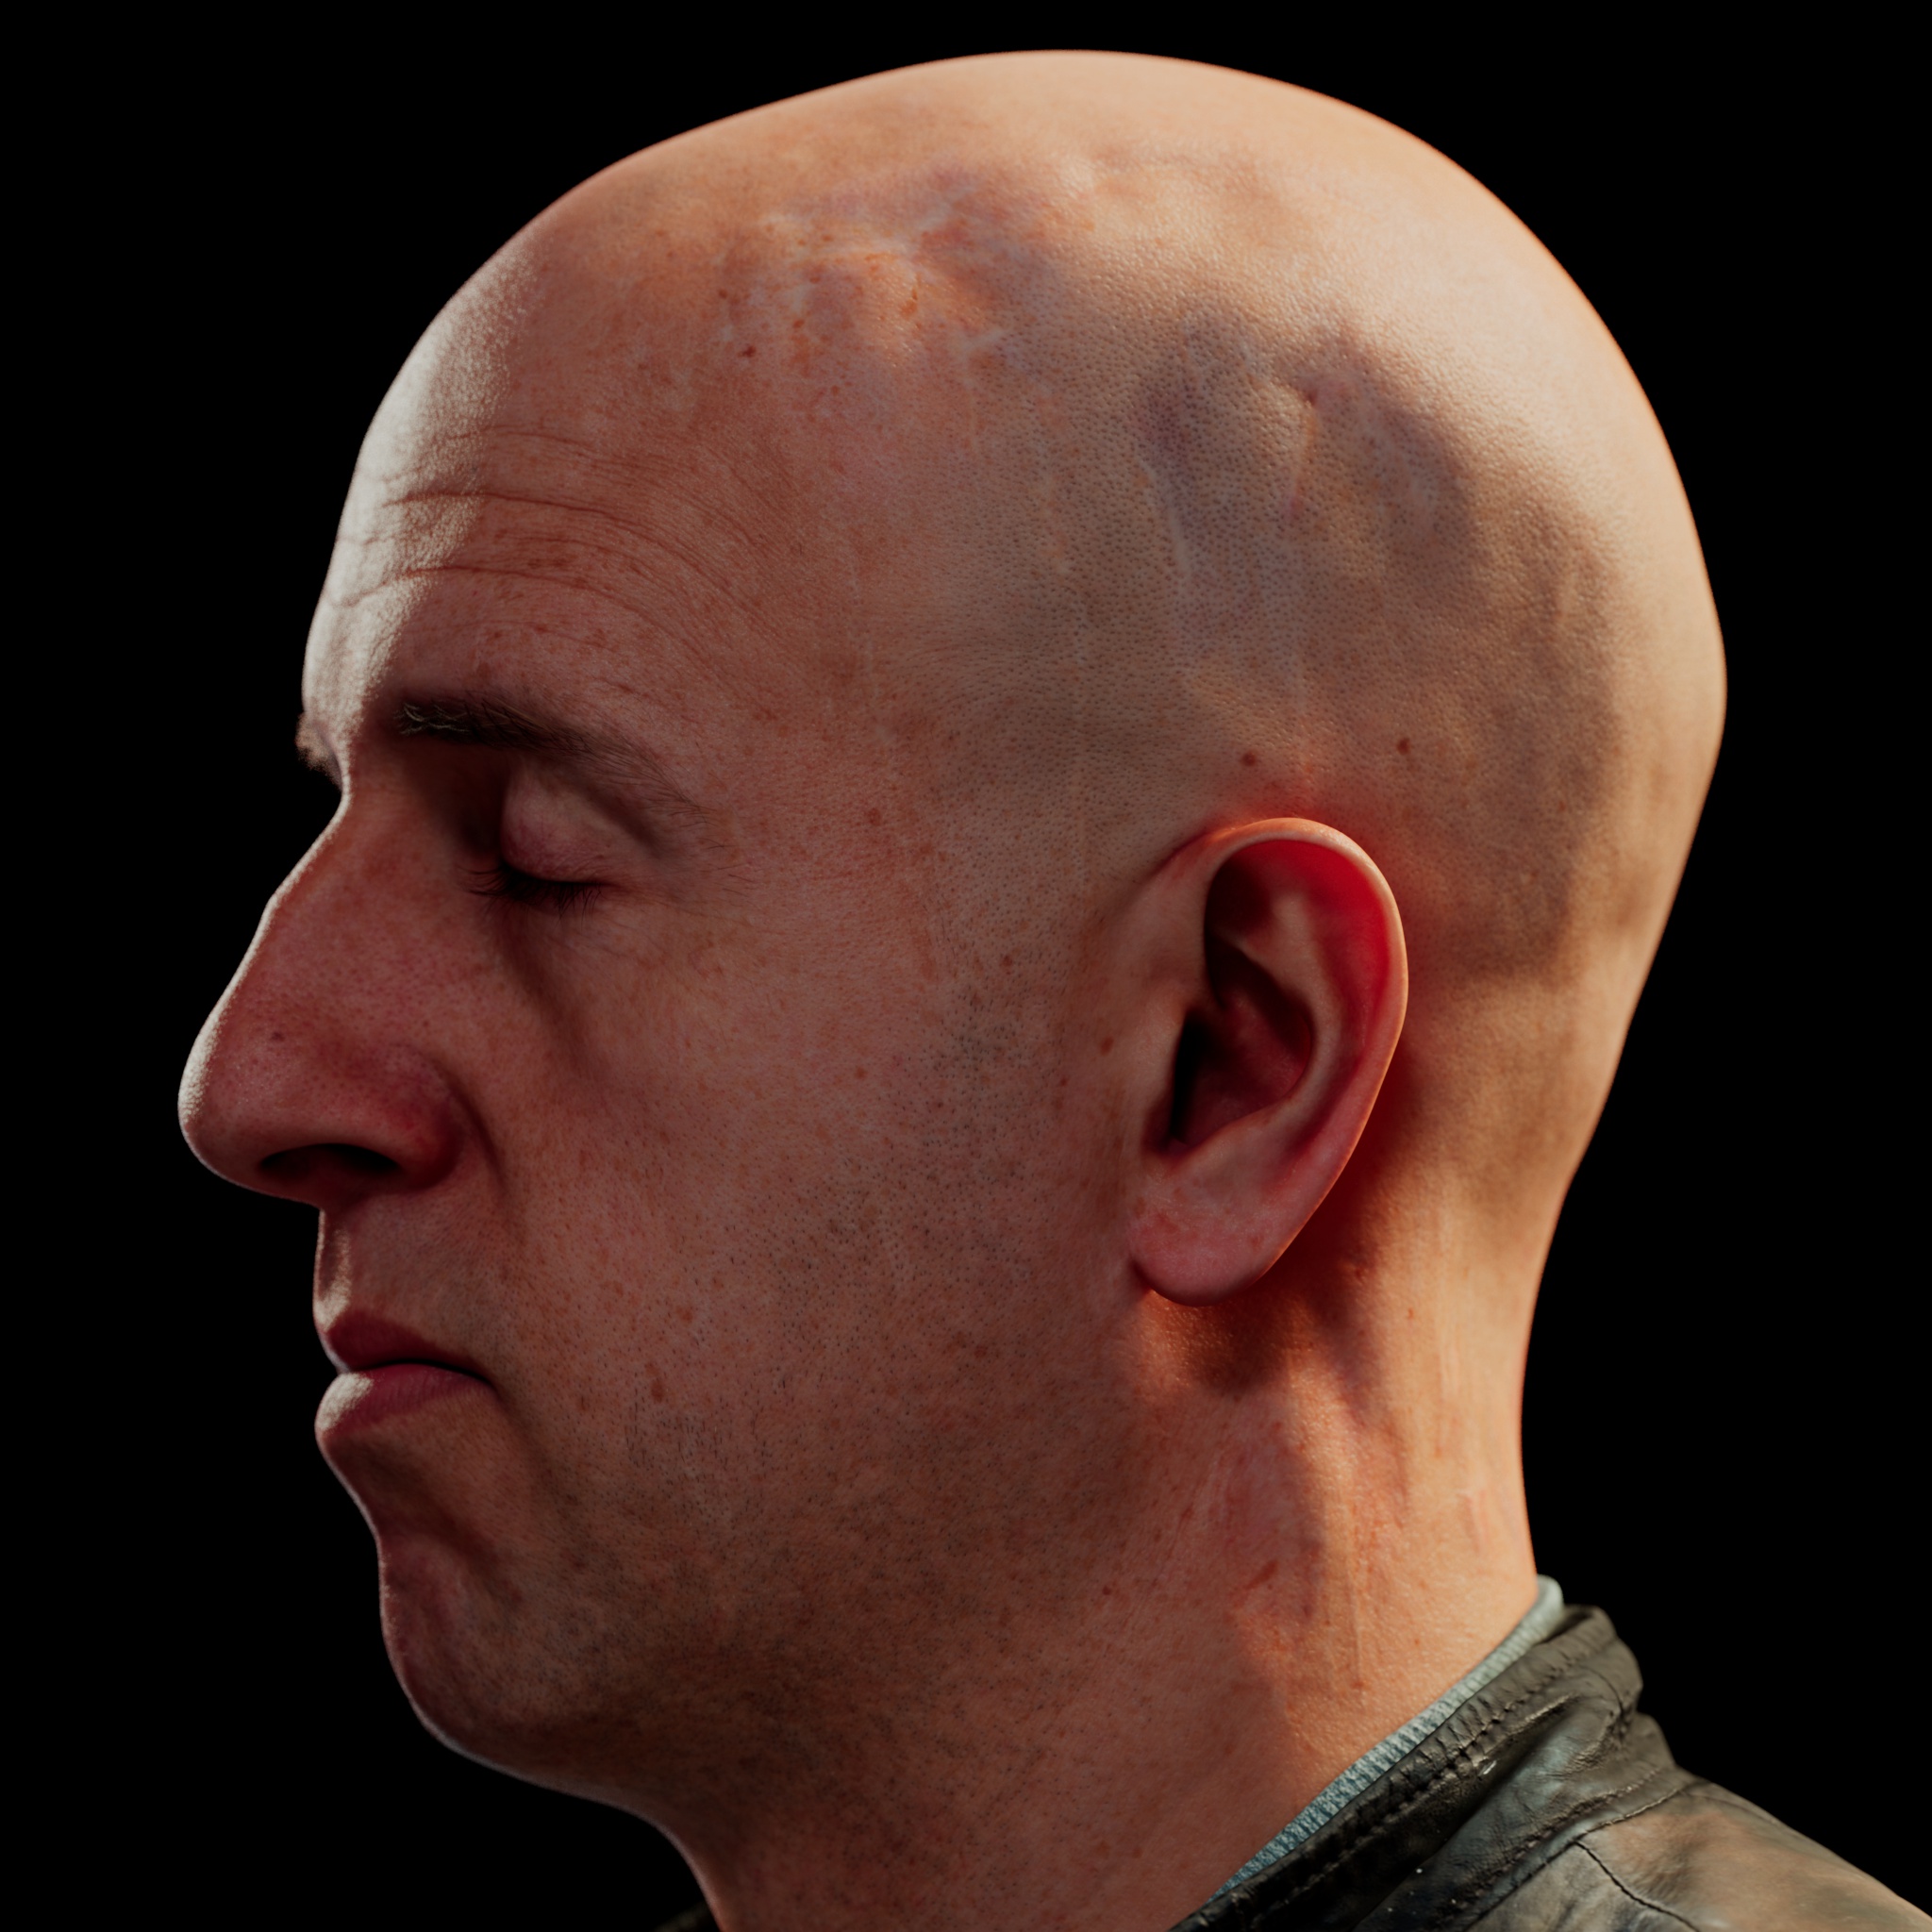
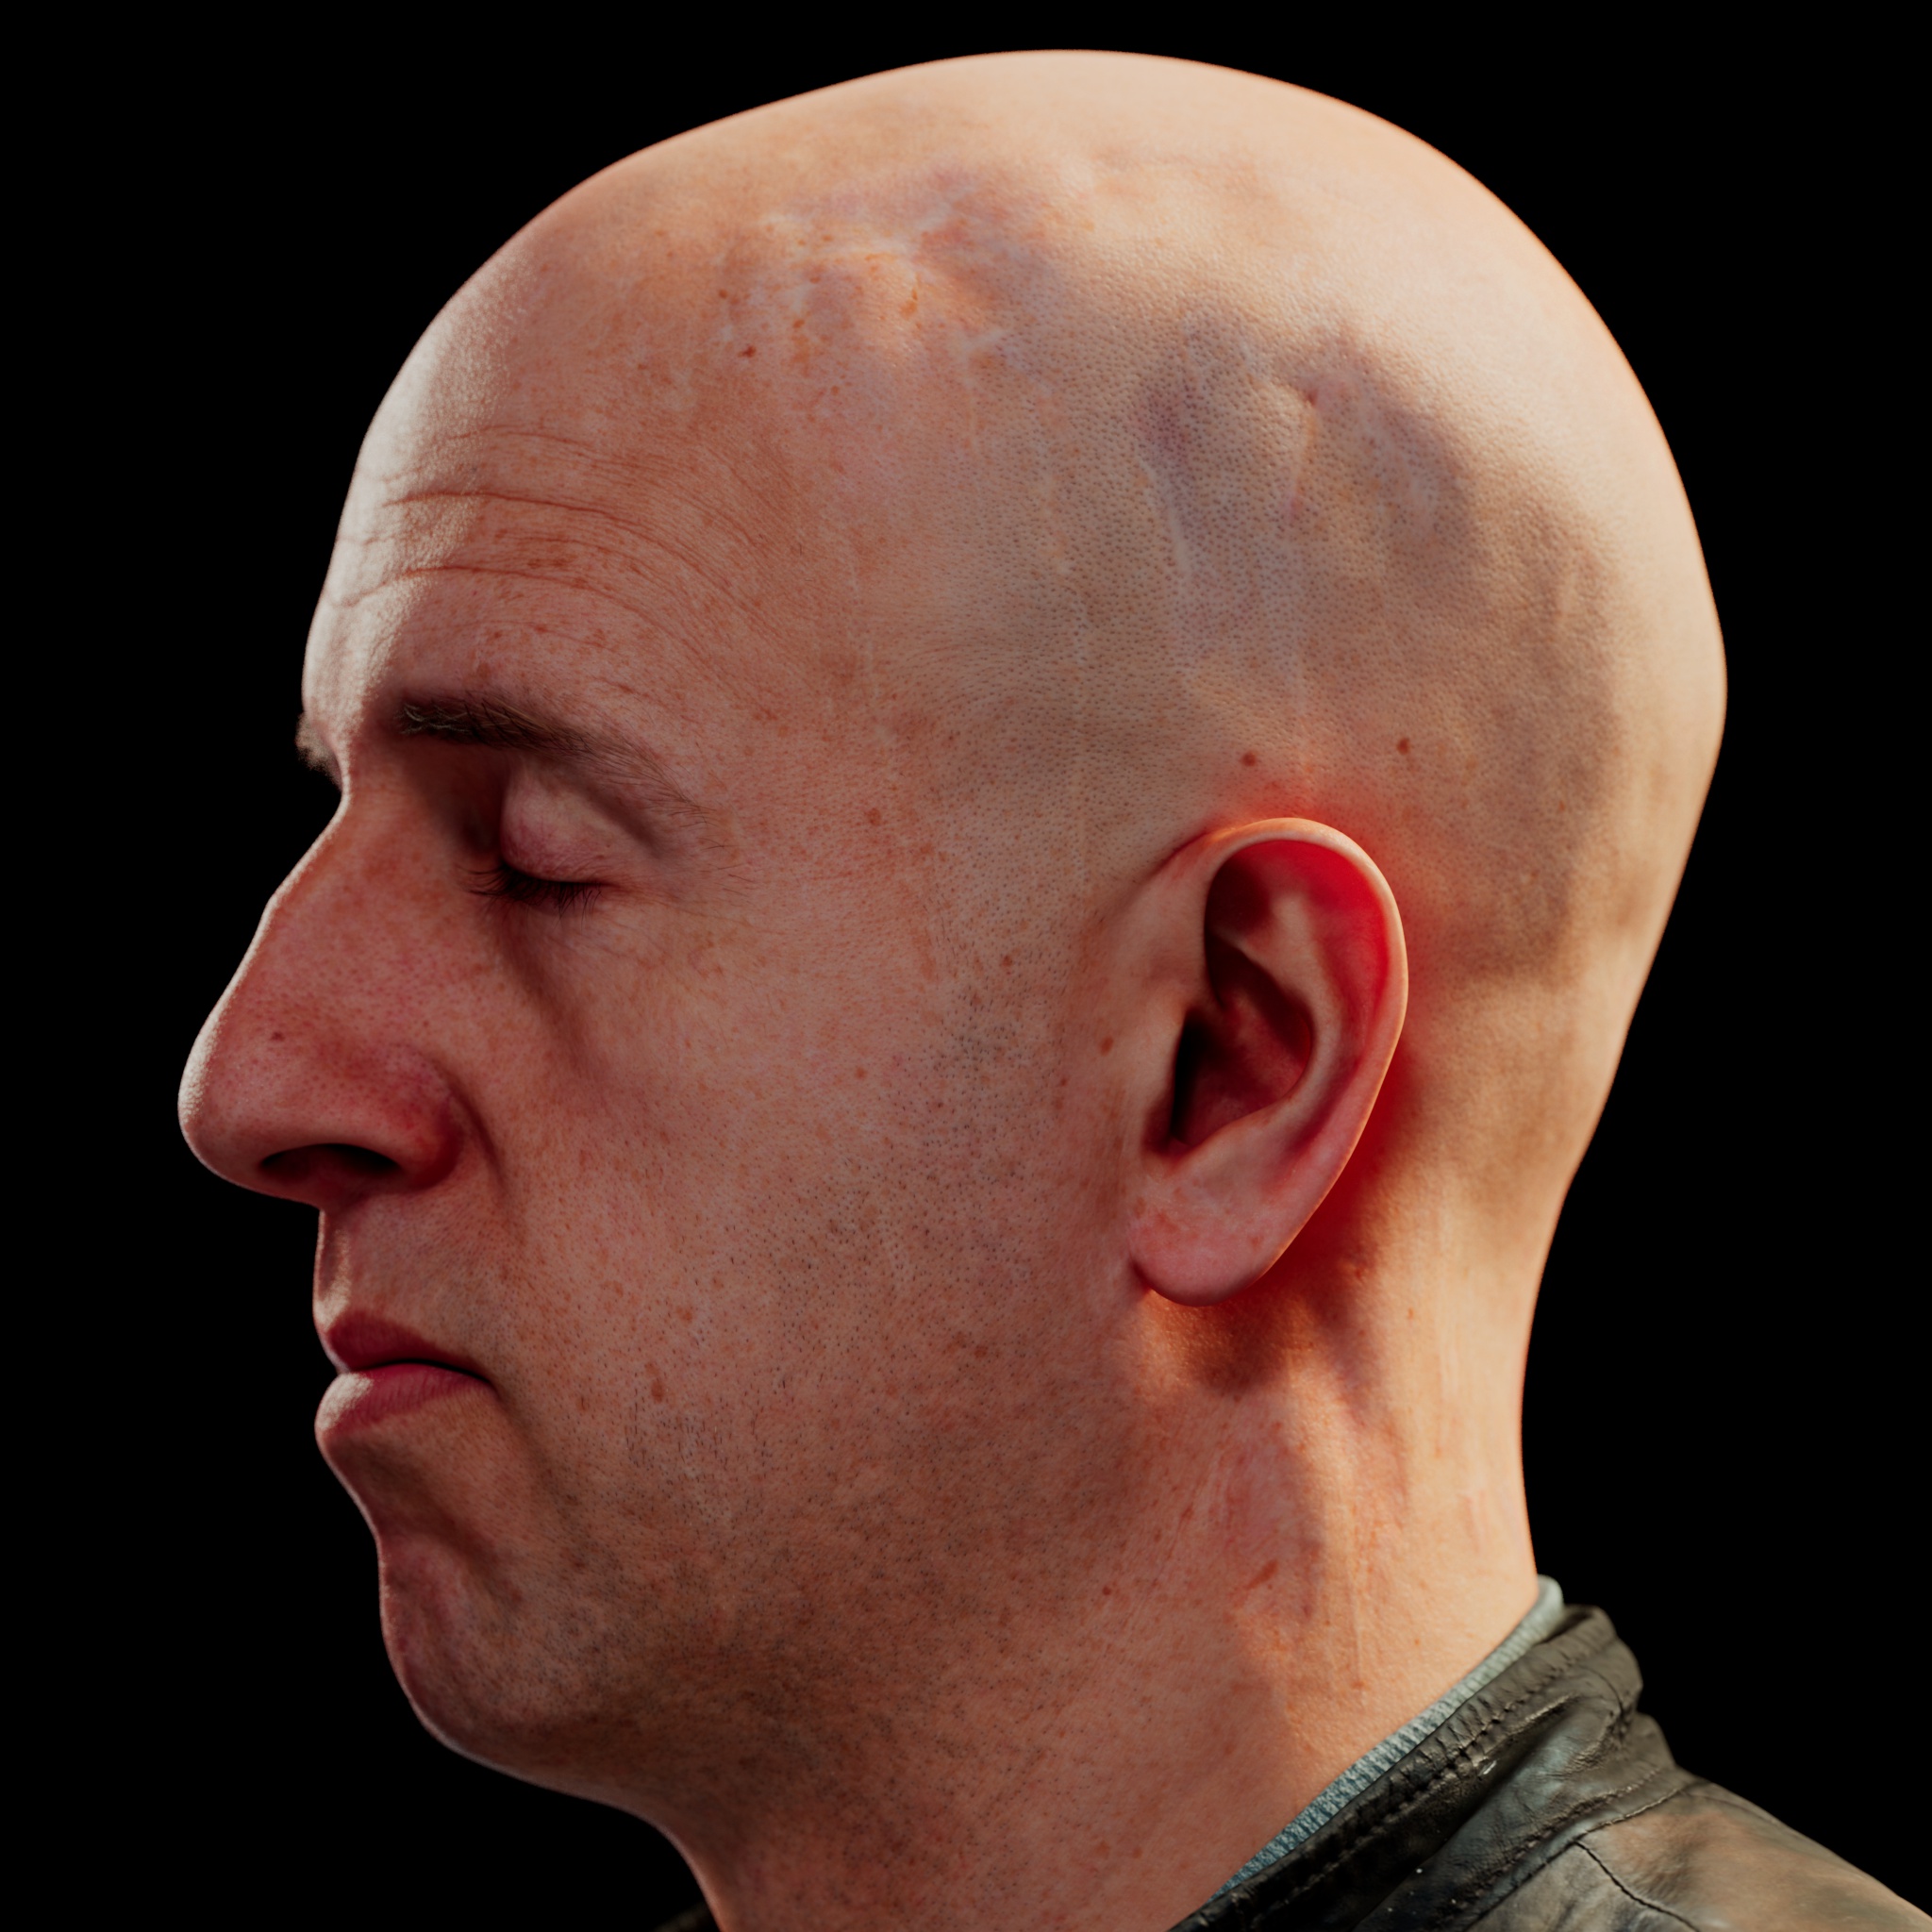
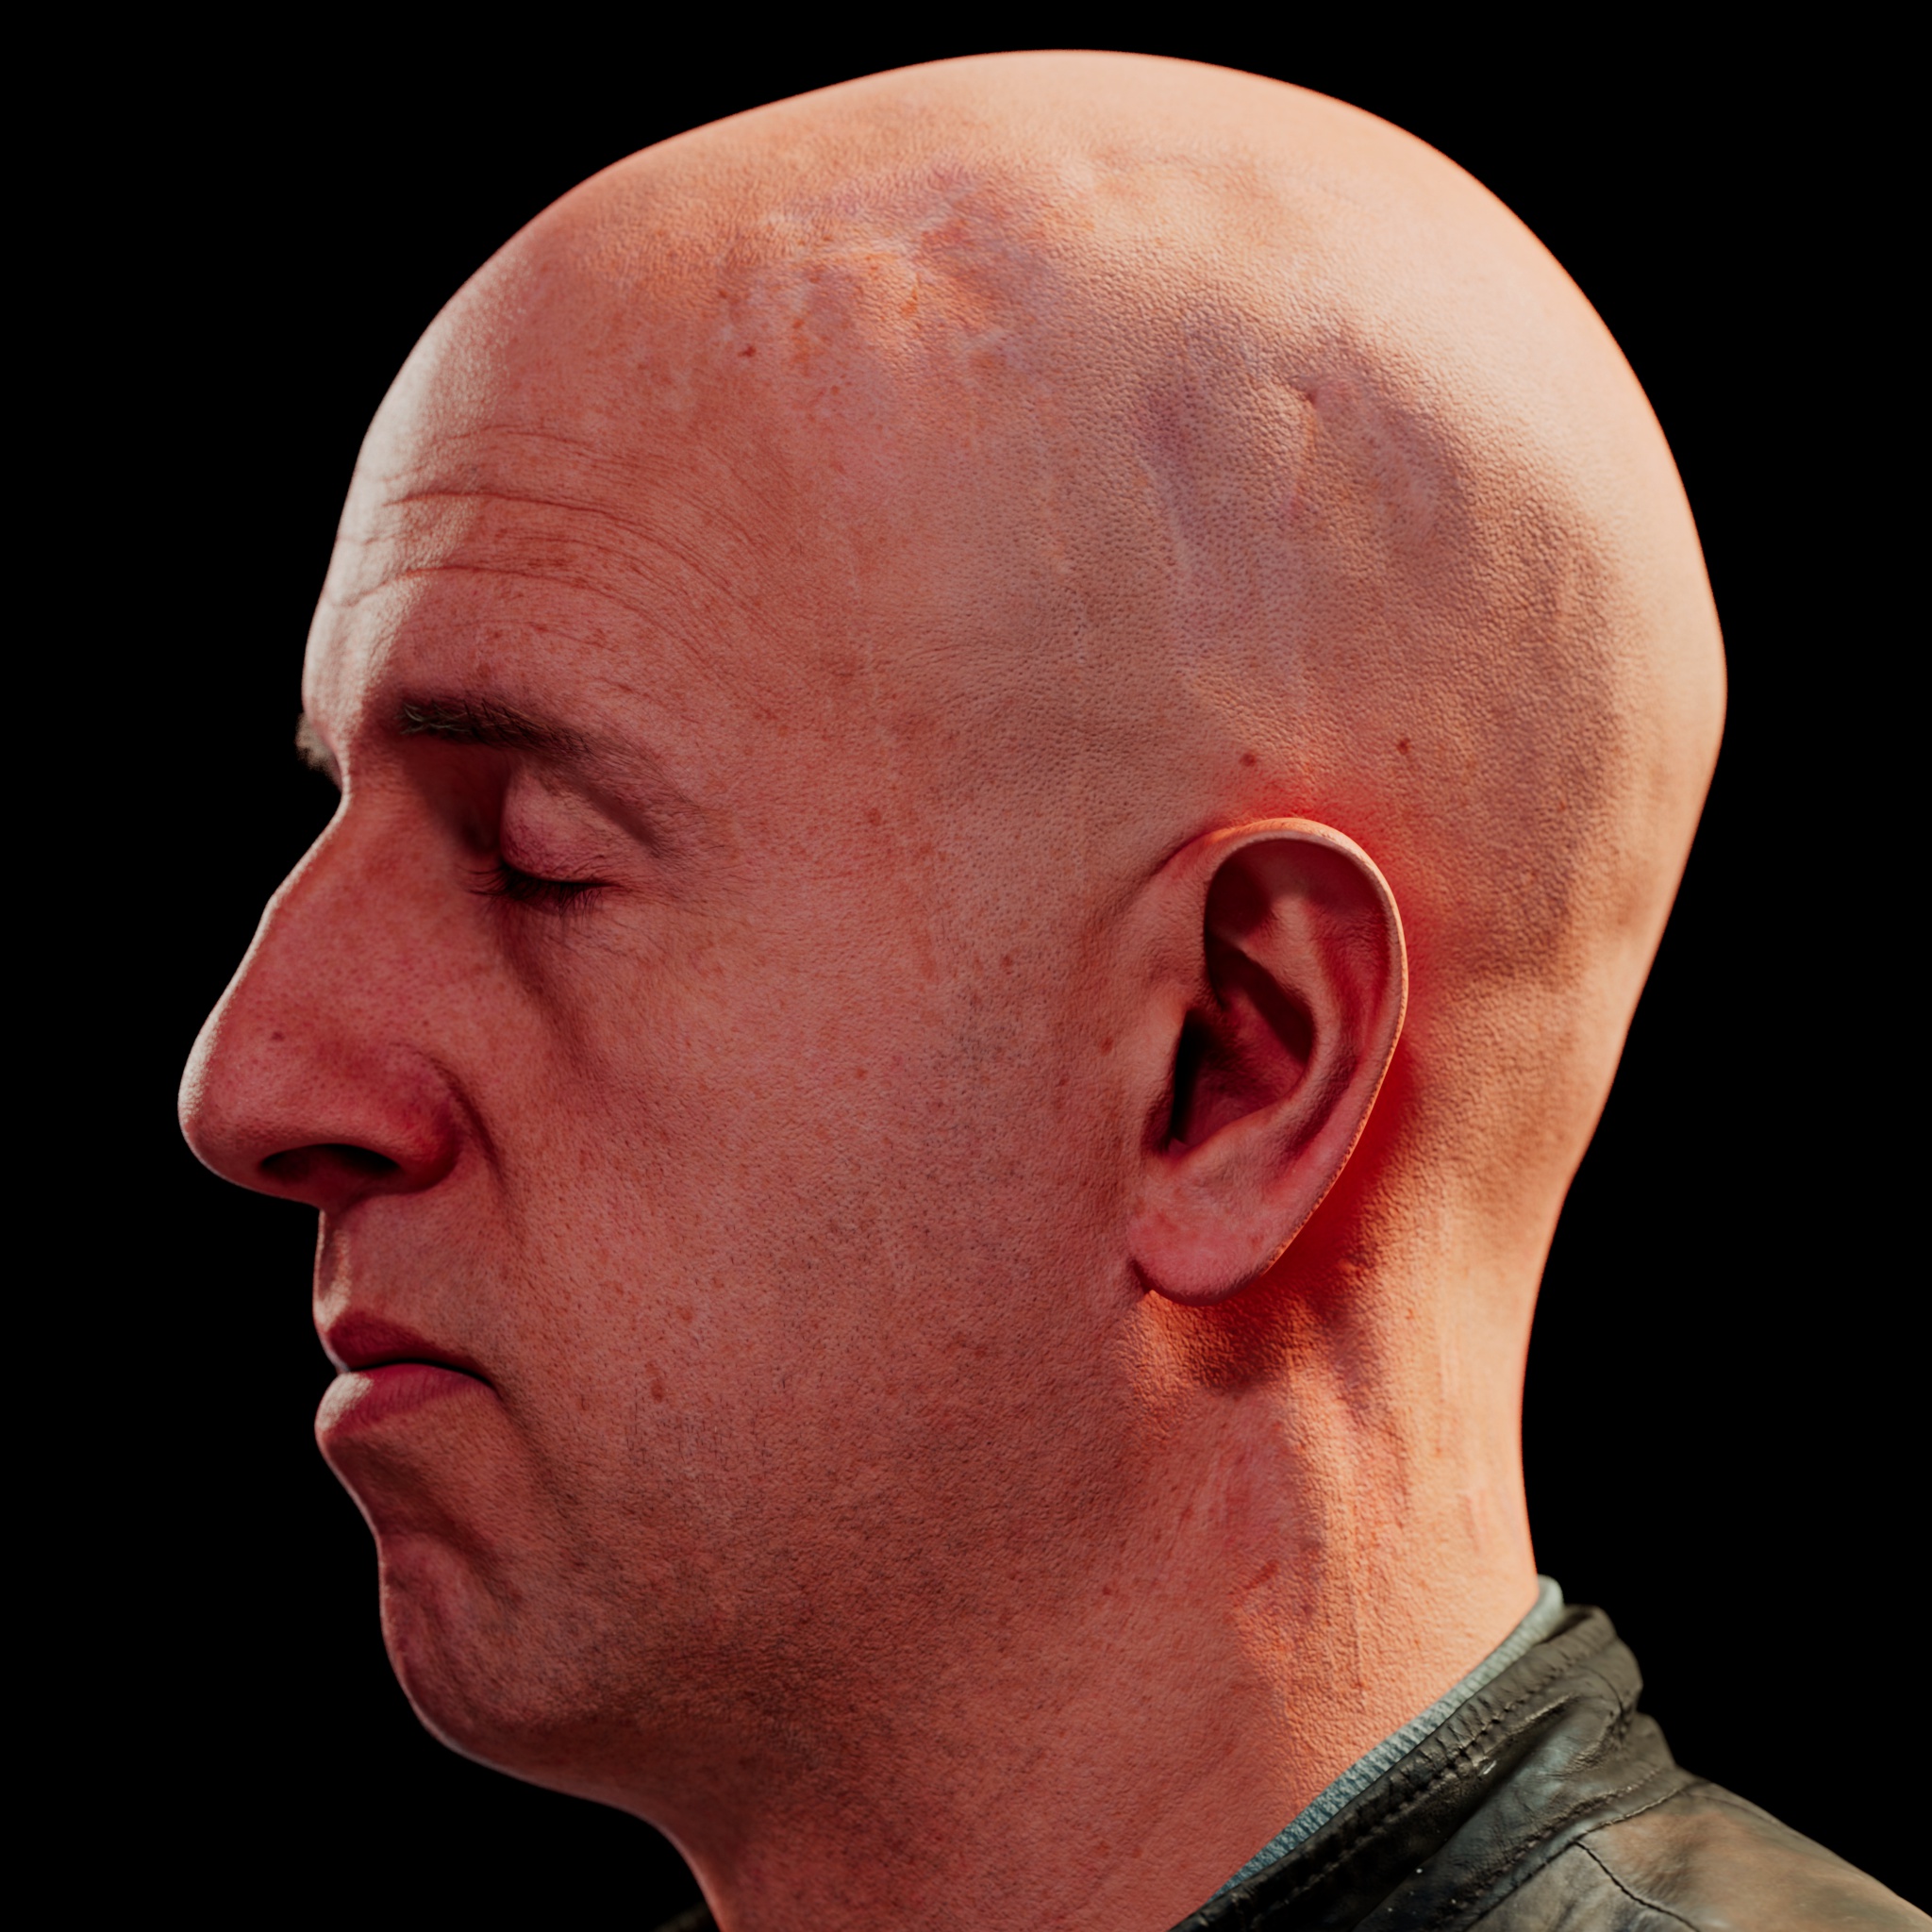
Below now shows the layers successively summed together, by setting the layer weights to their appropriate values.
现在,下面显示层依次总结在一起,通过设置层权重到它们的适当值。
|
|
|
|
|
|
Deep layer. 深层。 |
Deep and mid layer. 深层和中层。 |
Deep, mid and shallow layer, containing the diffuse pigment color. 深、中、浅层,含有弥漫色素的颜色。 |
All layers, with reflections. 所有的层次,与反射。 |
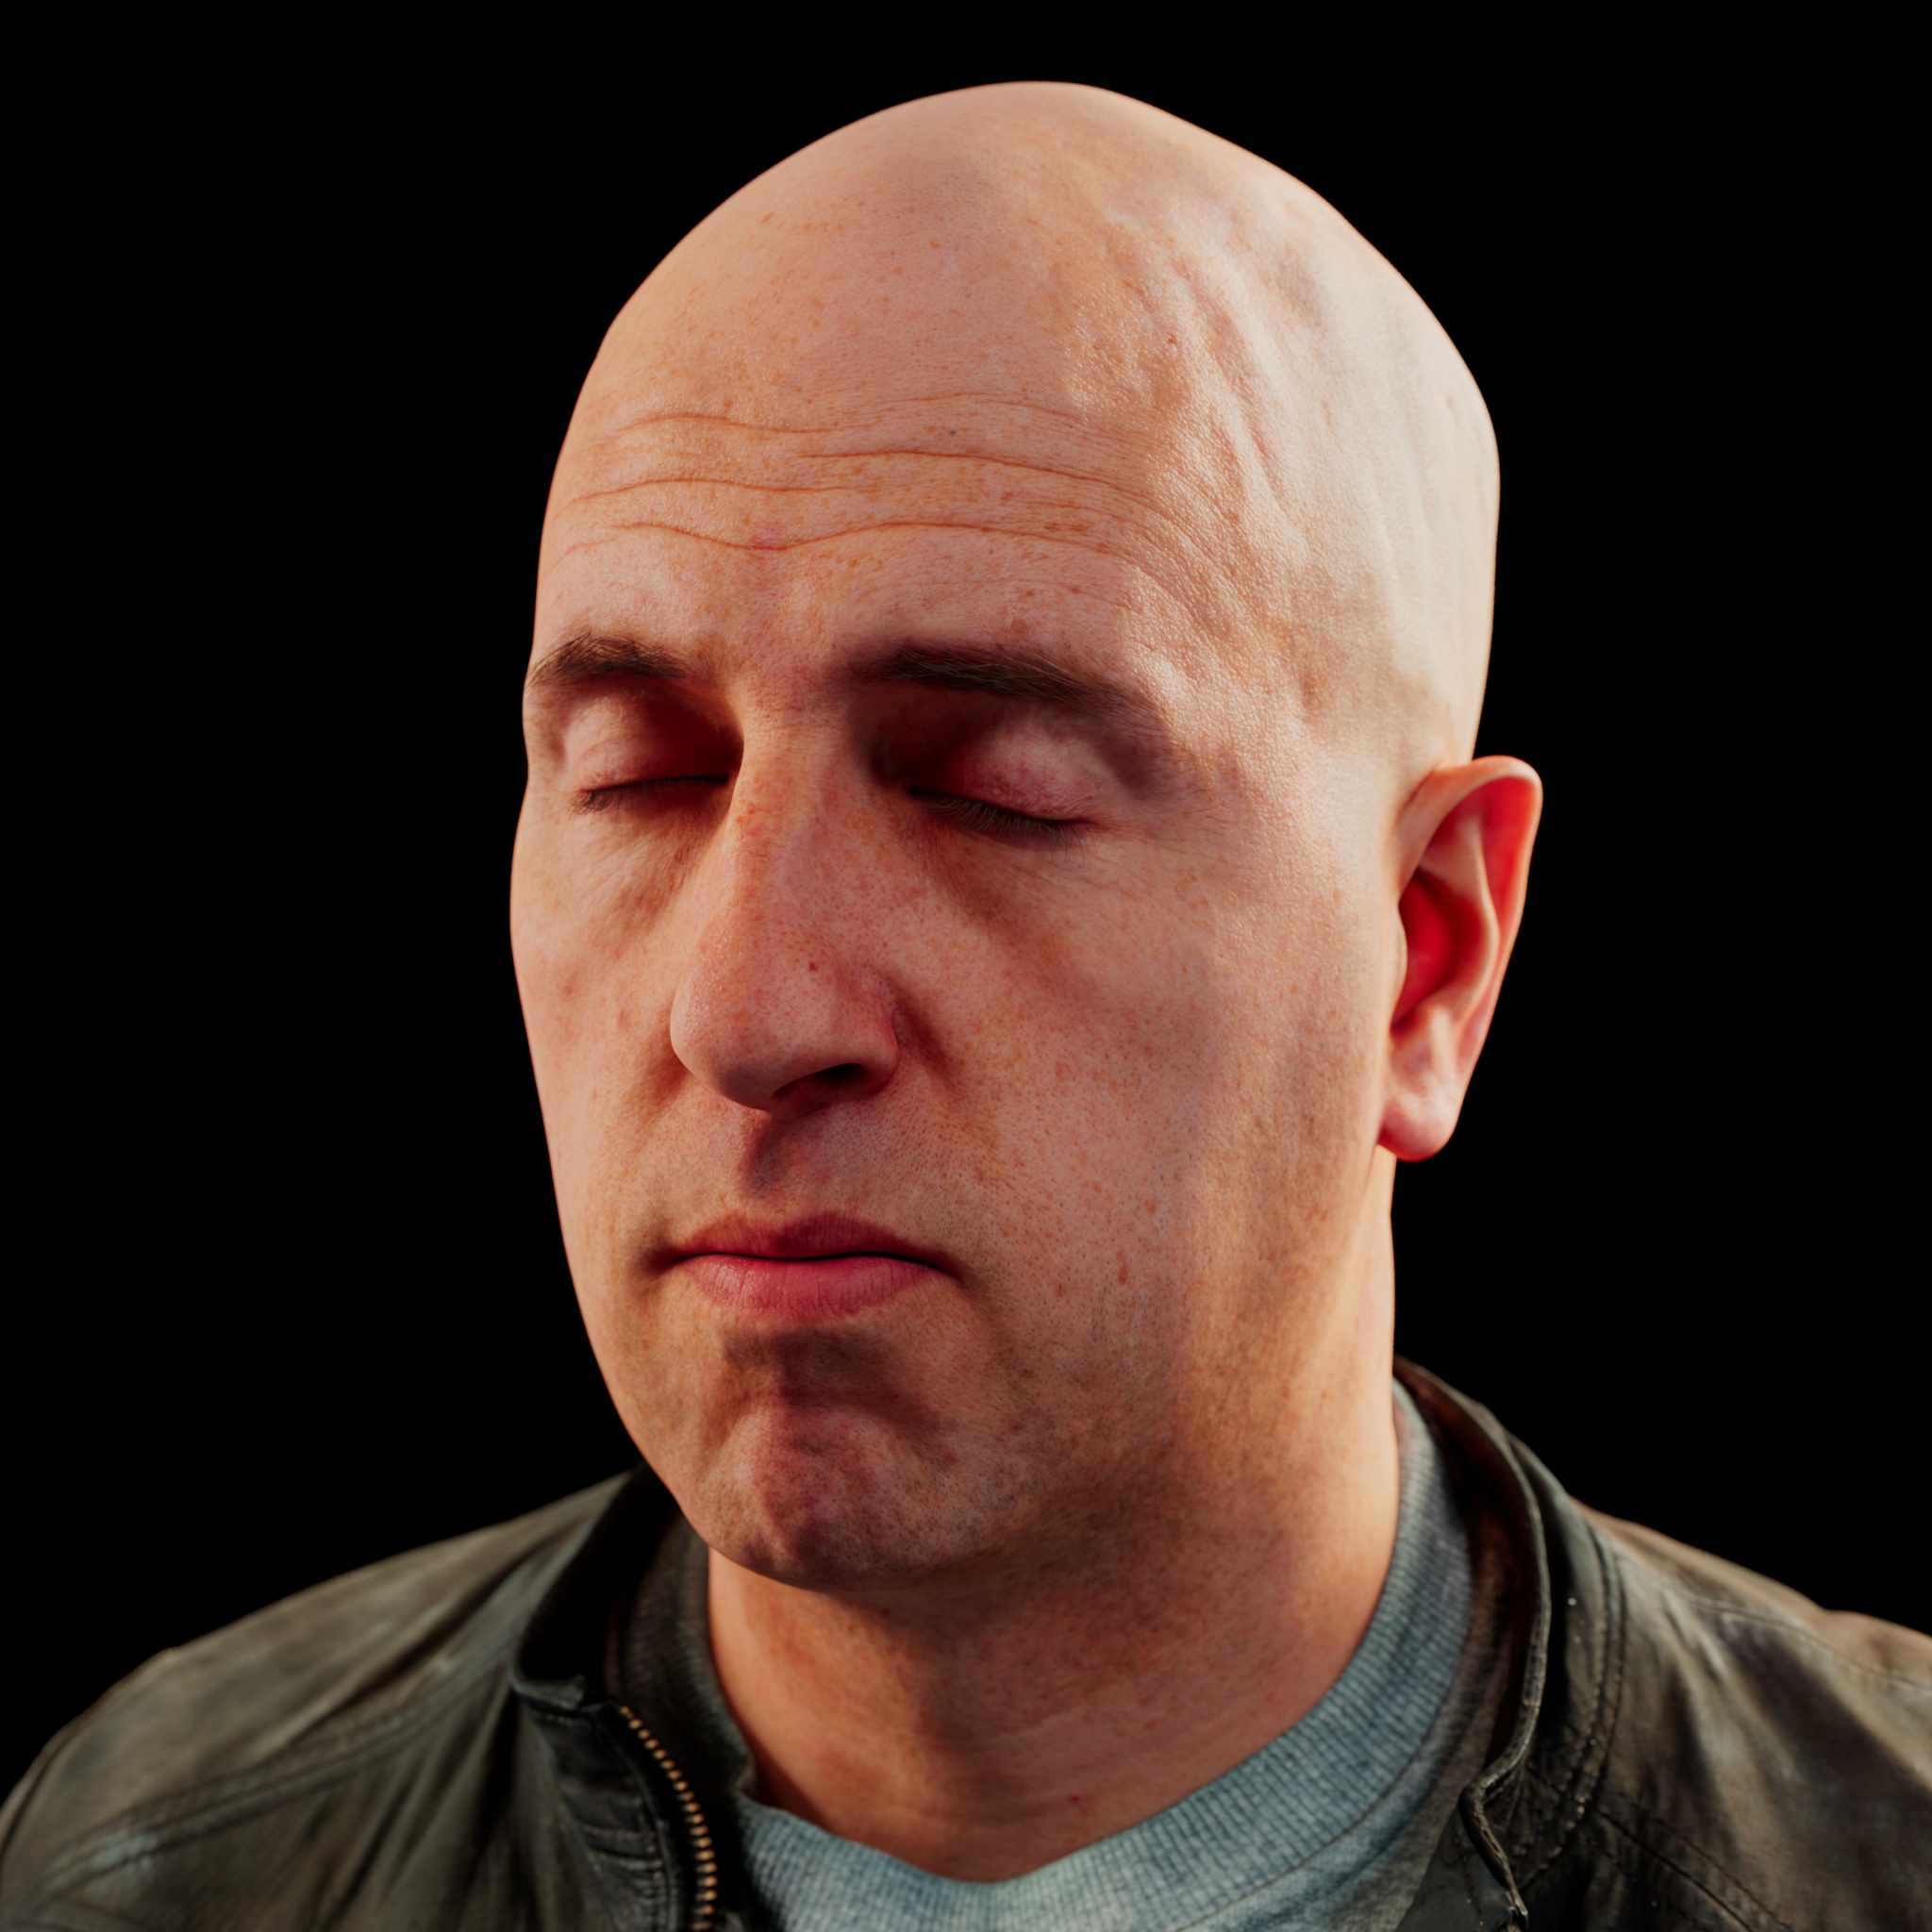
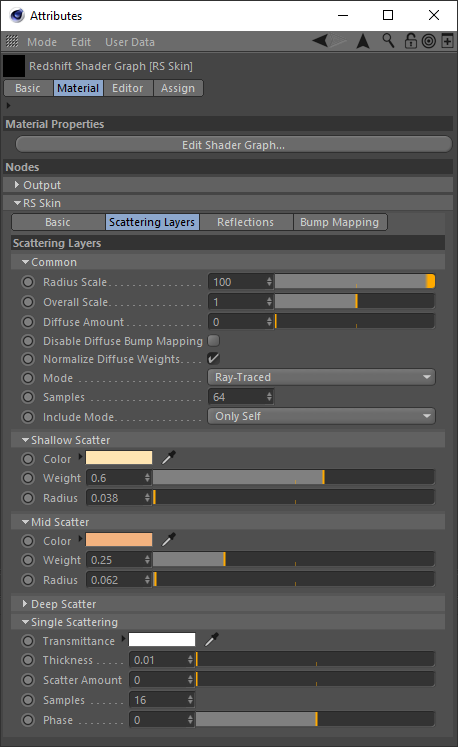
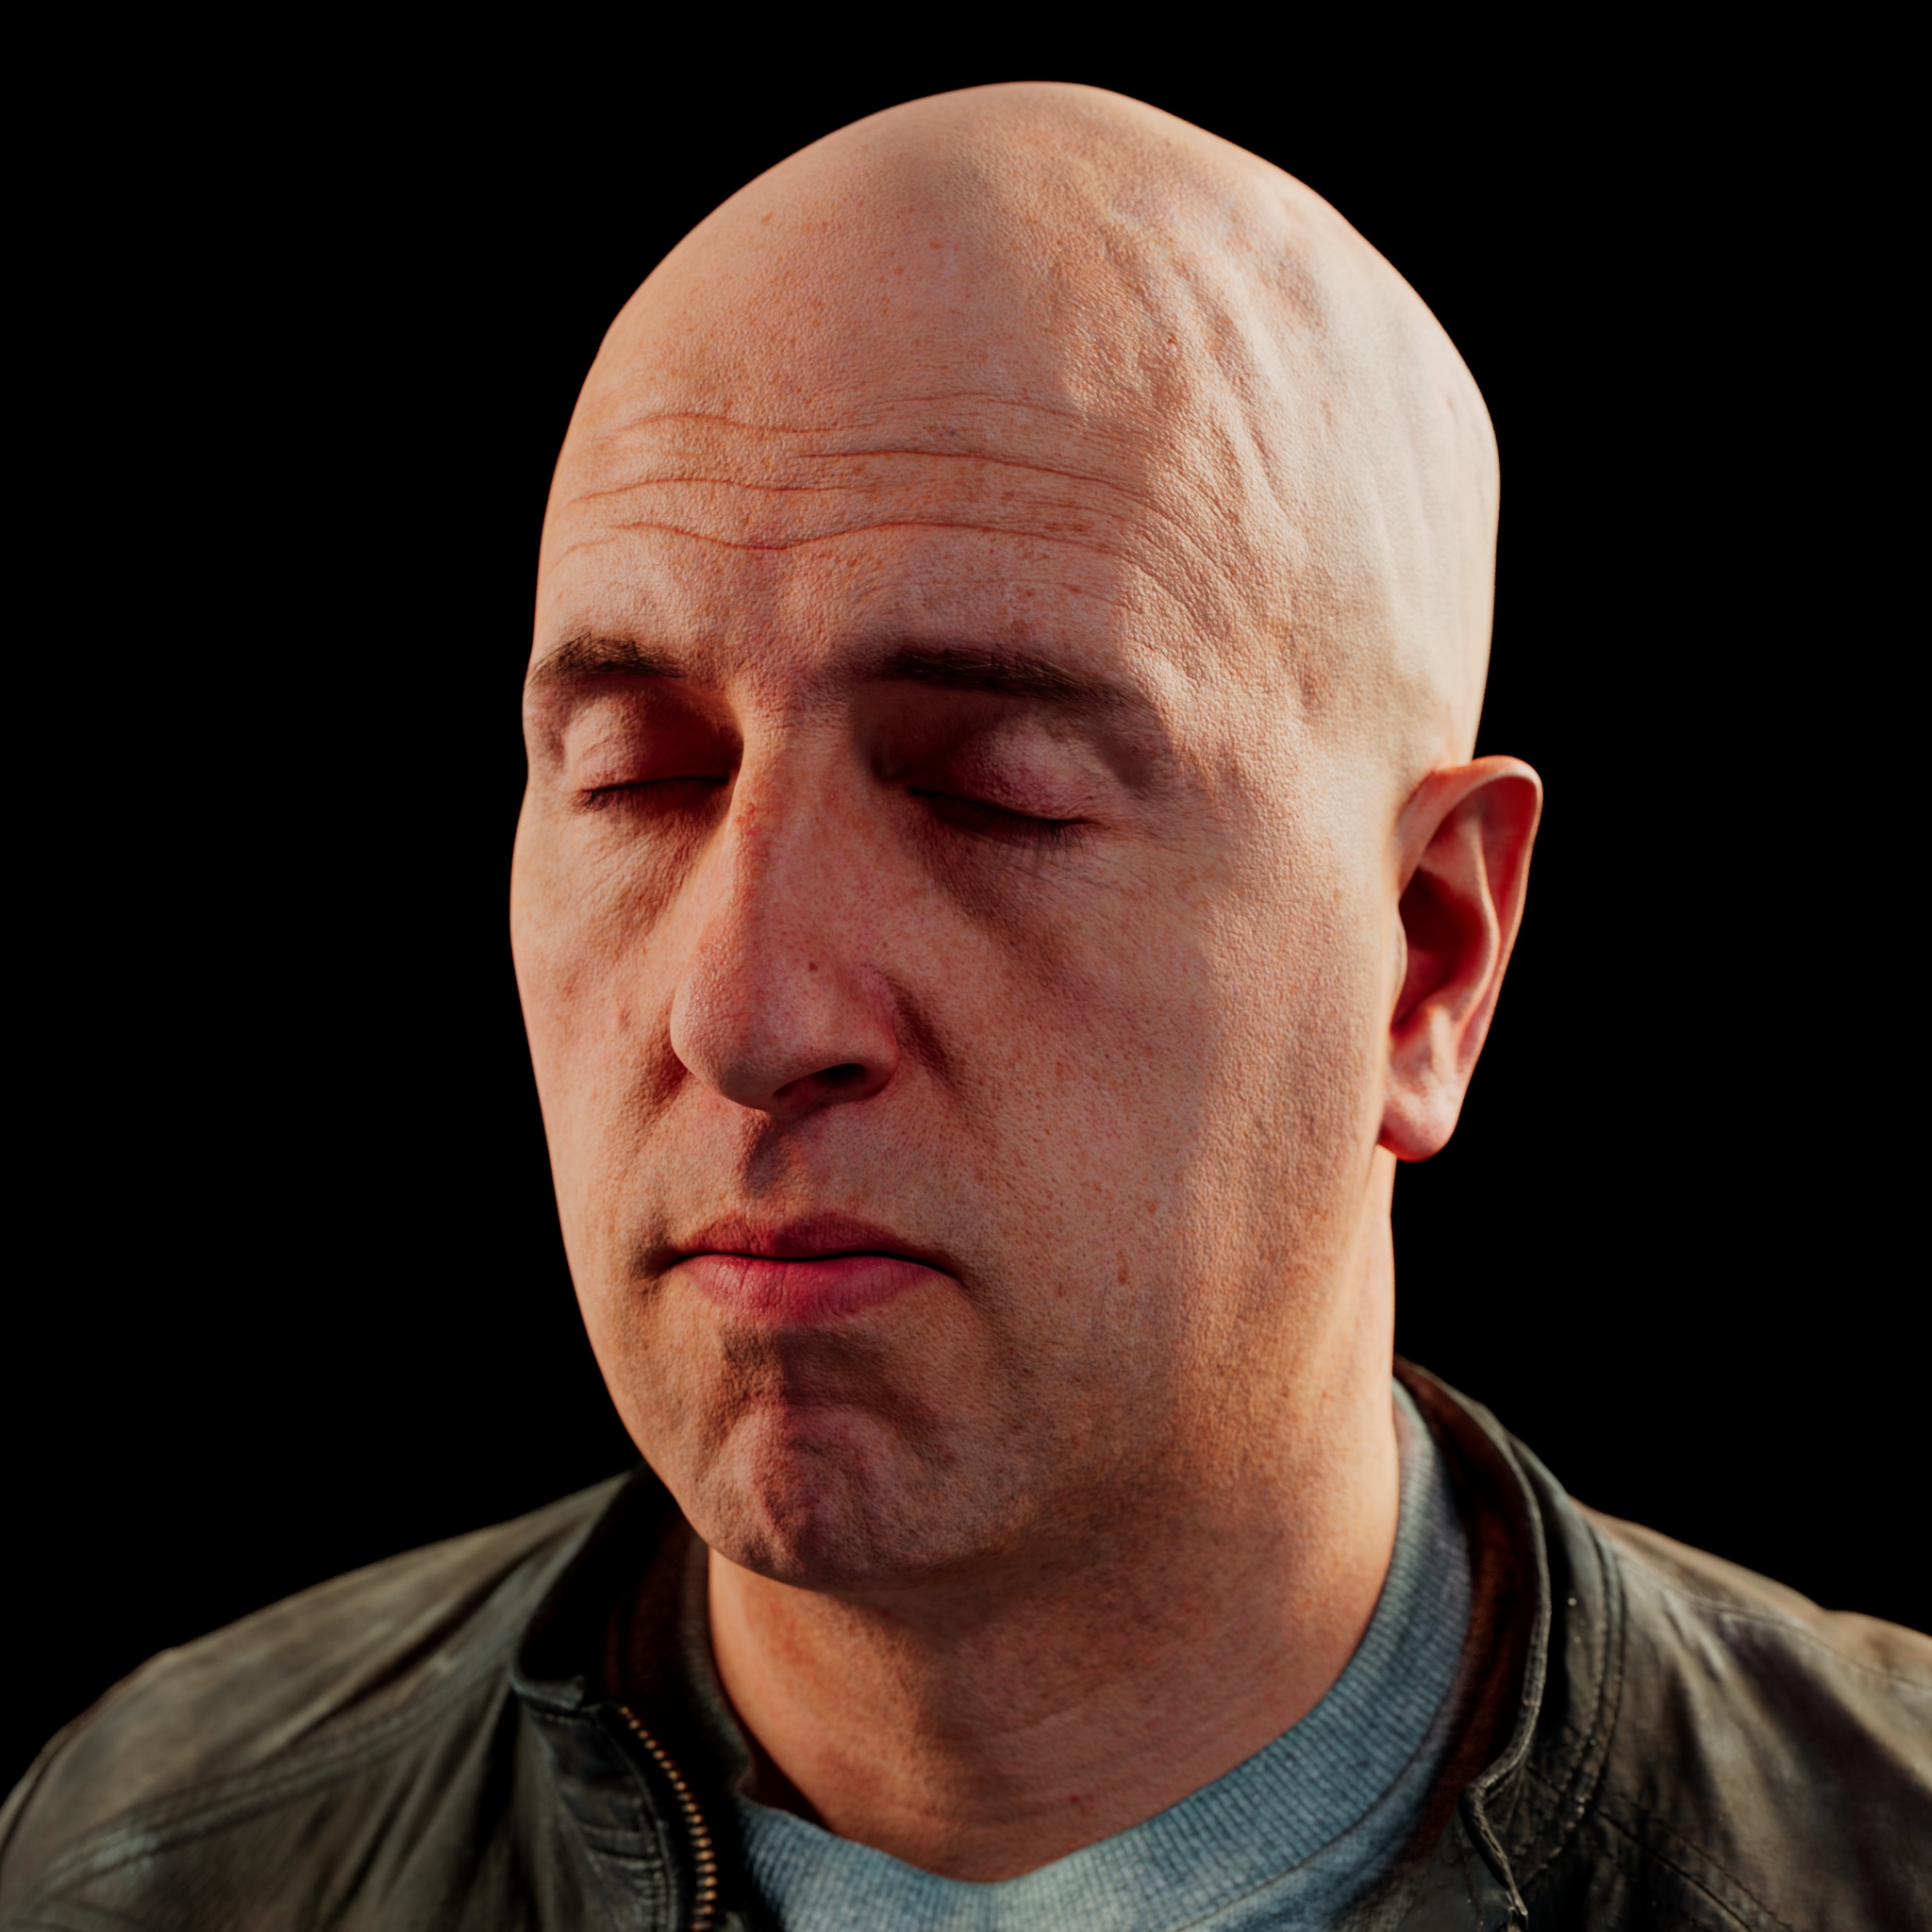
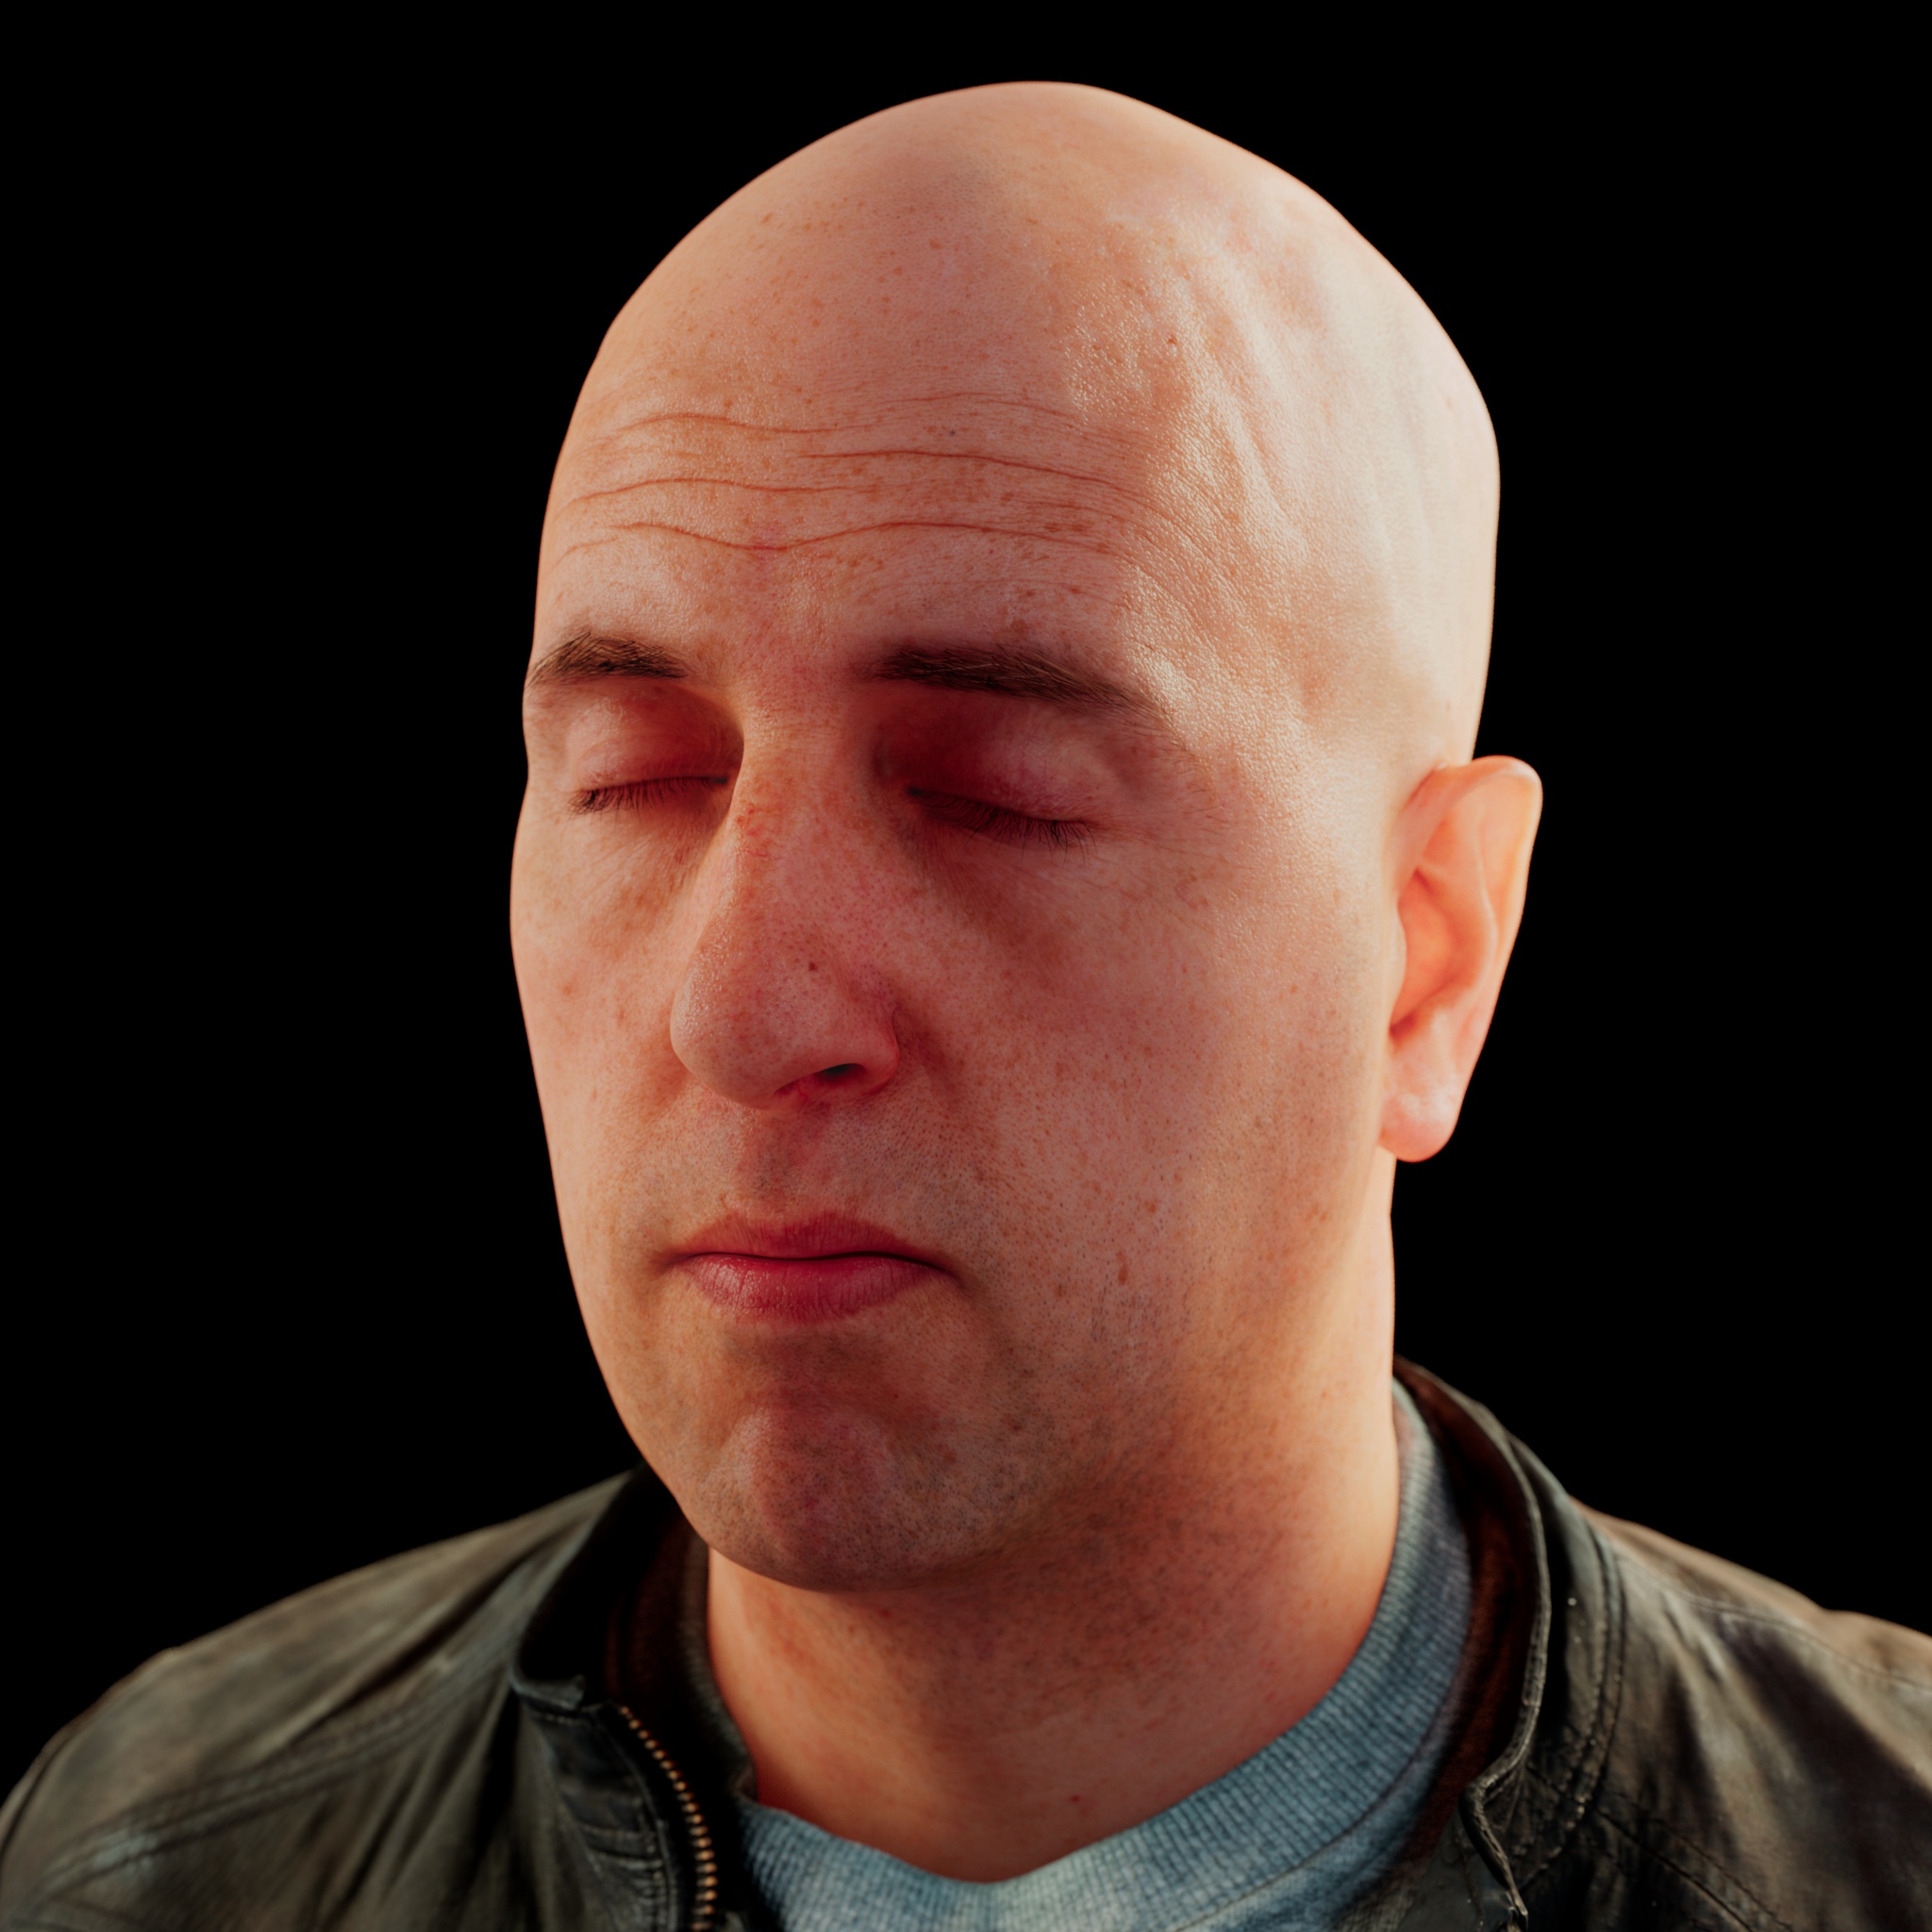
Below is an example shader graph and the values used to create the images above.
下面是一个示例着色器图形和用于创建上面的图像的值。
Shader graph
着色图
The tints for the mid (top) and deep (bottom) texture layers.
中(顶部)和深(底部)纹理层的色调。
The skin shader and its weights. Note how the 'Normalize Diffuse Weights' option has been disabled for better color control of the layers.
皮肤着色器及其重量。注意“标准化扩散权重”选项是如何被禁用的,以便更好地控制图层的颜色。


赶快留个言打破零评论!~