Photographic Exposure 摄影曝光
Introduction 引用
Attaching the Redshift Photographic Exposure lens shader to a camera provides the user with physical camera controls such as ISO, f-stop, vignetting and other controls.
附加红移摄影曝光镜头着色器给用户提供物理相机控制,如 ISO,f-stop,渐晕和其他控制。
Using Photographic Exposure is important when working with certain features of the renderer such as IES lights and the physical sun/sky. The reason is that these features can generate very high light intensities. By default, the Photographic Exposure lens shader brings these intensities into control so they don't appear too blown out or too dim.
使用摄影曝光在处理渲染器的某些特征时非常重要,例如 IES 光和物理的太阳/天空。原因是这些特征可以产生非常高的光强。默认情况下,摄影曝光镜头着色器带来这些强度进入控制,所以他们不会显得太吹或太暗淡。
A scene lit with a Sun/Sky rig but no Photographic Exposure lens shader attached. It's completely blown out white!
一个场景点亮了太阳/天空钻机,但没有照相曝光镜头着色附加。它是完全吹出白色!
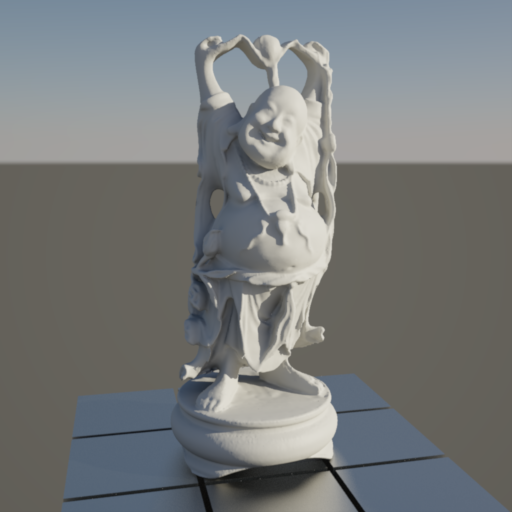
The same scene with a Photographic Exposure lens shader attached to the camera.
同样的场景,摄影曝光镜头着色器附在相机上。
How To Use
如何使用
You can use the photographic exposure settings via the "Redshift Photographic Exposure" lens shader, as shown below.
您可以通过“红移摄影曝光”镜头着色器使用摄影曝光设置,如下所示。
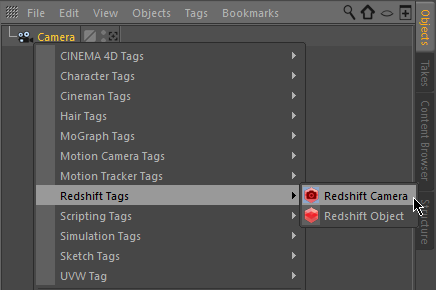
To Photograph Exposure effect is available via the Redshift Camera tag. If the camera doesn't have one already, one can be created by right-clicking on the camera object and selecting the Redshift Camera tag from the Redshift Tags sub-menu.
拍摄曝光效果可以通过红移相机标签。如果相机还没有红移标签,你可以通过右键点击相机对象并从红移标签子菜单中选择红移相机标签来创建。
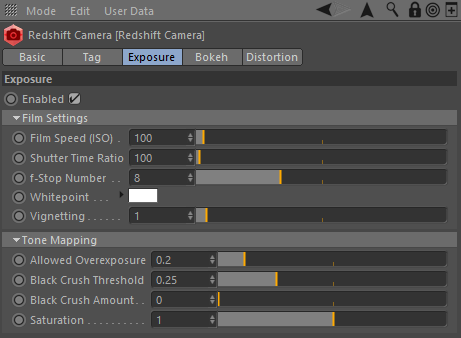
The settings for this effect are under the Exposure tab of the Redshift Camera tag
这个效果的设置在红移相机标签的曝光标签下
Film Settings
电影布景
Film Speed / Shutter Time / F-Stop
胶卷速度/快门时间/f 制动
The "Film Speed" parameter controls the sensitivity of the film. In real-life high ISOs mean that the film is very sensitive and will capture a lot of light in a short amount of time, but the image can be grainy. Low ISOs mean that the shutter has to be open for longer for the film to capture enough light (otherwise the image will be too dark) but the final result will be cleaner. Please note that Redshift does not simulate the chemical properties of film so there won't be any grain issues at high ISO settings!
“胶卷速度”参数控制胶卷的感光度。在现实生活中,高 iso 意味着胶片非常敏感,可以在短时间内捕捉大量光线,但图像可能是颗粒状的。低 iso 值意味着快门必须打开更长的时间,以便胶片捕捉到足够的光线(否则图像将过于黑暗) ,但最终的结果将更干净。请注意,红移不模拟化学性能的电影,所以不会有任何粮食问题在高 ISO 设置!
The "Shutter Time Ratio" parameter controls the duration the camera's shutter will stay open. A value of 30 means 1/30, i.e. a 30th of a second. Therefore, the smaller the value, the longer the shutter stays open and the brighter the image (and vice-versa).
“快门时间比率”参数控制相机快门持续打开的时间。30表示1/30,即1/30秒。因此,值越小,快门保持打开的时间越长,图像越亮(反之亦然)。
The "F-Stop" parameter is a divider of the aperture of the camera (the hole through which light come onto the film). So if the aperture of the camera is 1.0, an F-stop of 2.0 means 1.0/2.0. An F-Stop of 16.0 means 1.0/16.0. So the larger the F-Stop the smaller the aperture. Smaller apertures mean that less light enters the camera and lands on the film, so the image is dimmer. So the larger the F-Stop, the dimmer the image.
“ F-Stop”参数是相机孔径(光线进入胶片的孔)的分配器。因此,如果相机的光圈值是1.0,光圈值为2.0意味着光圈值为1.0/2.0。16.0表示1.0/16.0。所以光圈越大,光圈越小。光圈越小意味着进入相机并落在胶卷上的光线越少,因此图像越暗。因此 f 光圈越大,图像就越暗淡。
Redshift combines all the three parameters together to control how dark or how bright an image is. Users that have some experience with photography will find them more intuitive than a simple magic "image brightness" control. Users that are not familiar with camera/film properties can simply pick any of the three controls and adjust that to get the desired result (i.e. how bright or how dark the final image should be)
红移将所有三个参数组合在一起,以控制图像的暗度或亮度。有一些摄影经验的用户会发现它们比一个简单的魔术“图像亮度”控制更直观。不熟悉相机/底片属性的用户可以简单地选择三个控件中的任何一个,然后调整它来获得想要的结果(即最终图像应该有多亮或多暗)
F-Stop was lowered from 8.0 to 4.0. The image is now brighter.
F 光圈值从8.0降低到4.0,图像更亮了。
Whitepoint
怀特波因特
This parameter controls what is considered "white" in the image. Images that are lit by colored light sources can never achieve a proper white (1.0, 1.0, 1.0) color. An indoor scene, for example, might be lit by incandescent lights which are yellow/orange compared to pure white light.
这个参数控制图像中被认为是“白色”的部分。用彩色光源照明的图像永远不能达到合适的白色(1.0,1.0,1.0)。例如,一个室内场景可能由白炽灯照明,与纯白光相比,白炽灯是黄色/橙色的。
If you scene has such an overall tint (because of lighting) you have two choices:
如果你的场景有这样的整体色调(因为光线) ,你有两个选择:
- Either adjust each and every light and make it more white. This can be extremely tedious though! 要么调整每一个灯光,让它更白一些,但这可能会非常乏味
- Adjust the Whitepoint parameter explained here which will re-tint the entire image as a post process 调整这里解释的 Whitepoint 参数,它会将整个图像重新着色为一个后处理
The color you choose for "Whitepoint" is the color that will be removed from the image. So if you image is slightly reddish you should make "Whitepoint" a bit red (for example (1.0, 0.9, 0.9)) in order to remove the red tint.
您为“ Whitepoint”选择的颜色是将从图像中移除的颜色。因此,如果你的图像是略带红色的,你应该把“ Whitepoint”调成红色(例如(1.0,0.9,0.9)) ,这样可以去除红色的色调。
WhitePoint set to (1.0, 0.5, 0.5). This means that a lot of red and some of green and blue is removed from the image.
WhitePoint 设置为(1.0,0.5,0.5)。这意味着大量的红色和一些绿色和蓝色被从图像中删除。
Vignetting
渐晕
In real-life, just light reaches the film it goes through the camera lens. Lenses are often imperfect and, depending on the angle of the lighting, they might absorb or reflect away some light so less of it eventually reaches the camera. The result is darkening around the edges of the image. This imperfection, however, can sometimes be visually pleasing and 'focuses' the viewer towards the center of the image.
在现实生活中,只有光线通过相机镜头到达胶卷。镜头通常是不完美的,取决于光线的角度,它们可能会吸收或反射掉一些光线,因此最终到达相机的光线很少。结果是图像边缘变暗。然而,这个缺陷有时会在视觉上令人愉悦,并将观者“聚焦”到图像的中心。
The higher the Vignetting value, the more darkening there will be around the edges of the image.
渐晕值越高,图像的边缘就会越暗。
Vignetting set to 16
渐晕设置为16
Tone Mapping Settings
音调映射设置
Most computer graphics displays can reproduce all colors ranging from black (0.0, 0.0, 0.0) to white (1.0, 1.0, 1.0). But, often, lights and other effects use values that go beyond (1.0, 1.0, 1.0). For example, physical sun can produce values that are in the thousands.
大多数计算机图形学显示器可以重现从黑色(0.0,0.0,0.0)到白色(1.0,1.0,1.0)的所有颜色。但是,通常情况下,灯光和其他效果使用的数值超过了(1.0,1.0,1.0)。例如,物理太阳可以产生数以千计的值。
Tone Mapping allows these very high values to be "remapped" to the "0.0 to 1.0" range that computer displays use in order to preserve fidelity without washing out the colors.
音调映射允许这些非常高的值“重新映射”到“0.0至1.0”范围,计算机显示器使用,以保持保真度而不冲洗出的颜色。
The photographic exposure window includes a small graph to help demonstrate what will happen to pixel intensities as the individual settings are tweaked. The horizontal x-axis is the input value (before the tone mapping) and the vertical y-axis is the output value (after tone mapping). The intersection of the two gray lines show the (1, 1) point.
摄影曝光窗口包括一个小图表,以帮助演示什么将发生的像素强度作为个人设置调整。水平 x 轴是输入值(音调映射之前) ,垂直 y 轴是输出值(音调映射之后)。两条灰线的交点显示(1,1)点。
Allowed Overexposure
允许过度曝光
This parameter controls what happens to high-intensity pixel values. It works by 'squashing' the high intensities into lower intensities in order to preserve fidelity that would normally be washed out white (because of these high intensities). A setting of 0.0 is the most aggressive setting. It means that lights have to be extremely bright in order for the final pixels to approach the pure white (1.0, 1.0, 1.0) display color. Larger 'allowed overexposure' values are less aggressive and leave the original intensities more unaffected.
这个参数控制高强度像素值的变化。它通过“挤压”高强度到低强度,以保持保真度,通常会被洗出白色(因为这些高强度)。0.0的设置是最具侵略性的设置。这意味着灯光必须非常明亮,以便最后的像素接近纯白(1.0,1.0,1.0)显示颜色。较大的“允许过度暴露”值是不太积极的,留下原始强度更不受影响。
The above can be seen on the graph, too. Lower allowed overexposure settings make high input intensities come out as lower intensities. From the graph one can see that a setting of 0.0 for allowed overexposure means that almost nothing will ever come out as pure white as the curve approaches the 1.0 level (horizontal gray line) but never truly reaches it.
上面的图表也可以看到。较低的允许过度曝光设置使高输入强度出来的低强度。从图中我们可以看到,过度曝光设置为0.0意味着当曲线接近1.0水平(水平灰线)时,几乎没有什么东西会变成纯白色,但是从来没有真正达到。
A few different settings are demonstrated below:
以下是一些不同的设置:
|
|
|
|
|
Overexposure set to 0.0 曝光过度设置为0.0 |
Overexposure set to 0.1 曝光过度设置为0.1 |
Overexposure set to 0.25 曝光过度设置为0.25 |
|
|
|
|
|
Overexposure set to 0.5 曝光过度设置为0.5 |
Overexposure set to 0.75 过曝设置为0.75 |
Overexposure 1.0 (disables the effect) 过度曝光1.0(禁用效果) |
Black Crush
黑色粉碎
Similar to how 'allowed overexposure' controls what happens to brightly lit areas, 'black crush' controls what happens in the dimmer parts of the image. It effectively squashes the darker colors in order to provide more contrast for images that have too much ambient lighting.
类似于“允许过度曝光”控制发生在明亮区域的情况,“黑色挤压”控制图像中较暗部分的情况。它有效地压缩了较暗的颜色,以提供更多的对比度的图像,有太多的环境照明。
The 'black crush amount' controls how much of the effect should be applied. A value of 0.0 means 'no crushing'. A value of 1.0 means 'maximum crushing'.
“黑色粉碎量”控制应该施加多少效果。值为0.0意味着“没有粉碎”。值为1.0意味着“最大破碎”。
The 'black crush threshold' controls at which parts of the input intensity range the crushing should happen. Low numbers mean 'only crush very dark intensities' while higher values allow more of the input intensity range to be black-crushed.
“黑色压碎阈值”控制输入强度范围的哪些部分应该发生压碎。低数字意味着“只挤压非常暗的强度”,而较高的数值允许更多的输入强度范围被黑色挤压。
The effect of both of these parameters on the pixel intensities can be seen on the graph.
这两个参数对像素强度的影响可以在图上看到。
We demonstrate a few different settings in the images below. The black crush threshold was set to 0.25 so that only the darker parts of the image are affected by it.
我们在下面的图片中展示了一些不同的设置。黑色压碎阈值设置为0.25,因此只有图像的较暗部分受到影响。
|
|
|
|
|
Black Crush 0.0. Threshold 0.25 黑色粉碎0.0. 阈值0.25 |
Black Crush set to 0.25. Threshold 0.25 黑色粉碎设置为0.25。阈值0.25 |
Black Crush set to 0.5. Threshold 0.25 黑色粉碎设置为0.5。阈值0.25 |
|
|
|
|
Black Crush set to 0.75. Threshold 0.25 黑色粉碎设置为0.75。阈值0.25 |
Black Crush set to 1.0. Threshold 0.25 黑色粉碎设置为1.0。阈值0.25 |
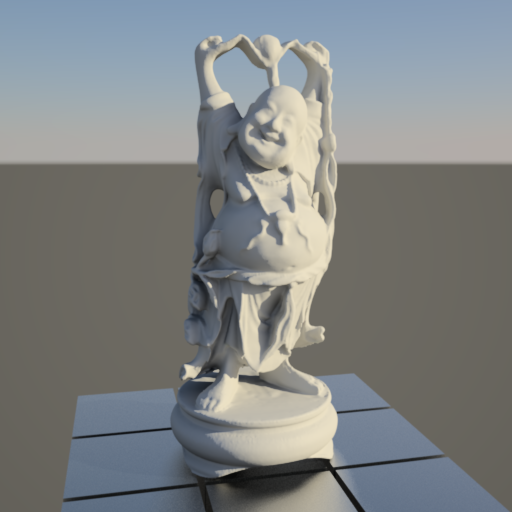
Saturation
饱和度
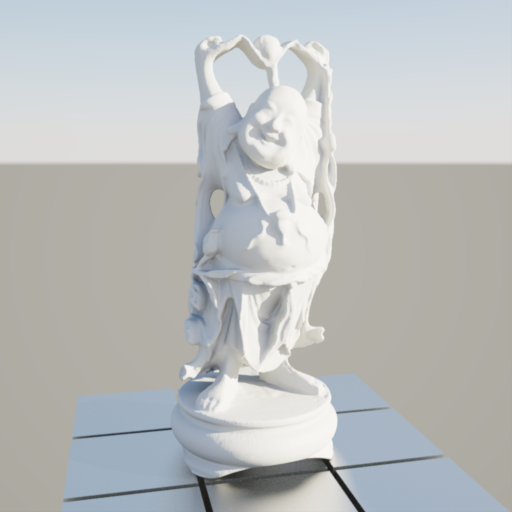
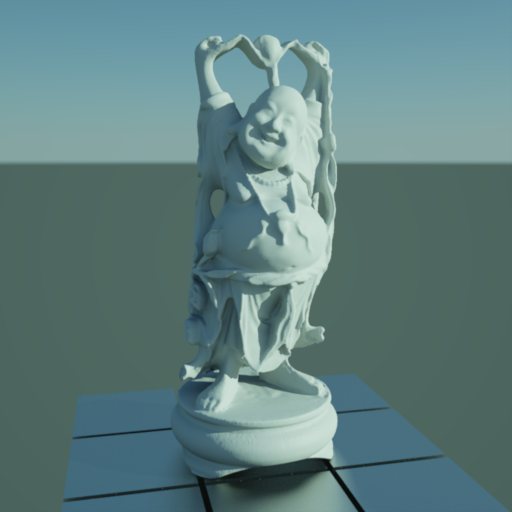
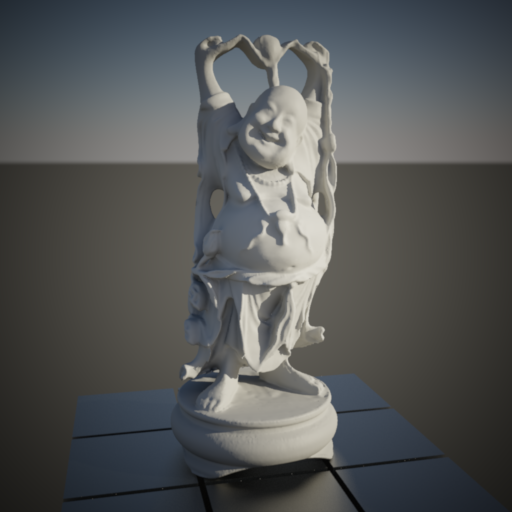
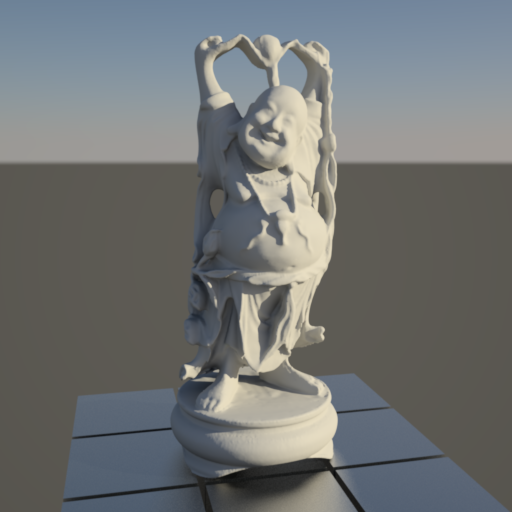
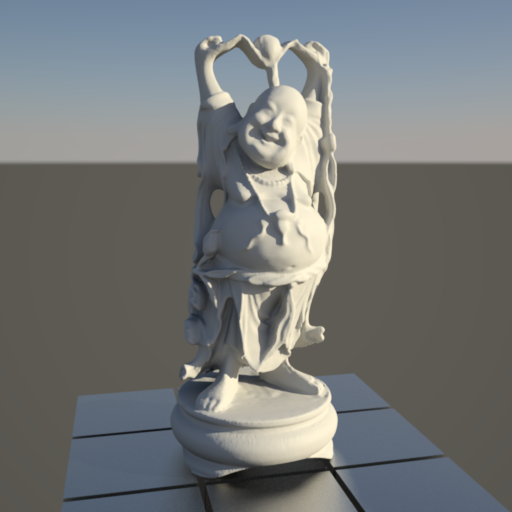
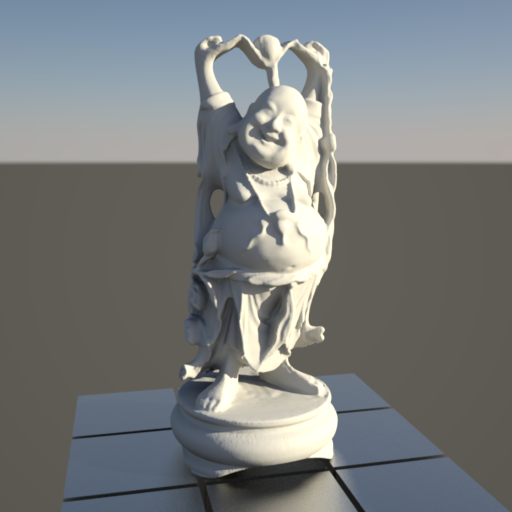
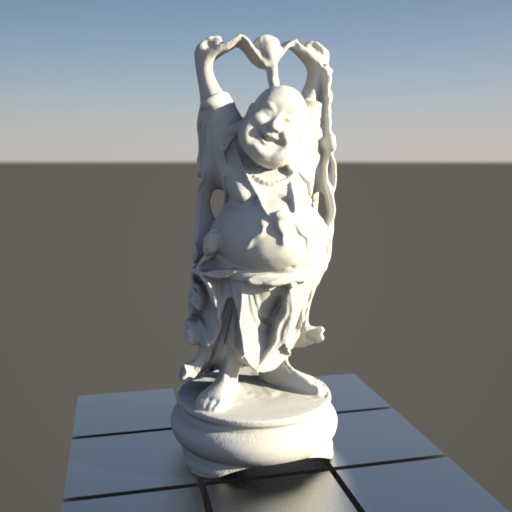
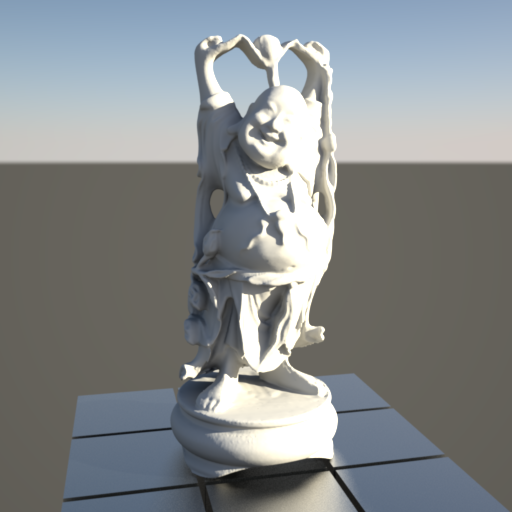
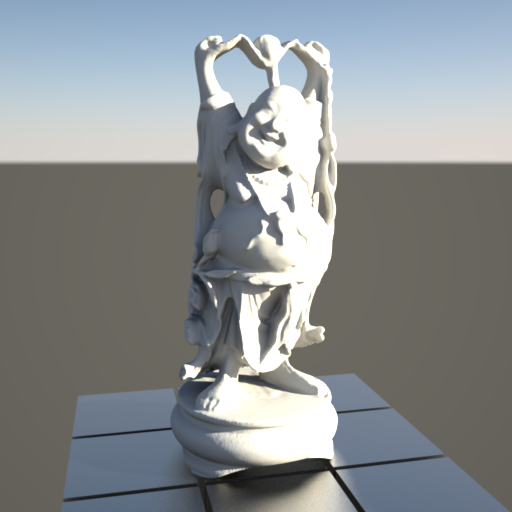
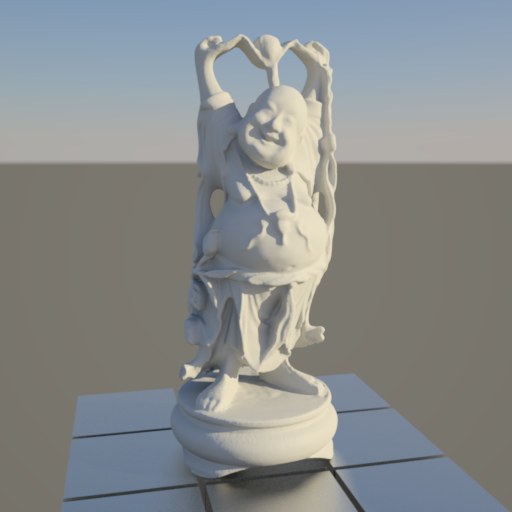
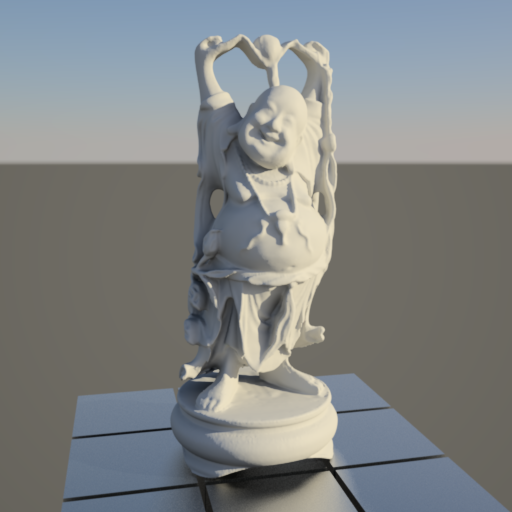
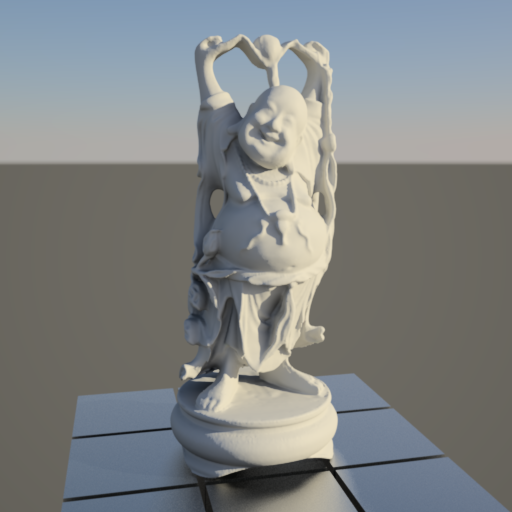
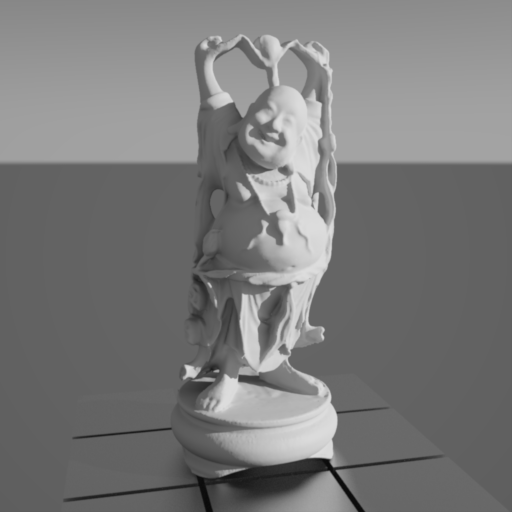
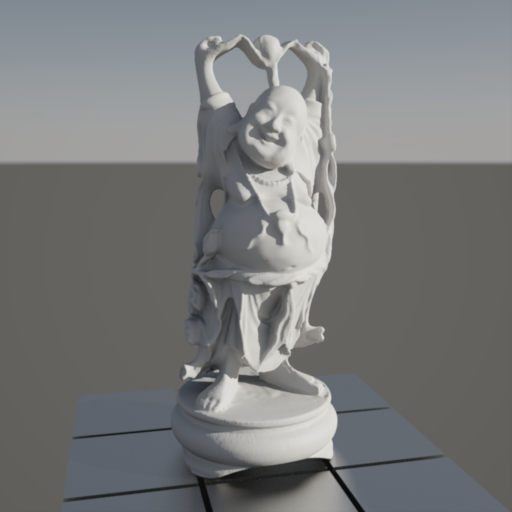
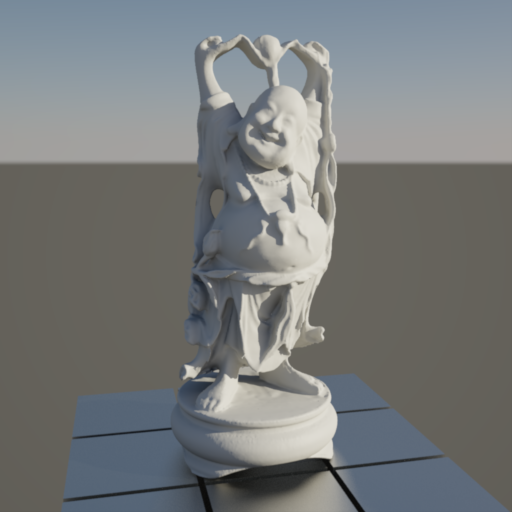
This controls the color saturation. The lower this value, the more grayscale the image. The neutral value is 1.0. If you set it to values higher than 1.0, the colors will appear more saturated.
这控制着色彩的饱和度。这个值越低,图像的灰度值越高。中性值是1.0。如果您将其设置为大于1.0的值,则颜色将显得更加饱和。
|
|
|
|
Saturation 0.0 饱和度0.0 |
Saturation 0.5 饱和度0.5 |
|
|
|
|
Saturation 1.0 饱和度1.0 |
Saturation 2.0 饱和度2.0 |


赶快留个言打破零评论!~