Output 输出
Progressive Rendering
渐进渲染
Progressive rendering refers to Redshift's interactive rendering mode. It renders the framebuffer in multiple passes which usually start up noisy and get progressively cleaner. It is useful in getting fast feedback when shaders, meshes or lights are edited. 递进渲染是指红移的交互式渲染模式。它使帧缓冲区在多个通道中呈现,这些通道通常会启动噪声并逐渐变得清晰。当着色器、网格或灯光被编辑时,它在获得快速反馈方面是有用的
When progressive rendering is enabled, certain renderer features and options have no effect. These are:
当启用渐进渲染时,某些渲染特性和选项不起作用。这些特性和选项是:
- All unified sampling settings (including filtering) 所有统一的采样设置(包括过滤)
- Point-based subsurface scattering. If you're using point-based SSS, ray-traced SSS (with equivalent settings) will be used instead when doing progressive rendering. 基于点的次表面散射。如果你使用的是基于点的 SSS,那么在进行渐进渲染时将使用射线跟踪的 SSS (带有等效的设置)
- Photon mapping (including caustics). Redshift's photon mapping implementation is computed as a separate pass so it's only available to production (non-progressive) renders 光子映射(包括焦散线)。Redshift 的光子映射实现是作为一个单独的过程计算的,因此它只能用于生产(非渐进式)渲染
- Irradiance cache, irradiance point cloud. These are not needed because progressive rendering computes GI in a brute-force way. 辐照度缓存,辐照度点云。这些是不需要的,因为渐进渲染以蛮力的方式计算 GI
- All parameters that have to do with "number of samples". Examples include the number of samples for Depth-Of-Field, number of samples for glossy reflections or refractions, number of area light samples, etc. 所有与“样品数量”有关的参数。例子包括景深采样的数量,光泽反射或折射采样的数量,面积光采样的数量等等
Bucket mode is always recommended instead of progressive mode for final renders.
对于最终渲染,总是推荐使用 Bucket 模式,而不是渐进模式。
Some AOVs are not computed in progressive mode.
有些操作参数不是以渐进模式计算的。
Unified Sampling
统一抽样
For information on unified sampling, please refer to the 有关统一抽样的资料,请参阅unified sampling page 统一抽样页.
Sample Filtering
样本过滤
Filter Type And Size
过滤器类型和大小
Sample filtering defines how the per-pixel samples will be combined together to produce the final pixel color. There are plenty of options here: Box, Triangle, Gauss, Mitchell and Lanczos. The first filter type ("Box") is the blurriest of all and the last filter ("Lanczos") is the sharpest. The most "neutral" is the Gaussian filter, which is also our default.
样本筛选定义了如何将每个像素的样本组合在一起以生成最终的像素颜色。这里有很多选择: Box,Triangle,Gauss,Mitchell 和 Lanczos。第一个过滤器类型(“ Box”)是所有过滤器中最模糊的,而最后一个过滤器(“ Lanczos”)是最尖锐的。最“中性”的是高斯滤波器,这也是我们的默认。
You can control the final 'blurriness' of the filter using the "Filter Size" parameter. A thing to remember here is that, the sharper the filter type, the larger the filter size typically needs to be. For example, Gaussian filters work fine with values like 2.0, 2.5 and 3.0 while Mitchell typically works best with values like 3.0, 4.0 or 5.0.
您可以使用“ Filter Size”参数控制过滤器的最终“ bluriness”。需要记住的是,滤镜类型越清晰,通常需要的滤镜尺寸就越大。例如,高斯滤波器对2.0、2.5和3.0这样的值都能很好地工作,而 Mitchell 通常对3.0、4.0或5.0这样的值工作得最好。
On some renderers 'filter size' refers to the filter radius. On Redshift, 'filter size' refers to the filter's diameter! For this reason, if you're porting a scene from a different renderer, you might have to double the filter size value in order to get similar results.
在一些渲染器上,“滤镜尺寸”指的是滤镜半径。在红移模式下,“滤镜尺寸”指的是滤镜的直径!出于这个原因,如果你从不同的渲染器移植一个场景,你可能需要把过滤器大小的值加倍才能得到类似的结果。
Choosing a filter type and filter size highly depends on what you are rendering. For example, still images can often get away with sharpening filters such as Mitchell or Lanczos. Animations, on the other hand, usually work best with blurrier filters, like Gauss. The reason is that 'jaggies' are particularly visible on animations!
过滤器类型和大小的选择在很大程度上取决于你的渲染。例如,静态图像通常可以通过使用米切尔或兰索斯这样的滤镜来进行锐化。另一方面,动画通常最适合模糊滤镜,如高斯。原因是锯齿在动画中特别明显!
The images below were all rendered with min 4 samples and max 16 samples.
下面的图像都渲染了最小4个样本和最大16个样本。
|
|
|
|
|
Gauss, Size 2.0. A bit too sharp around the rings 高斯,尺寸2.0。环的周围有点太尖了 |
Gauss, Size 3.0. Ok. 高斯,3.0码,好的 | |
|
|
|
|
|
Mitchell, Size 2.0. Very sharp features. Almost as if antialiasing is disabled. Mitchell filters require larger sizes! 米切尔,尺寸2.0。非常锐利的特点。几乎好像反走样被禁用。米切尔过滤器需要更大的尺寸! |
Mitchell, Size 3.0. Still a bit aliased but looking better. 米切尔,3.0码,还是有点走样,不过看起来好多了。 |
Mitchell, Size 4.0. Sharp and relatively smooth. The mitchell filter typically works best with sizes like 4.0 and 5.0 米切尔,尺寸4.0。锋利和相对光滑。米切尔过滤器通常工作最好的尺寸为4.0和5.0 |
Max Subsample Intensity
最大子样强度
Usually monitors can show colors ranging from black (0.0, 0.0, 0.0) to white (1.0, 1.0, 1.0). Any color that is brighter than white (like 10.0, for example) will still be rendered as white. But the internal workings of a renderer do care about these "overbright" colors.
通常显示器可以显示从黑色(0.0,0.0,0.0)到白色(1.0,1.0,1.0)的颜色。任何比白色更亮的颜色(例如10.0)仍然会呈现为白色。但渲染器的内部工作确实关心这些“过于明亮”的颜色。
Scenes containing very bright lighting and/or strong emissive materials can be very hard to antialias. The reason has to do with sample filtering: say a pixel was rendered with 64 samples. If most of these samples are mid-gray (0.5, 0.5, 0.5) but there is a single sample that is extremely bright (100.0, 100.0, 100.0), that sample will 'dominate' the final pixel color.
包含非常明亮的灯光和/或强发射材料的场景很难做到抗混淆。原因与样本过滤有关: 假设一个像素用64个样本渲染。如果这些样本大多数是中灰色(0.5,0.5,0.5) ,但有一个样本非常明亮(100.0,100.0,100.0) ,这个样本将“主宰”最终的像素颜色。
The issue can be addressed by limiting the intensities of individual samples. For example, ensure that no sample is brighter than 2.0. The 'Max Subsample Intensity' control allows the user to adjust that limit. The higher the 'Max Subsample Intensity', the harder for the renderer will be to antialias the image.
这个问题可以通过限制个别样本的强度来解决。例如,确保任何样品的亮度都不超过2.0。“最大子样强度”控制允许用户调整限制。最大子采样强度越高,渲染器就越难消除图像的混淆。
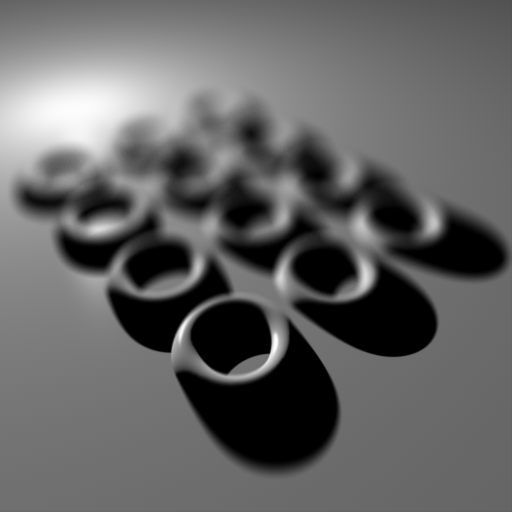
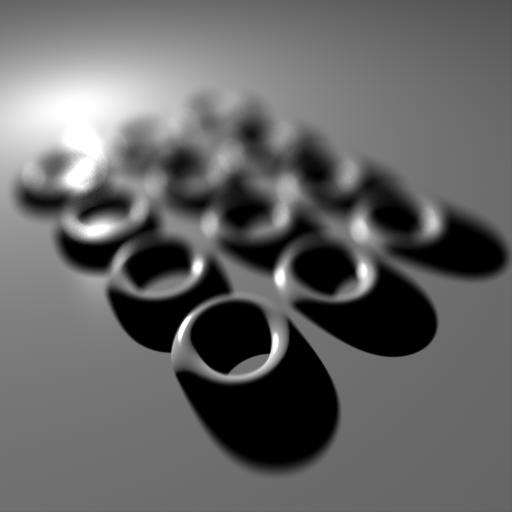
The image below contains a self-illuminating torus with intensity 100.0. The AA settings are min 4 samples per pixel, max 16 samples per pixel.
下面的图像包含了一个自发光环面,亮度为100.0。AA 设置为每像素最小4个采样,每像素最大16个采样。
|
|
|
|
|
Max Subsample Intensity set to 128. All the rings are smooth except the self-illuminated one. That part of the image looks as if no antialiasing is enabled. 最大子样强度设置为128。除了自发光环外,所有环都是光滑的。图像的这一部分看起来好像没有启用反锯齿。 |
Max Subsample Intensity set to 4.0. While there is a little bit of improvement, the self-illuminating ring still shows aliasing artifacts! 最大子样强度设置为4.0。虽然有一点改善,自我照明环仍然显示混淆的人工制品! |
Max Subsample Intensity set to 1.0. The self-illuminating ring now renders smoothly. 最大子样本强度设置为1.0。自发光环现在呈现平滑。 |
There are a couple of important drawbacks to using 'Max Subsample Intensity':
使用“最大子样强度”有一些重要的缺点:
- If you are generating an HDR image, bright pixels will be clamped to that value. If you were hoping to apply bloom effects as a post-process that could limit your ability to do so. 如果您正在生成 HDR 图像,亮像素将被固定到该值。如果您希望应用布鲁姆效应作为后处理,可能会限制您的能力这样做
- Clamping the per-sample values means that "light energy" is lost. The effect is especially apparent with high antialiasing settings (i.e. many samples per pixel). The lost energy appears as a darkening effect, especially in a blurry effect like Depth-Of-Field. 夹紧每个样品的值意味着“光能”的损失。这种效果在高反走样设置(即每像素有多个样本)下尤其明显。损失的能量会显示为一种暗化效果,尤其是在像景深这样的模糊效果中
The only current solution for both cases is raising the 'Max Subsample Intensity' which, unfortunately, will re-introduce harsh edges on strongly illuminated objects.
目前唯一的解决方案,这两种情况下是提高“最大子样本强度”,不幸的是,将再次引入强烈照明对象的严厉边缘。
The images below demonstrate the "energy loss" with an aggressive 'Max Subsample Intensity' setting.
下面的图像显示了“能量损失”与侵略性的“最大子样本强度”设置。
|
|
|
|
Max Subsample Intensity set to 1.0. Even though some of the specular highlights are strong, the depth-of-field effect is weak on them. 最大子样强度设置为1.0。尽管有些镜面高光很强烈,但景深效果对它们的影响却很弱。 |
Max Subsample Intensity set to 4.0. Notice the stronger blurry specular highlights. 最大子样本强度设置为4.0。注意更强的模糊高光。 |
Max Secondary Ray Intensity
最大次级射线强度
Just like 'max subsample intensity' limits the intensity of primary rays for antialiasing, depth of field and motion blur, 'max secondary ray intensity' does the same for glossy and GI rays. This feature is useful for reducing fire-flies that may appear in glossy reflections or refractions, which can occur when a small percentage of rays are unlucky enough to sample extremely hot light sources, when most of the rays do not. The ideal solution would be to use as many rays as it takes to clean up the noise caused by fire-flies, but often this is not practical since many thousand, if not infinite, ray samples would be required. Clamping glossy samples is a simple (though not physically correct) solution, which helps ensure that hot samples are no brighter than a specified max amount.
就像“最大次采样强度”限制了用于反走样、景深和运动模糊的主光线的强度一样,“最大次级光线强度”也限制了光滑光线和 GI 光线的强度。这一特征对于减少萤火虫的出现很有帮助,萤火虫可能会出现在光滑的反射或折射中,当一小部分光线不幸采集到极热的光源时,而大多数光线都没有采集到。理想的解决办法是使用尽可能多的射线来清除萤火虫造成的噪音,但这通常是不实际的,因为需要数千个,如果不是无限的射线样本。夹紧光滑样品是一种简单的(虽然不是物理上正确的)解决方案,这有助于确保热样品不超过指定的最大量。
See the section on noise for examples.
有关例子,请参阅噪波一节。
AOV Processing
处理视觉效果图
In Cinema 4D these options are located under the AOV tab.
在影院4D 中,这些选项位于 AOV 标签下。
This option allows you to apply a 'clamp' (intensity limit) to the AOV color and AO channels. For colors, the clamp will be applied to each color channel (RGB). Clamping occurs prior to any AOV filtering. For examples of how and when these settings should be used, please refer to the 这个选项允许你应用一个“钳子”(强度限制)到 AOV 颜色和 AO 通道。对于颜色,钳将适用于每个颜色通道(RGB)。夹紧发生在任何 AOV 过滤之前。有关如何及何时使用这些设置的例子,请参阅AOV tutorial page 教程页面.
Enable Deep Output
启用深度输出
When this option is checked, Redshift can render deep images. For more information regarding deep rendering and deep EXRs, please refer to this page.
选中此选项后,红移可以渲染深层图像。有关深层呈现和深层 EXRs 的更多信息,请参阅本页。
Enable Clamping / Max Value
启用箝位/最大值
When 'Enable Clamping' is checked, the maximum value allowed for each color channel or AO is defined by 'Max Value'
当选中“启用夹持”时,每个颜色通道或 AO 允许的最大值由“最大值”定义
Disable Importance-based Optimizations
禁用基于重要性的优化
By default, Redshift adjusts the numbers of samples of different effects like glossy reflections and refractions, area lighting and brute-force GI based on the visual importance of the pixel. For example, darker reflections can get away with fewer glossy reflection samples. However, doing so, can produce noisy AOV and negatively affect the final comp.
默认情况下,Redshift 会根据像素的视觉重要性来调整不同效果的样本数量,比如光滑的反射和折射、区域照明和蛮力 GI。例如,较暗的反射可以用较少的光泽反射样本。然而,这样做,可以产生噪声 AOV 和负面影响最终比赛。
This option disables these optimizations and guarantees that the required number of samples will be used, irrespective of whether the reflection/refraction/lighting is dark for a pixel.
此选项禁用这些优化,并保证使用所需数量的样本,而不管反射/折射/照明对于像素是否为黑色。
Sampling Overrides
取样覆盖
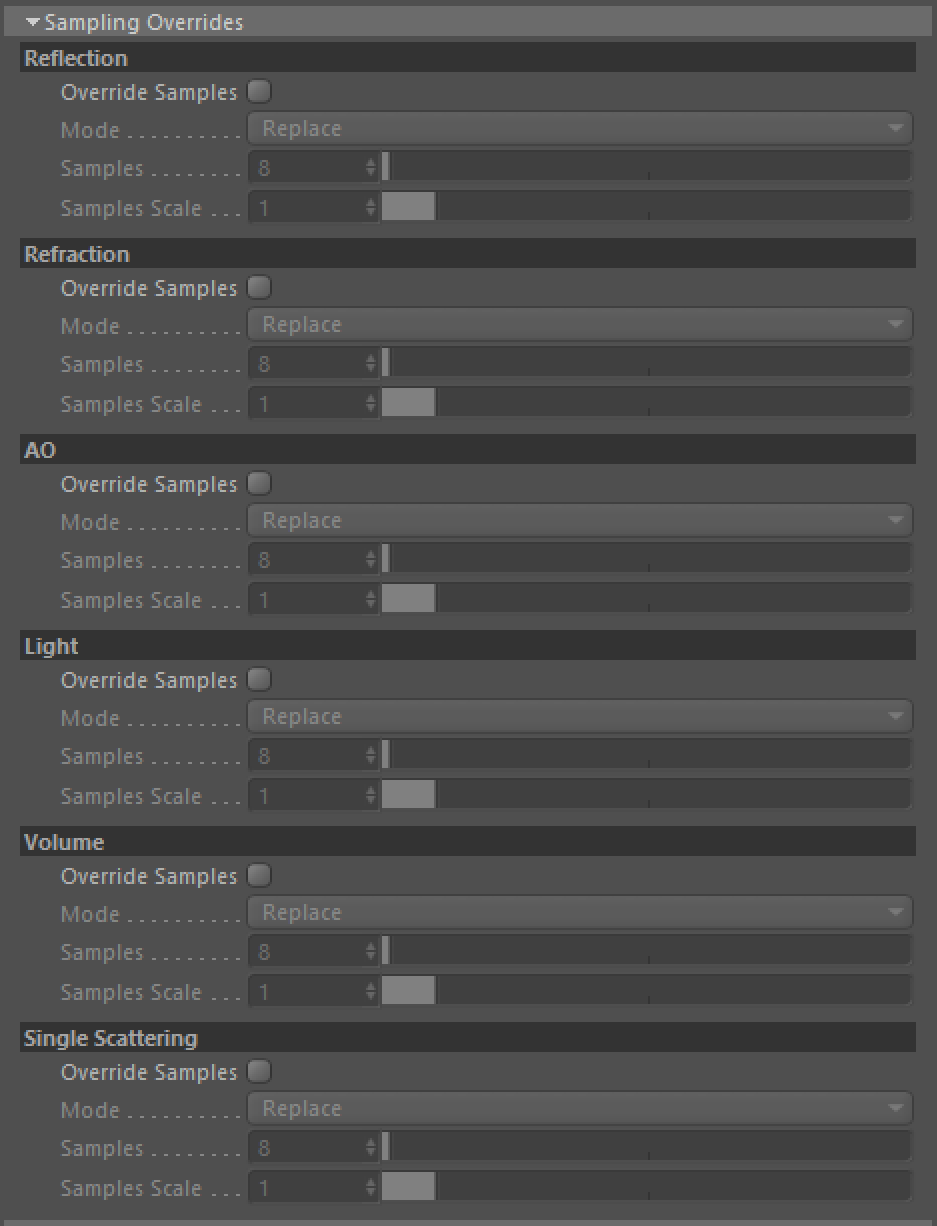
These options allow you to apply global overrides or scales to the number of samples for 这些选项允许您对。的示例数应用全局覆盖或缩放reflections 反射, refractions 折射, ambient occlusion 环境闭塞 and 及lights/shadows 光影 ray categories. This is useful for tuning performance or removing noise across the whole scene without having to manually edit materials or lights individually. Overrides are disabled by default. 射线分类。这是有用的调整性能或消除整个场景的噪音,而不必手动编辑材料或单独的灯。默认情况下禁用重写
Override Samples
覆盖样本
Checking this will enable the global samples override for the given ray category. Once checked, you will be presented with the following override options:
检查这个选项将为给定的射线类别启用全局样本覆盖。勾选之后,你会看到如下的覆盖选项:
- Replace Samples – replaces the samples for the given ray category 替换样本-替换给定射线类别的样本
- Scale Samples – scales the samples for the given ray category 刻度样本-刻度给定射线类别的样本
Samples / Samples Scale
样本/样本量表
The override value for the number of samples.
样本数的覆盖值。
Motion Blur
动态模糊
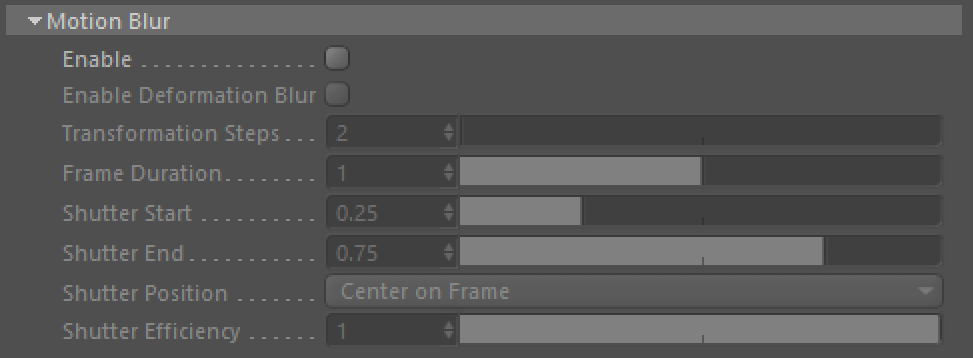
Motion blur options are described on their own page. Please click 动态模糊选项在它们自己的页面上有描述。请单击here 这里 for more info. 了解更多信息
Denoise
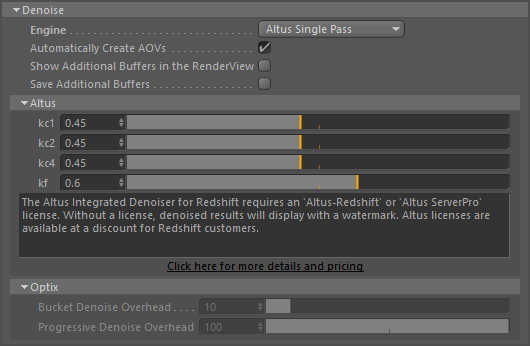
Redshift supports two separate denoising engines: Innobright's Altus denoiser and NVidia's OptiX AI denoiser. 红移支持两个独立的去噪引擎: Innobright 的 Altus denoiser 和 NVidia 的 OptiX AI denoiser
- Innobright's Altus denoiser is a commercial product which has to be purchased separately. Redshift users can take advantage of a special offer which can be found by clicking the link in the UI. 创新布赖特公司的阿尔特斯(Altus)降噪器是一种商业产品,必须单独购买。红移用户可以利用一个特殊的优惠,可以通过点击用户界面中的链接找到
- NVidia's OptiX denoiser is available for free and ships with Redshift. 的 OptiX 降噪器可以免费使用,并且可以使用红移
For more information on denoising, please see this document.
有关去噪的更多信息,请参阅这篇文章。
Gamma
伽马
The gamma options (and gamma correction in general) are described on their own page. Please click 伽玛选项(和一般的伽玛校正选项)在他们自己的页面上有描述。请点击here 这里 for more info. 了解更多信息
Envrionment
英国环境公司
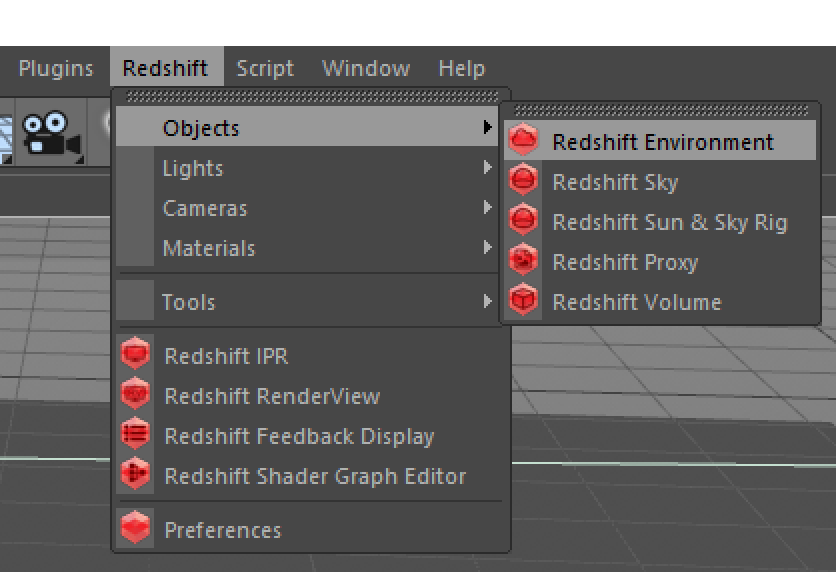
In Cinema 4D environments are created through the Redshift drop down menu.
在 Cinema 4 d 环境是通过红移下拉菜单创建的。
3ds Max and Houdini do not have this section. Please see the physical sun and sky, volumetric scattering or environment shader pages for more information.
3ds Max 和 Houdini 没有这个部分。请参阅物理太阳和天空,体积散射或环境着色页面的更多信息。
Lens
镜头
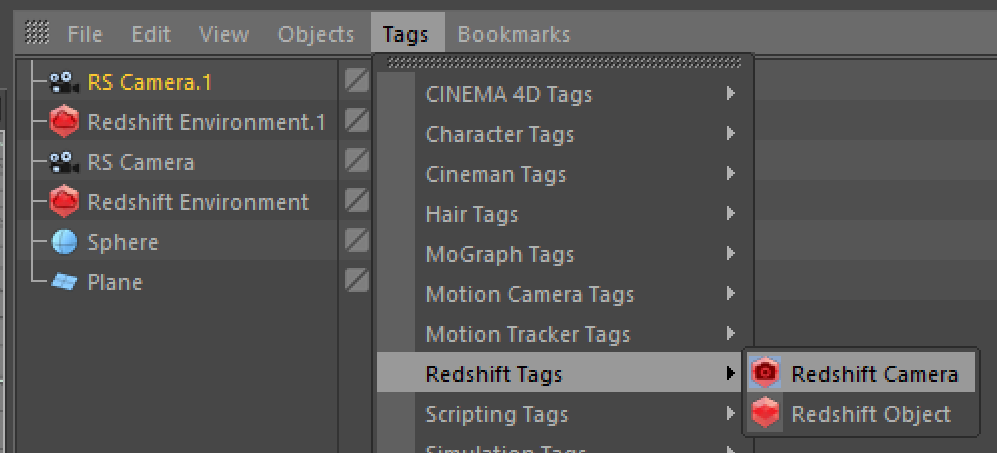
In Cinema 4D lens effects like photographic exposure, bokeh, and distortion are added to cameras via the Redshift Camera tag.
在影院4 d 镜头效果,如摄影曝光,散景和失真是通过红移相机标签添加到相机。
Photometric Units
光度计单位
Certain features of Redshift such as photographic exposure, physical sun/sky and IES light support require knowledge of the "units to meter" and "candela to square meter" settings. It's important to set these values correctly, otherwise lighting coming from physical light sources might appear too dim or too bright. 红移的某些特性,如摄影曝光,物理太阳/天空和 IES 光支持需要知识的“单位米”和“坎德拉到平方米”的设置。正确设置这些值很重要,否则来自物理光源的照明可能会显得太暗或太亮
If you're working with centimeters (i.e. 1 world unit is 1 centimeter), the units to meter scale should be set to 100. That's because, in this case, 100 world units means 100cm, which means 1 meter. If you're working with meters, then it should be set to 1, because 1 world unit means 1 meter.
如果你用的是厘米(即1世界单位是1厘米) ,那么米的单位应该设置为100。这是因为,在这个例子中,100个世界单位意味着100厘米,也就是1米。如果你用的是米,那么它应该设置为1,因为1世界单位意味着1米。
Additionally, photographic exposure, IES lights and the physical sky/sun use the "candela to square meter" setting. Please make sure to attach a photographic exposure lens shader when using IES lights and physical sun/sky, otherwise your lighting will appear too bright or too dim.
此外,摄影曝光,IES 光源和物理天空/太阳使用“坎德拉到平方米”的设置。当使用 IES 光源和物理太阳/天空时,请确保附加一个摄影曝光镜头着色器,否则你的照明会显得太亮或太暗。
Quantize to 8-bit and Dither
量子化到8位并抖动
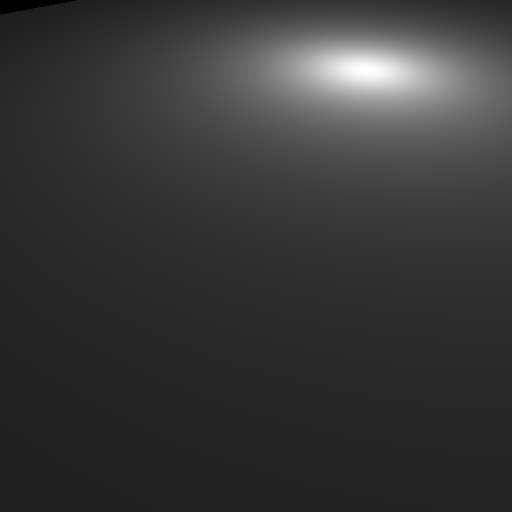
Most computer displays are able to show up to 256 shades of gray even if you are viewing an HDR image. Depending on the monitor capabilities and calibration, there's the possibility of "banding" artifacts on slow-changing gradients. 大多数计算机显示器能够显示256个灰度阴影,即使你正在观看 HDR 图像。根据监视器的能力和校准,有可能在缓慢变化的梯度上“捆绑”工件
Dithering can help with that! 犹豫不决可以有所帮助
In Redshift, dithering only works on 8-bit images, i.e. non-HDR images. So, assuming you don't care about HDR output, you can enable the "quantize to 8-bit and dither" option and get rid of any banding artifacts.
在红移中,抖动只对8位图像有效,也就是非 hdr 图像。因此,假设您不关心 HDR 输出,那么您可以启用“ quantize to 8-bit and dither”选项并删除任何条带工件。
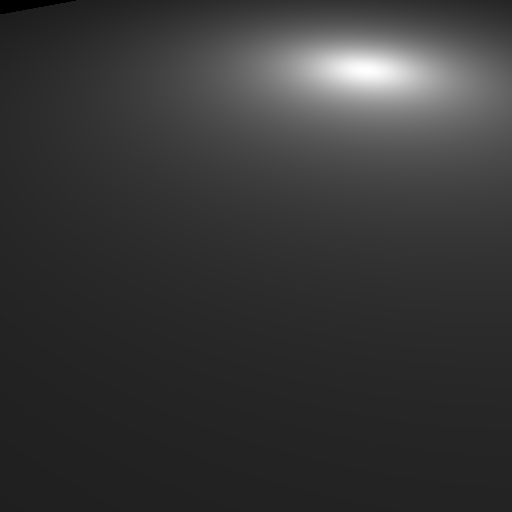
The left image shows the banding near the bottom. Please note that, depending on your monitor calibration, the effect might not be very noticeable.
左边的图片显示了底部附近的条纹。请注意,根据您的监视器校准,效果可能不是很明显。
|
|
|
|
|
No Dithering 不要犹豫 |
|
Quantization and dithering enabled 启用量化和抖动 |
Because this option quantizes to 8-bits per color channel, the final image will lose color precision in the dark tones. Additionally, any pixel that's overbright will have its intensity clamped to a value of 1.0. For these reasons, if you do care about HDR you should keep this option disabled and, instead, apply dithering or other kinds of processing on an external image editing program.
因为此选项将每个颜色通道量化为8位,所以最终图像在深色调中将失去颜色精度。此外,任何过亮的像素的亮度都会被限制在1.0。由于这些原因,如果您确实关心 HDR,您应该禁用此选项,而是在外部图像编辑程序上应用抖动或其他类型的处理。





赶快留个言打破零评论!~