Material 材料
Introduction
引言
This is a general purpose material that is physically plausible, energy conserving and aligned with 'PBR' based principles. It offers two layers of reflection (a coating and base reflection), transmission/refraction, diffuse lighting and sub-surface scattering to accurately model a wide variety of materials ranging from glass, metals, plastic to skin.
The material is grouped into several sections:
- The 'Base Properties' section contains the most commonly used properties of a material, covering diffuse, reflections, sheen, refraction, sub-surface transmission and “基本属性”部分包含材料最常用的属性,覆盖漫反射,反射,光泽,折射,亚表面传输和single 单身的 scattering effects. 散射效应
- The 'Sub-Surface Multiple Scattering' section contains properties for sub-surface multiple 复数 scattering for modeling complex materials such as wax and skin.
- The 'Coating' section contains properties commonly used for clear-coat reflections.
- The 'Overall' section contains properties applied to the material as a whole, such as opacity.
- The 'Optimizations' section contains properties that allow you to fine-tune the performance of the material.
- The 'Advanced' section contains properties not commonly used, but necessary for extra control.
Base Properties
The 'Base Properties' section defines the most commonly used features of a material, such as diffuse, reflection and refraction/transmission.
“基本属性”部分定义了材质最常用的特征,如漫反射、反射和折射/透射。
Preset
预置
To help you get started, in the 'Base Properties' section of the material there is a 'Presets' drop-down that lists some pre-defined material settings. The presets show how to make metals using complex IOR, glass, single-scattered and multiple scattered materials.
|
|
|
|
|
|
| Glass 玻璃 | Water 水 | Plastic 塑料 | Aluminuim | Copper 铜 |
|
|
|
|
|
|
| Gold 黄金 | Iron 铁 | Lead 铅 | Platinum 白金 | Silver 银牌 |
|
|
|
|
|
|
| Milky Coffee 牛奶咖啡 | Jade 玉 | Paper 纸张 | Tinted Glass 有色玻璃 |
Diffuse
漫反射
Color
颜色
This defines the color of the surface when reflecting diffuse direct lighting or indirect global illumination. Setting this to black means no diffuse lighting.
When in PBR 'Metalness' mode, this is also the color of the metal.
这定义了反射漫射直接照明或间接全局光源时表面的颜色。将其设置为黑色意味着没有漫射照明。在 PBR“金属性”模式下,这也是金属的颜色。
Weight
重量
This scales the overall amount of diffuse lighting, with 0.0 meaning no diffuse and one meaning maximum diffuse.
这可以缩放漫射照明的总体数量,0.0意味着没有漫射,一个意味着最大的漫射。
Roughness
粗糙度
This controls the 'roughness' of the diffuse lighting and is useful for simulating matte/dirty surfaces. This material implements the Oren-Nayar shading model to emulate rough surface micro-facets. A roughness of 0.0 is equivalent to a perfectly smooth surface, or traditional Lambert shading.
这控制了漫射照明的“粗糙度”,对于模拟磨砂/脏表面很有用。这种材料实施奥伦-纳亚尔阴影模型,以模拟粗糙表面微小面。一个0.0的粗糙度相当于一个完美的光滑表面,或传统的朗伯阴影。
|
|
|
|
|
|
| Roughness 0.0 粗糙度0.0 | 0.1 | 0.2 | 0.5 | 1.0 |
Back-lighting/Translucency
背光/半透明
Very thin materials that have an amount of translucency from sub-surface scattering, such as paper or leaves, can use the 'Back-lighting/Translucency' options as a cheap solution to emulate the effect of sub-surface scattering. For thick translucent materials that have body, such as wax and liquids, you should use the sub-surface scattering features of this material (see single scattering and multiple scattering).
非常薄的材料,如纸张或树叶,具有一定量的半透明次表面散射,可以使用“背光/半透明”选项作为一个廉价的解决方案,以模拟次表面散射的效果。对于具有物体的厚的半透明材料,如蜡和液体,你应该使用这种材料的亚表面散射特征(见单次散射和多次散射)。
Color
颜色
This is the back-face diffuse color of the surface. When non-black, light will be able to shine through to give a translucent effect. This is useful for lighting very thin materials, such as paper or leaves and is cheaper than sub-surface scattering.
这是背面漫反射的表面颜色。当非黑色时,光线将能够透过,产生半透明的效果。这是有用的照明非常薄的材料,如纸张或树叶,是廉价的次表面散射。
Weight
重量
This scales the overall amount of diffuse translucent lighting.
这可以缩放整个漫反射半透明照明的数量。
Translucency in Detail
半透明的细节
Below is an example that shows the effect of a light shining through a thin translucent object, with various degrees of translucency. With one light in the scene, behind the object, this example also shows the effect of GI as the light passes through.
下面是一个例子,显示了光线透过一个薄的半透明物体的效果,不同程度的半透明。在场景中有一盏灯,在物体的后面,这个例子也显示了光线通过时 GI 的效果。
In this demonstration the front-facing diffuse color of the leaf is red, while the back-lighting color is green, to differentiate between front and back lighting.
在这个演示中,叶子正面的漫反射颜色是红色,而背面照明颜色是绿色,以区分前面和后面照明。
|
|
|
|
|
|
|
Back-lighting Weight: 0.0 背光重量: 0.0 Diffuse Color: (1.0, 0.0, 0.0) 漫反射色: (1.0,0.0,0.0) |
0.01 | 0.05 | 0.1 | 0.25 |
Reflection
反思
Most real-world materials exhibit an amount of reflection. The two most visible aspects of reflection are its blurriness (driven by material roughness) and its strength (driven by the Fresnel effect).
大多数真实世界的材料都展示了大量的反思。 反射最明显的两个方面是它的模糊性(由材料的粗糙度驱动)和它的强度(由菲涅耳效应驱动)。
Color
颜色
This is the reflection tint.
这是反射色。
To be physically correct, this should be white and the IOR/Reflectivity for each RGB channel should be used instead to add color.
为了在物理上正确,这应该是白色的,并且应该使用每个 RGB 通道的 IOR/Reflectivity 来添加颜色。
Weight
重量
This is a multiplier of the reflection tint. Reflections are disabled when this value is 0.0.
这是一个反射色调的倍增器。当这个值为0.0时,反射将被禁用。
Roughness
粗糙度
This is the roughness of the surface reflection. A roughness value of 0.0 means perfectly 'polished', or full glossiness. A roughness value of 1.0 means almost diffuse appearance.
这是表面反射的粗糙度。粗糙度值为0.0意味着完美的抛光或光泽度。粗糙度值为1.0意味着外观几乎漫反射。
Samples
样本
Blurry reflections (when "Roughness" is greater than 0.0) will need multiple samples to get a clean "grain-free" result. Higher numbers will reduce any potential grain issues but will take longer to render and vice-versa.
模糊反射(当“粗糙度”大于0.0)将需要多个样本得到一个干净的“无纹理”的结果。更高的数字将减少任何潜在的谷物问题,但将需要更长的渲染时间,反之亦然。
BRDF
This allows you to select which reflection model to use;
这允许您选择要使用的反射模型;
- "Beckmann (Cook-Torrance)" is a physically-based industry-standard reflection model that accurately represents a wide variety of materials. “贝克曼(库克-托伦斯)”是一个物理基础的行业标准的反射模型,准确地代表了各种各样的材料
- "GGX" is a relatively new model that offers a wide specular tail, making it perfect for difficult to emulate metals such as chrome. “ GGX”是一个相对较新的模式,提供了一个广泛的镜面尾巴,使其完美难以仿真金属,如铬
- "Ashikhmin-Shirley" is good for a wide variety of materials and samples efficiently for noise-free results. “ Ashikhmin-Shirley”适用于各种材料和样品,高效无噪音的效果
BRDF and Reflection Roughness in Detail
详细介绍了 BRDF 和反射粗糙度
The roughness of a material describes how micro-facet surface perturbations affect light reflections. A perfectly smooth surface will reflect light like a polished mirror, while a rough surface will scatter the reflection in multiple directions.
材料的粗糙度描述了微刻面表面的扰动如何影响光的反射。一个完美光滑的表面会像一面抛光的镜子一样反射光线,而一个粗糙的表面会将反射光线散射到多个方向。
Redshift supports three different BRDF models to simulate micro-facet perturbations: Beckmann (Cook-Torrance), GGX and Ashikhmin-Shirley. Each BRDF is physically correct, efficient and energy conserving, and are proven for accurate general purpose reflections. The relatively new GGX BRDF has the added advantage of exhibiting a wide specular tail, which is a phenomenon seen on polished metals such as chrome.
Redshift 支持三种不同的 BRDF 模型来模拟微小面扰动: Beckmann (Cook-Torrance)、 GGX 和 Ashikhmin-Shirley。每个 BRDF 在物理上是正确的,有效的和节省能源的,并被证明为准确的一般用途的反射。相对较新的 GGX BRDF 具有额外的优势,展示了一个广泛的镜面尾巴,这是一种现象看到抛光金属,如铬。
Below shows how reflection roughness affects the material for each BRDF type.
下面展示了反射粗糙度如何影响每种 BRDF 类型的材质。
Note that the rougher the materials are, the noisier results. Rougher materials require more samples to clean up reflection noise, though at the expense of longer render times.
注意材料越粗糙,结果就越嘈杂。粗糙的材质需要更多的样本来清除反射噪声,尽管代价是更长的渲染时间。
|
|
|
|
|
|
|
Beckmann BRDF 贝克曼 BRDF 糙率0.0 |
0.25 |
0.5 |
0.75 |
1.0 |
|
|
|
|
|
|
|
GGX BRDF 粗糙度0.0 |
0.25 |
0.5 |
0.75 |
1.0 |
|
|
|
|
|
|
|
Ashikhmin-Shirley BRDF Ashikhmin-Shirley BRDF 糙率0.0 |
0.25 |
0.5 |
0.75 |
1. |
Anisotropy
各向异性
This allows to you stretch reflections in a particular axis; -1 to 0 for x/u axis and 0 to 1 for y/v axis, with 0.0 meaning isotropic. Anisotropy is used to emulate materials such as brushed metals where surface roughness is focused in a particular direction.
这允许你在一个特定的轴上拉伸反射;-1到0代表 x/u 轴,0到1代表 y/v 轴,0.0代表各向同性。各向异性被用来模拟材料,例如拉丝金属,其中表面粗糙度聚焦在一个特定的方向。
Rotation
旋转
This allows you to rotate the anisotropic effect, which can be used for emulating materials such beaten metals.
这允许你旋转各向异性效果,可用于仿真材料,如锤打金属。
Anisotropy in Detail
详细的各向异性
'Anisotropy' is used to stretch roughness in a particular axis, which enables modelling of materials such as brushed metals. For the best results a consistent orientation axis for anisotropy should be defined (see 'Surface Orientation' in the 'Advanced' section).
各向异性是用来拉伸在一个特定的轴的粗糙度,这使材料的模型,如拉丝金属。为了得到最好的结果,应该为各向异性定义一个一致的方向轴(见“高级”部分的“表面方向”)。
Below shows an example of changes in 'Anisotropy'. The red arrows on the textured surface point in the U direction and the green arrows point in the V direction. See how the rectangular specular highlights stretch with changing anisotropy:
下面是一个各向异性变化的例子。纹理表面上的红色箭头指向 u 方向,绿色箭头指向 v 方向。看看这个矩形镜面高光是如何随着各向异性的变化而拉伸的:
|
|
|
|
|
|
|
Ashikhmin-Shirley BRDF Ashikhmin-Shirley BRDF 糙率0.0 |
0.25 |
0.5 |
0.75 |
1.0 |
In conjunction with 'Anisotropy', 'Rotation' is used to control the orientation of the surface roughness axis. Using a texture that describes rotation, you can define interesting looking materials such as pounded metals.
与各向异性一起,旋转被用来控制表面粗糙度轴的方向。使用描述旋转的纹理,你可以定义看起来有趣的材料,比如捣碎的金属。
Below shows an example of changes in 'Rotation', with 0.25 representing a rotation of 90 degrees:
下面是一个旋转变化的例子,0.25代表旋转90度:
|
|
|
|
|
|
|
Rotation: 0.0 旋转: 0.0各向异性:-0.5 |
0.125 |
0.25 |
0.375 |
0.5 |
Fresnel Type
菲涅耳型
This allows you to select between different methods of controlling the reflection Fresnel effect;
这使您可以选择不同的方法来控制反射菲涅耳效应;
- "IOR (Advanced) IOR (高级)" lets you set the Index of Refraction for each red, green and blue channel. This allows you to control the reflectivity color for both dielectric materials (i.e. non-metals) and metals, while remaining physically correct. This mode also lets you set the 'Absorption/k' values required for metals. 'Absorption/k' should be 0,0,0 for non-metals. 让你设置每个红色,绿色和蓝色通道的折射率。这使您可以控制反射率颜色的绝缘材料(即非金属)和金属,同时保持物理正确。这个模式还可以让你设置金属所需的“吸收/k”值。非金属的“吸收/k”应该是0,0,0
- "Color+Edge Tint 色彩 + 边缘色彩" is an artist friendly mode that allows you to control the facing reflectivity color and metal edge tint, without required complex IOR values. The 'Metal Edge Tint' should be black for non-metals. 是一个艺术家友好的模式,允许您控制面临的反射率颜色和金属边缘着色,而不需要复杂的 IOR 值。非金属的“金属边色”应该是黑色的
- "Metalness 金属性" is a special mode designed for 'PBR' workflow compatibility with 'Substance' and 'Unreal' materials. 是一种特殊的模式,用于“ PBR”工作流程与“ Substance”和“ Unreal”材料的兼容性
- "IOR 返回抑制" lets you set a single Index of Refraction value to control reflectivity and is ideal for simple dielectric materials. Dielectric materials typically have an Index of Refraction between 1.0 and 2.0, where 1.0 means no reflectivity and higher values mean stronger reflectivity. 可以让你设置一个单折射率值来控制反射率,是简单介质材料的理想选择。介质材料的折射率通常在1.0到2.0之间,其中1.0表示没有反射率,更高的值表示更强的反射率
Fresnel Reflectivity in Detail
菲涅耳反射率的细节
Reflective materials can be generally split into two categories: dielectrics and conductors. Dielectric materials are things like water, glass, wood, plastic. Conductor materials are metals. Fresnel reflectivity realistically emulates reflection strength for these different kinds of materials, describing the facing reflectivity strength of the surface to the eye, with perpendicular reflectivity around the silhouette of an object falling off to white.
反光材料一般可以分为两类: 介质材料和导体材料。电介质材料是像水,玻璃,木材,塑料之类的东西。导体材料是金属。菲涅耳反射率逼真地模拟了这些不同材料的反射强度,描述了物体表面对眼睛的反射强度,物体轮廓周围垂直的反射率降为白色。
The 'Fresnel Type' option offers multiple modes to allow you to control the reflection strength and 'Fresnel effect' for different kinds of materials and they are covered below in their appropriate sections in detail.
“菲涅耳类型”选项提供多种模式,让您可以控制不同材质的反射强度和“菲涅耳效应”,它们在下面的适当部分详细介绍。
Above shows an example of the 'Fresnel effect' of facing reflectivity vs perpendicular reflectivity, tinted green to highlight the effect:
上图展示了一个菲涅耳效应的例子,反射率和垂直反射率,绿色突出效果:
IOR
返回抑制
The index of refraction used to calculate the strength of the Fresnel effect.
折射率用来计算菲涅耳效应的强度。
Consists of three values (for red, green and blue) when using "IOR (Advanced)" Fresnel.
在使用“ IOR (Advanced)”菲涅耳时包含三个值(用于红、绿和蓝)。
Fresnel Type mode "IOR" In Detail
菲涅耳型模式“ IOR”的细节
Most dielectric materials have a monochrome reflection, so the simple 'IOR' parameter suffices. Dielectric materials have fairly weak facing reflectivity strength, with IOR values between 1.0 and 3.0, where an IOR value of 1.0 means no reflection and values greater than 1.0 yield stronger reflection.
大多数介质材料具有单色反射,因此简单的 IOR 参数就足够了。介质材料面对反射率强度相当弱,IOR 值在1.0到3.0之间,其中 IOR 值为1.0意味着没有反射,大于1.0则产生更强的反射。
Below shows an example of how changing the 'IOR' of the material affects the reflectivity. Notice how as the reflection get stronger, the diffuse lighting gets weaker – this is due to energy conservation:
下面展示了更改材料的“ IOR”如何影响反射率的示例。注意,随着反射越来越强,漫射照明越来越弱——这是由于能量守恒:
|
|
|
|
|
|
|
IOR 1.0 1.0 |
1.25 |
1.5 |
2.0 |
3.0 |
Fresnel Type mode "IOR (Advanced)" In Detail
菲涅耳型模式“ IOR (Advanced)”详细介绍
This advanced mode allows you to set the 'complex' IOR for the material, per red, green and blue channel. Complex IOR consists of an 'IOR' value and an 'Absorption 'k'' coefficient. The scientific values to use can seem non-intuitive for conductors, but can be found at this website: http://refractiveindex.info/, where you can use wavelength of 0.65 for red, 0.55 for green and 0.45 for blue to compute the IOR and k values. Note that dielectric materials should always set the 'Absorption 'k'' coefficients to (0.0, 0.0, 0.0).
这种先进的模式允许您为材质设置复杂的 IOR,每个红色、绿色和蓝色通道。复合返回抑制由返回抑制值和吸收系数组成。对于导体来说,使用的科学数值看起来似乎不那么直观,但是可以在这个网站上找到: http://refractiveindex.info/ ,你可以用0.65的波长计算红色,0.55的波长计算绿色,0.45的波长计算 IOR 和 k 值。请注意,电介质材料应该始终设置“吸收“ k”系数为(0.0,0.0,0.0)。
This mode is particularly useful for metals, which typically have colored reflectivity and exhibit a slight color shift around the silhouette of the object due to absorption.
If you are not comfortable with working with 'complex' IOR, then we recommend you use the "Color+Edge Tint" option to define the Fresnel reflectivity instead.
这种模式对金属特别有用,因为金属通常具有彩色反射率,并且由于吸收而在物体轮廓周围显示出轻微的色移。如果您不习惯使用“复杂的”IOR,那么我们建议您使用“ Color + Edge Tint”选项来定义 Fresnel 反射率。
Below are examples of metal materials and their complex IOR values:
以下是金属材料及其复杂返回抑制值的例子:
|
|
|
|
|
|
|
Aluminuium 铝返回率: (1.342,0.965,0.585) k: (7.474,6.400,5.187) |
Copper 铜 (0.271, 0.677, 1.334) (0.271,0.677,1.334) (3.609, 2.625, 2.296) (3.609,2.625,2.296) |
Gold 金(0.183,0.422,1.432)(3.424,2.346,1.791) |
Iron 铁(2.911,2.950,2.530)(3.089,2.932,2.737) |
Two-tone 双音(0.402,6.081,0.475)(1.360,1.619,0.880) |
This mode can also be used for dielectric materials that have tinted reflections, by simply setting different IOR values for each red, green and blue channel. For example, to get a pure red tint you can use the following IOR (1.5, 1.0, 1.0). 这种模式也可用于有着色反射的介质材料,只需简单地为每个红色、绿色和蓝色通道设置不同的 IOR 值。例如,要获得纯红色色调,可以使用以下 IOR (1.5、1.0、1.0)
To achieve this without IOR per color channel, you would simply use the reflection 'Color' to tint the entire reflection. However, for physical correctness, the perpendicular reflectivity for dielectrics should always shift to white, which is not possible using the simple tinting method.
为了实现这个目的,您可以简单地使用反射“ Color”为整个反射着色。然而,为了物理上的正确性,介质的垂直反射率应该总是移动到白色,这是不可能使用简单的着色方法。
Below shows a comparison between tinted dielectric reflection using Fresnel complex IOR/Reflectivity control and the old-school 'Color' tint. The diffuse component is black, to highlight the reflectivity color; you can see that when using complex IOR, the reflectivity color shifts to white:
下面显示了使用菲涅耳复合返回率/反射率控制的有色介质反射和老派的“色彩”色调之间的比较。漫反射组件是黑色的,以突出反射率颜色; 您可以看到,当使用复杂 IOR 时,反射率颜色转换为白色:
|
|
|
|
No color tint, complex IOR 无色调,返回抑制复杂
IOR: (1.5, 1.2, 1.2) IOR: (1.5,1.2,1.2) K: (0.0, 0.0, 0.0) K: (0.0,0.0,0.0) Color: (1.0, 1.0, 1.0) 颜色: (1.0,1.0,1.0) |
Color tinted, simple IOR 着色,简单 IOR 1.5(1.0,0.2,0.2) |
Absorption (k)
吸收(k)
The absorption coefficients for complex IOR materials when using "IOR (Advanced)" Fresnel.
This is primarily for metals and should be 0.0 for dielectrics.
“ IOR (Advanced)”菲涅耳对复杂返回抑制材料吸收系数的影响。这主要是为金属和应该是0.0为电介质。
Reflectivity
反射率
The facing reflection color of the Fresnel effect when using "Color + Edge Tint" or "Metalness".
使用“色彩 + 边缘色调”或“金属性”时菲涅耳效应的面向反射色。
Metalness
金属性
The 'Metalness' weight. This value ranges between 0.0 and 1.0, where 0.0 means it is a dielectric material that uses the 'Reflectivity' color to control the reflectance and 1.0 means it is a fully reflective metal material that uses the diffuse/base color to control the color of the metal. Values between 0.0 and 1.0 are a blend between the two types of material.
金属的重量。这个值范围在0.0到1.0之间,其中0.0表示它是一种介电材料,使用“反射率”颜色来控制反射率,1.0表示它是一种全反射金属材料,使用漫反射/基色来控制金属的颜色。0.0和1.0之间的值是两种材质的混合。
Fresnel Type mode "Metalness" In Detail
菲涅耳型模式“金属性”的细节
This is an artist friendly control made popular by 'Physically Based Rendering' (or 'PBR' for short) principled materials of Unreal, Substance and Disney. The 'Metalness' parameter allows you to blend between a non-metal (i.e. dielectric) material and a purely metal material. When the 'Metalness' value is 0.0, the 'Diffuse Color' defines the diffuse lighting color and the 'Reflectivity' color defines the facing reflectivity – the properties common for dielectric materials. For most dielectrics the 'Reflectivity' color should be no greater than (0.04, 0.04, 0.04), which is actually the hard-coded default value used by Substance and Unreal. When the 'Metalness' value is 1.0, the material is fully reflective, like a metal, with the 'Diffuse Color' interpreted as a 'base color' defining the color of the metal reflection. A 'Metalness' value of 1.0 also means diffuse lighting is disabled and the dielectric 'Reflectivity' color is ignored. When the 'Metalness' value is between 0.0 and 1.0, the material is a blend between the 'dielectric' properties and the 'metal' properties.
这是一个友好的艺术家控制流行的“物理基础渲染”(或简称“ PBR”)原则材料的虚幻,物质和迪斯尼。“金属性”参数允许您混合非金属(即电介质)材料和纯金属材料。当“金属度”值为0.0时,“漫反射颜色”定义了漫射照明颜色,而“反射率”颜色定义了面向反射率——介质材料的常见特性。对于大多数介质,“反射率”的颜色应该不大于(0.04,0.04,0.04) ,这实际上是 Substance 和 Unreal 使用的硬编码默认值。当‘ Metalness’值为1.0时,材料是完全反射的,就像金属一样,‘漫反射颜色’被解释为定义金属反射颜色的‘基色’。“金属性”值为1.0也意味着漫射照明被禁用,并且电介质“反射率”颜色被忽略。当金属性值在0.0和1.0之间时,材料就是介电性能和金属性能的混合物。
Below shows an example of a material with different 'Metalness' values. Here you can see the effect of the diffuse color (0.944, 0.776, 0.372) as the material becomes more 'metal' as 'Metalness' increases:
下面展示了一个具有不同“金属性”值的材料的例子。这里你可以看到漫反射颜色的效果(0.944,0.776,0.372) ,随着金属度的增加,材质变得更“金属”:
|
|
|
|
|
|
|
Metalness: 0.0 金属度: 0.0 |
0.25 |
0.5 |
0.75 |
1.0 |
Metal Edge Tint
金属边色
The edge shift tint of the Fresnel effect when using "Color + Edge Tint" Fresnel.
This is primarily for metals and should be black for dielectrics.
使用“色彩 + 边缘色彩”菲涅耳时菲涅耳效应的边缘偏移色彩。这主要是为了金属和应该是黑色的电介质。
Fresnel Type mode "Color + Edge Tint" In Detail
菲涅耳型模式“颜色 + 边缘色调”的细节
This mode offers an artist friendly way to set complex reflectivity values using colors, without requiring knowledge of the non-intuitive complex IOR values. It is primarily useful for conductors/metals, which have colored facing reflectivity and a slight color shift towards the perpendicular reflection, but it can also be used for dielectric materials too.
这种模式提供了一种艺术家友好的方式,可以使用颜色设置复杂的反射率值,而不需要知道非直观的复杂 IOR 值。它主要是有用的导体/金属,其有颜色面临的反射率和轻微的垂直反射色移,但它也可以用于电介质材料。
For further reading you can see the paper here: http://jcgt.org/published/0003/04/03/paper.pdf
你可以在这里看到更多的文章: 《 http://jcgt.org/published/0003/04/03/paper.pdf
The idea is simple; the 'Reflectivity' color is the facing reflectivity strength, with most dielectric materials falling below (0.04, 0.04, 0.04) and conductors/metals considerably higher (0.5, 0.5, 0.5). The 'Metal Edge Tint' controls the color shift bias around perpendicular reflections. For metals, a general rule of thumb is that the 'Metal Edge Tint' should have a similar hue to the 'Reflectivity' color, only brighter. For dielectric materials, 'Metal Edge Tint' should always be black (0.0, 0.0, 0.0).
这个想法很简单,“反射率”的颜色是表面的反射率强度,大多数介质材料的反射率都低于(0.04,0.04,0.04) ,导体/金属的反射率要高得多(0.5,0.5,0.5)。“金属边缘色调”控制垂直反射周围的色移偏置。对于金属,一般的经验法则是,“金属边缘色彩”应该有一个类似的色调“反射率”的颜色,只是更明亮。对于电介质材料,‘ Metal Edge Tint’应该总是黑色(0.0,0.0,0.0)。
For perfect mirror reflectivity you can set both the 'Reflectivity' and 'Metal Edge Tint' to white.
为了完美的镜面反射率,你可以将“ Reflectivity”和“ Metal Edge Tint”设置为白色。
Below are examples of metals materials and their 'Reflectivity' and 'Metal Edge Tint' colors:
以下是金属材料的例子及其反射率和金属边色调:
|
|
|
|
|
|
|
Aluminium 铝 Reflectivity: (0.912, .914, .920) 反射率: (0.912,. 914,. 920) |
Copper 铜(0.926,0.721,0.502)(0.996,0.957,0.819) |
Gold 黄金(0.944,0.776,0.372)(0.998,0.981,0.734) |
Iron 铁(0.531,0.512,0.493)(0.571,0.540,0.592) |
Two-tone 双音(0.579,0.539,0.356)(0.981,0.071,1.000) |
Sheen 光泽
The sheen effect can be used to simulate a soft backscatter effect commonly seen on fabrics like velvet or satin.
光泽效应可以用来模拟柔软的反向散射效应,这种效应常见于天鹅绒或缎子等织物。
|
|
|
|
Cloth with Sheen 有光泽的布料
|
Cloth without Sheen 无光泽的布料 |
Color
颜色
This is the color tint of the sheen.
这是光泽的色调。
|
|
|
|
|
|
Sheen Color: Blue 颜色: 蓝色 |
Purple 紫色 |
Yellow 黄色 |
Teal 蓝绿色 |
Weight
重量
This is a multipler of the sheen tint. When 0.0 the sheen effect is disabled.
这是一个光泽色彩的多倍器。当0.0光泽效果是残疾人。
|
|
|
|
|
|
Sheen Weight: 0.0 光泽重量: 0.0 Sheen Color: Blue 颜色: 蓝色 |
0.1 |
0.5 |
1.0 |
Roughness
粗糙度
This controls the roughness of the sheen reflection, higher values result in a softer look.
这控制了光泽反射的粗糙度,较高的数值会导致较柔和的外观。
|
|
|
|
|
|
|
Sheen Roughness: 0.0 光泽粗糙度: 0.0 |
0.1 |
0.2 |
0.5 |
1.0 |
Samples
样本
The higher the sheen's roughness the softer the reflection will be and will need more samples to get a clean "grain-free" result. Higher sheen sample values will reduce any potential grain issues but will take longer to render and vice-versa.
光泽的粗糙度越高,反射就越软,需要更多的样品才能得到干净的“无颗粒”效果。较高的光泽样品价值将减少任何潜在的粮食问题,但将需要更长的时间,使反之亦然。
Refraction / Transmission 折射/传送
Color
颜色
This is the refraction tint.
这就是折射色。
To be physically correct, when used in conjunction with sub-surface scattering or sub-surface attenuation, this should be white.
为了物理上正确,当与次表面散射或次表面衰减结合使用时,这应该是白色的。
Weight
重量
This is a multiplier of the refraction tint. When 0.0 refraction transparency is disabled.
这是折射色调的倍增器。当禁用0.0折射透明度时。
Roughness
粗糙度
This is the roughness of the refraction rays.
这就是折射光线的粗糙度。
Note that for physical correctness, the perceived roughness effect is affected by the Index of Refraction (IOR) which determines how much rays bend. This means an IOR of 1.0 would yield no roughness effect, whereas larger IOR values yield a stronger roughness effect.
注意,为了物理上的正确性,可感知的粗糙度效应受到折射率(IOR)的影响,这决定了光线弯曲的程度。这意味着1.0的 IOR 不会产生粗糙度效应,而较大的 IOR 值产生较强的粗糙度效应。
To decouple this dependence on the IOR for the roughness, please see the "Decouple IOR from roughness' option under the 'Advanced' materials options tab.
为了将粗糙度对 IOR 的依赖解耦,请参见“ Advanced”materials options 选项卡下的“ Decouple IOR from 糙度”选项。
Refraction and Roughness in Detail
细节折射和粗糙度
When light is reflected by a surface, any energy that is not reflected is transmitted. This remaining transmission energy can be refracted or absorbed and scattered. Because of this, physically correct refractions share the same roughness and ray-bending through IOR properties as the reflections. The 'Link to Reflection' option ensures this physical correctness.
当光被表面反射时,任何未被反射的能量都会被传输。这剩余的透射能量可以被折射、吸收和散射。正因为如此,物理上正确的折射具有与反射相同的通过 IOR 属性的粗糙度和光线弯曲。“链接到反射”选项确保了这种物理正确性。
Below shows the effect of roughness on a reflective and refractive glass material with an IOR of 1.51 and with the 'Link to Reflection' option enabled to create a frosted glass effect. Notice how as roughness increases, reflectivity decreases, the glass appears more frosted and energy starts to get lost:
下面展示了粗糙度对返回抑制度为1.51的反射和折射玻璃材料的影响,并且使用链接到反射选项创建了磨砂玻璃效果。请注意,随着粗糙度的增加,反射率降低,玻璃表面出现更多的磨砂,能量开始流失:
|
|
|
|
|
|
|
Roughness: 0.0 粗糙度: 0.0 |
0.25 |
0.5 |
0.75 |
1.0 |
If you desire full control over the roughness and IOR of the refraction, simply un-check the 'Link to Reflection 链接到反射' option. ’选项
Below shows the effect of roughness on a reflective and refractive glass material, with the 'Link to Reflection' option disabled. To demonstrate, reflection roughness is 0.0, so you can clearly see the reflection remains sharp while the glass appears frosted with a refraction roughness of 0.25:
下面显示了粗糙度对反射和折射玻璃材料的影响,禁用了“链接到反射”选项。为了演示,反射粗糙度为0.0,所以你可以清楚地看到反射仍然是尖锐的,而玻璃看起来磨砂的折射粗糙度为0.25:
Below shows the effect of 'IOR' on a non-rough material, where increased IOR bends the rays more. To demonstrate the effect of ray bending, the refraction color is tinted. Noticed how with increased IOR, the more warped the transparency appears and the stronger the reflections appear:
下图显示了返回抑制对非粗糙材料的影响,其中返回抑制的增加使射线更加弯曲。为了演示光线弯曲的效果,折射颜色是有色的。注意到当 IOR 增加时,透明度的弯曲程度越大,反射越强:
|
|
|
|
|
|
|
IOR: 1.0 1.0 |
1.01 |
1.05 |
1.1 |
1.2 |
Below shows the effect of 'IOR' on a rough material. The roughness is fixed at 0.25. See how the perceived roughness changes with IOR - this is physically correct and due to micro-facet theory. Also notice that with an IOR of 1.0 there is no reflection and no refraction:
下面显示了 IOR 对粗糙材质的影响。粗糙度固定在0.25。看看感知的粗糙度如何改变 IOR-这是物理上正确的,由于微观方面的理论。还要注意,返回抑制值为1.0时,没有反射,也没有折射:
|
|
|
|
|
|
|
IOR: 1.0 1.0 |
1.1 |
1.2 |
1.3 |
1.4 |
Although physically correct, the notion that IOR affects the appearance of roughness can be confusing and non-intuitive. For more control you can decouple the IOR from roughness using the 'Decouple IOR from Roughness' option found in the 'Advanced' tab.
虽然物理上是正确的,但是 IOR 影响粗糙度外观的概念可能是混乱和不直观的。为了获得更多的控制,您可以使用“ Advanced”选项卡中的“ Decouple IOR from 糙度”选项将 IOR 与糙度分离。
Below shows the effect after roughness has been decoupled from IOR, with a fixed low IOR of 1.05:
下面显示了粗糙度与返回抑制解耦后的效果,返回抑制固定在1.05:
|
|
|
|
|
|
|
Roughness: 0.0 粗糙度: 0.0 |
0.25 |
0.5 |
0.75 |
1.0 |
As with reflection, rougher surfaces require more samples to clean up noise at the expense of rendering times.
与反射一样,粗糙的表面需要更多的样本来清理噪声,而这会减少渲染时间。
Samples
样本
Blurry refractions (when "Roughness" is greater than 0.0) and dispersion will need multiple samples to get a clean "grain-free" result. Higher numbers will reduce any potential grain issues but will take longer to render and vice-versa.
模糊折射(当“粗糙度”大于0.0)和分散将需要多个样本得到一个干净的“无颗粒”的结果。更高的数字将减少任何潜在的谷物问题,但将需要更长的渲染时间,反之亦然。
IOR
返回抑制
This is the Index of Refraction, which determines how much refractive rays bend when entering a medium. A value of 1.0 means no ray bending. Values should typically be between 1.0 and 2.0 for common dielectric materials.
这就是折射折射率,它决定了进入介质时折射光线的弯曲程度。值为1.0意味着没有光线弯曲。对于普通的电介质材料,其值一般应在1.0到2.0之间。
Link to Reflection
链接到反射
This option means the "roughness" and "IOR" values are the same as the base reflection. This is ideal for physically-correct refraction which dictates that whatever light is not reflected can be refracted. To specify different "roughness" and "IOR" values for refraction, simply un-check this option.
此选项意味着“粗糙度”和“ IOR”值与基反射值相同。这是理想的物理纠正折射,这表明无论什么光是不反射可以折射。要为折射指定不同的“粗糙度”和“ IOR”值,只需取消选中此选项。
Dispersion
分散
This controls how much the red, green and blue light separates for the dispersion rainbow effect. Values are in units of 'abbe'. A value of 0.0 is an invalid value for 'abbe' and disables the effect. Common dielectric materials have values between 20 and 70, with lower values yielding a stronger separation effect.
这控制多少红色,绿色和蓝色的分散彩虹效果光分开。数值以“ abbe”为单位。0.0是“ abbe”的无效值,并禁用该效果。常见的介质材料的电阻值在20到70之间,较低的电阻值会产生较强的分离效果。
Dispersion in Detail
细节上的分散
Some refractive materials exhibit an effect called dispersion, which is when light wavelengths separate based on the index of refraction of the surface for each wavelength. This creates the well-known prism rainbow effect.
一些折射材料表现出一种被称为色散的效应,这是指光的波长根据表面对每个波长的折射率而分离。这就产生了著名的棱镜彩虹效果。
The 'Dispersion' parameter allows you to specify the strength of the separation effect, in units of abbe. Dispersion is a subtle effect and common dielectric materials have values between 20 and 70, with lower values yielding a stronger separation effect. A value of 0.0 is an invalid abbe and disables the effect.
“分散”参数允许您指定分离效果的强度,以阿贝单位为单位。色散是一种微妙的效应,普通的介电材料的值在20到70之间,较低的值产生较强的分离效应。0.0的值是无效的 abbe 并禁用该效果。
Below shows the effect of the 'Dispersion' parameter for various values on a glass material:
下面展示了玻璃材料上各种数值的色散参数的影响:
|
|
|
|
|
|
|
Dispersion: 1.0 分散度: 1.0 |
5.0 |
10.0 |
20.0 |
30.0 |
Thin Walled
薄壁
This option is useful for thin refractive materials such a pane of glass, where the ray-bending effect is not noticeable and modeling actual object thickness is not worth it. When this option is enabled, refraction rays will enter and immediately exit the medium without bending the rays.
这个选项是有用的薄折射材料,如方格玻璃,其中射线弯曲效果不明显,建模实际物体厚度是不值得的。当启用此选项时,折射光线将进入并立即退出介质而不会使光线弯曲。
Sub-surface attenuation and dispersion effects are disabled when this option is enabled.
当启用此选项时,将禁用次表面衰减和色散效应。
Thin Transparent Materials in Detail
细节透明薄材料
The 'Thin Walled' option is available for rendering thin transparent objects that don't actually have modelled thickness, such as a pane of glass. For very thin objects, refractive rays will not travel enough of a distance inside the object before exiting to show any noticeable bending effect. Enabling this option preserves the reflection Fresnel effect while internally disabling any medium interface transition math that would allow rays to bend.
“薄壁”选项可用于渲染实际上没有建模厚度的薄透明物体,例如一块玻璃。对于非常薄的物体,折射光线在离开物体之前不会在物体内传播足够的距离,以显示任何明显的弯曲效果。启用这个选项可以保留反射菲涅耳效应,同时内部禁用任何允许光线弯曲的介质界面过渡算法。
Below shows an example of a pane of glass with no thickness and the 'Thin Walled' option enabled, compared to a very thin pane of glass with modelled thickness. You can see there's no noticeable ray bending difference:
下面展示了一个没有厚度的玻璃窗格和启用薄壁选项的例子,与一个有模型厚度的非常薄的玻璃窗格相比。你可以看到光线弯曲没有明显的区别:
|
|
|
|
Thin Walled: disabled 薄壁: 禁用 IOR: 1.5 |
Thin Walled: enabled 薄壁: 启用 |
Sub Surface Single Scattering
亚表面单次散射
These options allow you to describe the effect on transmitted light rays as they travel through a medium. All materials (except perfect, un-tinted glass) exhibit an amount of 'attenuation', where light is absorbed the deeper it travels through the medium. Denser materials have a stronger attenuation effect. Also attenuation is described for each red, green and blue channel, which indirectly affects the color of the medium. A good example of this effect is seen in tinted glass.
这些选项允许你描述透射光线在介质中传播时的影响。所有的材料(除了完美的未着色玻璃)都表现出一定程度的“衰减”,光在介质中传播得越深,就越容易被吸收。密度较大的材料具有较强的衰减效果。还描述了每个红色、绿色和蓝色通道的衰减,它们间接地影响介质的颜色。有色玻璃就是这种效果的一个很好的例子。
On top of attenuation, some mediums exhibit an amount of single scattering. Scattering gives the medium a foggy, milky quality which adds an extra amount of realism. Typical materials that are a good example of scattering are murky liquids such as milk, coffee, wine and beer.
在衰减之上,一些介质表现出一定数量的单次散射。散射给媒体一个雾,乳白色的质量,这增加了额外的现实主义数额。散射的典型例子是混浊的液体,如牛奶、咖啡、葡萄酒和啤酒。
Note that scattering can also affect light attenuation (see 'Attenuation Units') and render time.
请注意,散射也可以影响光衰减(见“衰减单位”)和渲染时间。
Attenuation Units
衰减单位
This option allows you to choose how you want to specify the sub-surface attenuation effect.
此选项允许您选择要如何指定次表面衰减效果。
- "Transmittance" is essentially the sub-surface color, with darker colors for denser materials. It is used to describe the absorption of light and is independent of attenuation due to any scattering. “透射率”基本上是亚表面颜色,对于密度更大的材料则使用较暗的颜色。它用于描述光的吸收,与任何散射引起的衰减无关
- "Extinction" uses scientific units to describe the sub-surface attenuation effect due to both light absorption and scattering. Use this mode for more flexible control of the scattering intensity. “消光”使用科学单位来描述由于光吸收和散射引起的亚表面衰减效应。使用这种模式可以更灵活地控制散射强度
Transmittance Color
透射颜色
When in 'Transmittance' attenuation mode, describes the sub-surface attenuation color. A color of black means full light absorption, yielding a solid material, while a color of white means light rays will pass right through without being absorbed. Dark colors can be used to describe denser materials.
当在“透射”衰减模式下,描述亚表面衰减颜色。黑色意味着充分的光吸收,产生固体材料,而白色意味着光线会直接穿过而不被吸收。深色可以用来描述密度更大的材料。
Absorption Scale
吸收量表
When in 'Transmittance' attenuation mode, acts as a scale of the absorption effect, with a value of 0.0 meaning no absorption and larger values meaning stronger absorption and thus denser-looking materials.
当处于“透射衰减”模式时,它起到吸收效应的标度的作用,其值为0.0意味着没有吸收,而较大的值意味着吸收更强,因此密度更大。
Extinction Coeff
绝灭 Coeff
When in 'Extinction' attenuation mode, describes the attenuation strength due to both absorption and scattering. These are scientific units, where lower values mean a less dense-looking material, and 0.0 meaning no attenuation at all.
当处于“熄灭”衰减模式时,描述吸收和散射引起的衰减强度。这些是科学单位,较低的数值意味着密度较小的材料,0.0意味着没有衰减。
Extinction Scale
灭绝规模
When in 'Extinction' attenuation mode, acts as a scale of the 'Extinction Coeff' values to allow quick control over the density of a material.
当处于“熄灭”衰减模式时,作为“熄灭 Coeff”值的尺度,可以快速控制材料的密度。
Scatter Coeff
4. disscatter Coeff
These are scientific units that describe the strength of the scattering affect for the red, green and blue channels and hence its color.
When in "Transmittance" 'Attenuation Units' mode, the scatter values also affect attenuation, so larger scattering values will make the medium appear more 'cloudy'.
这些是科学单位,描述了红色,绿色和蓝色通道的散射影响的强度,因此它的颜色。在“透射”“衰减单位”模式下,散射值也会影响衰减,因此较大的散射值会使介质看起来更“浑浊”。
When in "Extinction" 'Attenuation Units' mode, the scatter values act more like a color multiplier of the scattering effect. This allows you to easily scale up the brightness of the scattering effect which may break physical correctness, but also gives you extra flexibility to describe more exotic mediums.
在“消光”“衰减单位”模式下,散射值更像是散射效应的色彩倍增器。这使您可以轻松地放大散射效果的亮度,这可能会破坏物理正确性,但也为您提供了额外的灵活性,以描述更奇特的媒介。
Scatter Scale
分散量表
This scales the 'Scatter Coeff' values. A value of 0.0 disables the scattering effect.
这个比例的“散射 Coeff”值。0.0的值将禁用散射效果。
Phase
第二阶段
This describes the anisotropy of the scattering effect, for forward and back scattering. Forward scattering requires values between 0 and 1, which means rays will scatter away from the light source. Back scattering requires values between -1 and 0 which means rays will scatter back towards the light source.
这描述了前向和后向散射的散射效应的各向异性。前向散射要求值在0到1之间,这意味着光线会从光源散射开来。后向散射要求值在 -1和0之间,这意味着光线会向后散射到光源。
Samples
样本
This is the maximum number of samples shot for single scattering rays. More samples will mean less noisy looking single scattering, but can affect rendering performance.
这是单次散射射线的最大采样数。更多的样本将意味着更少的噪声看起来单一散射,但会影响渲染性能。
Sub-Surface Light Transmission Attenuation and Scattering
亚表面光的传输、衰减和散射
The 'Attenuation Units' option allows you to define the light attenuation and scattering properties for a sub-surface medium in two ways; "Transmittance" and "Extinction".
The "Transmittance" mode is recommended for materials such as tinted glass that have no scattering, offering an intuitive method to control the attenuation of light through the sub-surface.
The "Extinction" mode uses scientific values and is recommended for fuller control over the scattered light color.
“衰减单位”选项允许您以两种方式定义亚表面介质的光衰减和散射特性: “透射”和“消光”。“透射”模式推荐用于有色玻璃等没有散射的材料,提供了一种直观的方法来控制光通过子表面的衰减。“熄灭”模式使用科学的价值观,并建议对散射光的颜色进行更全面的控制。
Attenuation Units Mode "Transmittance" In Detail
详细介绍衰减单位模式“透射比”
This mode allows you to specify a 'Transmittance Color', i.e. the color of the light transmission ray after it has been absorbed by the material having travelled 1.0 unit of distance. This in turn determines a sub-surface absorption coefficient which can then be scaled using the 'Absorption Scale' parameter. When absorption is low, light will travel further through the sub-surface before it is extinguished, resulting in a more transparent looking material. Conversely, higher absorption means light will travel less before it is extinguished, giving a material a more solid, darker appearance.
这种模式允许你指定一种“透射颜色”,即光线被旅行了1.0单位距离的材料吸收后的颜色。这反过来又决定了一个亚表面吸收系数,然后可以使用“吸收标度”参数进行标度。当吸收较低时,光在被熄灭之前会进一步穿过地下表面,从而形成一种看起来更透明的材料。相反,更高的吸收率意味着光在熄灭之前传播的更少,这使得材料看起来更坚固、更黑暗。
Below shows the effect of 'Transmittance' on a glass material to create a red-tinted solid glass effect. Note how an 'Absorption Scale' of 0.0 disables the light attenuation effect. Also note how increasing the 'Absorption Scale' makes the glass look denser and thus darker in the thicker areas of the object:
下图显示了玻璃材料的“透射率”效果,创造了一种红色的固体玻璃效果。注意,0.0的“吸收标度”是如何禁用光衰减效果的。还要注意的是,增加“吸收比例”会让玻璃看起来更密集,因此在物体较厚的区域颜色更深:
|
|
|
|
|
|
|
Absorption Scale: 0.0 吸收标准: 0.0透射比颜色: (1.0,0.1,0.1) |
0.5 |
1.0 |
2.0 |
4.0 |
To enable sub-surface scattering the ' 为了使亚表面散射’Scatter Coeff 4. disscatter Coeff' values and ' ’价值观和’Scatter Scale 分散量表' must be greater than 0.0. In Transmittance attenuation mode, the 'Scatter Coeff 4. disscatter Coeff' and ' ’和’Scatter Scale 分散量表' defines the color of the scattered light and affects the overall attenuation of the light as it is scattered through the medium. The attenuation effect (or loss of energy) due to scattering is physically correct to ensure energy conservation. 定义了散射光的颜色,并影响了光在介质中散射时的整体衰减。散射引起的衰减效应(或能量损失)在物理上是正确的,以确保能量守恒
Below shows an example of just the scattering effect with no 'Transmittance Color' absorption affecting the attenuation of light; all attenuation is due to the scattering coeff. This is fairly close to real liquid materials that have very similar scattering and extinction coefficients. Notice that although the scatter coeff color is close to red, due its effect on attenuation the color of the light as it attenuates through the object tends towards the inverse of red, i.e. cyan. Also notice that with increased scattering coefficient strength, the material appears more diffuse/solid:
下面是一个例子,只是散射效应,没有’透射颜色’吸收影响光的衰减,所有的衰减是由于散射 coeff。这非常接近具有非常相似散射和消光系数的真实液体材料。请注意,虽然散射 coeff 颜色接近红色,但由于它对衰减的影响,当光线通过物体衰减时,其颜色趋向于红色的倒数,即青色。还要注意的是,随着散射系数强度的增加,材料显得更加漫反射/固体:
|
|
|
|
|
|
|
Scatter Scale: 1.0 散射比例: 1.0散射比例: (1.0,0.1,0.1)透射颜色: (1.0,1.0,1.0) |
2.0 |
4.0 |
8.0 |
16.0 |
If you want to achieve a scattering color that is close to the color of the 'Scatter Coeff', you need to compensate for the coeff's effect on attenuation.
如果你想达到一个散射颜色是接近的颜色“散射 Coeff”,你需要补偿 Coeff 的影响,对衰减。
Below shows an example of compensating for the scatter coeff's effect on attenuation by tweaking the 'Transmittance Color' to red, to essentially knock out the cyan color. Notice that the addition of 'Transmittance Color'-driven absorption makes the material appear denser – this is because light is now being attenuated by both absorption and scattering:
下面是一个补偿散射 coeff 对衰减的影响的例子,通过调整“透射颜色”到红色,基本上消除了蓝绿色。注意,增加“透射颜色”驱动的吸收使材料显得更加致密——这是因为光现在被吸收和散射减弱了:
|
|
|
|
|
|
|
Scatter Scale: 0.0 散射比例: 0.0散射比例: (1.0,0.1,0.1)透射比颜色: (1.0,0.1,0.1)吸收比例: 1.0 |
0.25 |
0.5 |
1.0 |
2.0 |
Attenuation Units Mode "Extinction" In Detail
衰减单位模式“熄灭”的细节
This mode allows you to specify the light attenuation effect and scattering with more control of the scattering color; in this mode it is assumed that all attenuation due to absorption and scattering is baked into the 'Extinction Coeff' values. The 'Extinction Scale' parameter is a simple scale of the coefficients, where lower values mean a more transparent material and higher values result in a more solid-looking material.
这种模式允许你指定光衰减效应和散射,并且可以更好地控制散射颜色; 在这种模式下,假设所有由于吸收和散射引起的衰减都被计入到‘绝灭 Coeff’值中。“消光标度”参数是系数的简单标度,其中较低的值意味着更透明的材料,较高的值导致更坚实的材料。
Note that 'Extinction Coeff' values are in scientific units and do not actually represent colors, they represent the rate at which the red, green and blue components of the light ray are attenuated.
注意,Extinction Coeff 值是以科学单位表示的,实际上并不代表颜色---- 它们代表光线中红色、绿色和蓝色成分衰减的速率。
Below shows an example different values of 'Extinction'. Note how with an extinction color of red, the attenuated light rays color tends towards cyan; this is for the same reason the scatter example above tended towards cyan with low scattering values:
下面是一个不同的灭绝值的例子。注意,当红色为消光色时,衰减光线的颜色趋向于青色; 这和上面的散射例子趋向于低散射值的青色是出于同样的原因:
|
|
|
|
|
|
|
Extinction Scale: 1.0 灭绝标准: 1.0灭绝标准: (1.0,0.1,0.1) |
2.0 |
4.0 |
8.0 |
16.0 |
To enable sub-surface scattering the ' 为了使亚表面散射’Scatter Coeff 4. disscatter Coeff' values and ' ’价值观和’Scatter Scale 分散量表' must be greater than 0.0. In Extinction attenuation mode, the 'Scatter Coeff 4. disscatter Coeff' defines the color of the scattered light, by simply tinting the scattered light. Because it does not affect attenuation, increasing the ' 通过简单地调整散射光的颜色来定义散射光的颜色。因为它不影响衰减,增加’Scatter Coeff 4. disscatter Coeff' values, or ' ’价值,或’Scatter Scale 分散量表', will increase the intensity of the scattered light. 会增加散射光的强度
To be physically correct, Scatter Coeff and Scatter Scale should not be greater than the 'Extinction Coeff' values, but it can be useful if the resultant image is too dark for your taste or you want to create interesting effects.
在物理上是正确的,Scatter Coeff 和 Scatter Scale 不应该大于 Extinction Coeff 的值,但是如果最终的图像对你的口味来说太暗或者你想创造有趣的效果,它可以是有用的。
Below shows an example of using similar coefficients to above examples, with increased scattering scales to increase the light intensity inside the sub-surface:
下面是使用与上面例子类似的系数的一个例子,增加散射尺度以增加亚表面内的光强度:
|
|
|
|
|
|
|
Scatter Scale: 4.0 分散度量表: 4.0分散度量表: (1.0,0.1,0.1)消光度量表: (1.0,0.1,0.1)消光度量表: 16.0 |
8.0 |
16.0 |
32.0 |
64.0 |
The simplest approach is to use the same 'Extinction' and 'Scatter' values to get the most predictable results. For example, if you want to make the scattered material more transparent, reduce the 'Extinction' and 'Scatter' values, and if you want to make the scattered material appear more opaque and 'diffuse' increase both the 'Extinction' and 'Scatter' values. 最简单的方法是使用相同的“ Extinction”和“ Scatter”值来得到最可预测的结果。例如,如果你想让散乱的材质更加透明,减少‘ Extinction’和‘ Scatter’的值,如果你想让散乱的材质看起来更不透明,‘ Extinction’和‘ Scatter’的值都会增加
Below shows examples of increasing the 'Extinction' and 'Scatter' values to make the material less translucent and more dense or opaque looking. Note that with both the extinction and scatter values being the same, the results are the same as the first scatter example:
下面的例子显示了增加“熄灭”和“分散”值,使材料更少半透明和更密集或不透明的外观。请注意,由于消光和散射值是相同的,结果与第一个散射例子是相同的:
|
|
|
|
|
|
|
Scatter Scale: 1.0 分散度量表: 1.0分散度量表: (1.0,0.1,0.1)消光度量表: (1.0,0.1,0.1)消光度量表: 1.0 |
2.0 2.02.0 |
4.0 4.04.0 |
8.0 8.08.0 |
16.0 16.016.0 |
If you want to achieve a scattering color that is close to the color of the ' 如果你想实现一个散射颜色是接近的颜色’Scatter Coeff 4. disscatter Coeff', you need to compensate for the ' ’,你需要弥补’Extinction Coeff 绝灭 Coeff''s effect on attenuation by making it grey-scale. 利用灰度对衰减的影响
Below shows an example of achieving a lighting result that is representative the 'scatter coeff' color. See how higher 'Scale' values make the object less transparent and denser:
下面展示了一个实现光照效果的例子,这个例子代表了“散射光”的颜色。看看更高的刻度值是如何使对象变得不那么透明和密集的:
|
|
|
|
|
|
|
Scatter Scale: 0.25 分散标度: 0.25分散标度: (1.0,0.1,0.1)消光标度: (1.0,1.0,1.0)消光标度: 0.25 |
0.5 0.50.5 |
1.0 1.01.0 |
2.0 2.02.0 |
4.0 4.04.0 |
Single-Scattering Performance Considerations
单次散射性能考虑因素
Single scattered materials can vary in density. Very densely scattered materials can look 'solid', while non-dense materials such as some liquids will not appear 'solid'. Choosing whether to enable transparency/refraction on a single-scattered material depends on how solid the scattering result looks and the shape of the geometry. Also a very important consideration is that transparent materials can be slower to render, particularly with refractive materials that have an IOR greater than 1.0, which allow the refraction rays to bend and potentially bounce around inside the sub-surface before they exit.
单一分散材料的密度可以不同。非常密集分散的材料看起来可能是固体,而非致密的材料,如某些液体,则不会看起来是固体。选择是否在单一散射材料上实现透明/折射取决于散射结果看起来的固体程度和几何形状。还有一个非常重要的考虑因素是,透明材料的渲染速度可能较慢,特别是折射率大于1.0的折射材料,这使得折射光线在退出之前在亚表面内弯曲并可能反弹。
Below shows a comparison between a relatively dense sub-surface scattering 'opaque' material and 'transparent' material. Note that because light does not exit the opaque material, the cyan tint present on the transparent material around the thin parts gets lost, otherwise the results are very similar. Also notice that with increased density, the difference becomes less apparent:
下面显示了一个比较密集的亚表面散射“不透明”材料和“透明”材料。请注意,由于光线不能透过不透明材料,薄部分周围透明材料上的青色会丢失,否则结果会非常相似。还要注意的是,随着密度的增加,差异变得不那么明显:
|
|
|
|
|
|
Refraction Weight: 1.0 (transparent) 折射重量: 1.0(透明)散射系数: (1.0,0.1,0.1)散射系数: 16.0消光系数: (1.0,0.1,0.1)消光系数: 16.0 |
0.0 (opaque) 0.0(不透明) |
1.0 (transparent) 1.0(透明)64.064.0 |
0.0 (opaque) 0.0(不透明) |
Phase in Detail
详细分阶段
The 'Phase' parameter controls the anisotropy of the scattering effect, describing how the lighting will bounce around inside the medium and get scattered. A phase of 0.0 means that the lighting will bounce around more and will appear more diffuse. Values greater than 0.0 produce what is known as "forward scattering". Forward scattering means the lighting doesn't bounce around in the medium as much and is mostly visible after travelling through the medium, away from the light source. On the other hand, negative numbers will produce "backward scattering' which means that scattered light will mostly be bounced out of the medium back towards the light source.
相位参数控制了散射效应的各向异性,描述了光线如何在介质中反弹并散射。一个0.0的阶段意味着光线会反射更多,并且会显得更分散。大于0.0的值会产生所谓的“前向散射”。前向散射意味着光线在介质中不会反弹很多,并且在穿过介质后,远离光源时,大部分光线是可见的。另一方面,负数会产生“后向散射”,这意味着散射光大部分会从介质反射到光源。
Below shows an example of how phase affects the resultant scattered lighting. The light is shining towards the side of the dragon, away from the camera, and the Scatter Coeff strength is exaggerated to highlight the effect:
下面展示了相位如何影响结果散射照明的一个例子。光线照向龙的侧面,远离摄像机,而 Scatter Coeff 的强度被夸大以突出效果:
|
|
|
|
|
|
|
Phase: -0.8 阶段:-0.8 Scatter Coeff: (1.0,0.1,0.1) Scatter Scale: 32.0 Extinction Coeff: (1.0,0.1,0.1) Extinction Scale: 16.0 |
-0.4 - 0.4 |
0.0 |
0.4 |
0.8 |
Sub-Surface Multiple Scattering
亚表面多次散射
In addition to sub-surface single scattering, the Redshift Material also supports sub-surface multiple scattering. Multiple scattering means that scattered light gets bounced around inside the medium multiple times, which produces a softer effect than single scattering alone.
除亚表面单次散射外,红移材料还支持亚表面多次散射。多次散射意味着散射光在介质内被多次反射,产生比单次散射更柔和的效果。
These options allow you to define the sub-surface multiple scattering effect (similar to the Redshift SubSurfaceScatter and Redshift Skin material shaders). The effect can be controlled for up to three layers. Most materials require only one layer to get plausible looking results, however complex materials such as skin require multiple layers to accurately emulate the scattering of light within the sub-surface.
这些选项允许您定义子表面多次散射效果(类似于红移 SubSurfaceScatter 和红移皮肤材质着色器)。这种效果最多可以控制三层。大多数材料只需要一层就可以得到合理的外观效果,然而像皮肤这样的复杂材料需要多层才能精确模拟亚表面内的光散射。
General
将军
Amount
金额
The sub-surface multiple scattering amount. When 0.0, the material will be pure diffuse, with no sub-surface scattering. When 1.0, the material will be fully sub-surface scattered, with no diffuse. Values in-between yield a blend of the two.
亚表面多次散射量。当0.0时,材料将呈纯扩散,没有亚表面散射。当1.0时,材质将完全分散在表面,没有漫反射。介于两者之间的值得到两者的混合。
To enable the multiple scattering effect, you must first set the 'Amount' parameter to a value greater than 0.0. When the 'Amount' value is 1.0, the material will be fully sub-surface scattered, with no diffuse lighting. Values between 0.0 and 1.0 result in a blend of sub-surface scattering and diffuse lighting. For the following examples the light is positioned behind the object in order to highlight the sub-surface effect.
若要启用多次散射效果,必须首先将“ Amount”参数设置为大于0.0的值。当“金额”值为1.0时,材质将完全分散在次表面,没有漫射照明。值在0.0和1.0之间导致亚表面散射和漫射照明的混合。对于下面的例子,光线被放置在物体的后面,以突出次表面效果。
Below shows the increasing sub-surface translucency effect of a jade material by increasing the 'Amount' parameter:
下图显示了通过增加“金额”参数来增加玉石材料的亚表面半透明效果:
|
|
|
|
|
|
|
Amount: 0.0 金额: 0.0 |
0.25 |
0.5 |
0.75 |
1.0 |
Radius Scale
半径比例尺
The scale controls how soft or hard the scattering effect will be. Higher numbers make the effect softer. This value is multiplied into the "Layer Radius" parameter explained below. A radius scale of 0 means no scattering effect.
尺度控制着散射效果的软硬程度。更高的数字会使效果变得更弱。这个值乘以下面解释的“图层半径”参数。半径为0意味着没有散射效应。
The 'Radius Scale' parameter allows you to control how deep the light rays go as they are scattered. Higher values result in a more translucent or 'soft' appearance, with lower values resulting in a more diffuse or 'hard' appearance. Tuning this value is also useful if your scene units don't match the material well.
“半径比例”参数允许你控制光线散射的深度。较高的值导致更半透明或“软”的外观,较低的值导致更漫反射或“硬”的外观。如果你的场景单位与材质不匹配,调整这个值也是有用的。
Note that internally Radius Scale acts as a multiplier of all the 'Layer Radius' values.
请注意,内部半径缩放作为一个倍增的所有’层半径’的价值。
Below shows how increasing the 'Radius Scale' can affect the overall translucency 'softness' by decreasing the density and allowing more light through:
下面展示了增加半径尺度如何通过降低密度和允许更多的光线通过来影响整体的半透明度柔软度:
|
|
|
|
|
|
|
Radius Scale: 0.0 半径: 0.0 |
1.0 |
2.0 |
3.0 |
4.0 |
Mode
模式
- Point-Based 基于点的
- Ray-Traced 射线追踪
You can use either point-based or ray-traced multiple sub-surface scattering in Redshift and both have their own advantages and disadvantages. In quite a few cases the techniques should look similar to each other but there are situations where the differences will be readily apparent, this is primarily due to the normalization of light that occurs when using point-based mode. Ray-traced mode does not normalize the light which can lead to differences that are most notable on thin objects or objects with more surface detail.
在红移中,可以使用基于点的多次子表面散射或者光线跟踪的多次子表面散射,这两种方法各有优缺点。在相当多的情况下,这些技术应该看起来彼此相似,但是在有些情况下,差异会很明显,这主要是由于在使用基于点的模式时发生的光的正常化。光线追踪模式并不能使光正常化,这会导致在薄物体或表面细节更多的物体上最显著的差异。
If your scene is setup to use point-based SSS shaders and you render in progressive mode it will automatically use ray-traced SSS during progressive renders. This way you can actually see the SSS effect in progressive mode (and not just the diffuse texture) and tweak settings interactively - while still using point-based for the final (bucket) rendering.
如果你的场景设置为使用基于点的 SSS 着色器,并且你在渐进模式下渲染,它会自动在渐进渲染期间使用光线跟踪 SSS。这样你就可以在渐进模式下看到 SSS 效果(不仅仅是漫反射纹理) ,交互式地调整设置,同时仍然使用基于点的最终(桶)渲染。
Please note that due to the differences in the two modes that the final result can differ when comparing progressive ray-traced SSS to the bucket rendered point-based SSS.
请注意,由于两种模式的差异,在比较渐进射线跟踪的 SSS 和基于桶渲染点的 SSS 时,最终结果可能不同。
Point-Based
基于点的
-
Faster and smoother
更快更流畅
-
Less detailed / accurate
不够详细/准确
-
Does not work in progressive mode
不在渐进模式下工作
-
Requires a “prepass” stage
需要一个“准备阶段”
-
Higher chance of flickering in difficult lighting situations.
在光线困难的情况下闪烁的几率更高。
-
Not possible to isolate SSS effect on a particular object which can result in unnecessary “light bleeding” artifacts.
不可能隔离 SSS 效应的一个特定的对象,可能会导致不必要的“光出血”伪影。
Ray-Traced
射线追踪
-
Slower and noisier
更慢更吵
-
More detailed / accurate
更详细/更准确
-
Works in progressive mode
以渐进模式工作
-
The higher the scatter radius the more samples are needed for clean results.
散射半径越大,清洁结果需要的样本就越多。
-
Possible to isolate SSS effect between objects or have it affect all objects. Please see here for more info.
可能隔离 SSS 效果之间的对象或有它影响所有的对象。请看这里的更多信息。
|
|
|
|
|
|
Mode: Point-Based 模式: 基于点 Render Time: 13s 渲染时间: 13秒 |
Ray-Traced 射线追踪 1m 11s |
Point-Based 基于点的 15s 15秒 |
Ray-Traced 射线追踪 2m 47s |
Samples
样本
This controls the number of samples cast for Multiple Sub-Surface Scattering rays. Higher numbers will reduce noise issues but will take longer to render.
这控制了多次亚表面散射射线的采样数量。更高的数字会减少噪音问题,但渲染时间会更长。
Ray-Traced only
光线追踪
|
|
|
|
|
Samples: 128 样本: 128 |
512 |
4096 |
Include Mode
包含模式
- All Objects : All other objects participate in the SSS effect. 所有对象: 所有其他对象都参与 SSS 效应
- Only Self : Contain the SSS effect in the same object only. 只有自我: 只在同一个物体中包含 SSS 效果
Ray-Traced only
光线追踪
Layer 1-3
第1至3层
Color
颜色
This is the scatter color of the layer, which it tends to the further the light travels within the layer.
这是图层的散射色,它趋向于光在图层中传播的更远。
The Layers 'Color' value describes the sub-surface scatter color of the light as it travels within the sub-surface.
层的“颜色”值描述了光在亚表面内传播时亚表面的散射颜色。
Below shows an example of different sub-surface scatter colors. Notice that in this example the diffuse color is white, hence the GI bounce appearing white on the near-side of the dragon:
下面展示了一个不同的亚表面散射颜色的例子。注意,在这个例子中漫反射的颜色是白色,因此 GI 反射在龙的近侧显示为白色:
|
|
|
|
|
|
|
Layer Color: (1.0, 0.0, 0.0) 层色: (1.0,0.0,0.0)漫反射色: (1.0,1.0,1.0) |
(0.0, 1.0, 0.0) (0.0,1.0,0.0) |
(0.0, 0.0, 1.0) (0.0,0.0,1.0) |
(0.54, 0.33, 0.12) Whole Milk (0.54,0.33,0.12)全脂牛奶 |
(0.48, 0.17, 0.1) Pink Skin (0.48,0.17,0.1)粉红色皮肤 |
Weight
重量
This is the weight of the layer, with larger values meaning the layer will dominate the sub-surface results.
这是权重的层,与较大的价值意味着该层将支配子表面的结果。
Note for correct energy conservation, the weights for each layer are normalized so the resultant total weight for all layers is always 1.0.
注意正确的能量守恒,每一层的权重被归一化,所以所有层的总权重总是1.0。
|
|
|
|
|
|
|
Layer 1 Weight: 0.0 1层重量: 0.0 Layer 1 Color: (1.0, 0.0, 0.0) 第一层颜色: (1.0,0.0,0.0) Layer 2 Weight: 1.0 第二层重量: 1.0 Layer 2 Color: (0.0, 0.0, 1.0) 第二层颜色: (0.0,0.0,1.0) Diffuse Color: (1.0, 1.0, 1.0) 漫反射色: (1.0,1.0,1.0) |
0.5 1.0 |
1.0 1.0 |
1.0 0.5 |
1.0 0.0 |
Radius
半径
This is the distance the light can travel through the object, with larger values producing softer results. A value of 0.0 will produce diffuse-like results.
这是光线穿过物体的距离,较大的数值会产生较柔和的效果。值为0.0将产生类似漫反射的结果。
The Layers 'Radius' value increases the distance which the light can travel within the sub-surface before it is extinguished. Higher values result in a more translucent or 'soft' appearance.
层的“半径”值增加了光线在被熄灭之前在子表面内传播的距离。较高的值会导致更透明或更“柔软”的外观。
Below shows an example of changing the 'Radius' value for Layer 1 (red color) and Layer 2 (blue color) and how different mixes affect the results:
下面是一个改变图层1(红色)和图层2(蓝色)的“半径”值的例子,以及不同的混合物如何影响结果:
|
|
|
|
|
|
|
Layer 1 Radius: 0.0 1层半径: 0.0 Layer 1 Color: (1.0, 0.0, 0.0) 第一层颜色: (1.0,0.0,0.0) Layer 2 Radius: 1.0 2层半径: 1.0 Layer 2 Color: (0.0, 0.0, 1.0) 第二层颜色: (0.0,0.0,1.0) Diffuse Color: (1.0, 1.0, 1.0) 漫反射色: (1.0,1.0,1.0) |
0.3 1.0 |
1.0 1.0 |
1.0 0.3 |
1.0 0.0 |
Important Considerations for Sub-Surface Multiple Scattering
亚表面多次散射的重要考虑因素
When using multiple layers to define more complex sub-surface materials such as skin, note that the weights for each layer are normalized before they are applied to the final sub-surface result. This means that if you are using 3 layers, each with a weight of 1.0, then the normalized weight for each layer will be 1.0 / 3.0.
当使用多层来定义更复杂的亚表面材料(如皮肤)时,请注意,每层的权重在应用到最终的亚表面结果之前已经标准化。这意味着如果您使用3个层,每个层的权重为1.0,那么每个层的规范化权重为1.0/3.0。
The final sub-surface result of all layers is tinted by the 'Diffuse Color', which essentially describes the 'exit' color of the scattered light. This makes it much easier to texture a surface that uses multiple sub-surface Layers.
所有层次的最终亚表面结果都被“漫反射颜色”染上了色彩,这基本上描述了散射光的“出口”颜色。这使得使用多个子表面层的表面纹理更加容易。
For the best performance sub-surface multiple scattering should be used in conjunction with opaque materials.
为了达到最佳的性能,子表面多次散射应与不透明材料结合使用。
Coating
涂层
These options allow you to define a coating layer over the material, to emulate properties such as varnish, the reflective clear coat of car paint, or slimy and wet surfaces. Additionally, the coating layer has its own bump map input which allows you to define details such as scratches separate from the base of the material, or leave as perfectly smooth.
这些选项允许你在材料上定义一个涂层,以模拟诸如清漆、汽车漆的反光透明涂层、或者湿滑潮湿的表面等性能。此外,涂层有自己的凹凸贴图输入允许你定义细节,如划痕从材料的基础上分离,或留下完美的光滑。
Since the coating layer covers the entire material, due to energy conservation it will indirectly affect the strength of lighting for the 'base layer' material properties, such as diffuse, reflection, refraction and scattering (see 'Energy Conservation' topic in the 'Advanced' section).
由于涂层覆盖了整个材料,由于能量守恒,它会间接影响“基层”材料的光照强度,如漫射、反射、折射和散射(见“高级”部分的“能量守恒”主题)。
General
将军
Color
颜色
This is the reflection tint.
这是反射色。
To be physically correct, this should be white and the IOR/Reflectivity for each RGB channel should be used instead to add color.
为了在物理上正确,这应该是白色的,并且应该使用每个 RGB 通道的 IOR/Reflectivity 来添加颜色。
Weight
重量
This is a multiplier of the reflection tint. Reflections are disabled when this value is 0.0.
这是一个反射色调的倍增器。当这个值为0.0时,反射将被禁用。
Roughness
粗糙度
This is the roughness of the surface reflection. A roughness value of 0.0 means perfectly 'polished', or full glossiness. A roughness value of 1.0 means almost diffuse appearance.
这是表面反射的粗糙度。粗糙度值为0.0意味着完美的抛光或光泽度。粗糙度值为1.0意味着外观几乎漫反射。
Samples
样本
Blurry reflections (when "Roughness" is greater than 0.0) will need multiple samples to get a clean "grain-free" result. Higher numbers will reduce any potential grain issues but will take longer to render and vice-versa.
模糊反射(当“粗糙度”大于0.0)将需要多个样本得到一个干净的“无纹理”的结果。更高的数字将减少任何潜在的谷物问题,但将需要更长的渲染时间,反之亦然。
BRDF
This allows you to select which reflection model to use;
这允许您选择要使用的反射模型;
- "Beckmann (Cook-Torrance)" is a physically-based industry-standard reflection model that accurately represents a wide variety of materials. “贝克曼(库克-托伦斯)”是一个物理基础的行业标准的反射模型,准确地代表了各种各样的材料
- "GGX" is a relatively new model that offers a wide specular tail, making it perfect for difficult to emulate metals such as chrome. “ GGX”是一个相对较新的模式,提供了一个广泛的镜面尾巴,使其完美难以仿真金属,如铬
- "Ashikhmin-Shirley" is good for a wide variety of materials and samples efficiently for noise-free results. “ Ashikhmin-Shirley”适用于各种材料和样品,高效无噪音的效果
Fresnel Type
菲涅耳型
This allows you to select between different methods of controlling the reflection Fresnel effect;
这使您可以选择不同的方法来控制反射菲涅耳效应;
- "IOR (Advanced) IOR (高级)" lets you set the Index of Refraction for each red, green and blue channel. This allows you to control the reflectivity color for both dielectric materials (i.e. non-metals) and metals, while remaining physically correct. 让你设置每个红色,绿色和蓝色通道的折射率。这使您可以控制反射率颜色的绝缘材料(即非金属)和金属,同时保持物理正确
- "Color 颜色" is an artist friendly mode that allows you to control the facing reflectivity color, without required complex IOR values. 是一个艺术家友好的模式,允许您控制面向的反射率颜色,而不需要复杂的 IOR 值
- "IOR 返回抑制" lets you set a single Index of Refraction value to control reflectivity and is ideal for simple dielectric materials. Dielectric materials typically have an Index of Refraction between 1.0 and 2.0, where 1.0 means no reflectivity and higher values mean stronger reflectivity. 可以让你设置一个单折射率值来控制反射率,是简单介质材料的理想选择。介质材料的折射率通常在1.0到2.0之间,其中1.0表示没有反射率,更高的值表示更强的反射率
IOR
返回抑制
The index of refraction used to calculate the strength of the Fresnel effect. Consists of three values (for red, green and blue) when using "IOR (Advanced)" Fresnel.
折射率用来计算菲涅耳效应的强度。在使用“ IOR (Advanced)”菲涅耳时包含三个值(用于红、绿和蓝)。
The coating reflection layer shares similar properties to the base reflection (see Reflection for examples of 'BRDF', 'Fresnel Type' and 'Roughness').
涂层反射层具有与基底反射相似的特性(参见反射的例子“ BRDF”,“ Fresnel 类型”和“粗糙度”)。
Below shows an example of a clear-coat reflection layer over a very rough metallic 'gold' material. Note that the rectangular specular highlight is clearly defined, compared to the rough base metal reflection. Note that an IOR of 1.0 effectively disables the coat. Also note that with a colored coat you can achieve a nice two-tone effect:
下面显示了一个非常粗糙的金属“黄金”材料上的透明涂层反射层的例子。请注意,与粗糙的基础金属反射相比,矩形镜面高光轮廓清晰。注意1.0的 IOR 可以有效地禁用被毛。还要注意的是,穿上彩色外套,你可以获得双色调的效果:
|
|
|
|
|
|
|
Coating IOR (Advanced): (1.0, 1.0, 1.0) 涂层 IOR (Advanced) : (1.0,1.0,1.0) |
(1.6, 1.6, 1.6) (1.6,1.6,1.6) |
(1.6, 1.01, 1.01) (1.6,1.01,1.01) |
(1.01, 1.6, 1.01) (1.01,1.6,1.01) |
(1.01, 1.01, 1.6) (1.01,1.01,1.6) |
Reflectivity 反射率
The facing reflectivity color of the Fresnel effect when using "Color" Fresnel Type.
使用“彩色”菲涅耳型时菲涅耳效应面向反射率的颜色。
Advanced
高级
Transmittance
透射率
Transmittance color for transmission emulation. A color of white means there will be no transmittance effect. Non-white colors will yield a subtle transmittance color-shift effect around the edges of the object, simulating coating depth.
透射仿真用透射比色。白色意味着没有透光效果。非白色的颜色会在物体边缘产生微妙的色移效果,模拟涂层的深度。
Thickness
厚度
Coating depth scale for the transmission emulation effect. Lower values yield a subtler effect, while larger values yield a stronger transmission effect. A value of 0.0 means the transmission effect is disabled.
透射仿真效果的涂层深度尺度。较低的数值产生较微妙的效果,而较大的数值产生较强的传递效果。值为0.0意味着传输效果被禁用。
Coating has 'Transmittance' and 'Thickness' parameters to emulate absorption of light as it travels through the coating layer before it reflects from the base layer. This can create interesting and more realistic looking coating on materials such as tinted glazing.
涂层具有“透射率”和“厚度”参数,以模拟光线在穿过涂层后从基层反射回来时的吸收。这可以创造有趣的和更现实的看起来涂层材料,如有色玻璃。
Below shows an example of the 'Transmittance' effect with increasing 'Thickness' to accentuate the effect:
下面的例子显示了增加厚度的透射效应来强调这种效应:
|
|
|
|
|
|
|
Thickness: 0.0 厚度: 0.0透光率: (1.0,0.55,0.55) |
0.1 |
0.2 |
0.3 |
0.4 |
Bump Map
凹凸贴图
Plug in your coating bump map here. Coating bump mapping is separate from the base layer, which means you can apply details such as scratches on just the coating, or even leave the coating blemish-free.
在这里插入你的凹凸贴图。涂层凹凸贴图是独立于基层的,这意味着你可以只在涂层上应用诸如划痕之类的细节,或者甚至可以让涂层无瑕疵。
By plugging a bump map into the main bump port of the material and leaving the coating bump port empty, you can achieve a more convincing-looking clear coat or varnish effect:
通过将凹凸贴图插入材料的主凹凸端口,让涂层凹凸端口保持空白,您可以获得更令人信服的清漆或清漆效果:
|
|
|
|
Bump in both base and coating port 在基座和涂层端口的凹凸 |
No bump in coating port 涂层端口无凹凸 |
Overall 整体而言
These options are applied to the overall material.
这些选项适用于整个材质。
Overall Tint
整体色调
This is an overall tint for the entire material.
这是整个材料的整体色调。
The 'Overall Tint' parameter allows you to tint the entire material after lighting has been calculated. This parameter is also useful if you want to apply additional lighting attenuation from effects such as ambient occlusion, to accentuate shadows around crevices.
“全部色彩”参数允许你在照明计算之后给整个材质着色。这个参数也是有用的,如果你想应用额外的灯光衰减的影响,如环境阻塞,以强调缝隙周围的阴影。
Below shows examples of 'Overall Tint'. See how it affects both diffuse lighting and reflections:
下面的例子展示了整体色调,看看它是如何影响漫射光和反射光的:
|
|
|
|
|
|
|
Overall Tint: (1.0, 0.0, 0.0) 整体色彩: (1.0,0.0,0.0) |
(0.0, 1.0, 0.0) (0.0,1.0,0.0) |
(0.0, 0.0, 1.0) (0.0,0.0,1.0) |
(1.0, 1.0, 1.0) (1.0,1.0,1.0) |
AO shader AO 着色器 |
Opacity
不透明度
This color describes the overall opacity of the material, with colors closer to white being more opaque. An opacity of black means the material will be fully transparent.
这种颜色描述了材料的整体不透明度,颜色更接近白色,更不透明。不透明的黑色意味着材料将是完全透明的。
Note that this effect is currently dependent on the global/local refraction trace depth (see Optimizations tab). If you only need cutout transparency you should make use of the Redshift Sprite shader.
请注意,此效果目前依赖于全局/本地折射跟踪深度(请参见 Optimizations 选项卡)。如果你只需要剪切透明度,你应该使用红移精灵着色器。
Below shows examples of the 'Opacity' of a material. Note that refraction color is the inverse of the opacity color. Grey-scale values are typically used to describe opacity:
下面显示了材质的不透明度的例子。请注意,折射颜色是不透明颜色的倒置。灰度值通常用来描述不透明度:
|
|
|
|
|
|
|
Opacity: (1.0, 0.0, 0.0) 不透明度: (1.0,0.0,0.0) |
(0.0, 1.0, 0.0) (0.0,1.0,0.0) |
(0.0, 0.0, 1.0) (0.0,0.0,1.0) |
(0.5, 0.5, 0.5) (0.5,0.5,0.5) |
(0.25, 0.25, 0.25) (0.25,0.25,0.25) |
Emission
排放
This is the emissive color of the material.
这是材料的放射性颜色。
Emission Weight
排放重量
This is a multiplier of the emissive color of the material.
这是材料发射色的倍增器。
Below shows examples of 'Emission':
下面是一些“心理创伤”的例子:
|
|
|
|
|
|
|
Emission: (1.0, 0.0, 0.0) 发射: (1.0,0.0,0.0)发射重量: 1.0 |
(0.0, 1.0, 0.0) (0.0,1.0,0.0)1.0 |
(0.0, 0.0, 1.0) (0.0,0.0,1.0)1.0 |
(0.0, 0.0, 1.0) (0.0,0.0,1.0)0.1 |
(0.0, 0.0, 1.0) (0.0,0.0,1.0)10.0 |
Bump Map
凹凸贴图
Connect your overall bump map here.
在这里连接你的整体凹凸贴图。
Optimizations 优化
These options allow you to fine-tune the performance of the material.
这些选项允许您对材质的性能进行微调。
Enable Trace Depth Overrides
启用跟踪深度重写
This enables the per material Max Reflection and Refraction/Opacity Trace Depth parameters below.
When not enabled, the global trace depth will be used.
这使每个材质的最大反射和折射/不透明跟踪深度参数如下。未启用时,将使用全局跟踪深度。
Note that when enabled, the override cannot exceed the global trace depth.
请注意,当启用时,覆盖不能超过全局跟踪深度。
Reflection
反思
Trace Depth
追踪深度
This parameter controls the trace depth for reflection rays shot from this material. If the reflection rays of a material are not very defined (meaning: they are blurry because of the roughness parameter or have a low weight), then multiple bounces can be a waste of rendering time. This parameter allows the user to reduce the trace depth and speed up rendering.
这个参数控制从这种材料射出的反射光的跟踪深度。如果一个材质的反射光线没有很明确的定义(意思是: 由于粗糙度参数而模糊,或者重量较轻) ,那么多次反射可能会浪费渲染时间。此参数允许用户减少跟踪深度并加快呈现速度。
Cut-off Override Enable
切断重写启用
This parameter allows you to override the global cut-off setting for reflections.
此参数允许您覆盖反射的全局截止设置。
Cut-off Threshold
截止阈值
When the reflections of a material are very dark (because of low "Weight" or "Color" values) they contribute very little to the final image. This parameter defines what is considered "very dark" at which point no more reflection rays will be shot - which will speed up rendering. Scenes containing very strong lights might need this parameter set to very low values such as 0.0001 in order to avoid early termination of tracing which can produce a grain-like effect.
当一个材质的反射非常暗(因为低的“重量”或“颜色”值) ,它们对最终图像的贡献很小。这个参数定义了什么被认为是“非常黑暗”,在这一点上没有更多的反射射线将被拍摄-这将加速渲染。包含非常强光的场景可能需要将这个参数设置为非常低的值,如0.0001,以避免过早终止跟踪,因为跟踪会产生类似颗粒的效果。
Cull Dim Internal Reflections
剔除暗淡的内部反射
This is a simple, but important performance optimization to prevent rays getting trapped inside objects that are both reflective and refractive. Normally, two rays would be spawned for every surface hit inside the object, one for reflection and one for refraction. If you had a glass object, for example, you would have rays bouncing about, trapped inside the sphere until their max trace depth is reached, potentially adding very little to the overall visual quality if the reflected amount is 'weak'. Having this option enabled turns off reflected rays inside the object. Note that this option does not affect refractive rays that are reflected due to Total Internal Reflection. One caveat of using this option is that hot internal specular reflections will be lost, which is not realistic, but often acceptable. This is enabled by default.
这是一个简单,但重要的性能优化,以防止光线陷入物体的反射和折射。通常情况下,每次撞击物体内部的表面都会产生两条射线,一条用于反射,一条用于折射。例如,如果你有一个玻璃物体,你可能会有光线反射,被困在球体内,直到达到最大的跟踪深度,如果反射量很弱,可能对整体的视觉质量增加很少。启用这个选项可以关闭物体内部的反射光线。注意,这个选项不会影响由于全内反射而反射的折射光线。使用这个选项的一个警告是热内镜反射将会丢失,这是不现实的,但往往是可以接受的。这是默认启用的。
Unless you are modelling materials like lenses that need to look realistic, we recommend you leave this option enabled.
除非你建模材料,如镜头,需要看起来真实,我们建议你离开这个选项启用。
Below shows a comparison between a glass material with the 'Cull Dim Internal Reflections' option enabled/disabled. You can see the hot internal specular reflection is lost with the option enabled, which is not realistic but can be acceptable and renders much faster:
下面显示了一个玻璃材料与“ Cull Dim Internal Reflections”选项启用/禁用的比较。你可以看到内部的热镜面反射(物理)在启用选项的情况下丢失了,这是不现实的,但是可以接受,渲染速度也快得多:
|
|
|
|
Cull Dim Internal Reflections: enabled 剔除暗淡的内部反射: 启用 |
disabled 残疾的 |
Refraction
折射
Trace Depth
追踪深度
This parameter controls the trace depth for refraction rays shot from this material. If the refraction rays of a material are not very defined (meaning: they are blurry because of the roughness parameter or have a low weight), then multiple bounces can be a waste of rendering time. This parameter allows the user to reduce the trace depth and speed up rendering.
这个参数控制从这种材料射出的折射光线的跟踪深度。如果一种材料的折射光线没有非常明确的定义(意思是: 因为粗糙度参数而模糊或者重量较轻) ,那么多次反弹可能会浪费渲染时间。此参数允许用户减少跟踪深度并加快呈现速度。
Cut-off Override Enabled
已启用切断覆盖
This parameter allows you to override the global cut-off setting for refractions.
此参数允许您覆盖折射操作的全局截止设置。
Cut-off Threshold
截止阈值
When the refractions of a material are very dark (because of low "Weight" or "Color" values) they contribute very little to the final image. This parameter defines what is considered "very dark" at which point no more reflection rays will be shot - which will speed up rendering. Scenes containing very strong lights might need this parameter set to very low values such as 0.0001 in order to avoid early termination of tracing which can produce a grain-like effect.
当一个材料的折射是非常黑暗的(因为低“重量”或“颜色”值) ,他们贡献非常小的最终图像。这个参数定义了什么被认为是“非常黑暗”,在这一点上没有更多的反射射线将被拍摄-这将加速渲染。包含非常强光的场景可能需要将这个参数设置为非常低的值,如0.0001,以避免过早终止跟踪,因为跟踪会产生类似颗粒的效果。
Combined Trace Depth
组合痕迹深度
This allows you to set a custom combined trace depth for your Redshift material shader.
这允许您为您的红移材质着色器设置自定义组合跟踪深度。
Optimization Options In Detail
详细的优化选项
When the 'Enable Trace Depth Override' option is enabled, the material trace depths defined here are used instead of the global ones. This can be useful for fine-tuning performance on a per material basis where dropped bounces might not be noticed.
当启用“启用跟踪深度覆盖”选项时,将使用此处定义的物质跟踪深度而不是全局深度。这可能是有用的微调性能在每个材料的基础上下降反弹可能不会被注意到。
When the 'Reflection/Refraction' Cut-off Override is enabled, the cut-off values are used instead of the global ones.
当启用“反射/折射”截止覆盖时,将使用截止值而不是全局值。
For examples of how to use the trace depths and cut-offs, please see the Material documentation.
有关如何使用跟踪深度和截断的示例,请参阅 Material 文档。
Advanced
高级
These options allow you to tune features of the material that are not commonly used.
这些选项允许您调优不常用的材料特性。
Diffuse / Reflection / Coating
漫反射/反射/涂层
Direct Scale
直接比例
This parameter allows you to independently scale the weight of direct lighting rays, i.e. diffuse/reflection rays intersecting lights in the scene. Setting this value to 0.0 effectively disables direct lighting.
这个参数允许你独立衡量直接照明光线的重量,即漫反射光线与场景中的光线相交。将此值设置为0.0有效禁用直接照明。
Indirect Scale
间接比例
This parameter allows you to independently scale the weight of indirect lighting rays, i.e. GI/reflection rays intersecting surfaces in the scene. Setting this value to 0.0 effectively disables indirect lighting, which can be a useful optimization.
这个参数允许你独立衡量间接照明光线的重量,即 GI/反射光线与场景中的表面相交。将这个值设置为0.0可以有效地禁用间接照明,这是一个有用的优化。
Note that setting this value to 0.0 is equivalent to the 'Specular Highlights Only' option that can be found in other Redshift material shaders, such as Architectural.
请注意,将这个值设置为0.0相当于在其他红移材质着色器(如 Architectural)中可以找到的“仅高光”选项。
Direct and Indirect Scales in Detail
详细的直接和间接比例尺
To optionally balance the amount of direct lighting vs indirect lighting, or even cancel direct or indirect lighting altogether, you can adjust the 'Direct Scale' and 'Indirect Scale' for diffuse and reflections.
Note for physically correct results both the 'Direct' and 'Indirect' lighting scales should be 1.0 or the same value.
要选择平衡直接照明和间接照明的数量,甚至完全取消直接或间接照明,你可以调整漫反射和反射的直接比例和间接比例。注意,为了实际上正确的结果,“直接”和“间接”照明天平应该是1.0或相同的数值。
Below shows an example of scaling down the amount of Diffuse Direct and Indirect Lighting. Diffuse GI is enabled and the base is emissive to highlight the GI indirect lighting effect. Notice how the influence of the direct light diminishes and GI indirect bounce diminishes:
下面是一个缩小漫射直接和间接照明的例子。漫反射 GI 是启用的,基地是发射突出的 GI 间接照明效果。注意直接光线的影响是如何减少的,GI 间接反弹是如何减少的:
|
|
|
|
|
|
|
Diffuse Direct Scale: 1.0 漫反射直接比例: 1.0 |
0.75 |
0.5 |
0.25 |
0.0 |
|
|
|
|
|
|
|
Diffuse Indirect Scale: 1.0 漫反射间接比例: 1.0 |
0.75 |
0.5 |
0.25 |
0.0 |
Below shows an example of scaling down the amount of Reflection Direct and Indirect Lighting. Notice how the influence of the rectangular direct lights diminishes – the lights are very hot so much lower scale values need to be used to see a noticeable effect. Indirect reflection of the surrounding scene requires less aggressive values to see a difference:
下面是一个缩减反射直接和间接照明的例子。注意如何影响的矩形直接灯减少-灯是非常热,所以低规模的价值观需要用来看到一个显着的效果。对周围环境的间接反射需要不那么咄咄逼人的价值观才能看出区别:
|
|
|
|
|
|
|
Reflection Direct Scale: 1.0 反射直接比例: 1.0 |
0.2 |
0.1 |
0.05 |
0.0 |
|
|
|
|
|
|
|
Reflection Indirect Scale: 1.0 反射间接比例: 1.0 |
0.75 |
0.5 |
0.25 |
0.0 |
Convert from Glossiness to Roughness
从光泽度转换为粗糙度
This option is useful when you have legacy textures that drive material roughness using the 'glossiness' convention - i.e. where a glossiness value of 0.0 means maximum roughness and a value of 1.0 means perfectly smooth. Enabling this option essentially inverts any inputs to 'roughness' parameters, to convert from glossiness to roughness.
这个选项对于那些使用“光泽度”约定来驱动材质粗糙度的遗留纹理非常有用——也就是说,光泽度值0.0表示最大粗糙度,1.0表示完全光滑。启用此选项实质上将任何输入转换为“粗糙度”参数,从而将光泽度转换为粗糙度。
Refraction
折射
Convert from Glossiness to Roughness
从光泽度转换为粗糙度
This option is useful when you have legacy textures that drive material roughness using the 'glossiness' convention - i.e. where a glossiness value of 0.0 means maximum roughness and a value of 1.0 means perfectly smooth. Enabling this option essentially inverts any inputs to 'roughness' parameters, to convert from glossiness to roughness.
这个选项对于那些使用“光泽度”约定来驱动材质粗糙度的遗留纹理非常有用——也就是说,光泽度值0.0表示最大粗糙度,1.0表示完全光滑。启用此选项实质上将任何输入转换为“粗糙度”参数,从而将光泽度转换为粗糙度。
Decouple IOR From Roughness
从粗糙度解耦 IOR
Physically correct refraction roughness due to micro-facet theory is affected by the Index Of Refraction, where higher IOR values can yield a rougher appearance and an IOR of 1.0 would yield no roughness at all. Enabling this option ignores the IOR when generating rough refraction rays, which can result in a more predictable effect, even though it is not physically correct.
由于微小面理论而引起的物理上正确的折射粗糙度受到折射率的影响,较高的返回抑制值可以产生较粗糙的外观,1.0的返回抑制值根本不会产生粗糙度。启用此选项将在生成粗略折射光线时忽略 IOR,这可能导致更可预测的效果,即使它在物理上是不正确的。
See this example for the 'Decouple IOR from Roughness' option.
请参阅下面的例子了解“从糙度中解耦 IOR”选项。
Shadow Opacity
阴影不透明度
This option allows you to tune the shadow opacity of transparent materials. A value of 0.0 means the transparency of the shadow is unaffected, while a value of 1.0 means the shadow will be fully opaque and black. This option can be useful when used in conjunction with photon caustics, when a darker shadow can prevent photon caustics from appearing washed out.
此选项允许您调整透明材质的阴影不透明度。值为0.0意味着阴影的透明度不受影响,而值为1.0意味着阴影将是完全不透明和黑色。这个选项在与光子焦散相结合时很有用,当一个较暗的阴影可以防止光子焦散出现被淘汰。
Note that setting this value to 1.0 is equivalent to enabling the 'Enable Refractive Caustics' option found on the Redshift Architectural material shader.
注意,将这个值设置为1.0相当于启用红移建筑材质着色器上的‘允许折射焦散’选项。
Below shows the effect of increasing the 'Shadow Opacity' for a tinted glass material. The shadow is from area lighting and is quite soft; as the opacity increases the shadow loses its reddish tint and the photon caustics stand out more:
下图显示了增加有色玻璃材质的阴影不透明度的效果。阴影来自于区域照明,非常柔和; 当不透明度增加时,阴影失去了它的红色色彩,光子焦散效果更加突出:
|
|
|
|
|
|
|
Shadow Opacity: 0.0 阴影不透明度: 0.0 |
0.25 |
0.5 |
0.75 |
1.0 |
Opacity Affects Alpha Channel
不透明度影响 Alpha 通道
By default with this option enabled, refraction and opacity will affect the alpha channel. So if your object has 50% transparency your alpha will reflect that with 50% alpha.
默认情况下,如果启用此选项,折射和不透明度将影响 alpha 通道。所以如果你的对象有50% 的透明度,你的 alpha 会以50% 的透明度反映出来。
Disable this parameter if you want your transparent objects to have a solid alpha.
如果您希望您的透明对象具有实心 alpha 值,请禁用此参数。
Energy Conservation Mode
节约能源模式
Energy conservation is an important feature of the Redshift Material, as it ensures physically plausible lighting for more realistic results. A material can be considered as a stack of layers, where light energy is transmitted from layer to layer, with each layer losing a certain amount of energy. For example, the amount of energy not reflected by the top-most layer (due to Fresnel) can then be refracted or diffuse. This mode lets you choose how the energy is transmitted between layers;
节约能源是红移材料的一个重要特征,因为它确保了更真实的照明效果。一种材料可以被看作是层叠,光能在层与层之间传输,每一层都损失一定量的能量。例如,没有被最顶层(由于菲涅耳)反射的能量数量可以被折射或扩散。这种模式可以让你选择如何在层之间传输能量;
- "Mono" uses the luminance of the remaining energy to affect layers below. This is the mode used by other Redshift material shaders, such as Architectural. “ Mono”使用剩余能量的亮度来影响下面的图层。这是其他红移材质着色器使用的模式,比如建筑
- "RGB" uses the remaining color energy to affect the layers below. For example, if a reflection layer is pure red (1.0, 0.0, 0.0), then the energy remaining for diffuse or refraction will be (0.0, 1.0, 1.0). “ RGB”使用剩余的颜色能量来影响下面的图层。例如,如果反射层是纯红色(1.0,0.0,0.0) ,那么漫反射或折射的剩余能量为(0.0,1.0,1.0)
Energy Conservation in Detail
详细节约能源
Conceptually, the material can be visualized as layers like so:
从概念上讲,材质可以被视觉化为层,如下图所示:
- Coating 涂层
- Reflection 反思
- Refraction / Diffuse / Sub-surface Transmission and Scattering 折射/扩散/亚表面透射与散射
For physical correctness, energy is automatically conserved between these conceptual layers and between the diffuse/refraction/sub-surface layer so that the amount of light reflected is no more than received. In other words, a highly reflective material will have very little diffuse lighting or refraction/transmission.
为了物理上的正确性,这些概念层之间以及漫反射/折射/亚表面层之间自动保存能量,因此反射的光量不超过接收到的光量。换句话说,高反射材料的漫射照明或折射/透射很少。
Below shows a comparison between energy conservation modes with a tinted base reflection and grey base diffuse color. Notice how under "RGB" mode, the diffuse color takes on some of the inverse color of the red reflection tint – this is correct, because the diffuse layer gets the remaining energy that was not reflected. Notice how under "Mono" mode the diffuse color remains grey:
下面显示了带有色基反射和灰基漫反射色的节能模式之间的比较。注意在“ RGB”模式下,漫反射颜色呈现了红色反射色——这是正确的,因为漫反射层获得了未被反射的剩余能量。注意在“ Mono”模式下漫反射颜色保持灰色:
|
|
|
|
Conservation Mode: RGB 保守模式: RGB IOR: (2.0,1.0,1.0) k: (0.0,0.0,0.0)反射色: (1.0,1.0,1.0)漫反射色(0.5,0.5,0.5) |
Mono 女名女子名 |
'Overall Tint' Affects Emission
整体色调对发射的影响
Enabling this option forces the 'Overall Tint' to also affect the material emission color. When using the 'Overall Tint' to affect lighting (such as using ambient occlusion shader results), you should leave this option un-checked for more realistic results.
启用此选项将强制“ overalltint”也影响材质发射颜色。当使用‘ Overall Tint’影响照明(如使用环境遮挡着色器结果) ,你应该保留这个选项,以获得更真实的结果。
Enabling the 'Overall Tint Affects Emission' option allows you to apply the 'Overall Tint' to the emissive part of the material. If the 'Overall Tint' is meant to just affect lighting, this option should be un-checked.
启用“全部色彩影响发射”选项,可以让你应用“全部色彩”到材料的发射部分。如果“整体色调”意味着只影响照明,这个选项应取消选中。
Below shows a comparison between this option being enabled and disabled, with AO driving the 'Overall Tint' of the emissive ball material. With the option enabled you can see the AO shadow affects the emissive strength of the ball material:
下面显示了在启用和禁用这个选项之间的比较,AO 驱动的发射球材料的全部色彩。使用这个选项,你可以看到 AO 阴影影响球材质的发射强度:
|
|
|
|
'Overall Tint' Affects Emission: disabled 整体色调影响发射: 禁用 |
Enabled 启用 |
Anisotropy
各向异性
Surface Orientation
表面定向
When this option is set to 'None', Redshift will attempt to compute an axis automatically based on the surface normal. This can be acceptable for simple flat surfaces, but can produce unpredictable results for other types of surfaces. 当此选项设置为“无”时,红移将尝试基于曲面法线自动计算轴。这对于简单的平坦表面是可以接受的,但是对于其他类型的表面可能会产生不可预知的结果
UV Set
紫外线
This option allows you to specify a named UV Set or Tangent Set to define the surface axis that is used to control anisotropic reflection direction.
此选项允许您指定一个命名的 UV 设置或切线设置来定义用于控制各向异性反射方向的表面轴。
UV Channel 紫外线通道
The vertex attribute channel name for UVs to drive the surface orientation for anisotropic reflections.
用于 uv 驱动各向异性反射的表面方向的顶点属性通道名称。
Tangent Channel 切线通道
The vertex attribute channel name for Tangents to drive the surface orientation for anisotropic reflections.
用于驱动各向异性反射的表面方向的切线的顶点属性通道名称。


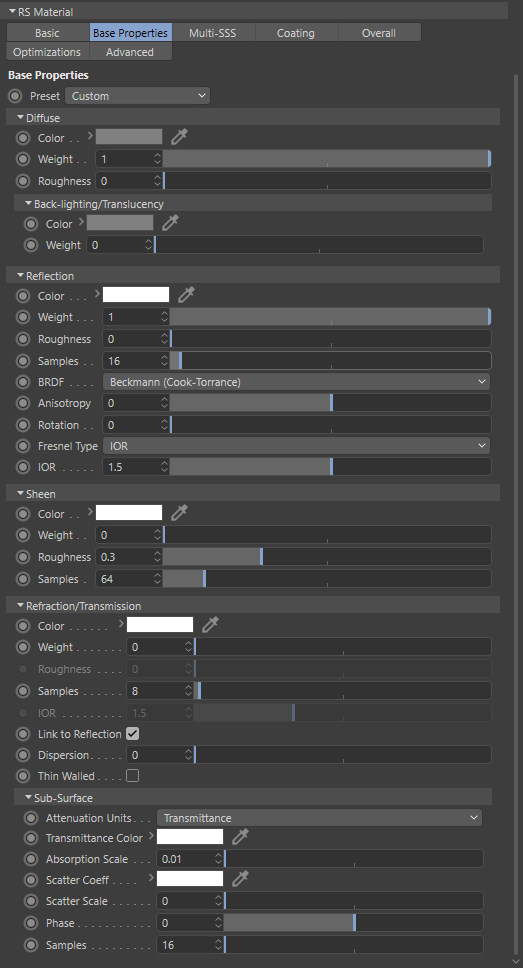
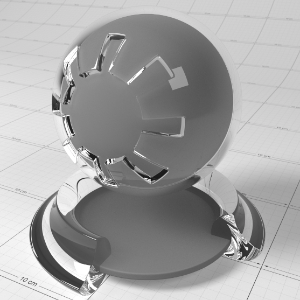
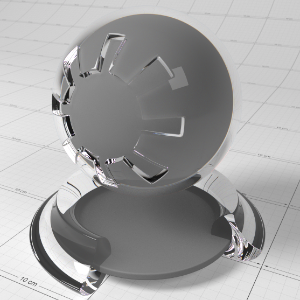
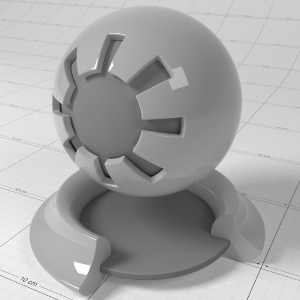
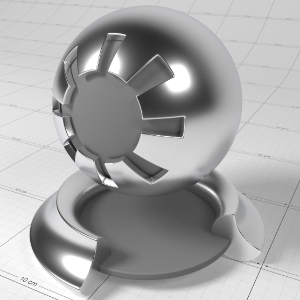
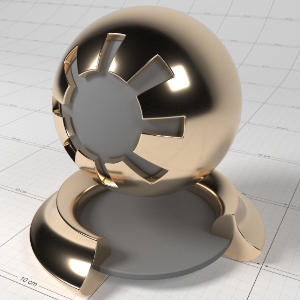
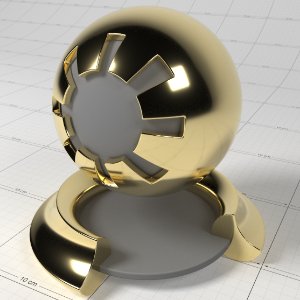
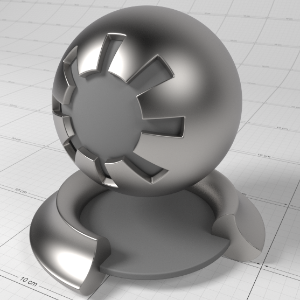
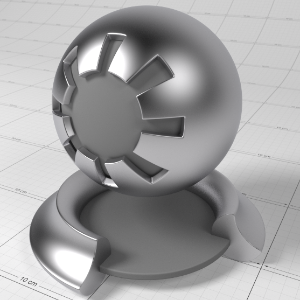
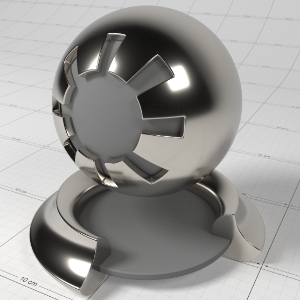
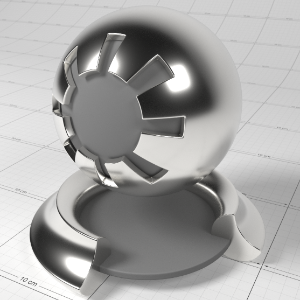
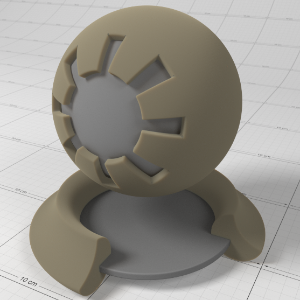
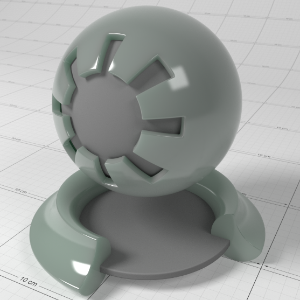
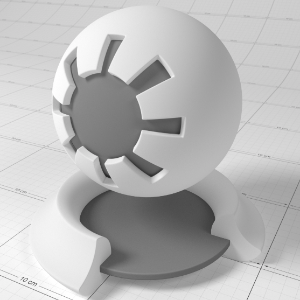
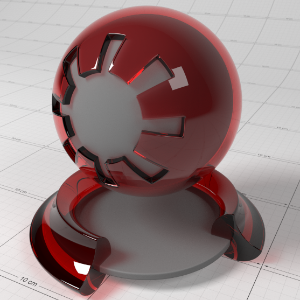
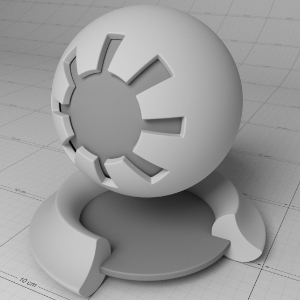
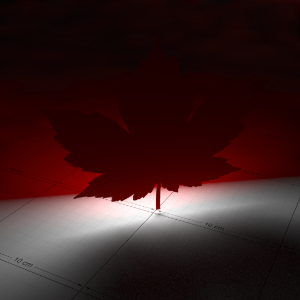

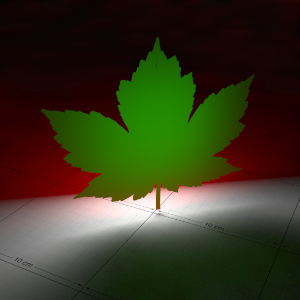
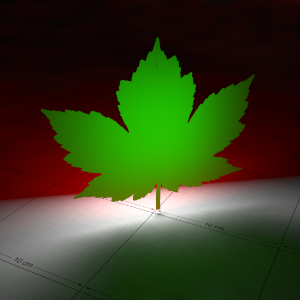
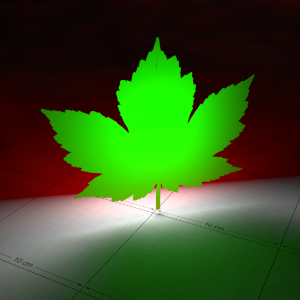
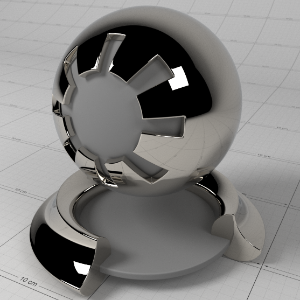
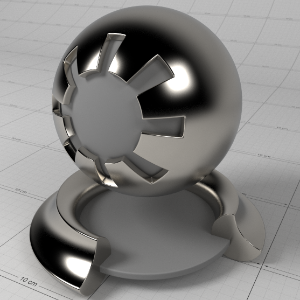
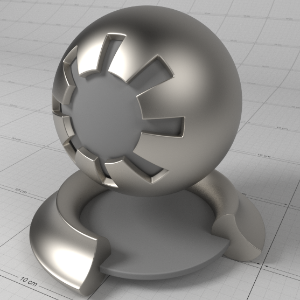
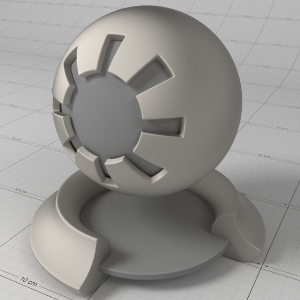
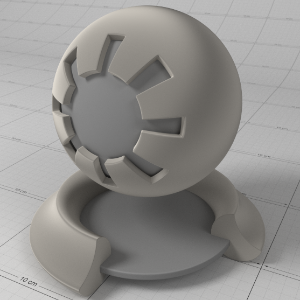
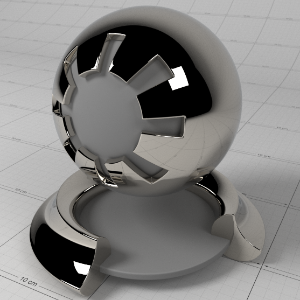
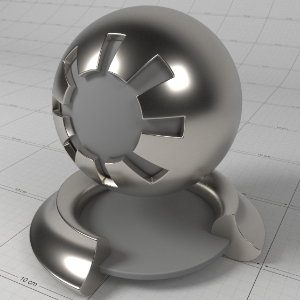
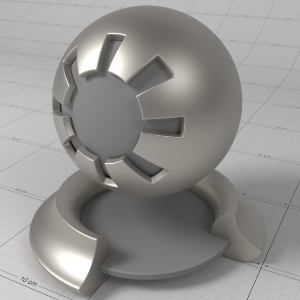
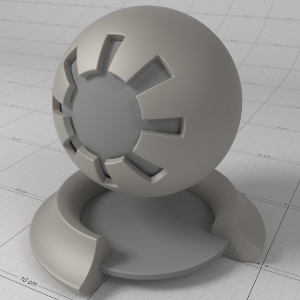
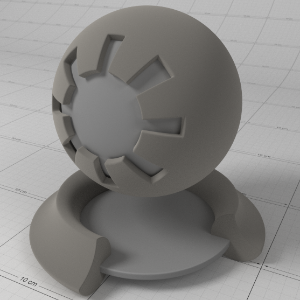
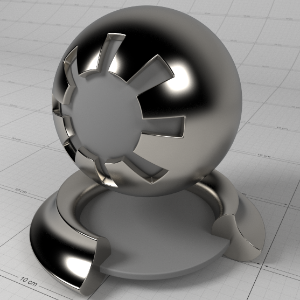
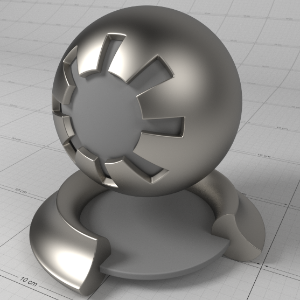
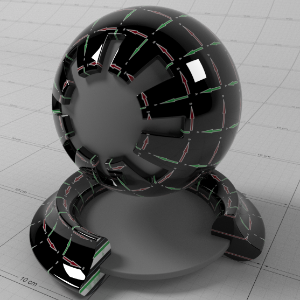
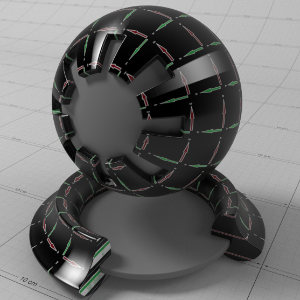
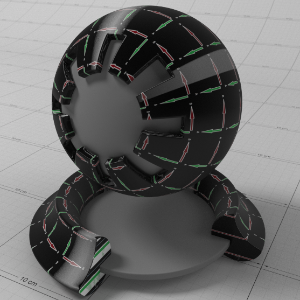
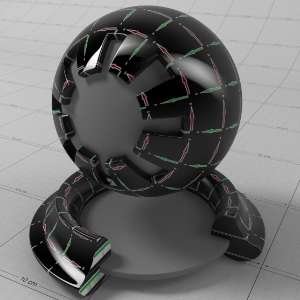
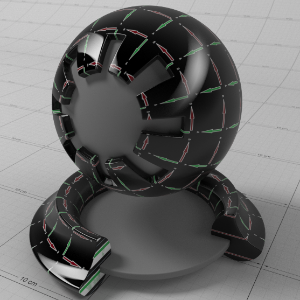
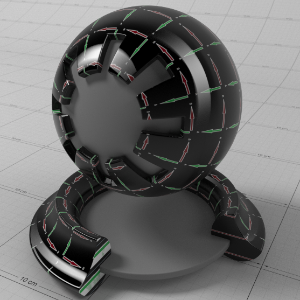
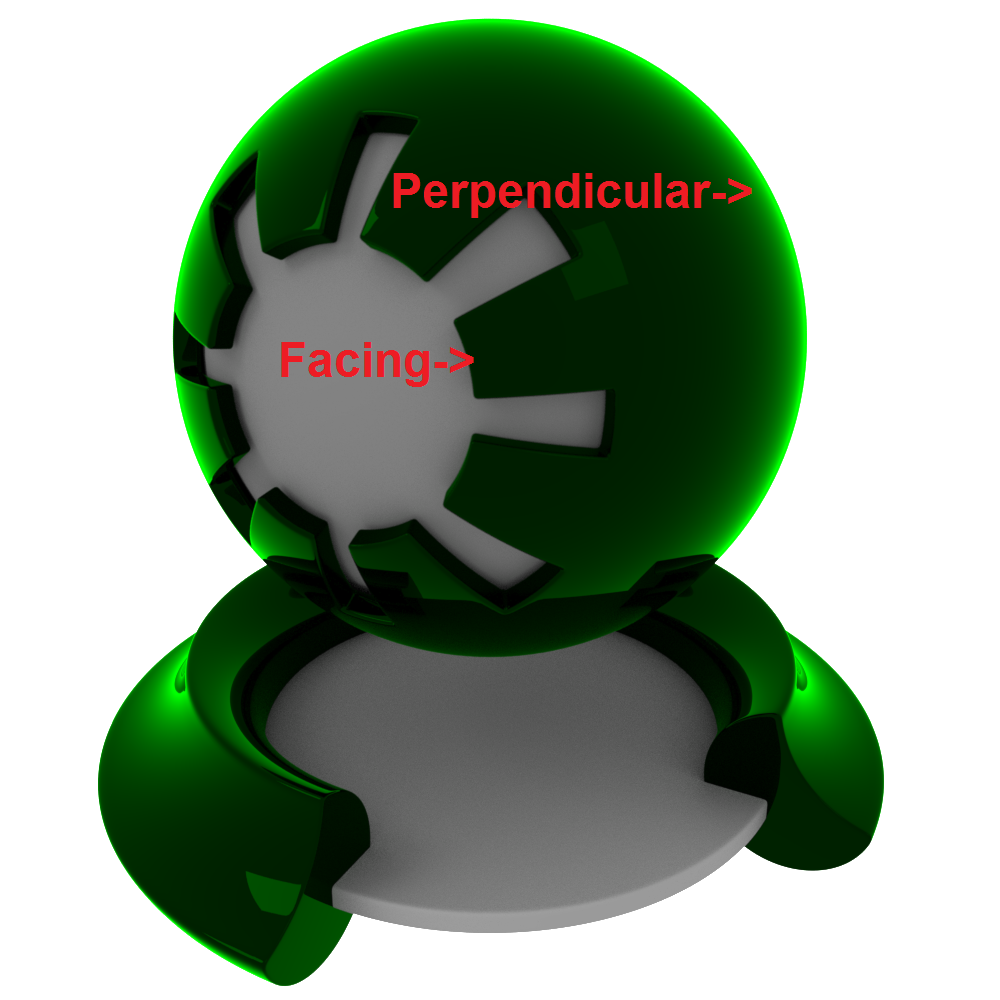
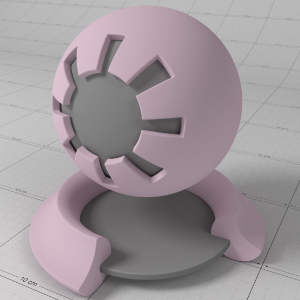
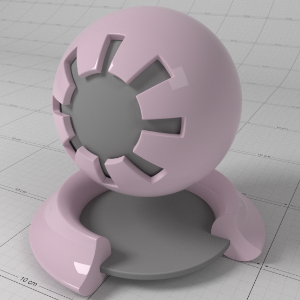
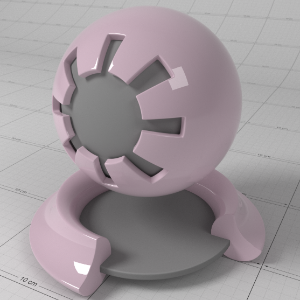
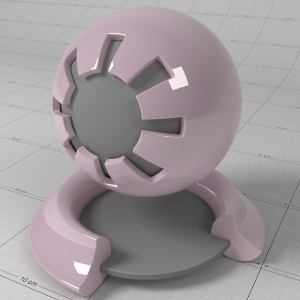

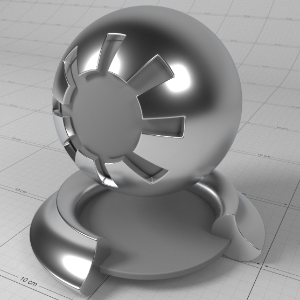
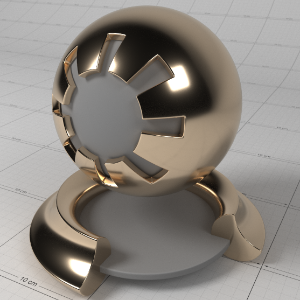
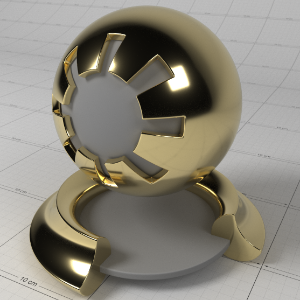
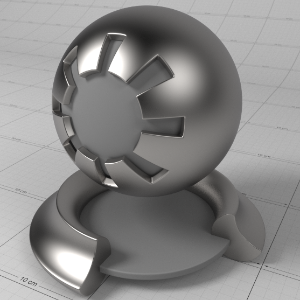
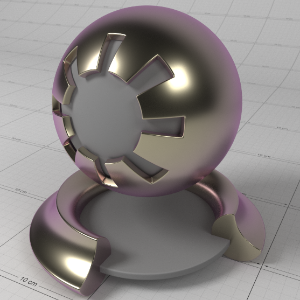

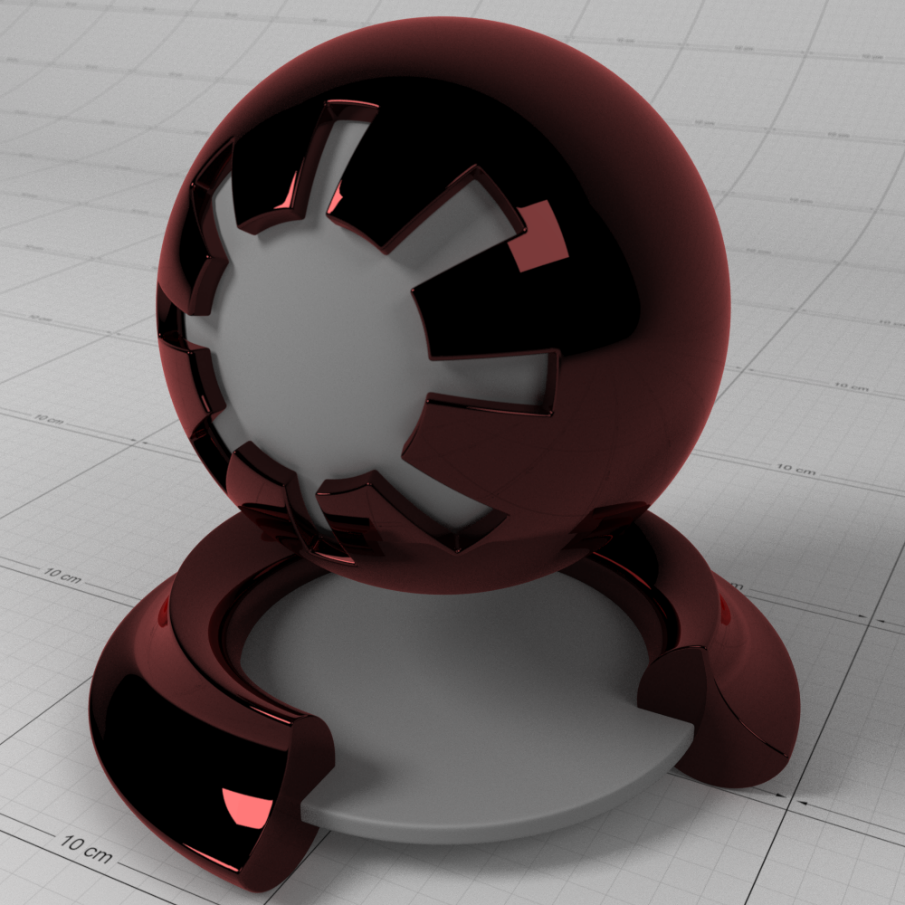
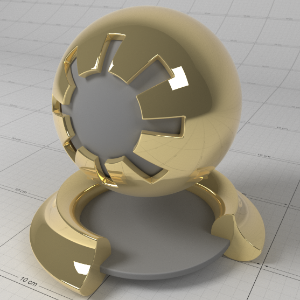
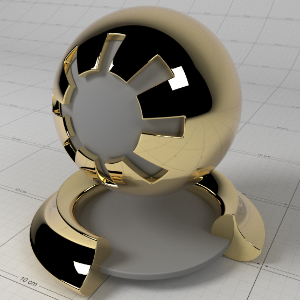
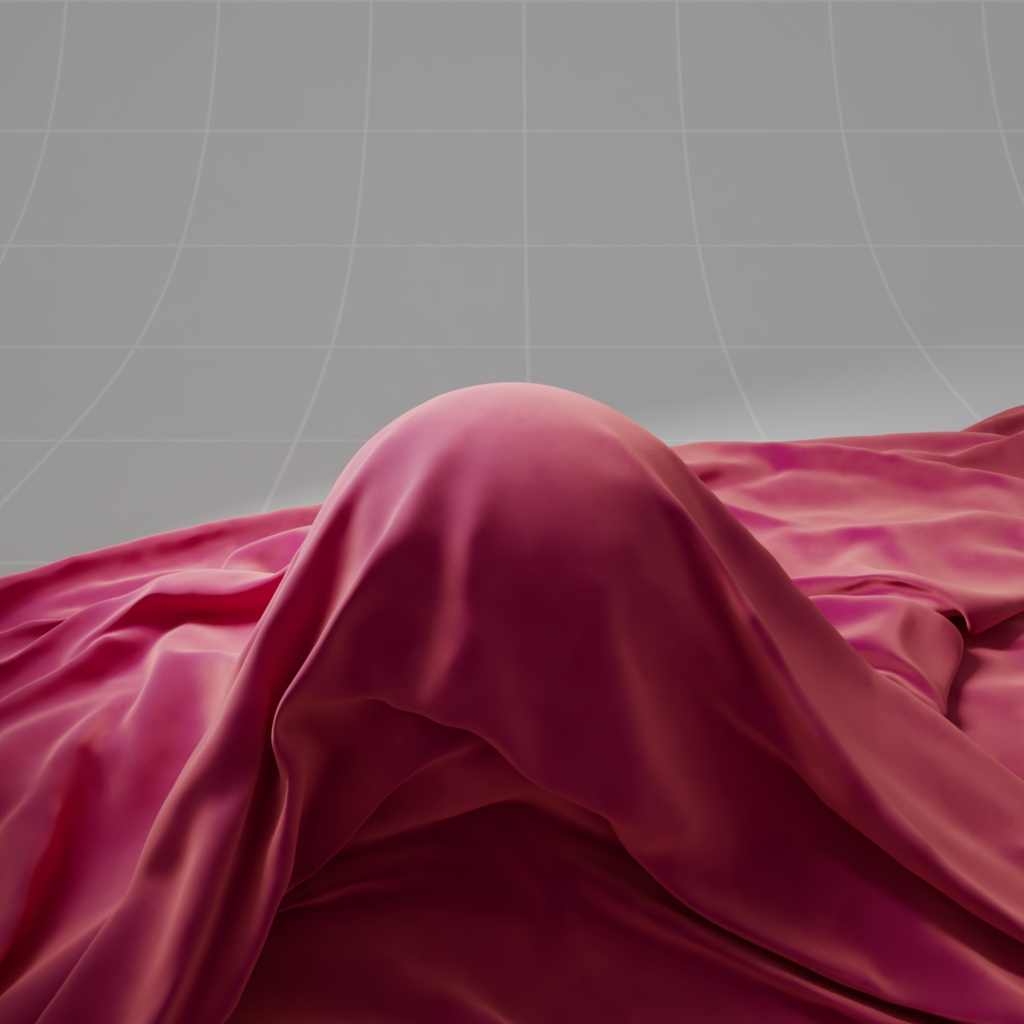
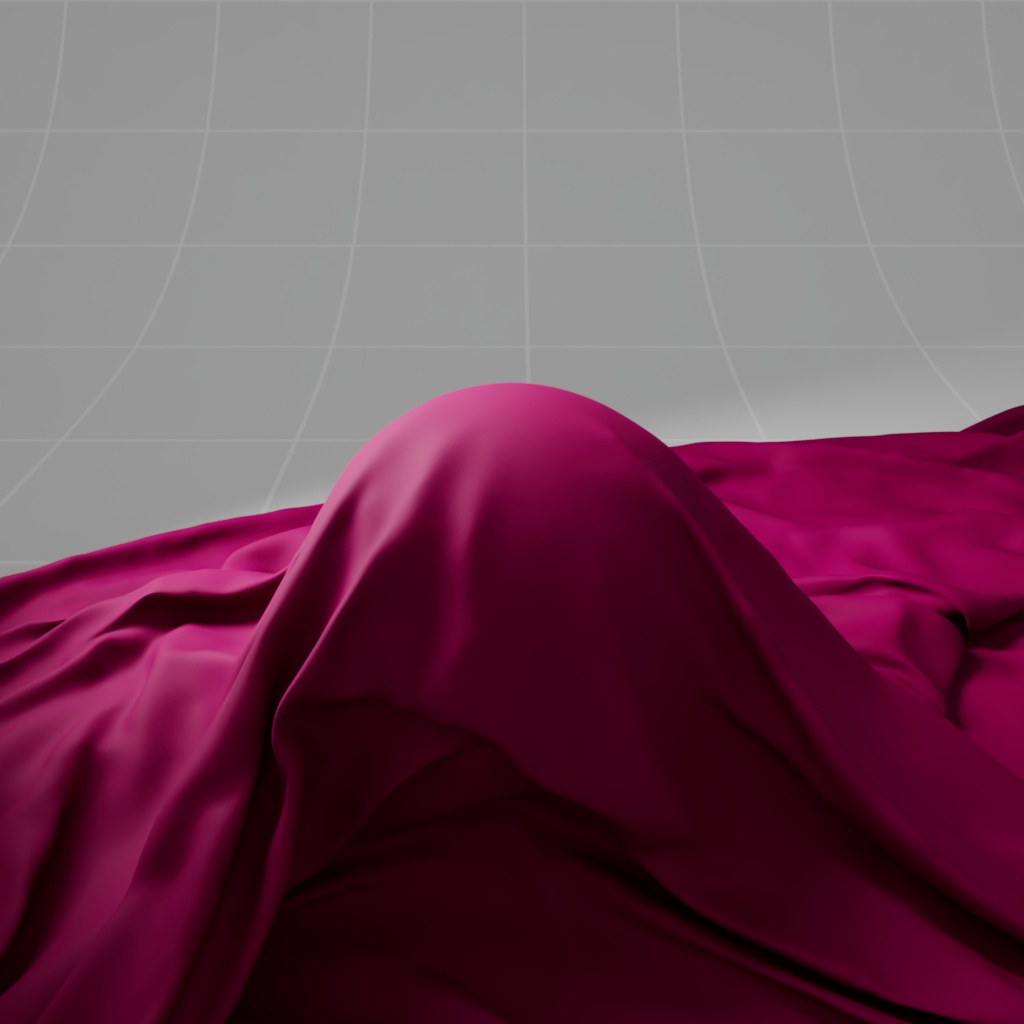
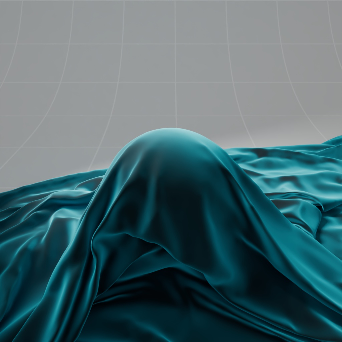
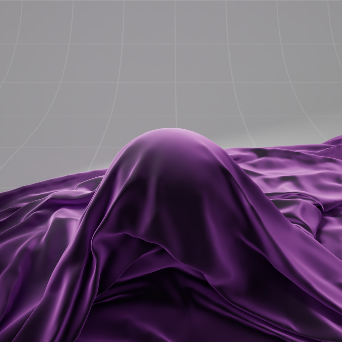
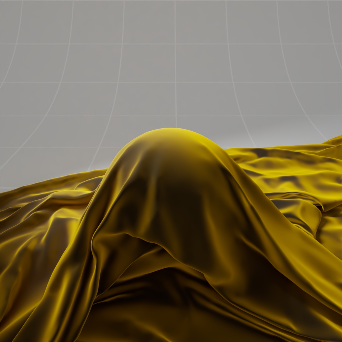
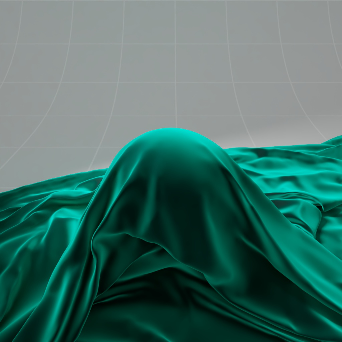
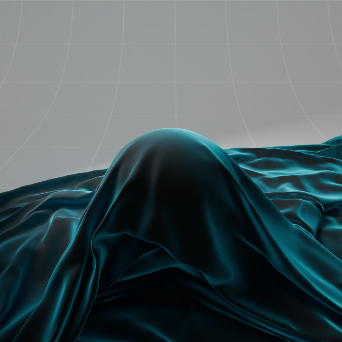
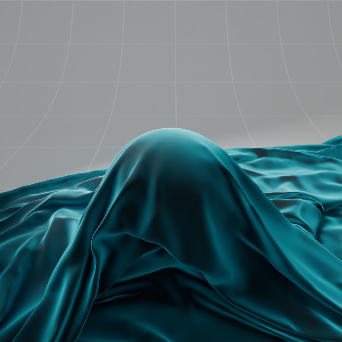
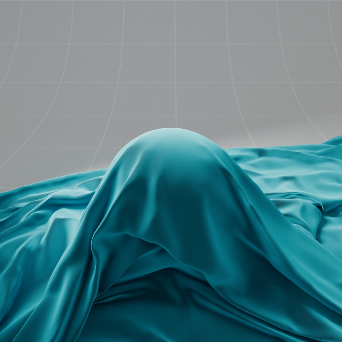
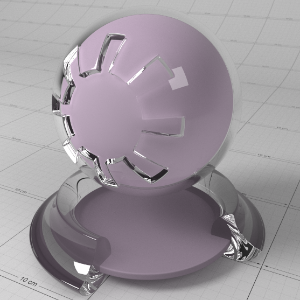
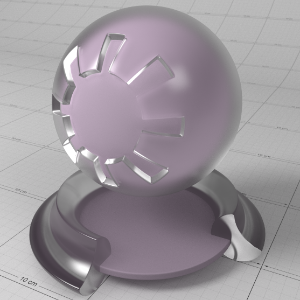

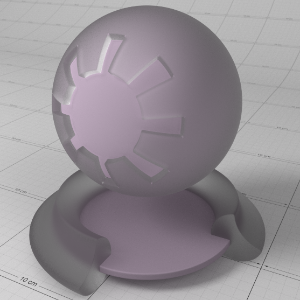
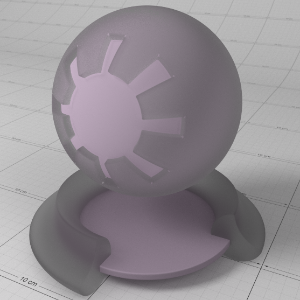
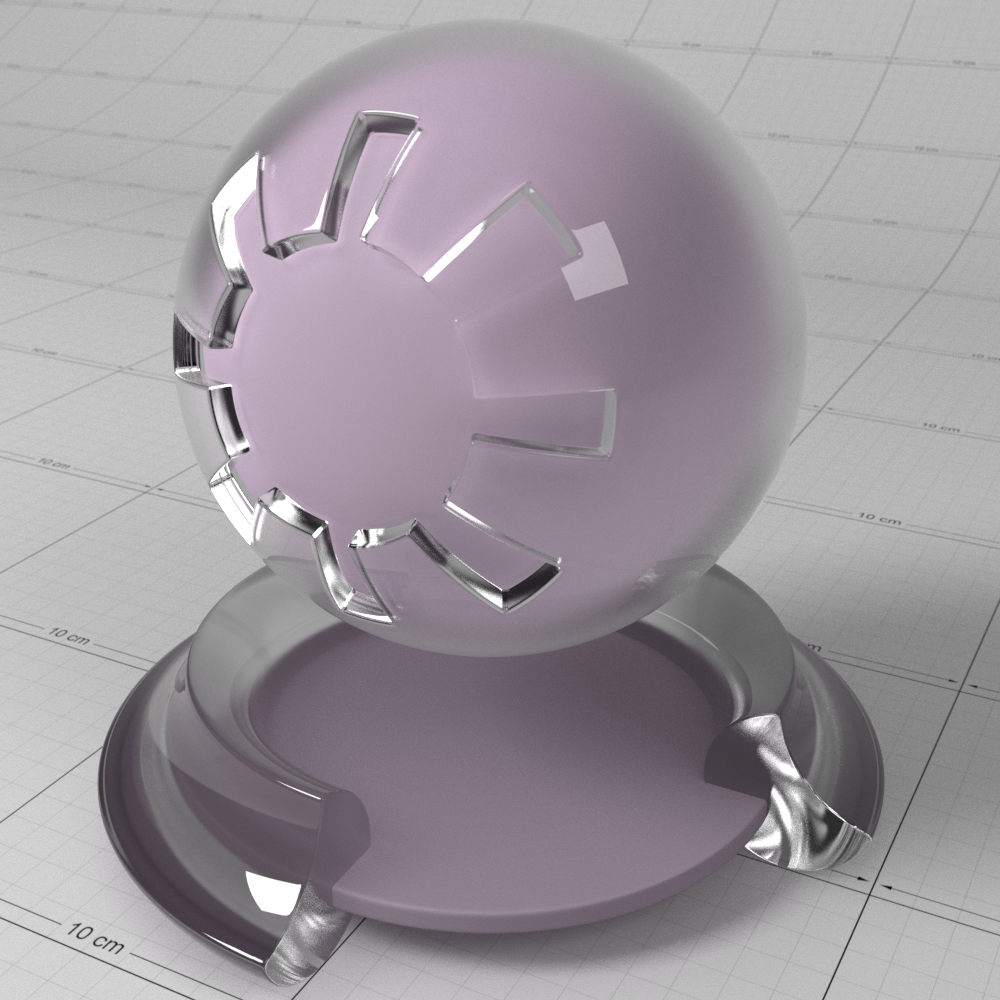
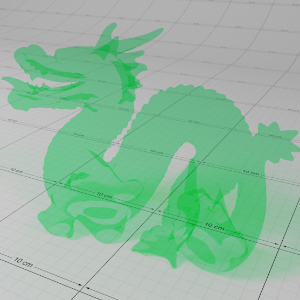
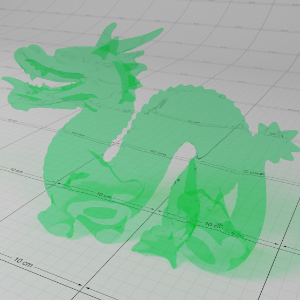
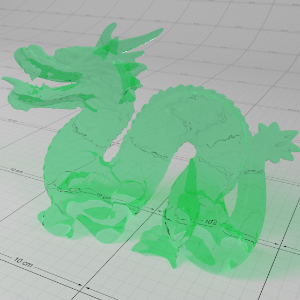
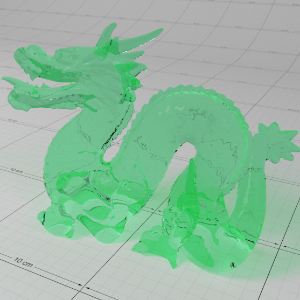
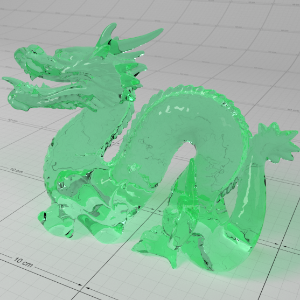
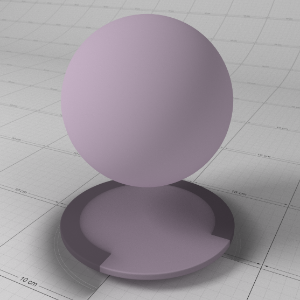
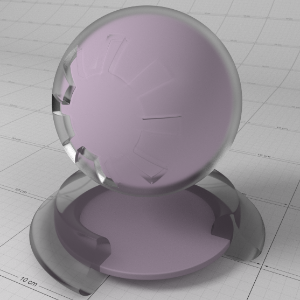
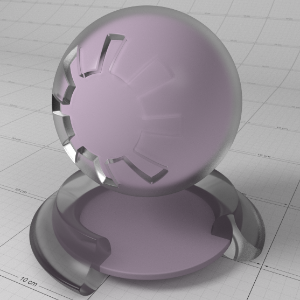
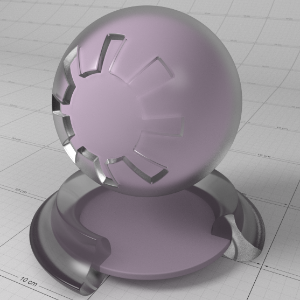
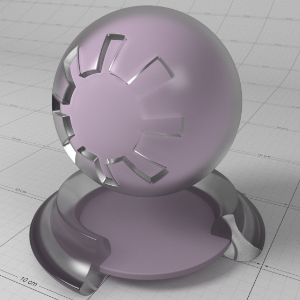
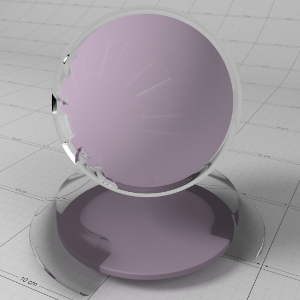
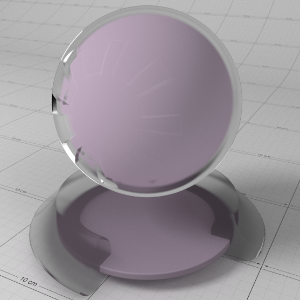
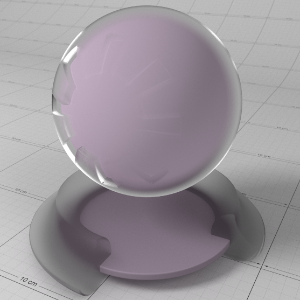
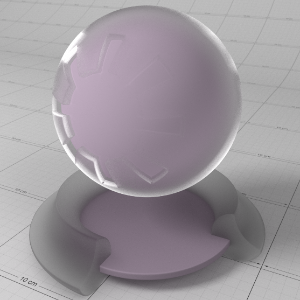
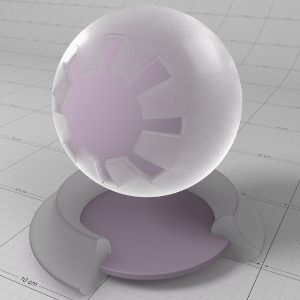
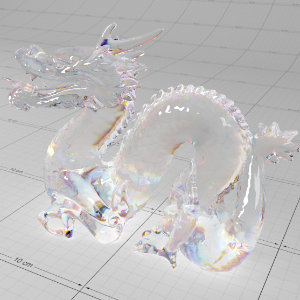
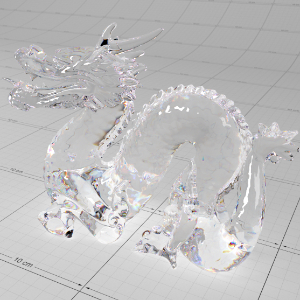
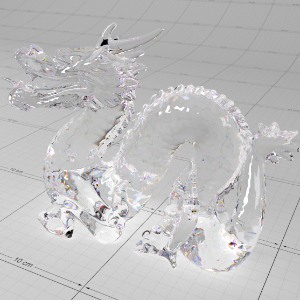
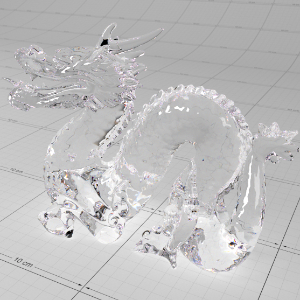
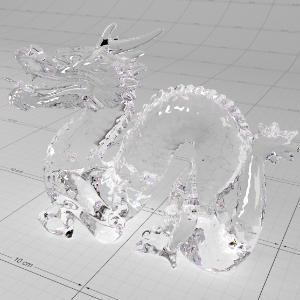
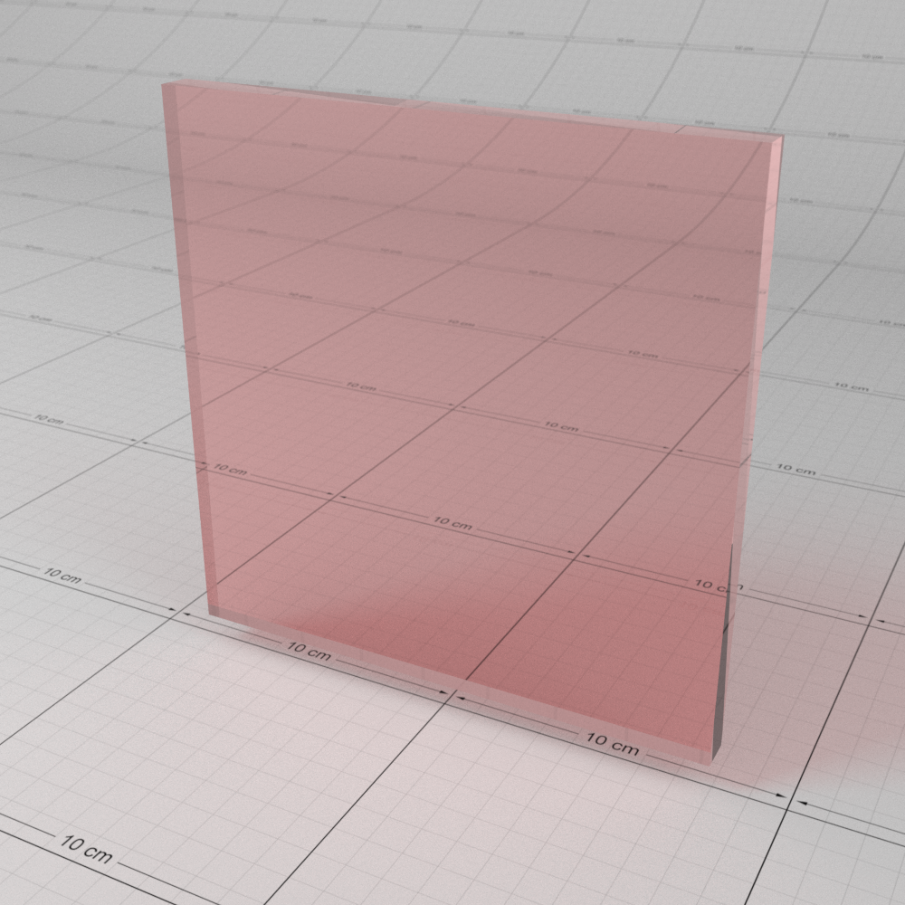

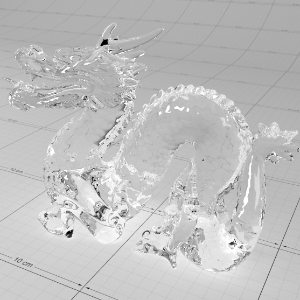
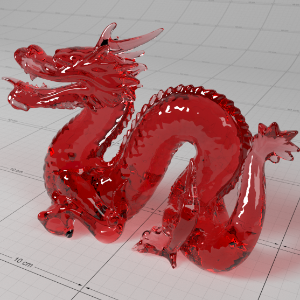
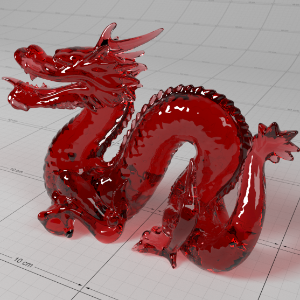
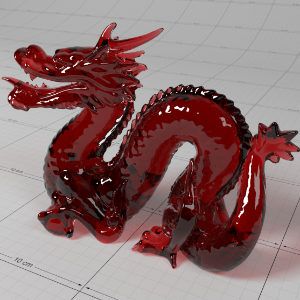
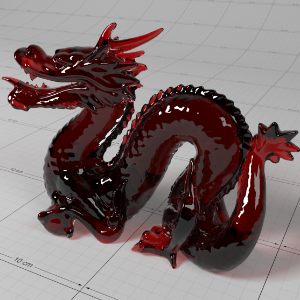
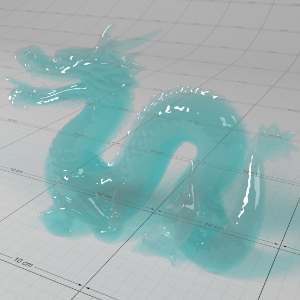
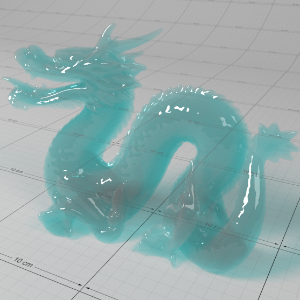
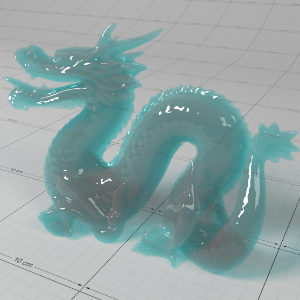
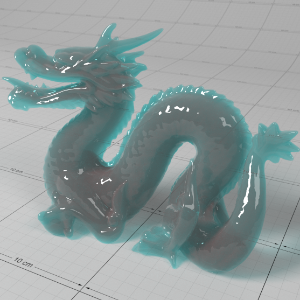
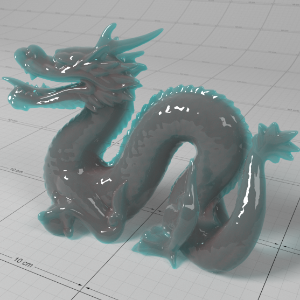
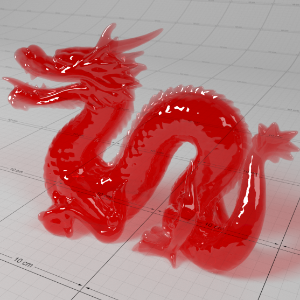
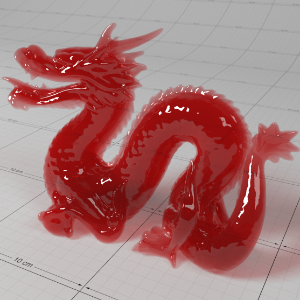
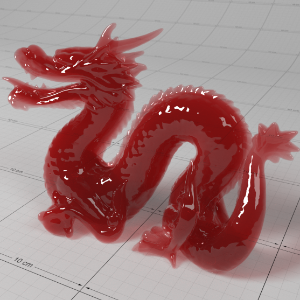
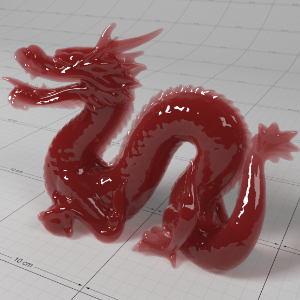
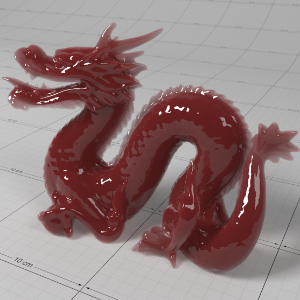

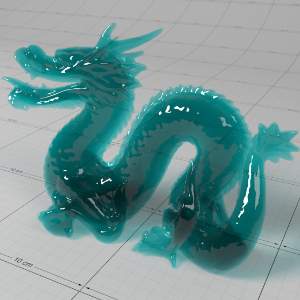
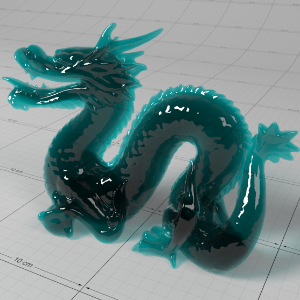

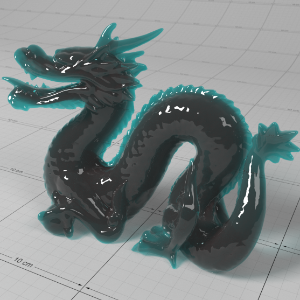

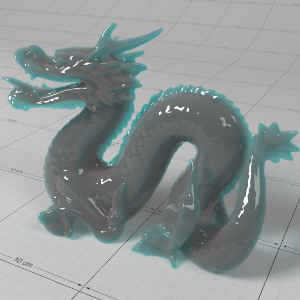
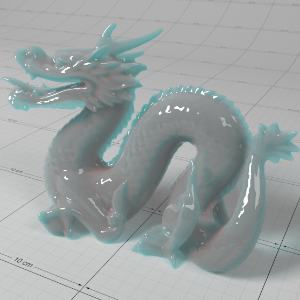
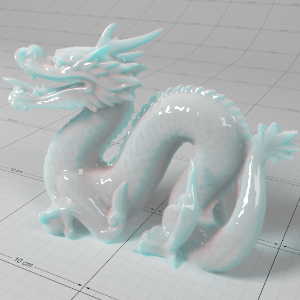
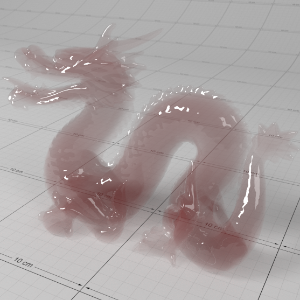
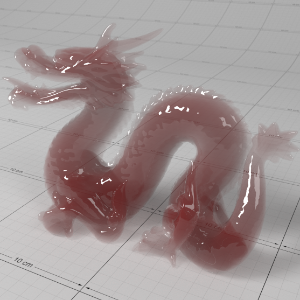
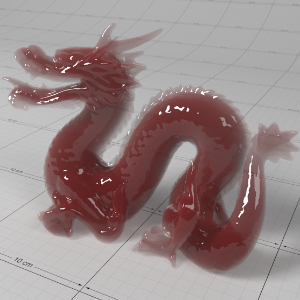
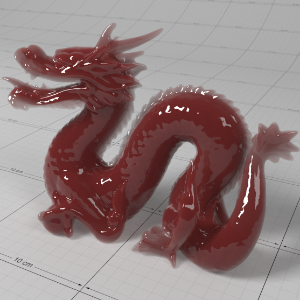
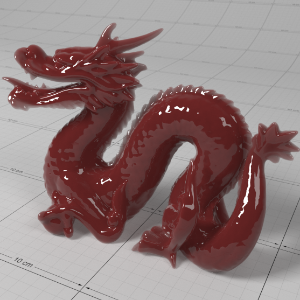
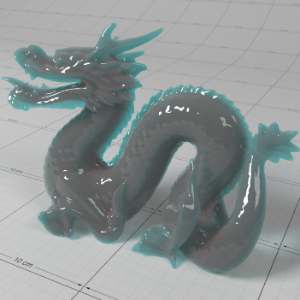
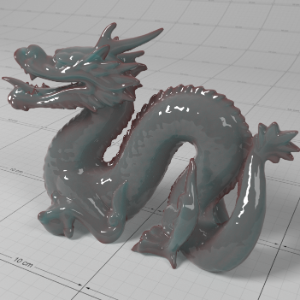
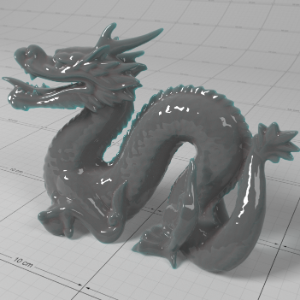
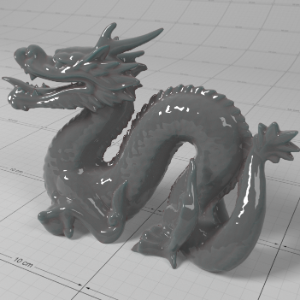
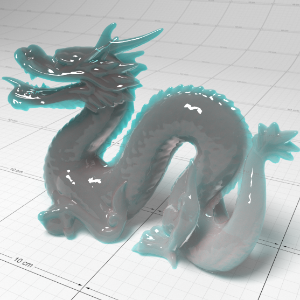
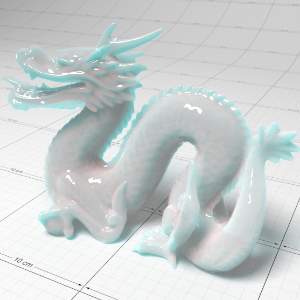
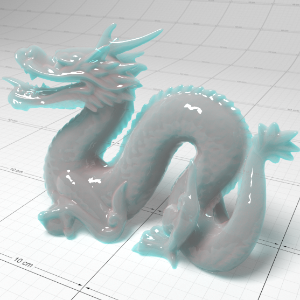
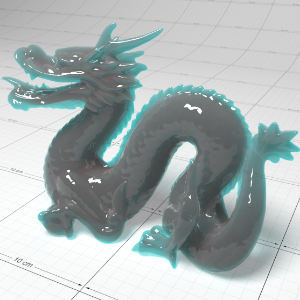
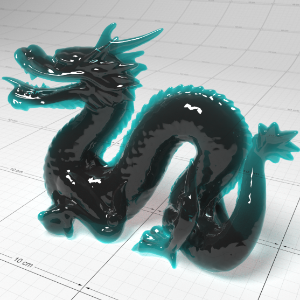
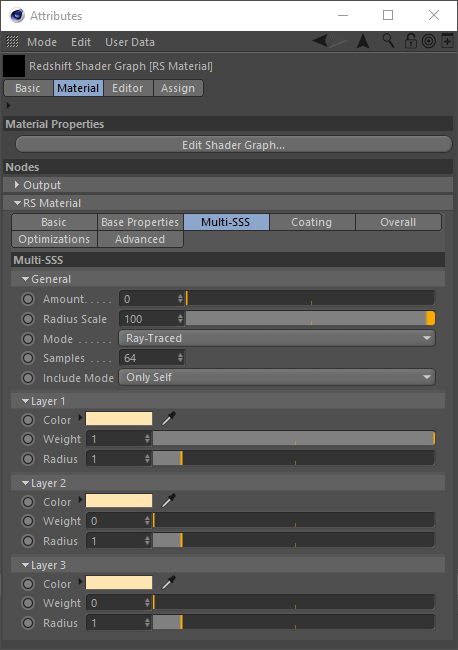
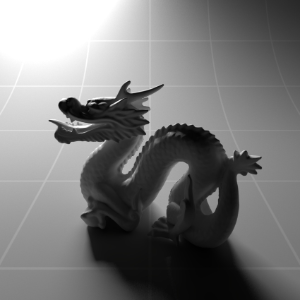
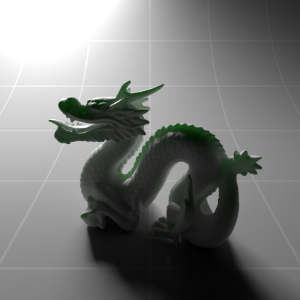
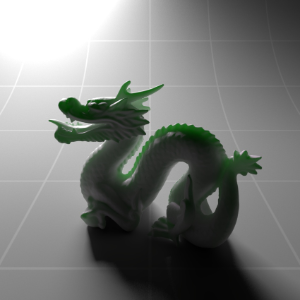
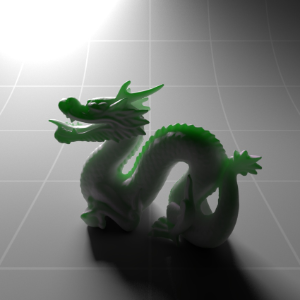

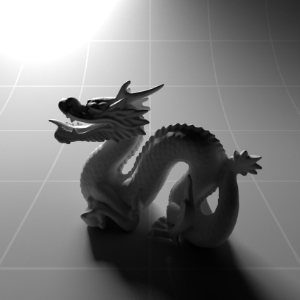
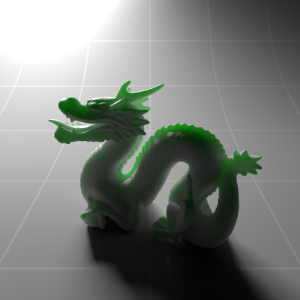
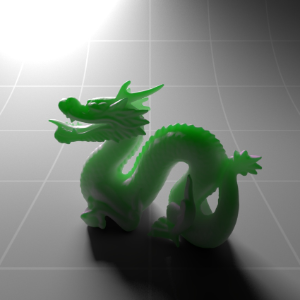
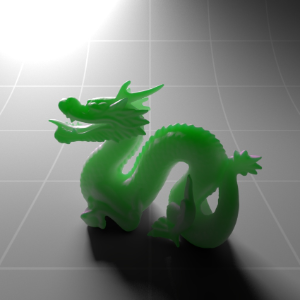
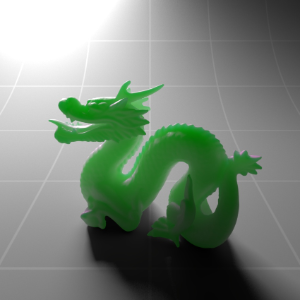

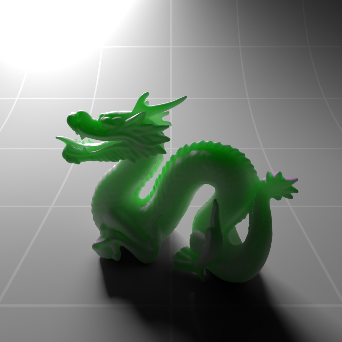
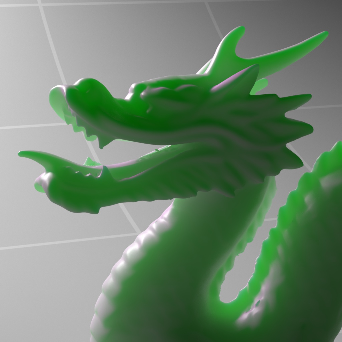
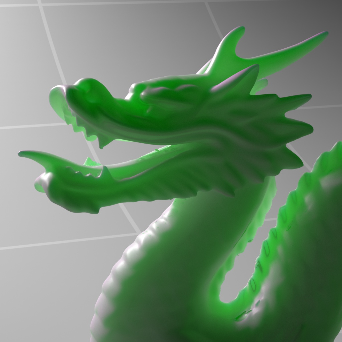
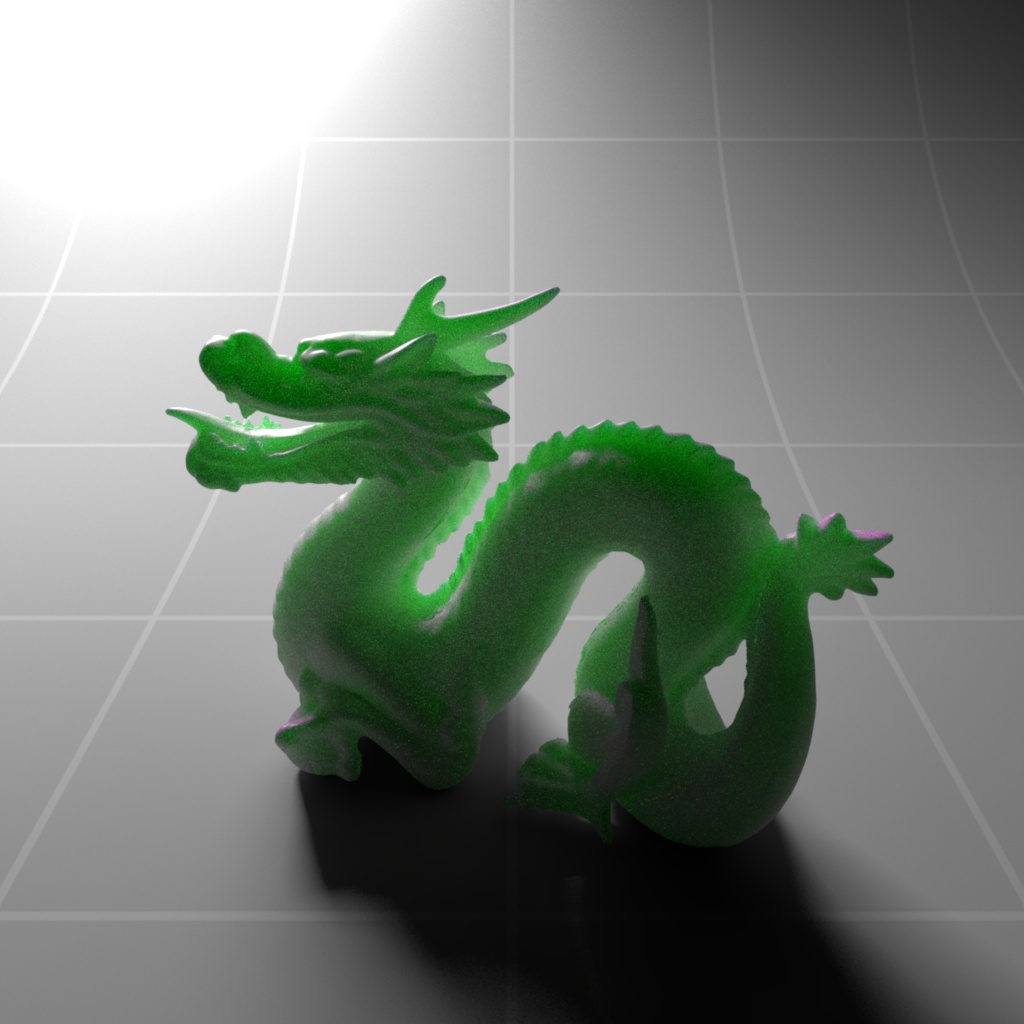
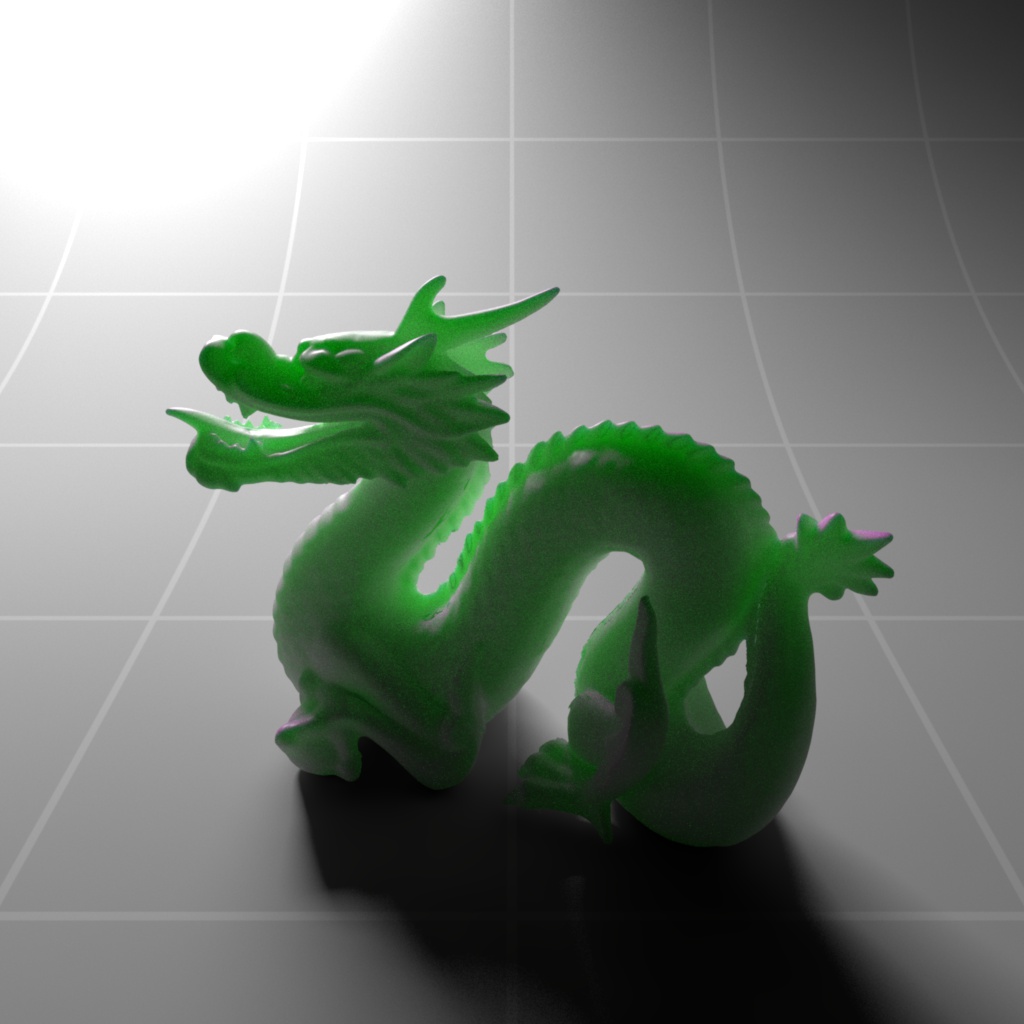
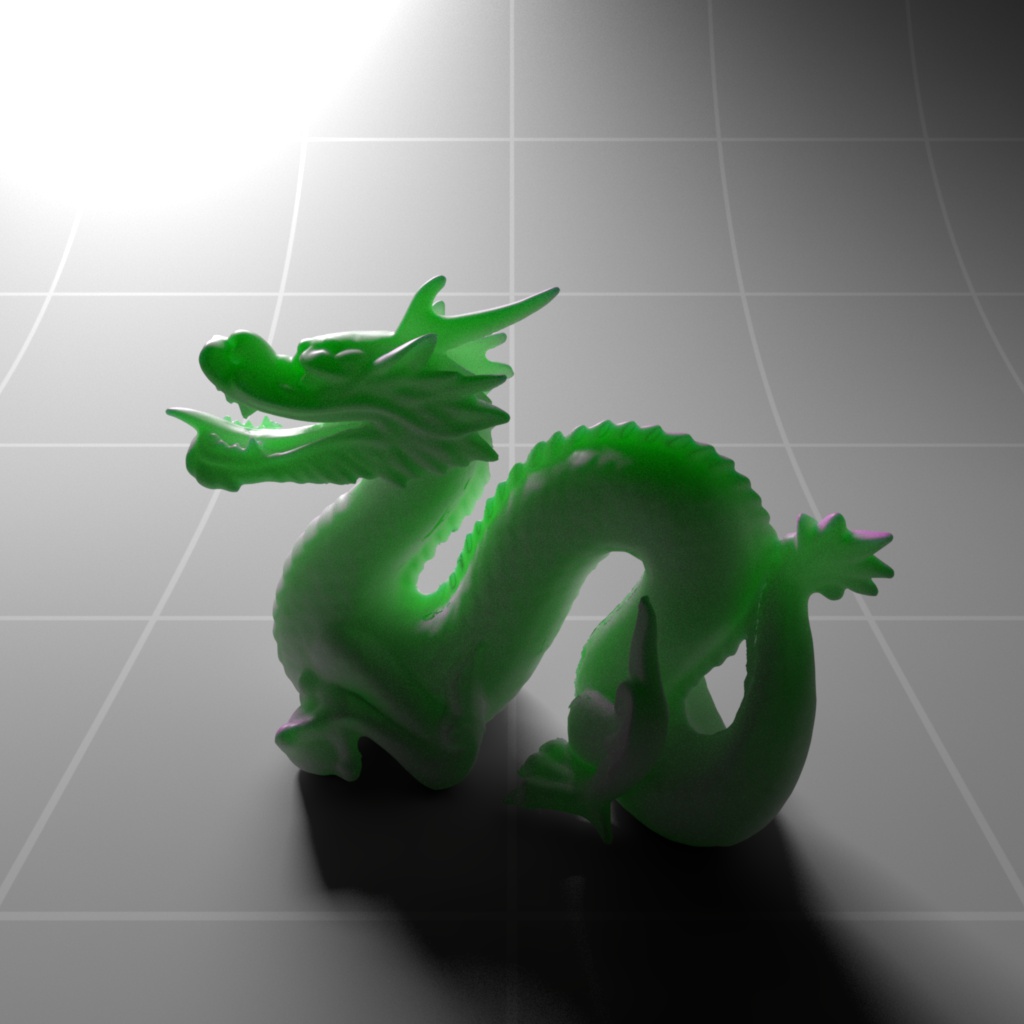
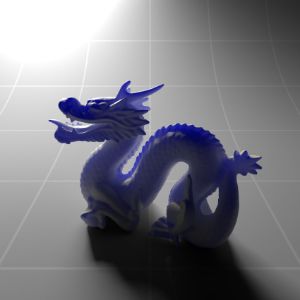
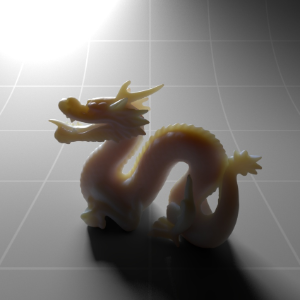
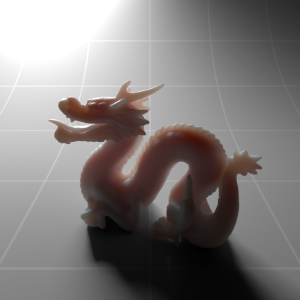
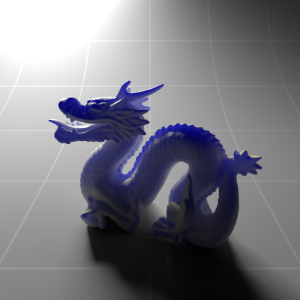
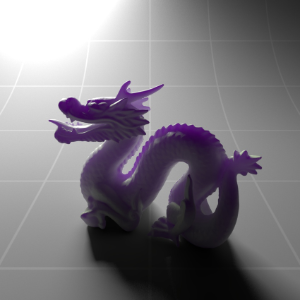
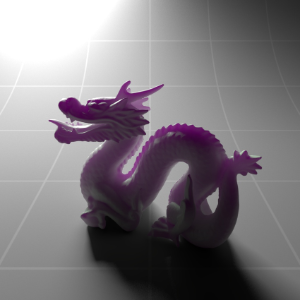
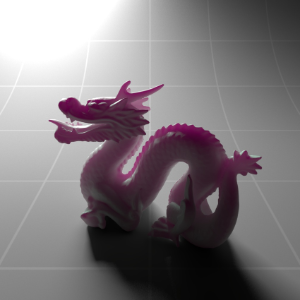
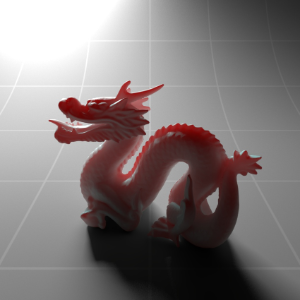
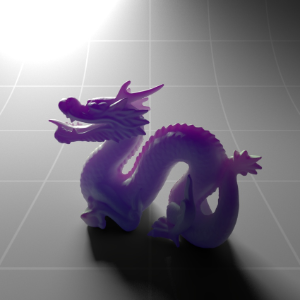
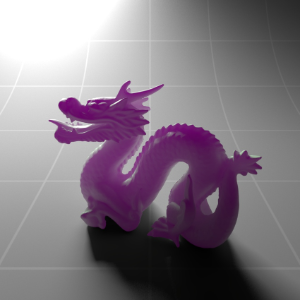

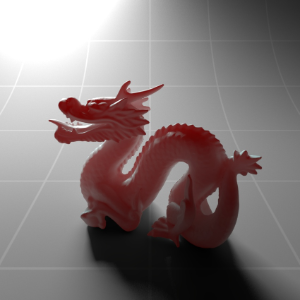
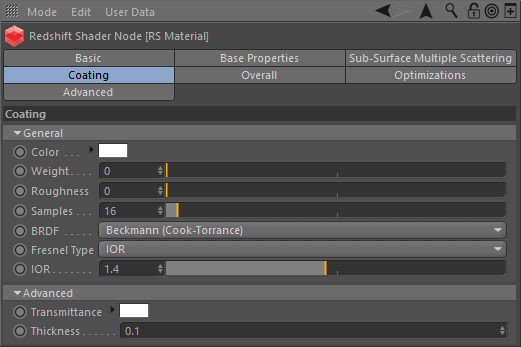
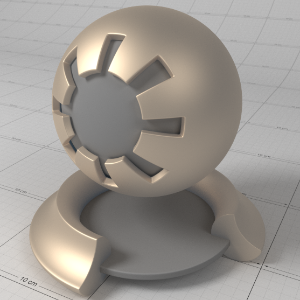
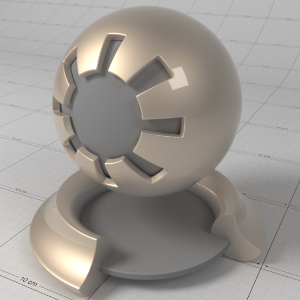
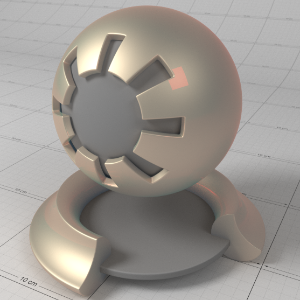
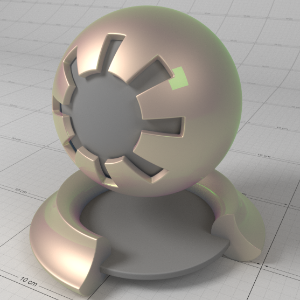
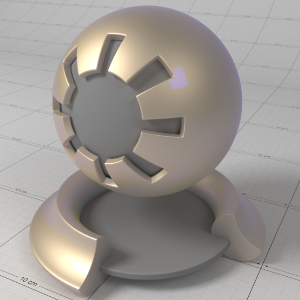
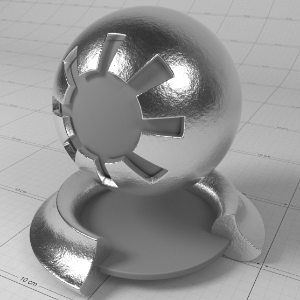
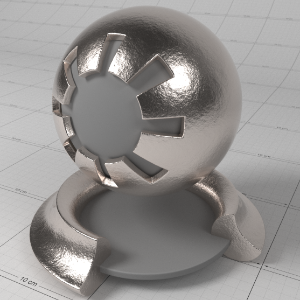

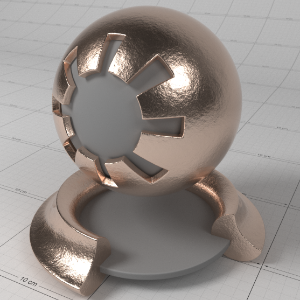
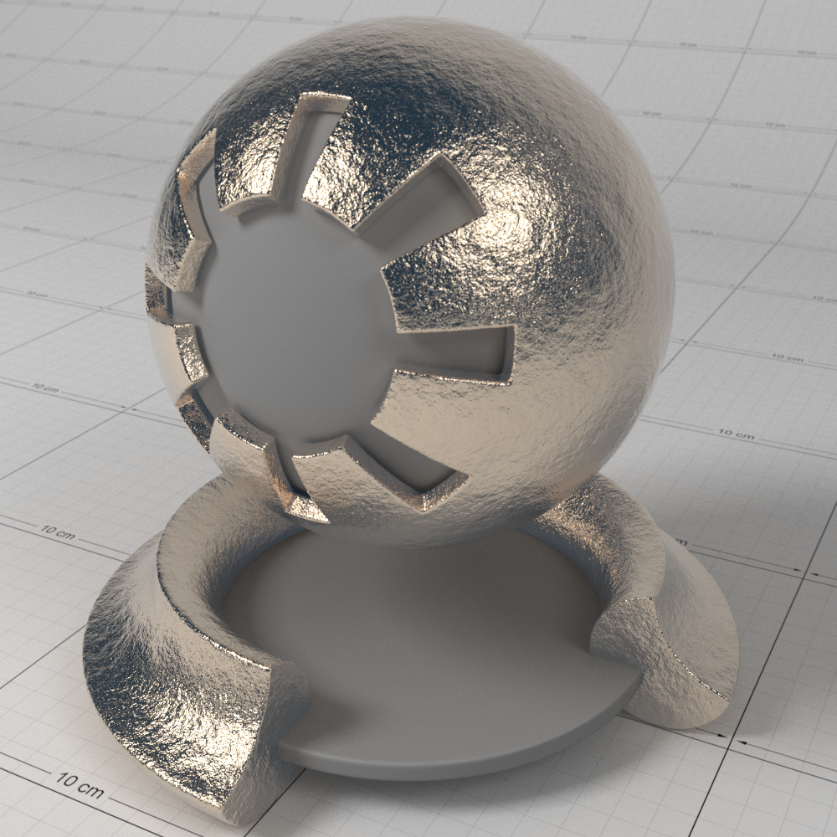
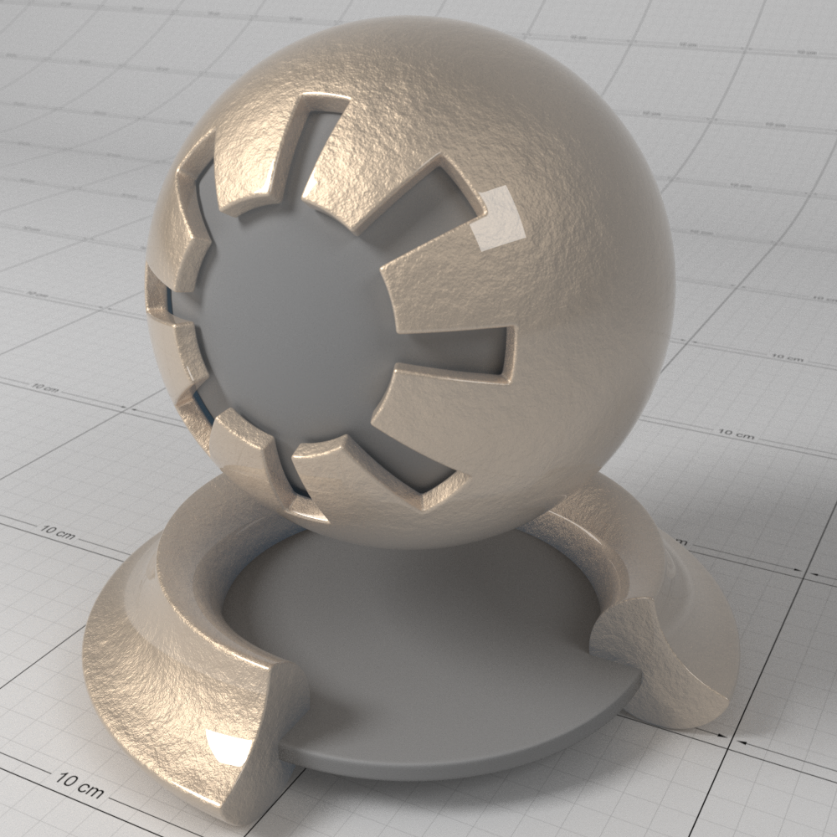
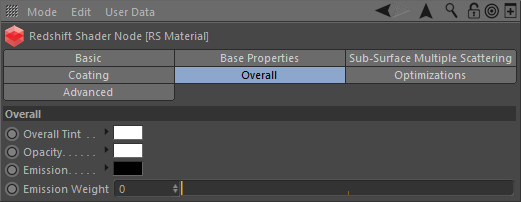
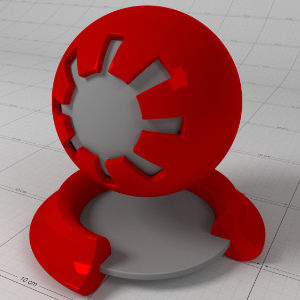
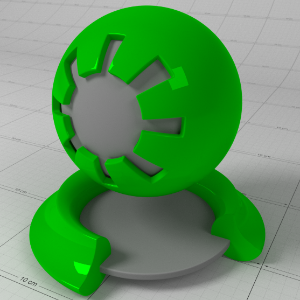
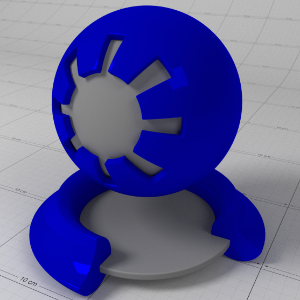
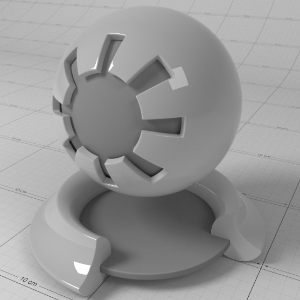
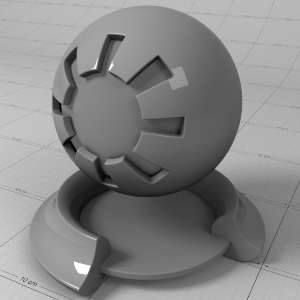
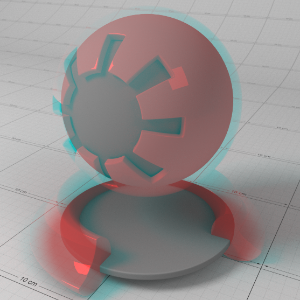
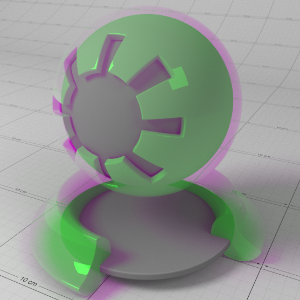
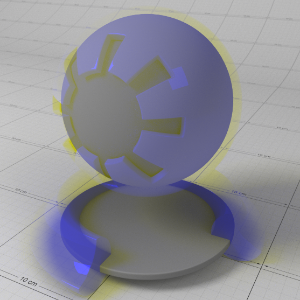
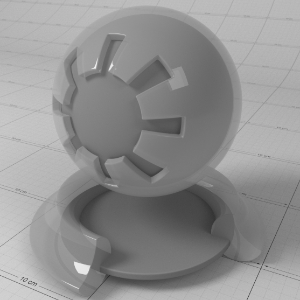
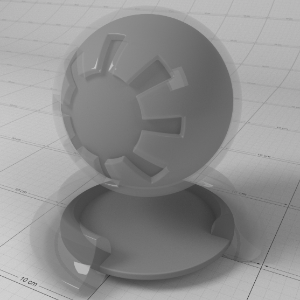
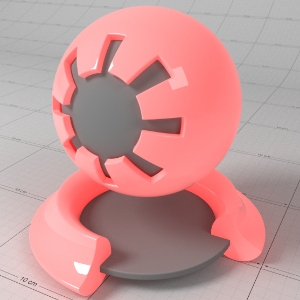
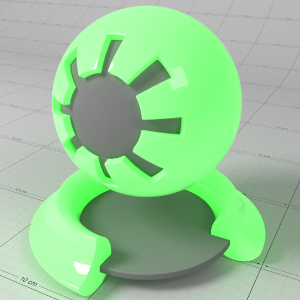
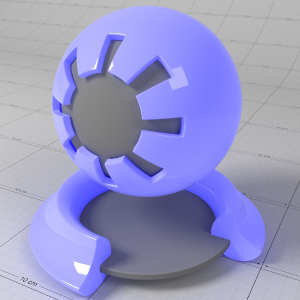
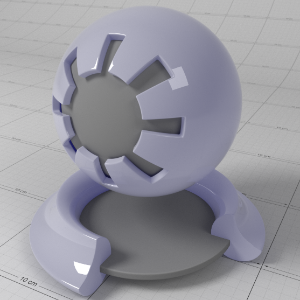
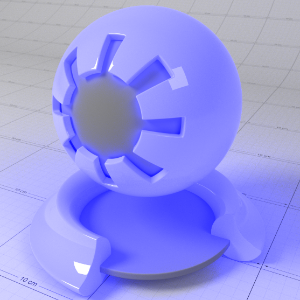
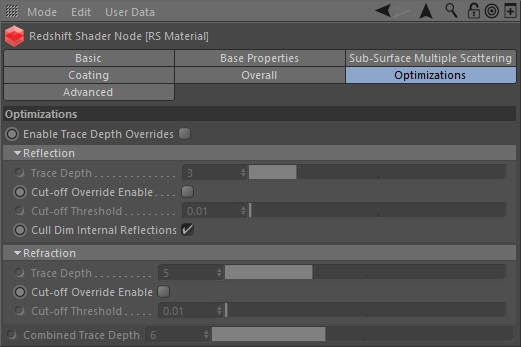
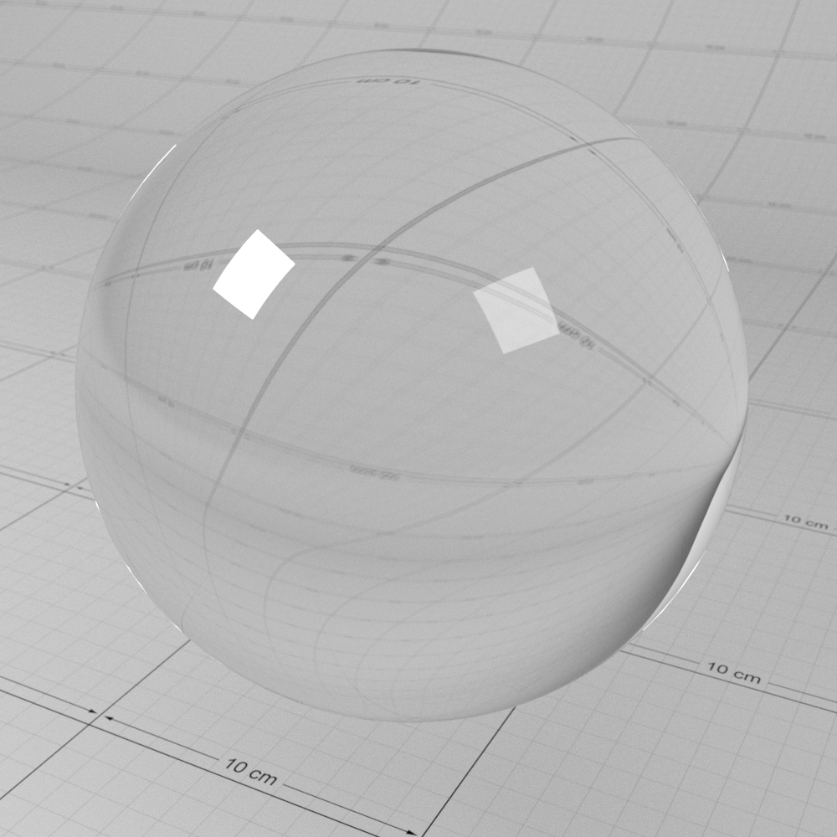
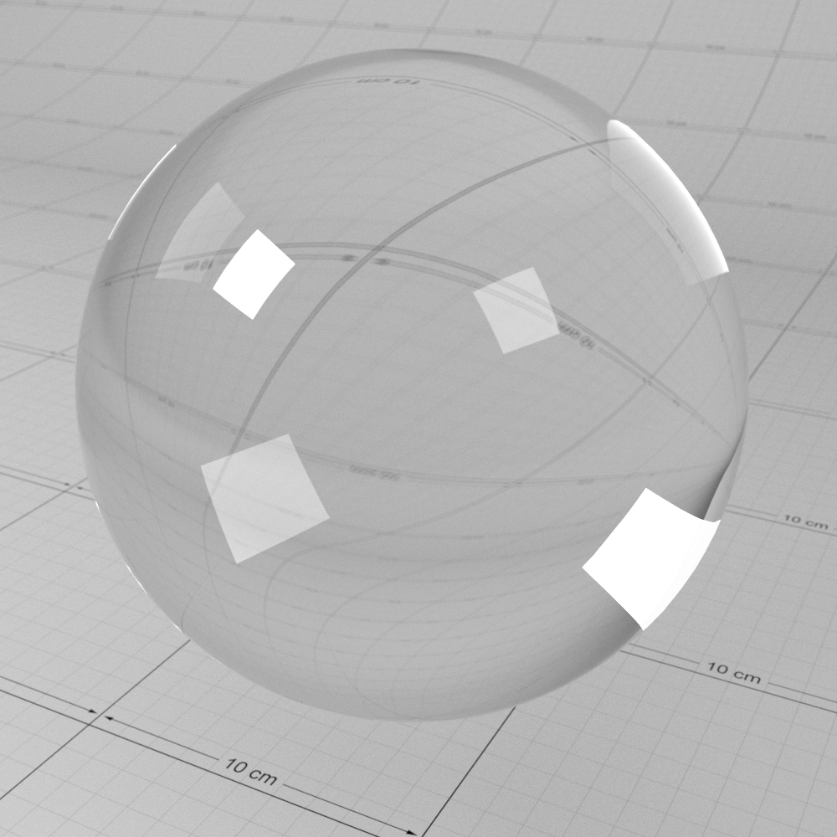
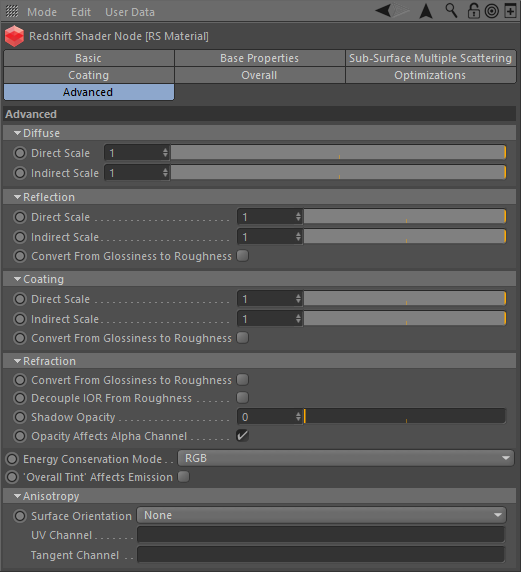
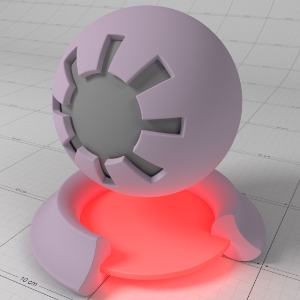
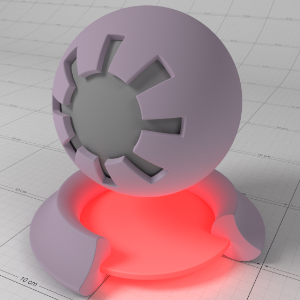
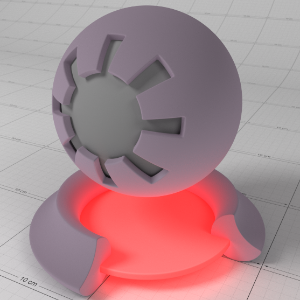
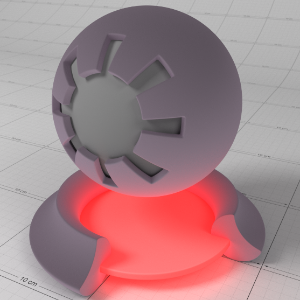
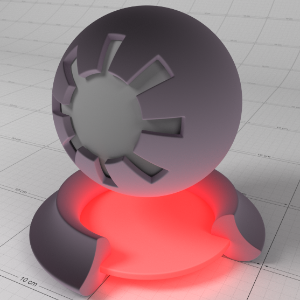
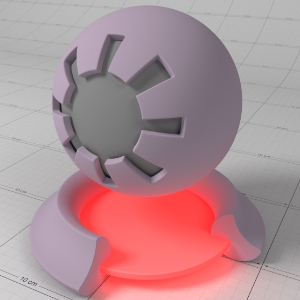
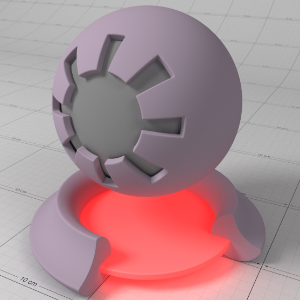
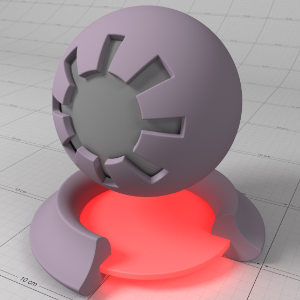
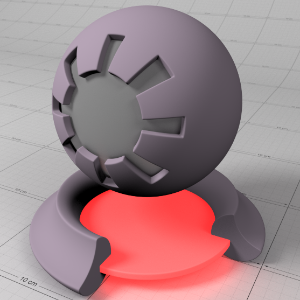
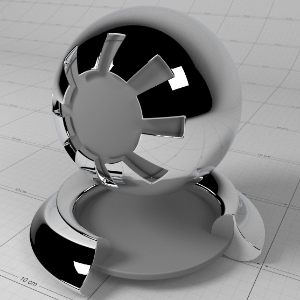
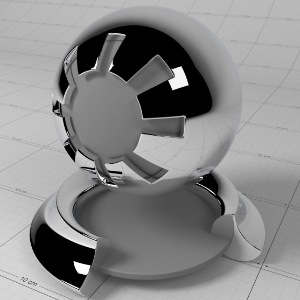
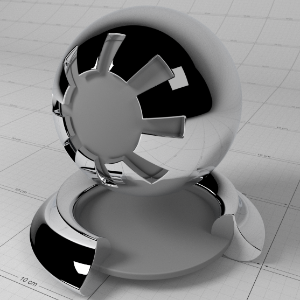
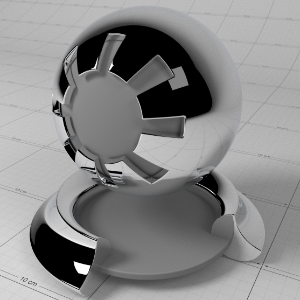
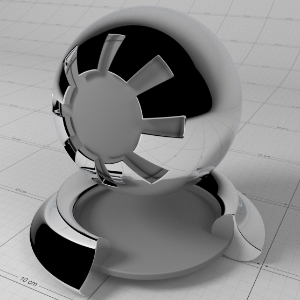
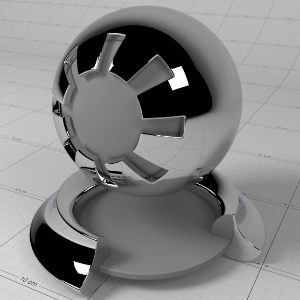
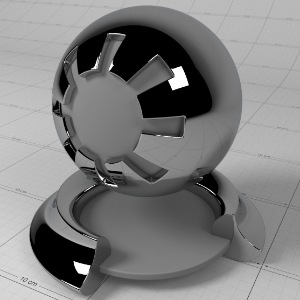
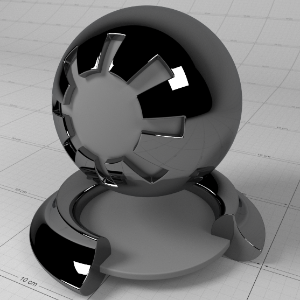
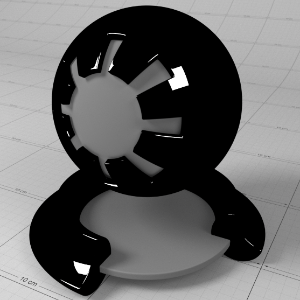
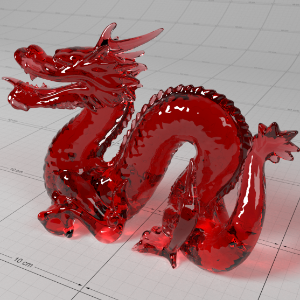
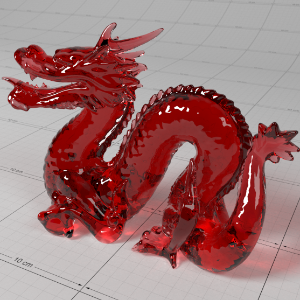
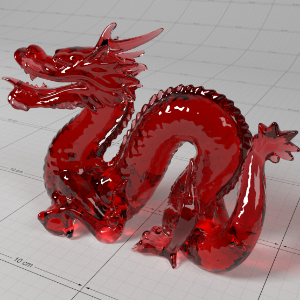
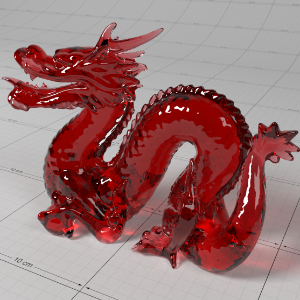
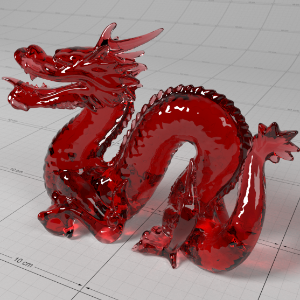
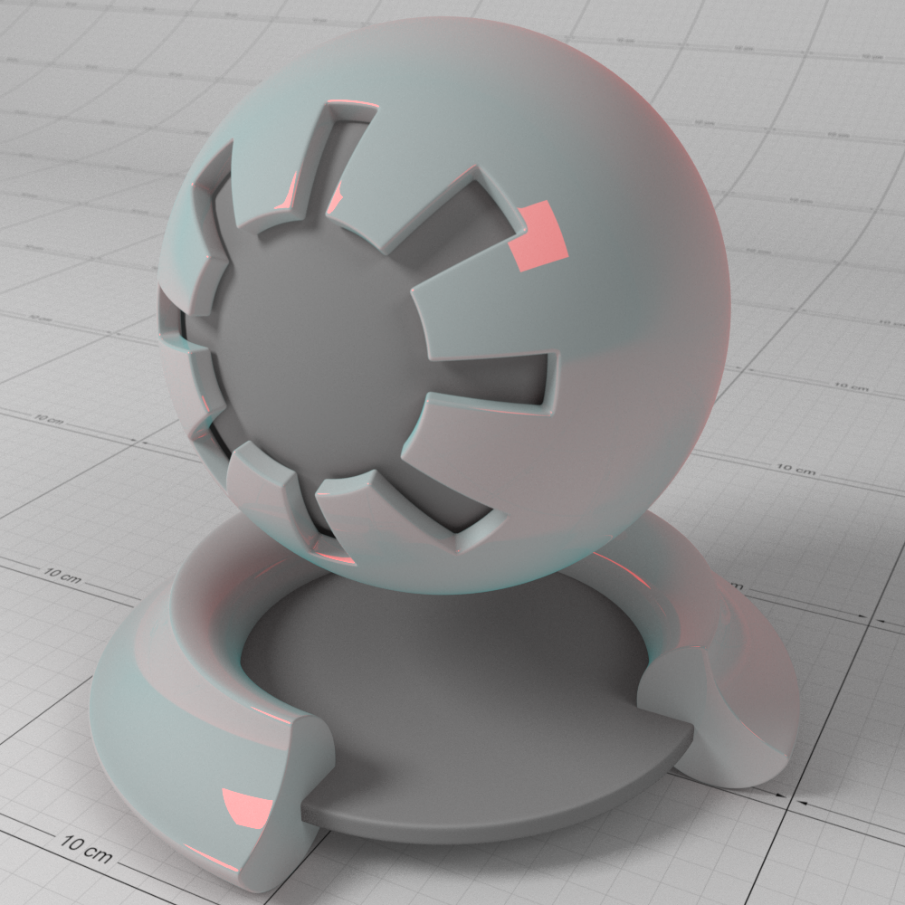
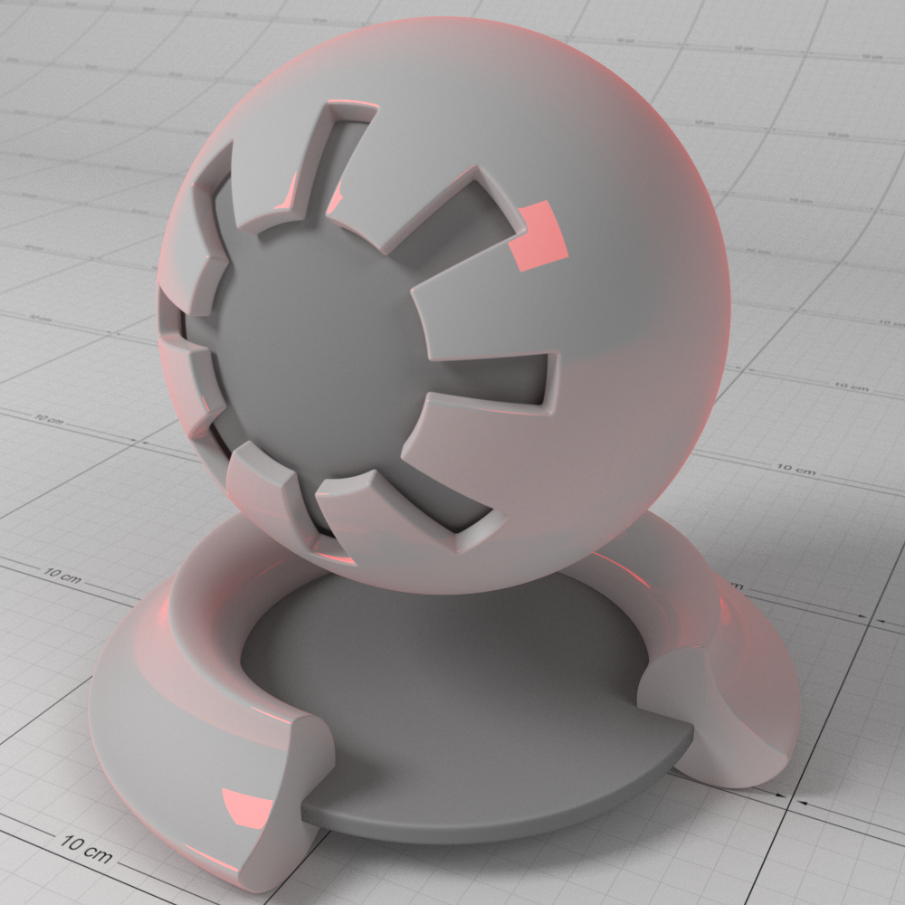
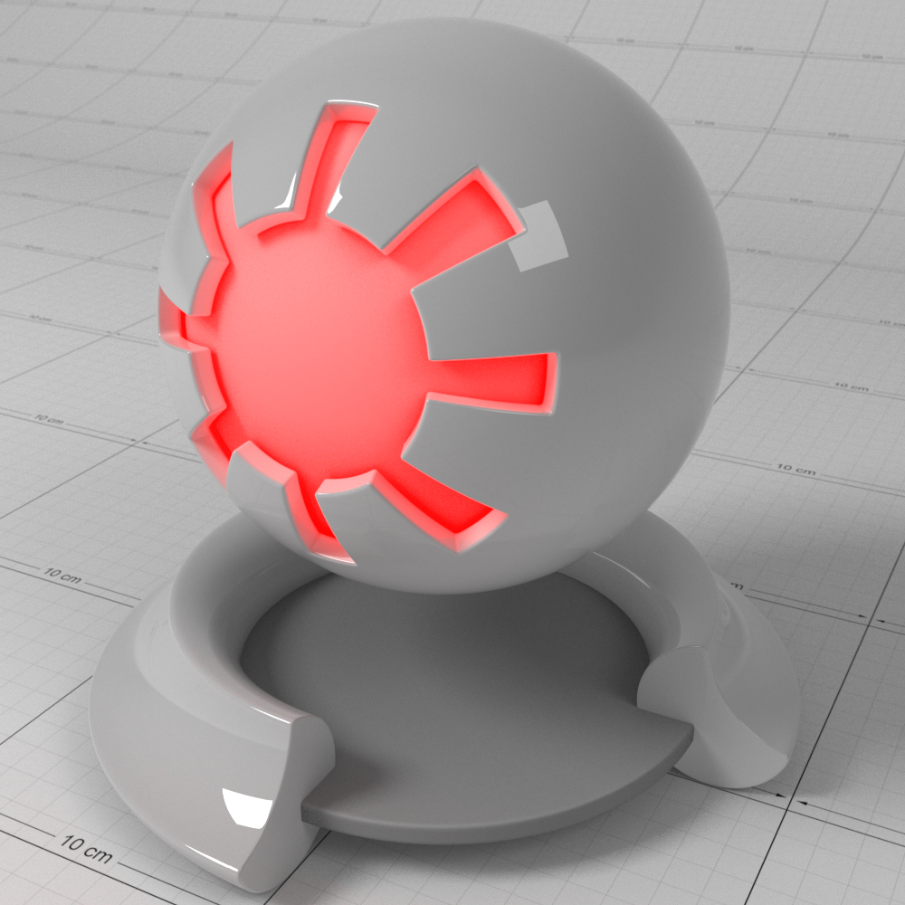
赶快留个言打破零评论!~