Hair
头发
Redshift supports the rendering of native Cinema 4D Hair and Feather objects. Redshift by default will translate the hair data based on Cinema 4D's built in Hair Material attached to the Hair object. Using the built-in Hair Material we can control the color as well as the geometric shape of our strands with parameters such as: Thickness, Length, Frizz, Kink, Curl, Twist etc. We can use Cinema 4D's built Hair Material for shading at the same time as Redshift's RS Hair material shader, that accesses Cinema 4D's material parameters through a C4D Hair Attributes node, allowing for further customized shading.
红移支持渲染本地电影4 d 毛发和羽毛物体。默认情况下,红移会将基于 Cinema 4 d 内置的头发材质的头发数据转换到头发对象上。使用内置的头发材料,我们可以控制颜色以及几何形状的参数,我们的发丝: 厚度,长度,卷曲,扭曲等。我们可以使用 Cinema 4 d 的内置 Hair Material 进行阴影处理,同时使用 Redshift 的 RS Hair Material 着色器,通过 C4D Hair Attributes 节点访问 Cinema 4 d 的材质参数,允许进一步定制阴影处理。
Basic Workflow
基本工作流程
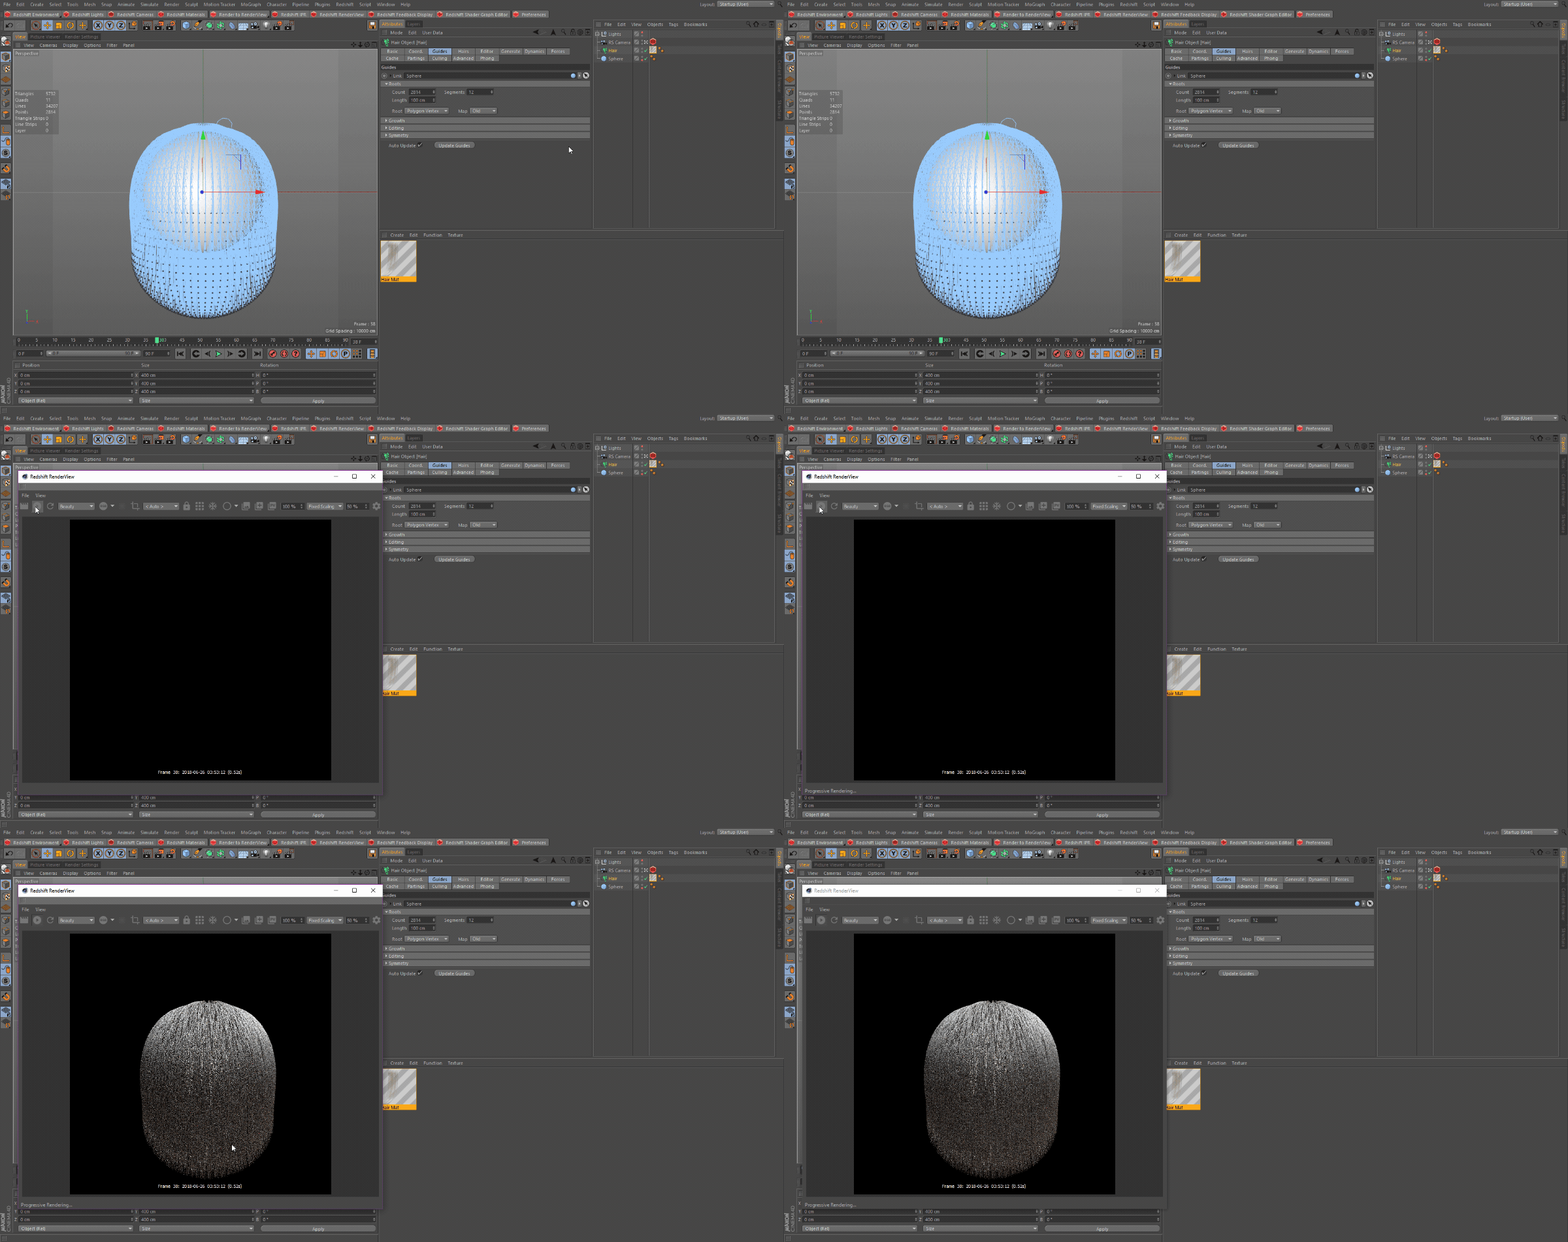
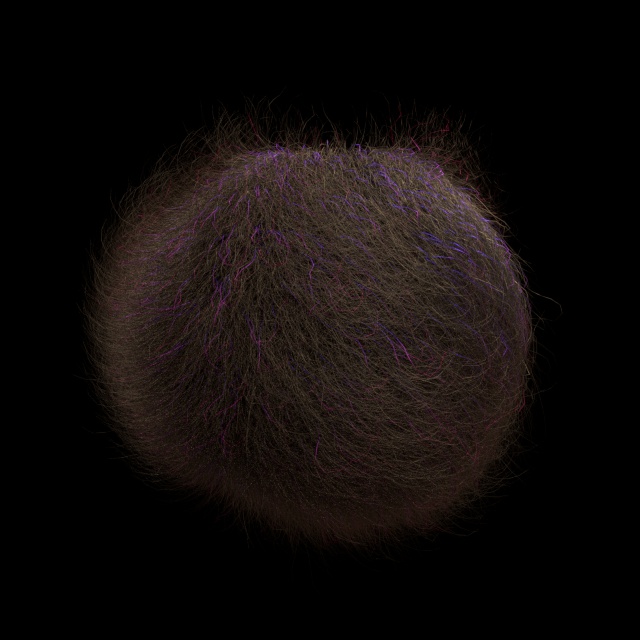
Let's see how we can render the Cinema 4D Hair Object inside of Redshift. Below we have set up a basic hair object on a sphere and adjusted some of the base settings to produce more hair. Our Hair object will render without the need for any tags.
让我们来看看如何在红移中渲染电影院的4 d 毛发对象。下面我们在一个球体上设置了一个基本的头发对象,并且调整了一些基本的设置来生成更多的头发。我们的头发对象将渲染没有任何标签的需要。
Hair Object
毛发物体
Note
注意
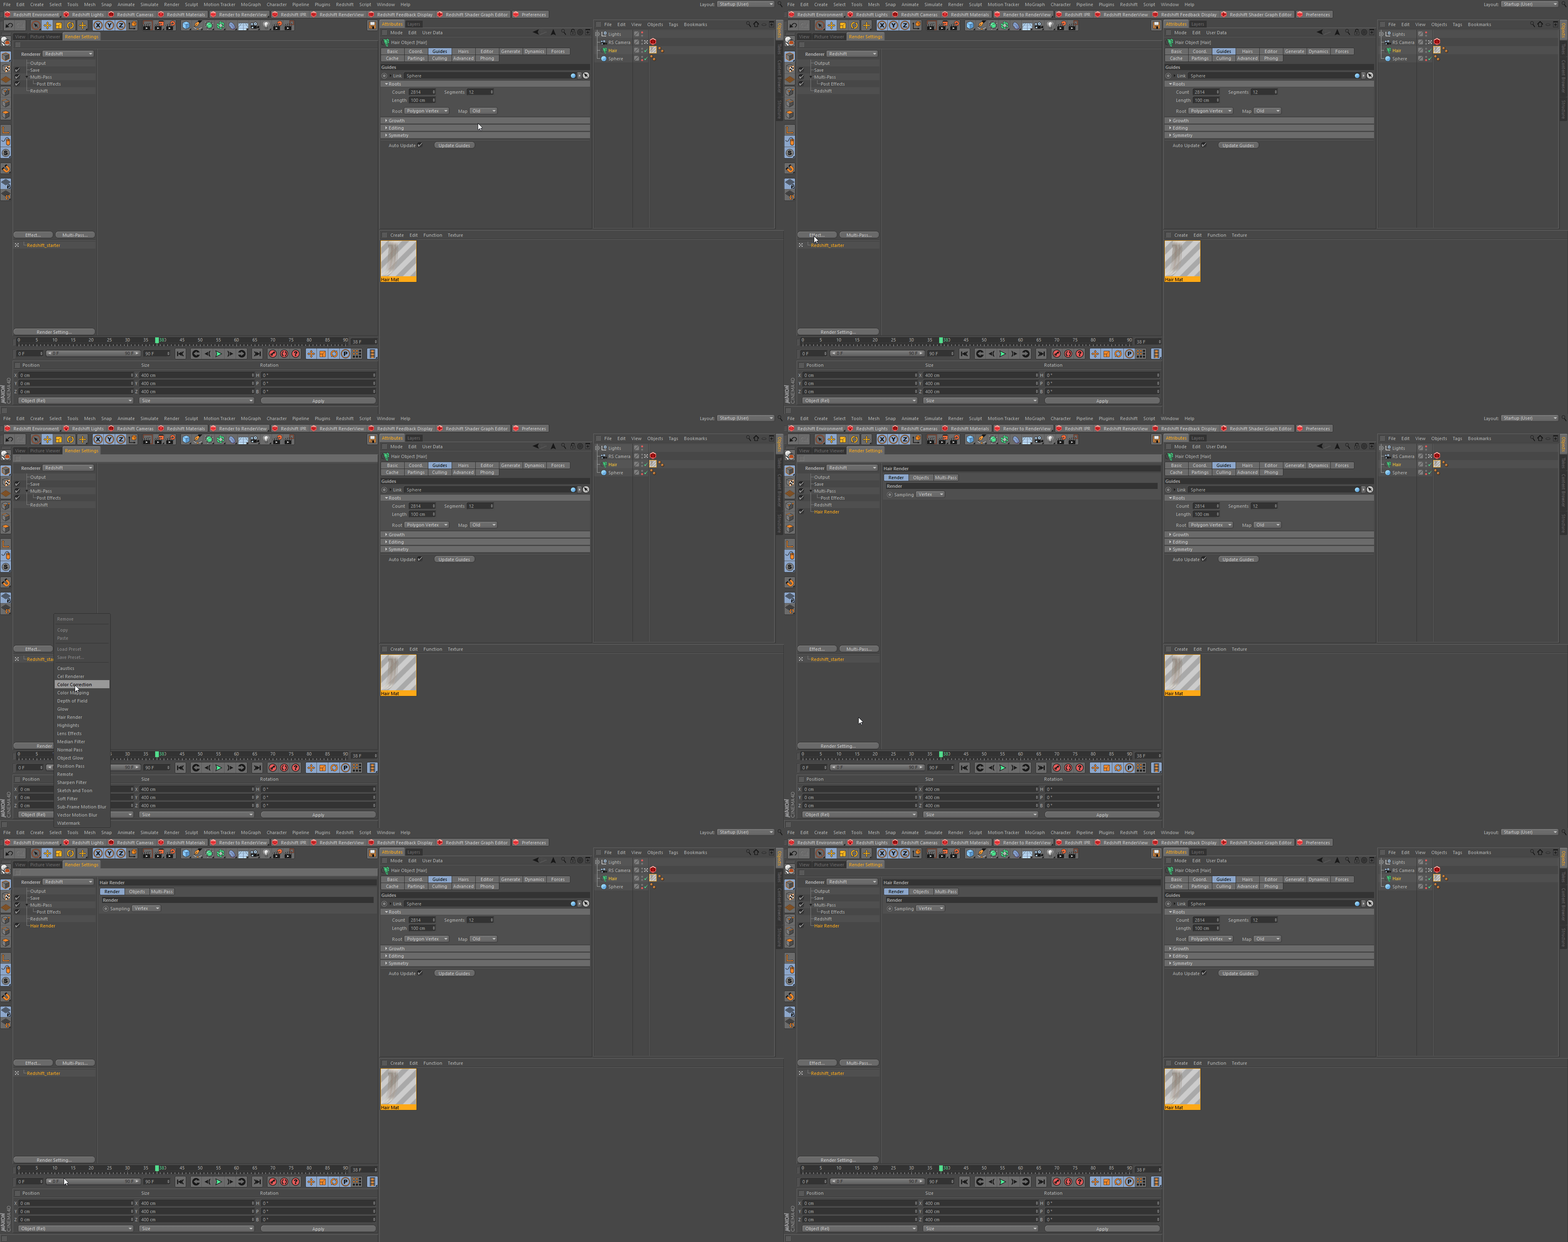
If the Hair object, is not visible make sure you have the Hair Render post effect added and checked, so Cinema 4D exports the hair for Redshift.
如果头发对象,是不可见的,请确保您有头发渲染后的效果添加和检查,所以电影4 d 导出的红移头发。
Hair Render
毛发渲染
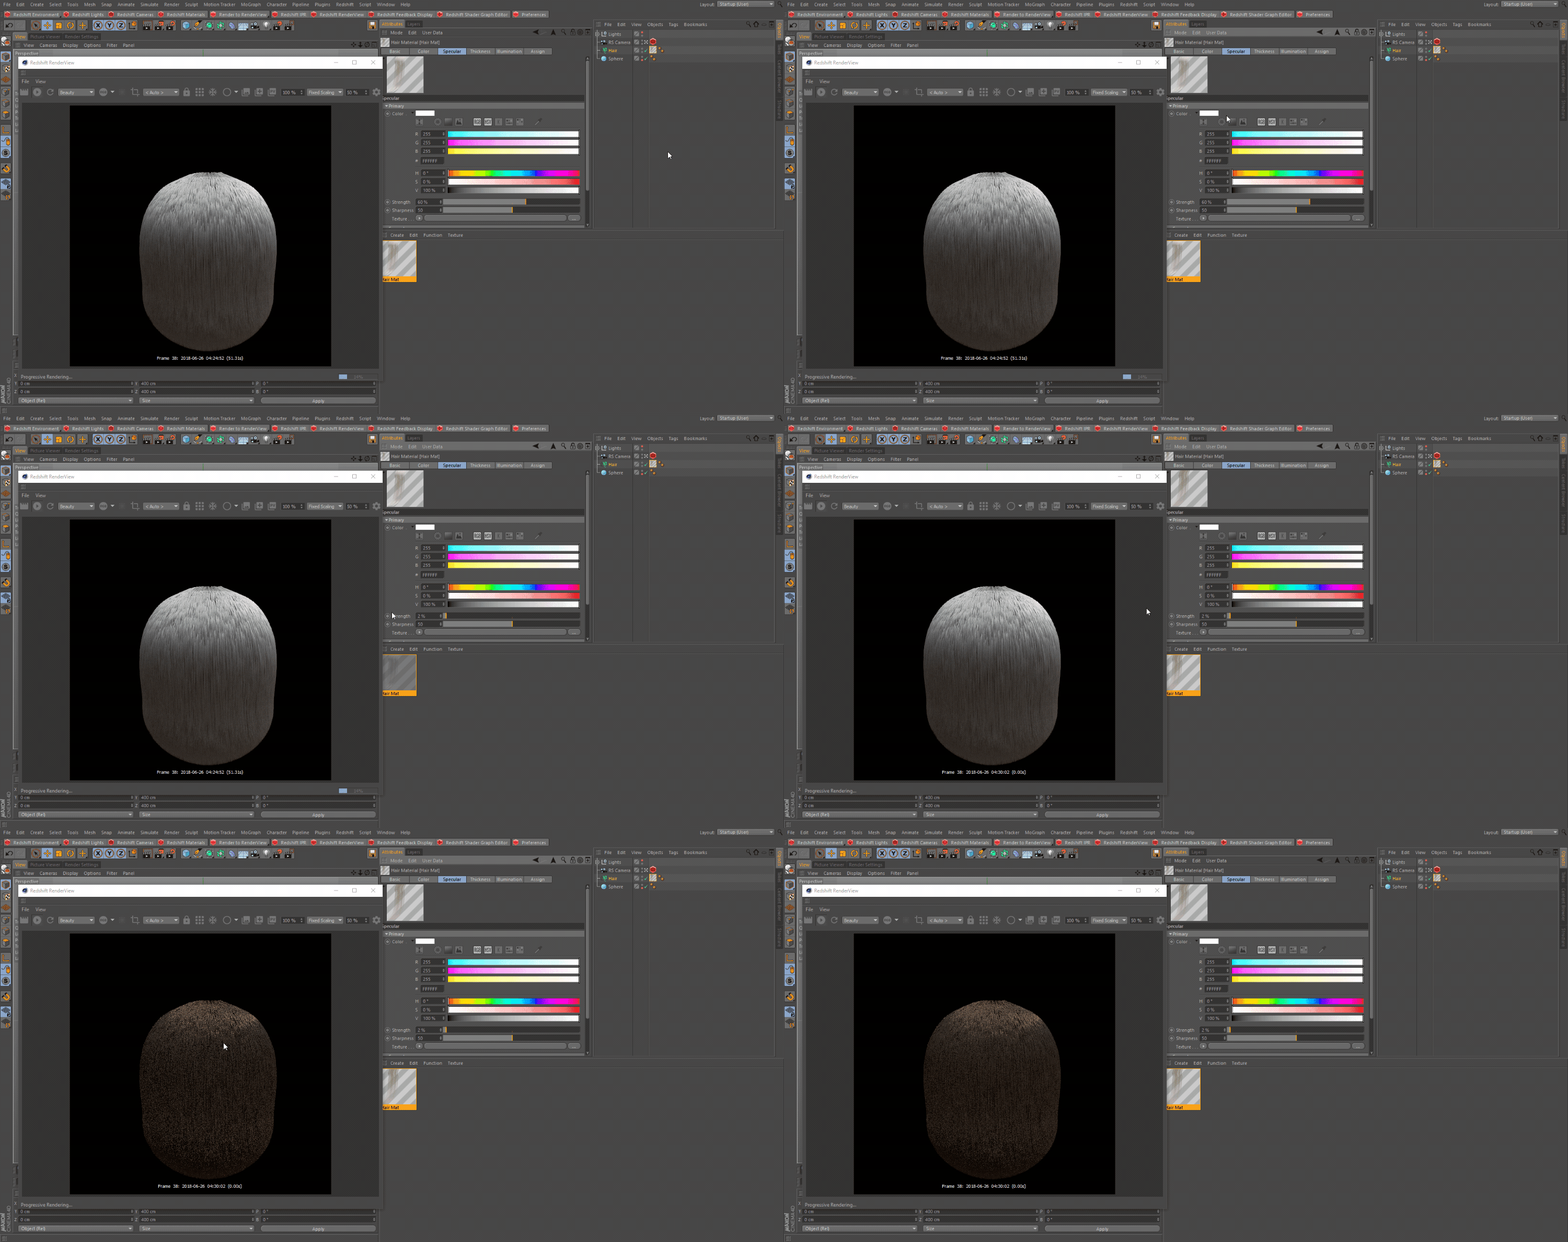
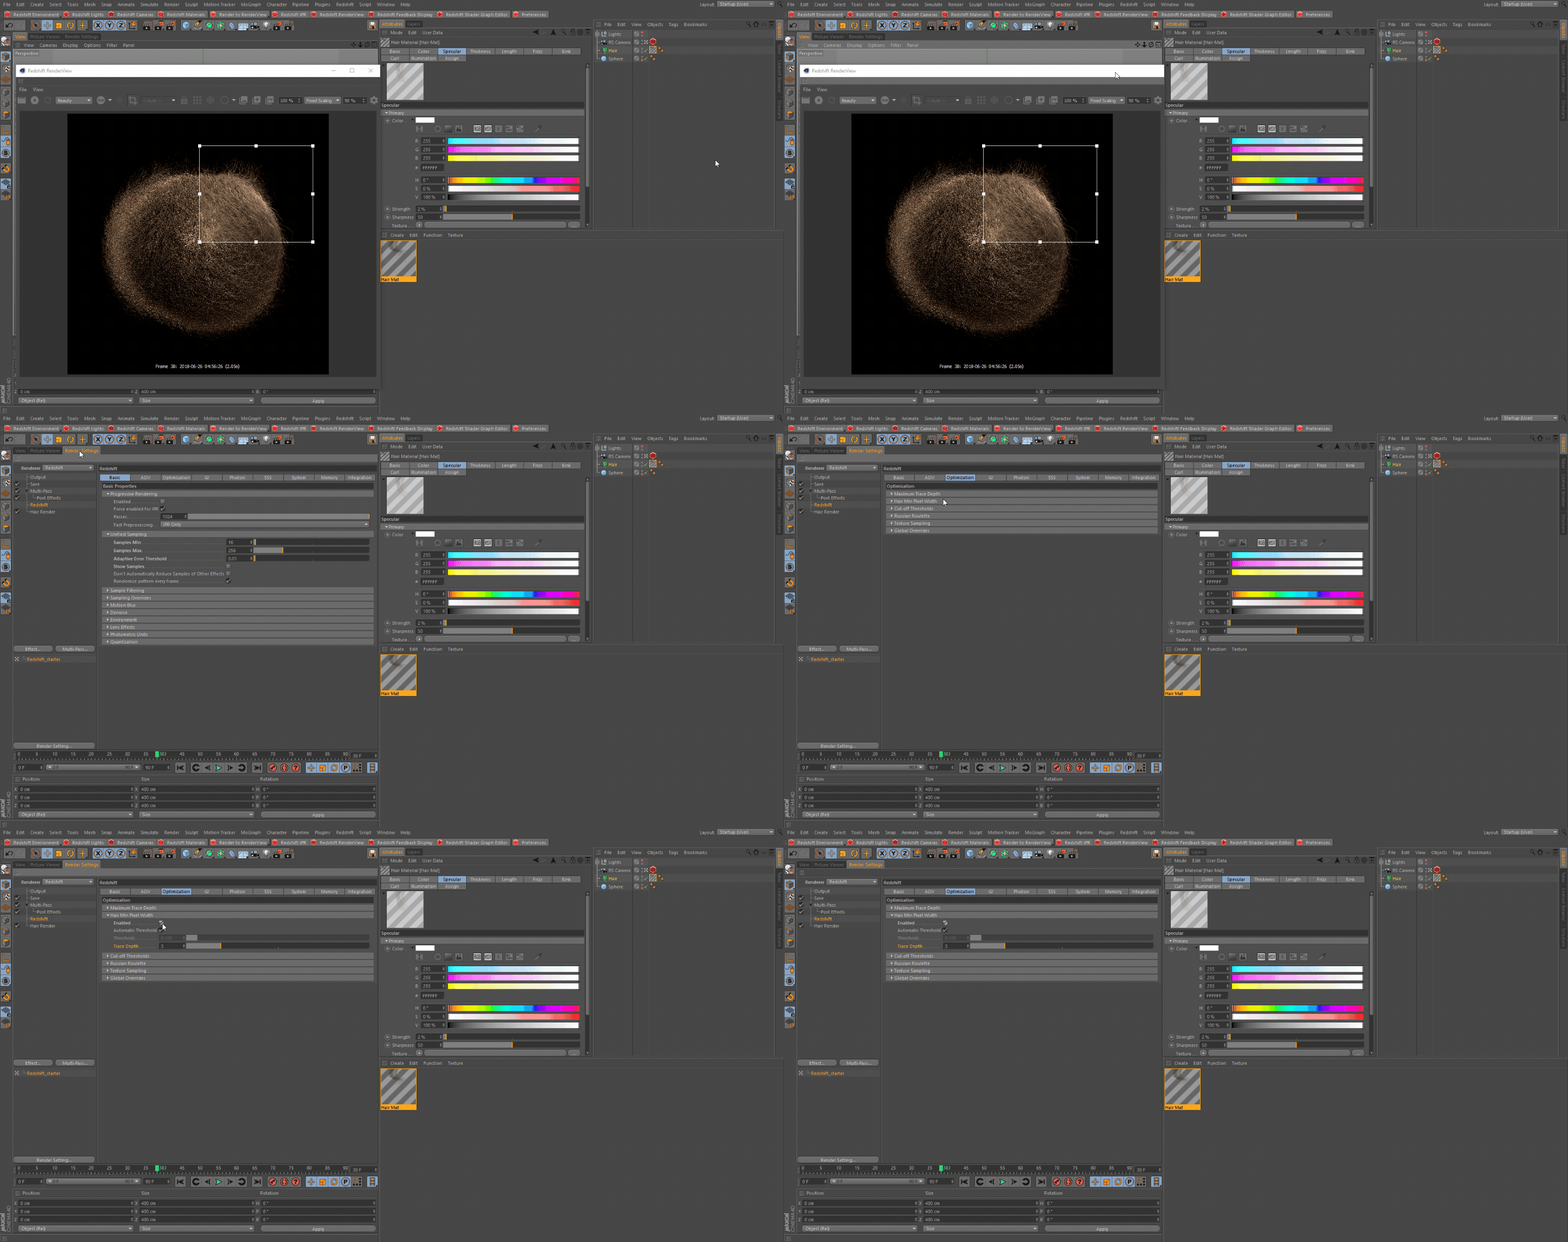
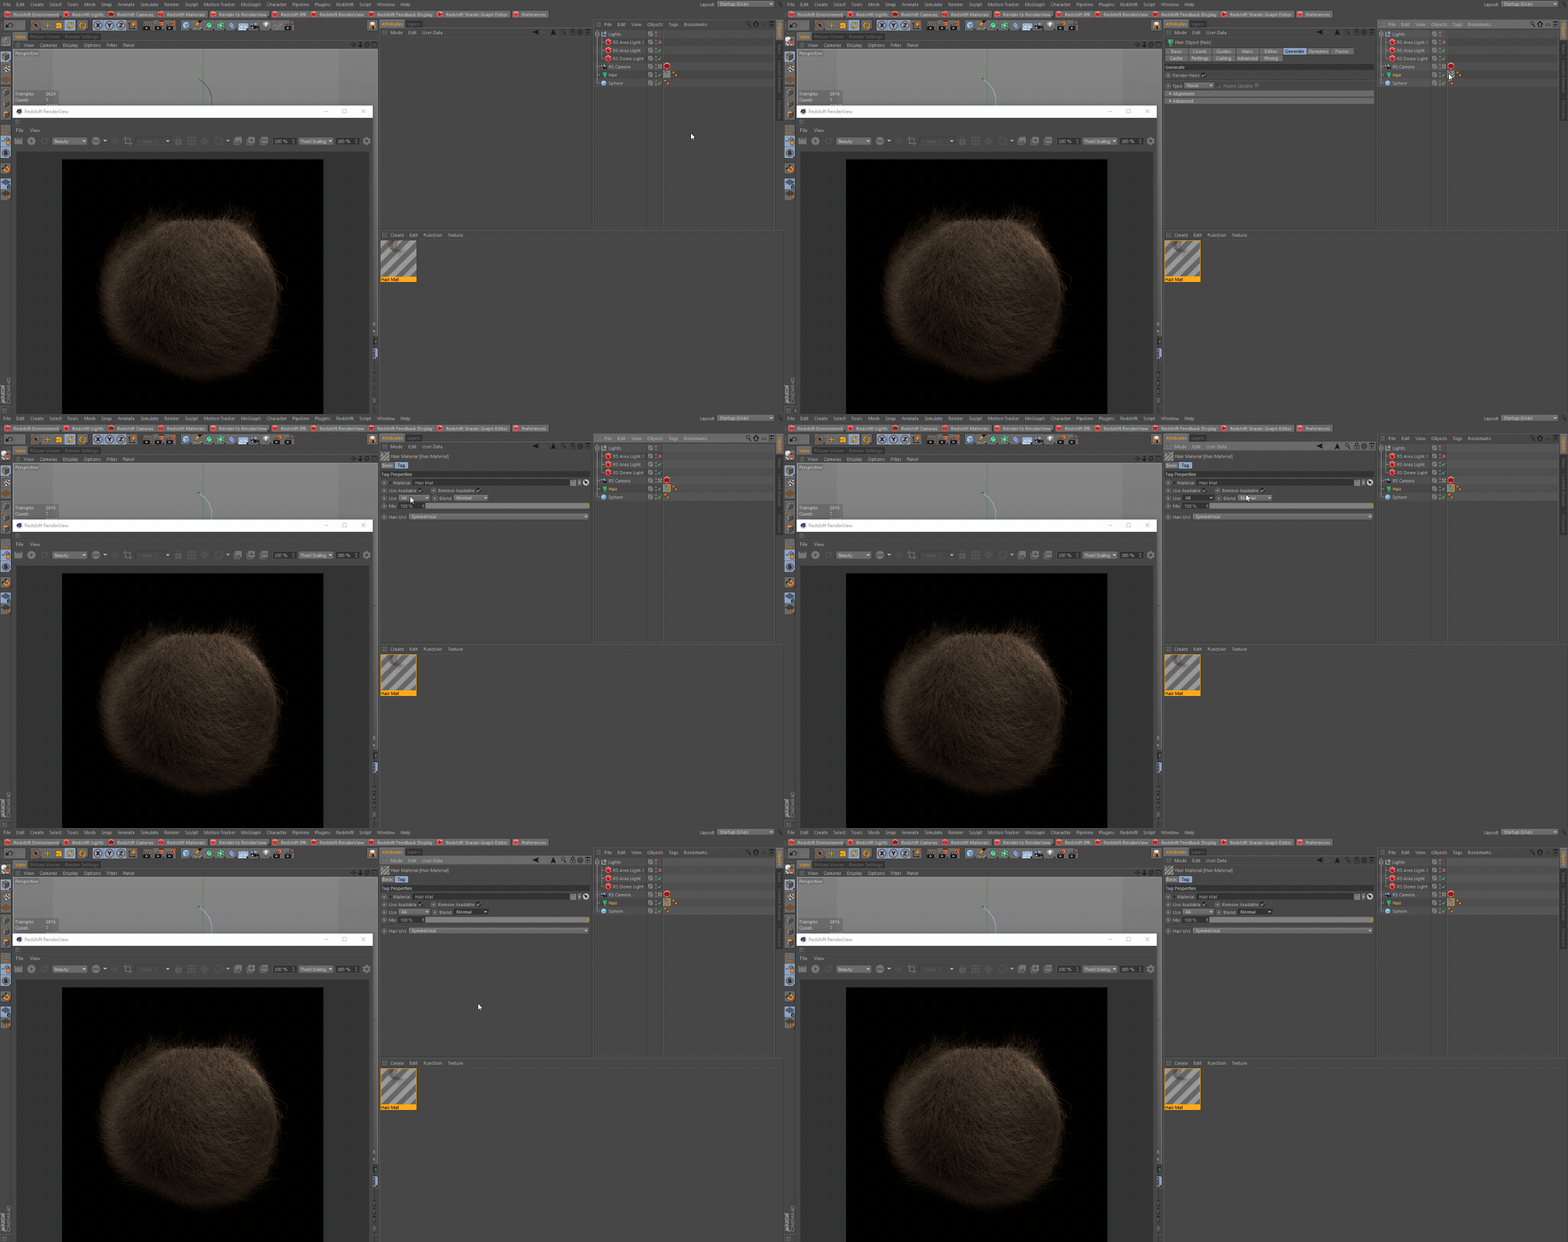
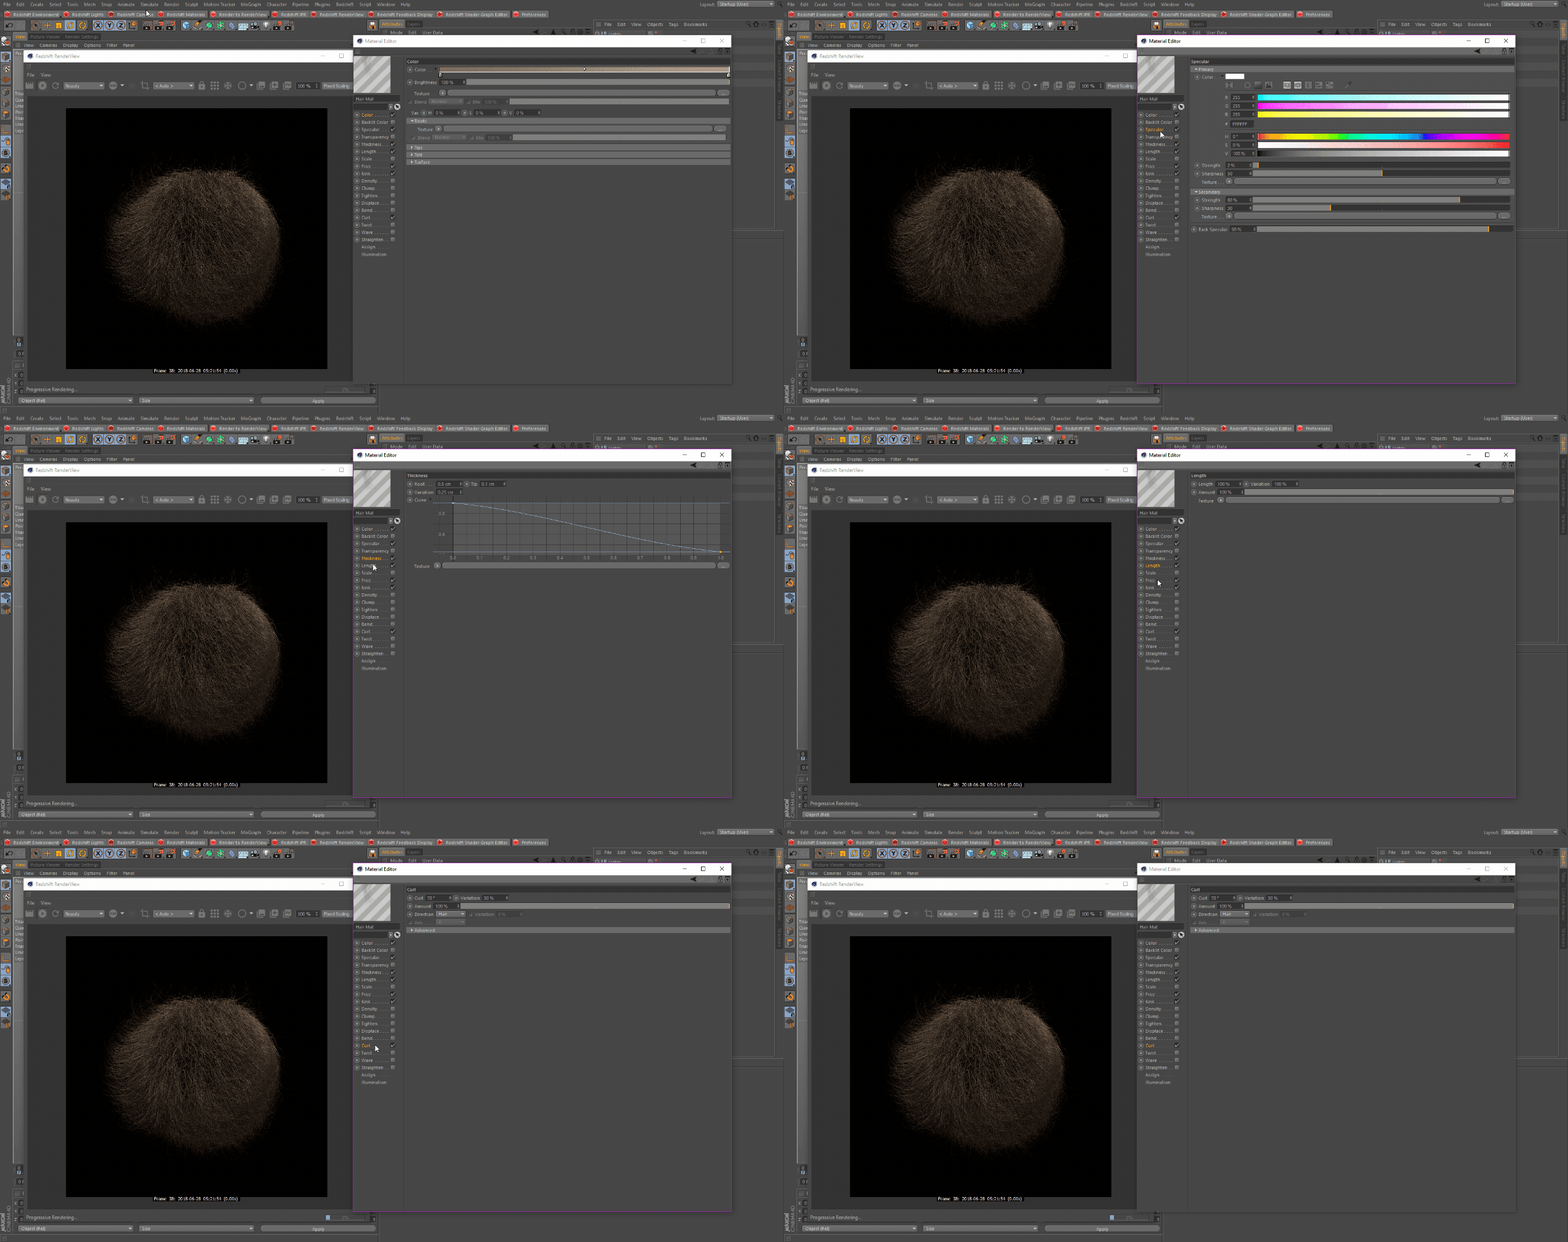
Now the reason our hair looks like it has no material applied or the color channel is not working, has to do with the specular channel. Due to the way Redshift's hair model is set up, the Cinema 4D Hair material's specular has an extremely strong effect in Redshift. So we are going to lower the strength down to 1-2%.
现在,原因我们的头发看起来像没有材料应用或颜色渠道不工作,与镜面渠道。由于红移的头发模型是建立的方式,电影院4 d 头发材料的镜面有一个非常强烈的效果红移。所以我们要把强度降低到1-2% 。
Specular Strength
镜面强度
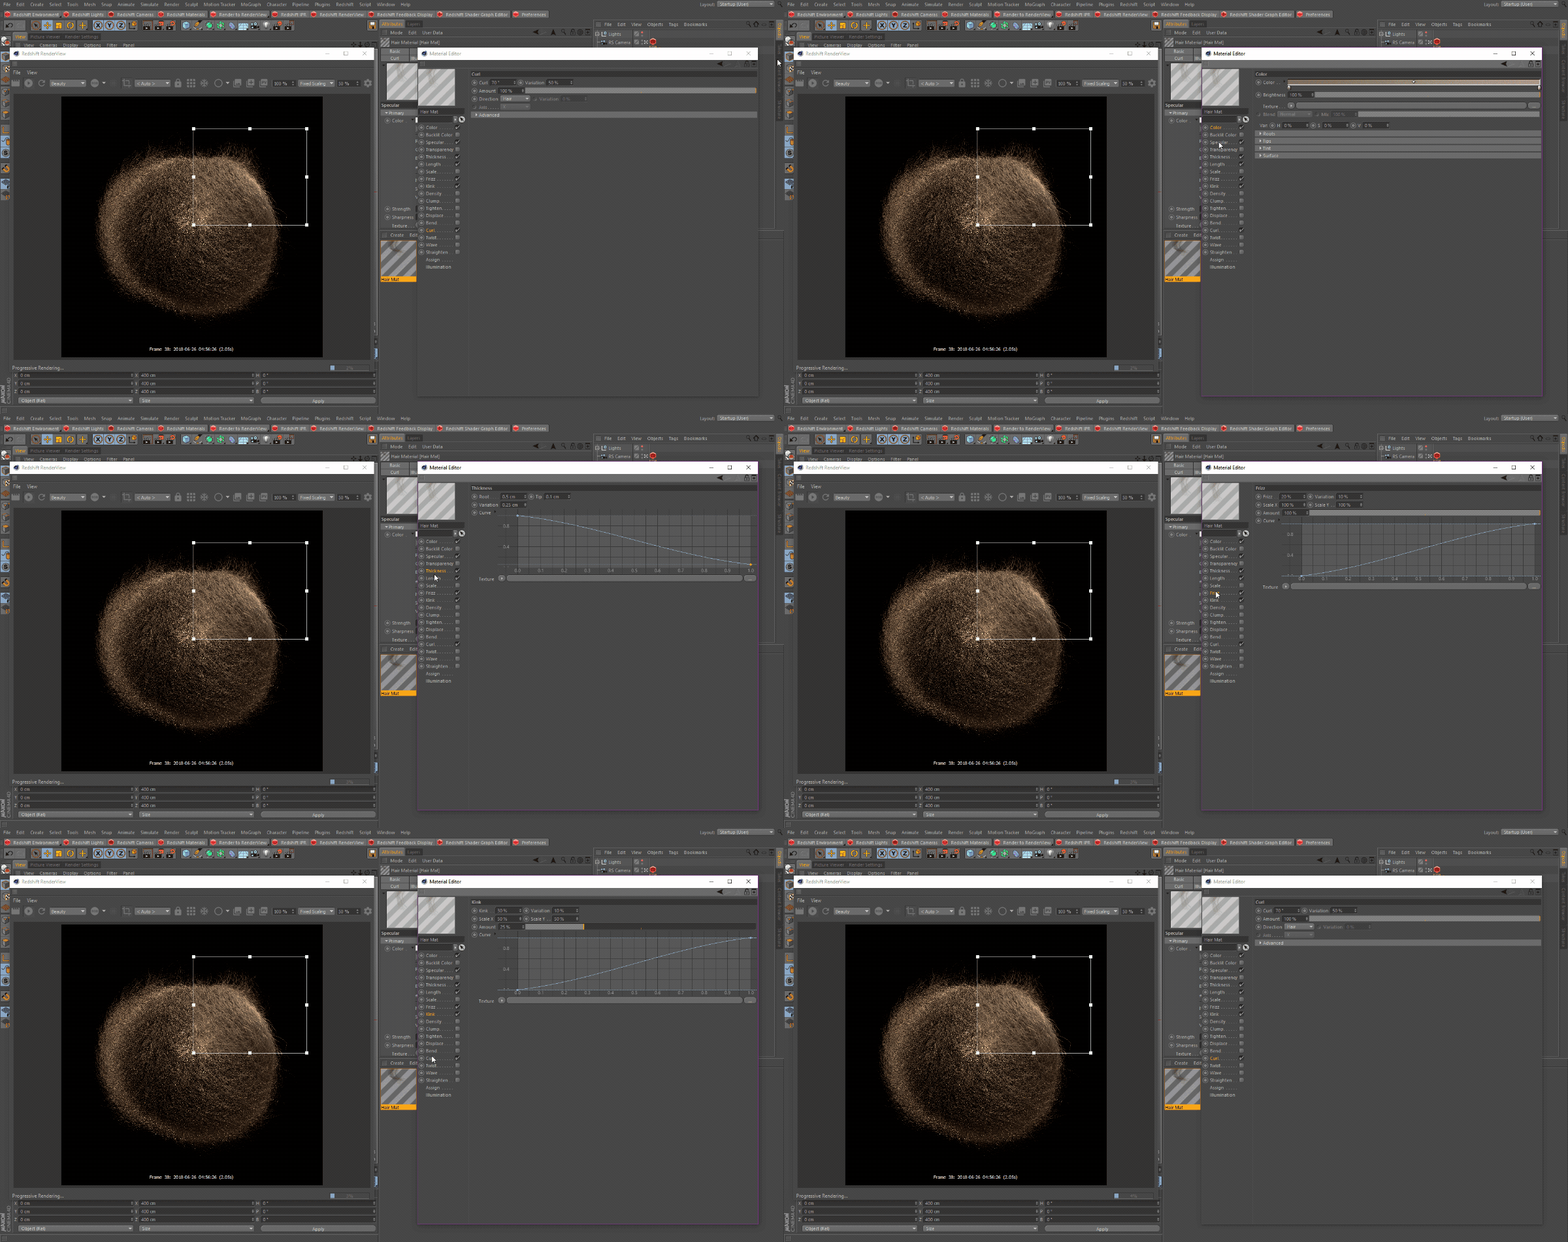
Now that we have adjusted the specular, let's take a look at some of the other parameters inside of the Hair Material. Let's adjust the Thickness, Length, Frizz, Kink and Curl to add some life and randomness to our hair. Redshift is taking all these attributes into account so we are getting a much more natural looking result compared to the flat boring hair shown above.
现在我们已经调整了镜面,让我们看看其他一些参数内的头发材质。让我们调整一下头发的厚度,长度,卷曲,扭结和卷曲,为我们的头发增加一些生命力和随机性。红移考虑到了所有这些因素,所以我们得到了一个更自然的看起来比上面显示的单调乏味的头发结果。
Hair Mat
毛垫
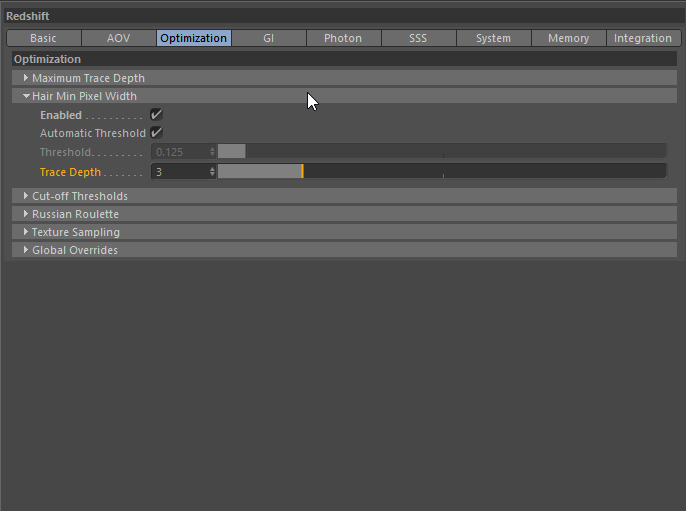
Before we render let's take a look at at the Optimization tab in Redshift's Render Settings. We are going to enable Hair Min Pixel Width which will allow for cleaner results without having to crank up our unified sampling. More information on the Hair Min Pixel Width can be found here.
在渲染之前,让我们看一下红移渲染设置中的优化选项卡。我们将使头发最小像素宽度,这将允许清洁的结果,而不必加快我们的统一采样。更多关于头发最小像素宽度的信息可以在这里找到。
Hair Min Pixel Width
头发最小像素宽度
Hair Object
毛发物体
Generate
生成
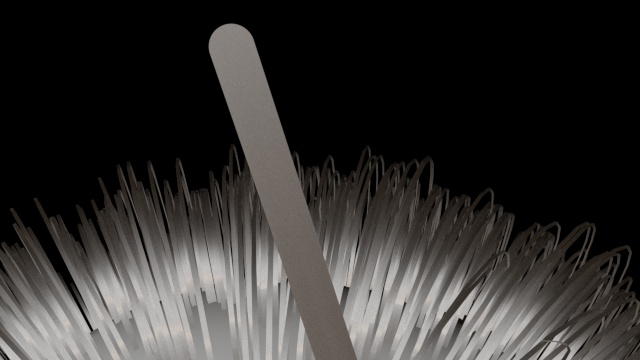
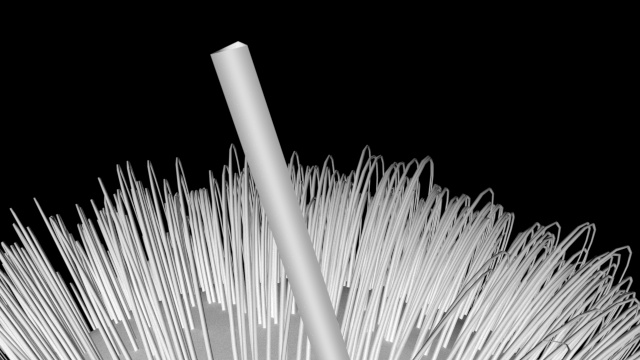
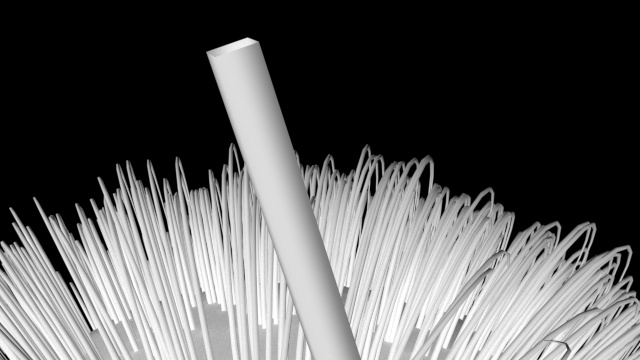
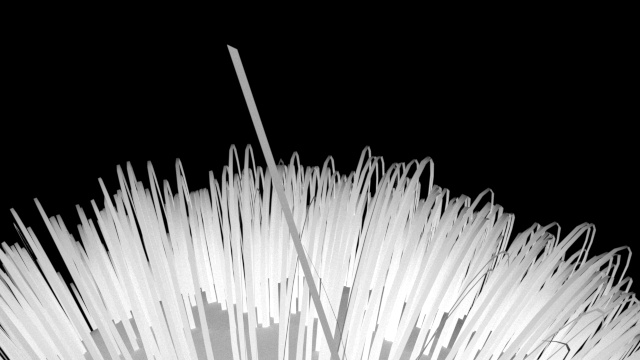
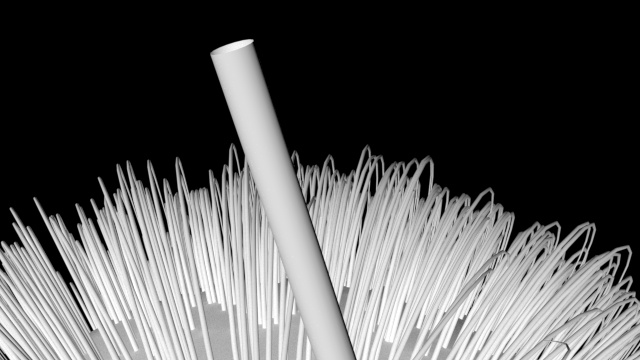
There are a few options in the Generate tab of the Hair Object, that will effect how our hair will render with Redshift. With the Render Hairs option checked on (enabled by default), our Hair Object will use Redshift's Hair-Strand primitive generated at scene conversion time. We can disable Render Hairs and use the different Polygon primitives by changing the Type parameter as shown below. Note that these however will generate an actual polygon mesh. The different primitives are compared below:
在头发对象的生成选项卡中有一些选项,它们将影响我们的头发如何使用红移渲染。在渲染毛发选项选中(默认启用) ,我们的头发对象将使用红移的 Hair-Strand 原语在场景转换时生成。我们可以禁用渲染毛发和使用不同的多边形原语通过改变类型参数如下所示。请注意,这些然而将生成一个实际的多边形网格。下面比较不同的原语:
Generate Settings
生成设置
Both Hair Strands Primitive and Polygon Primitives can be enabled and rendered at the same time if needed. If only one is required make sure you disable the other, otherwise overlapping geometry will be rendered
如果需要,可以同时启用和渲染发丝原语和多边形原语。如果只需要一个,请确保禁用另一个,否则将呈现重叠的几何体
|
|
|
|
| Hair Strand Primitive (Render Hairs) 原始毛发(呈现毛发) | Triangle 三角形 | Square 广场 |
|
|
|
|
| Flat 单位 | Circle 圆圈 |
Render Hairs vs Polygon primitive 绘制毛发 vs 多边形原语
The Render Hairs option, which is Redshift's Hair Strand primitive, is a flat ribbon-like object that is optimized for a high volume of thin strands. Polygon primitives, which are normal geometry created by Cinema 4D, give you the option to use deformers (Bend,Twist,Displacer,ect.) as well as sub-divide your geometry. Polygon primitives also contain UVs so they can be textured like normal objects, ajd support the different projection modes of the texture tag. In situations with high counts of hair the Render Hairs option will give the best render performance.
Render Hairs 选项是 Redshift 的 Hair Strand 原语,是一个扁平的丝带状对象,为大量的细丝而优化。多边形原语,这是由 Cinema 4D 创建的正常几何图形,可以让你选择使用变形(弯曲,扭曲,置换,ect.)以及子分割你的几何图形。多边形原语也包含 uv,所以他们可以像普通物体一样纹理,ajd 支持纹理标签的不同投影模式。在毛发数量高的情况下,渲染毛发选项将提供最好的渲染性能。
Caching 缓存
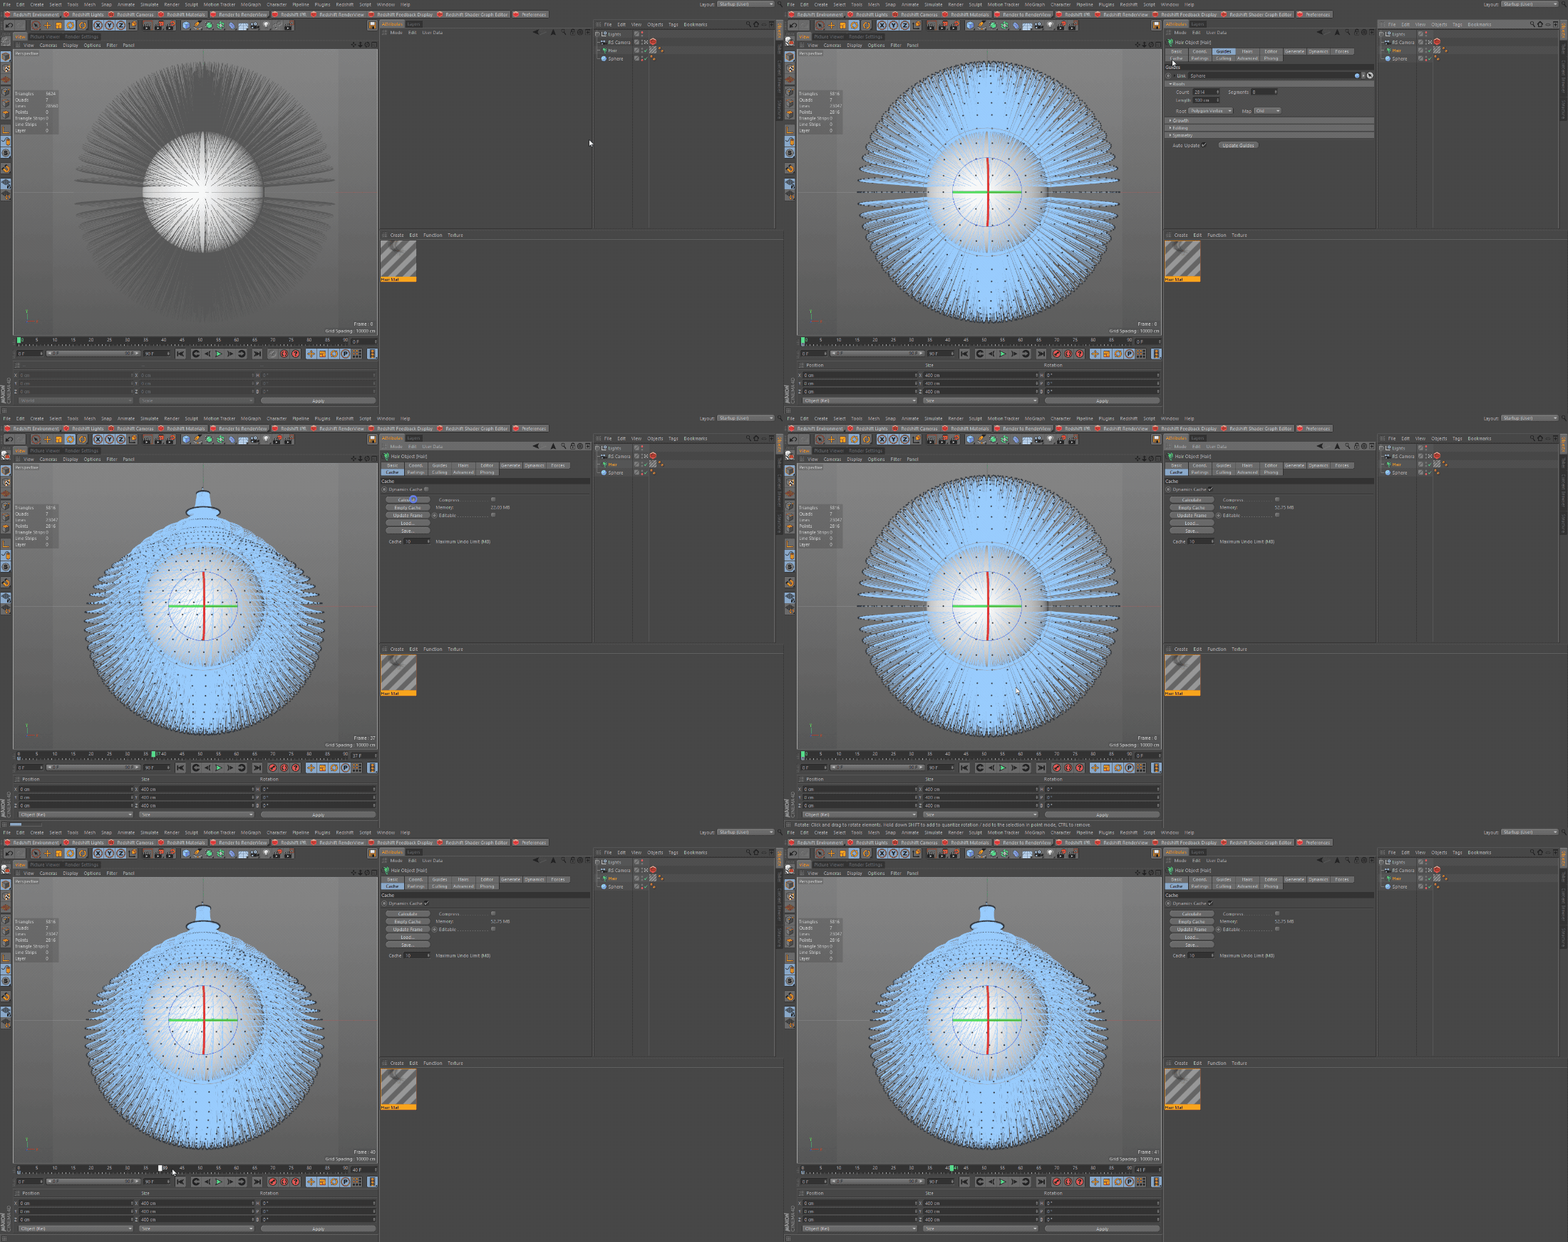
In order to have consistent results while using motion blur, especially deformation blur, we will need to cache our Hair Object. Let's go to the Cache tab located in our Hair Object and Catculate.
为了有一致的结果,而使用运动模糊,特别是变形模糊,我们需要缓存我们的头发对象。让我们去缓存标签位于我们的头发对象和 Catculate。
Caching Hair Object
头发对象的缓存
Hair Min Pixel Width
头发最小像素宽度
The Hair Min Pixel Width setting is an optimization setting to help Redshift clean up noise by making the hair strands thicker so the camera rays have a better chance to hit the strands, but will also make them partially transparent to compensate for increased thickeness. Making the strands transparent will increase render times in that aspect, but allows you to keep lower unified samples, in the end you will end up with reduced render times. It is recommended to keep Automatic Threshold enabled. For more information about Hair Min Pixel Width visit here.
头发最小像素宽度设置是一个优化设置,可以帮助 Redshift 通过使头发变厚来清除噪音,这样相机光线更有可能照到头发,但也可以使它们部分透明,以补偿增加的厚度。使线透明将增加渲染时间在那方面,但允许你保持较低的统一样本,最终你将以减少渲染时间而告终。建议保持“自动阈值”处于启用状态。更多关于 Hair Min Pixel Width 的信息请访问这里。
Hair Min Pixel Width
头发最小像素宽度
The Cinema 4D Hair Material
电影4 d 发型材料
The Cinema 4D Hair Material not only affects the shading of strands but also the shape and size. Redshift translates all this information for us to render, but because of the different shading models between Redshift and the native Cinema 4D materials, the specualr channel will be too strong changing the appearance of the material. It is suggested to tone it down to a low value, shown in the example below.
电影院4D 头发材料不仅影响着发线的阴影,而且还影响着头发的形状和大小。红移为我们翻译所有这些信息来渲染,但是由于红移和原生影院4 d 材质的阴影模型不同,specualr 通道会强烈地改变材质的外观。建议将其调低到一个较低的值,如下面的示例所示。
Adjusted Specular Channel
调整镜面通道
|
|
|
| Default Specular Strength (60%) 默认镜面强度(60%) | Adjusted Specular Strength (2%) 调整后的镜面强度(2%) |
Blending Materials
混合材料
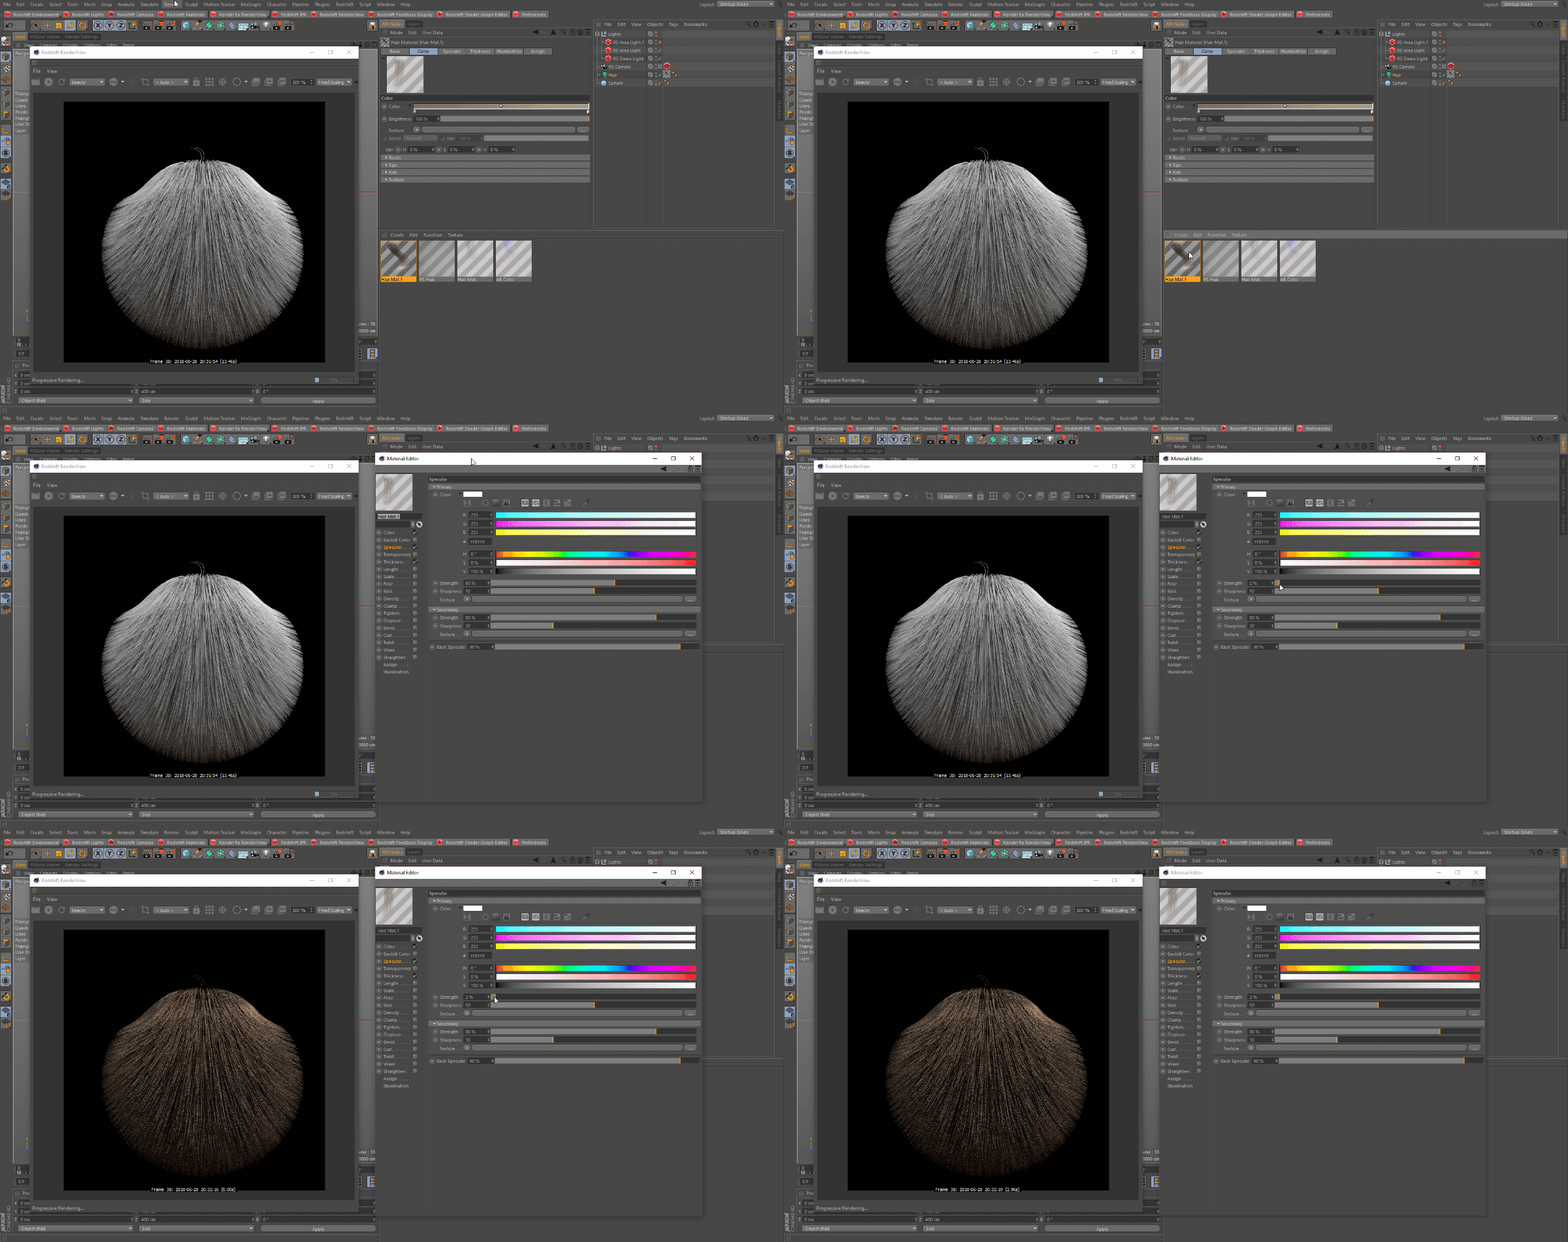
You can blend multiple Hair materials on top of one another to get a varied result. You simply drag another hair material on to your hair object and adjust the blend settings, down below is an example on how this can be achieved.
你可以将多种头发材料混合在一起,得到不同的效果。你只需拖动另一个头发材料到你的头发对象和调整混合设置,下面是一个例子如何可以实现这一点。
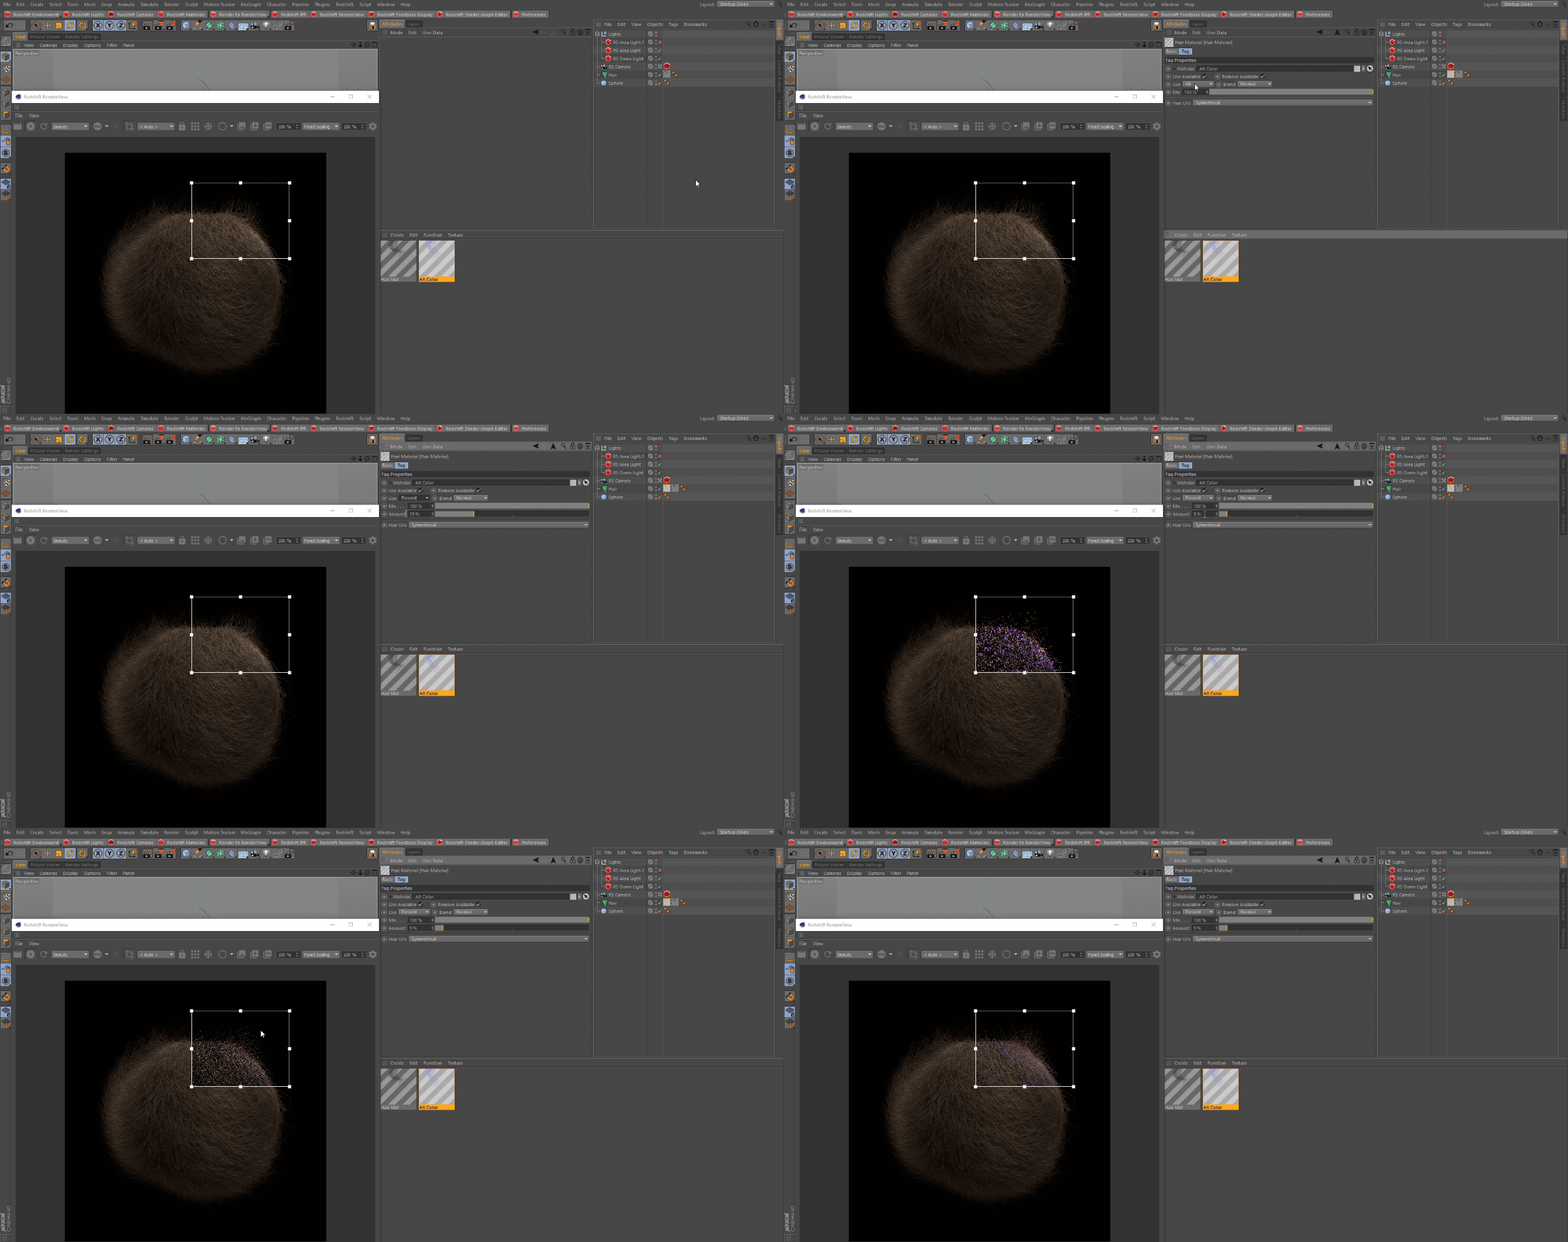
Let's take a look at a Hair object with a single material applied. When we click on the Hair Material Tag we can see all of our options to blend our hair materials.
让我们看看一个头发对象与单一材质应用。当我们点击头发材料标签,我们可以看到我们的所有选项,以混合我们的头发材料。
Hair Mat
毛垫
Now let's copy the original hair material and change the color and a couple of the settings to keep a similar geometric look but with a completely different color.
现在让我们复制原始的头发材料,改变颜色和一对夫妇的设置,以保持相似的几何外观,但完全不同的颜色。
2nd Hair Mat
第二个发垫
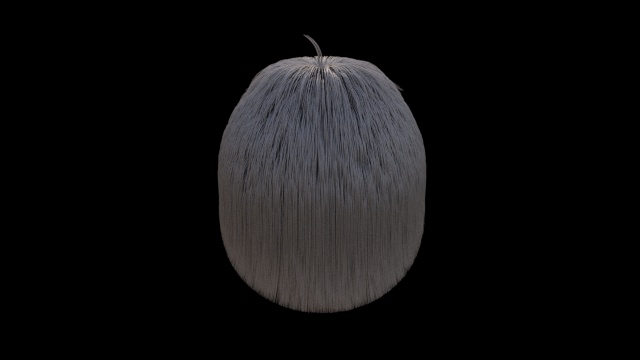
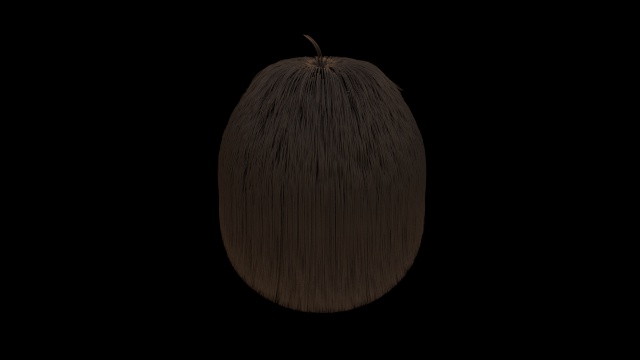
Cinema 4D will automatically give Redshift our blended result to be rendered. So let's drag our new Hair material on the Hair Object, the materials will be used from left to right. Because we only want a bit of this new material coming through, we will set it to Percent mode and set the amount to 5%, which means only 5% of this material will come through,meaning the other 95% will be our original material we had applied.
电影4 d 将自动给红移我们的混合结果被渲染。所以让我们拖动我们的头发对象的新材质,材质将从左到右使用。因为我们只需要一点这种新材料,我们将它设置为百分比模式,并设置为5% ,这意味着只有5% 的材料将通过,这意味着其他95% 将是我们的原始材料,我们已经申请。
Blended Hair Mat
混合发垫
|
|
|
| Single Material 单一材料 | Blended Material Result 混合材料结果 |
You can use as many Hair Materials as necessary on your Hair Object.
你可以使用尽可能多的头发材料作为必要的头发对象。
Shading Hair in the Shader Graph
阴影头发在着色器图形
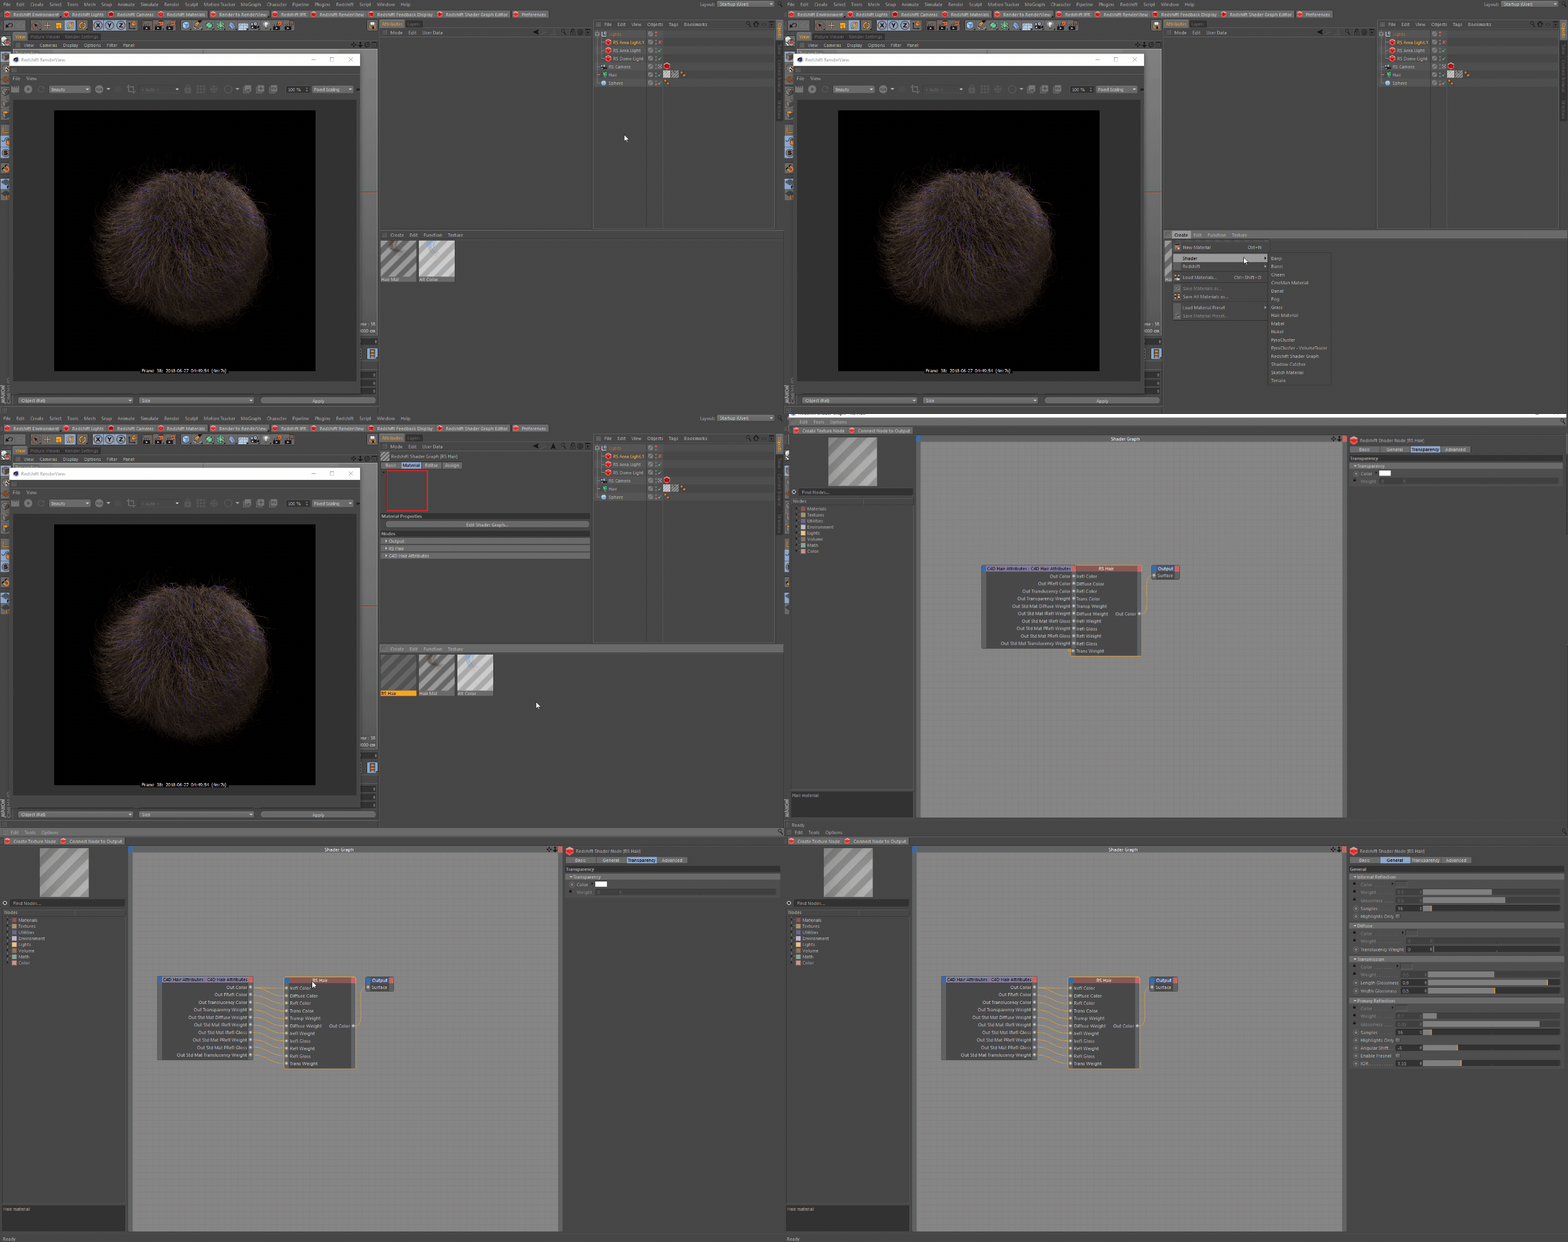
While the default Cinema 4D material has a lot of flexibility and can give very good results we can also use the Redshift Hair Material and have the ability for custom shading inside our graph. The default RS Hair material will use the C4D Hair Attributes node, which will access the blended result of all Cinema 4D Hair materials attached to the hair object. The RS Hair material will then take over allowing the use of redshift nodes for custom shading.
默认的 Cinema 4 d 材质有很大的灵活性,可以给出非常好的结果,我们也可以使用红移发材质,并有能力在我们的图形自定义阴影。默认的 RS 头发材质将使用 C4D 头发属性节点,它将访问所有电影院4D 头发材质附加到头发对象的混合结果。RS 头发材质然后将接管允许使用红移节点自定义阴影。
Redshift Hair Material
红移头发材料
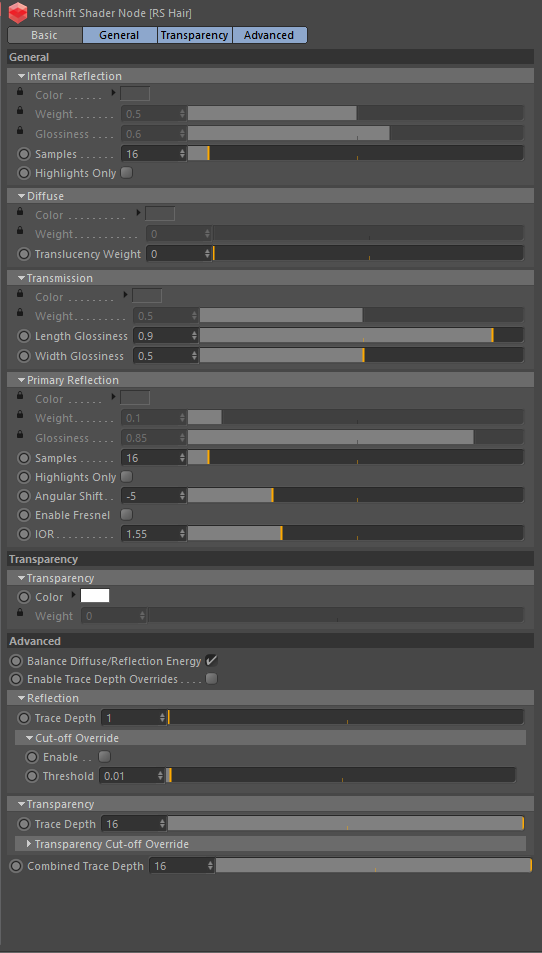
The Redshift Hair material is inspired by the paper 'An Artist Friendly Hair Shading System' by Sadeghi et al. Which is a simplified version of the Marschner Shading Model and introduces controls that are more user friendly, while still simulating the anisotropic reflections and complexity of real hair and fur to get realistic results. Redshift simplifies the Sadeghi shading model into three reflections:
红移头发材料的灵感来源于 Sadeghi 等人的文件‘一个艺术家友好的头发着色系统’。它是马施纳阴影模型的简化版本,引入了更加用户友好的控件,同时仍然模拟真实头发和毛皮的各向异性反射和复杂性,以获得真实的结果。Redshift 将 Sadeghi 着色模型简化为三个反射:
- Internal Reflection: which is light that has entered the hair and reflected back out. (This reflection is responsible for the overall color of the hair) 内部反射: 光线进入头发并反射回来。(这种反射决定了头发的整体颜色)
- Transmission, which is light that has entered the hair and reflected through the back-side. (This reflection is responsible for the back-lit translucency effect) 透射,即光线进入头发并通过头发后面反射。(这种反射负责背光半透明效果)
- Primary reflection, which is light that is reflected off the surface of the hair. (This reflection is responsible for the shininess) 初级反射,即从头发表面反射的光线。(这种反射是光亮的原因)
The Redshift Hair Material parameters are desribed in detail here.
这里详细描述了红移毛发材料的参数。
|
|
|
RS Hair Material
头发材料
The C4D Hair Attributes will only work with the Cinema 4D Hair Object in Render Hairs mode.
C4D 头发属性只能在渲染头发模式下使用电影院4D 头发对象。
Custom Shading Example
自定义阴影示例
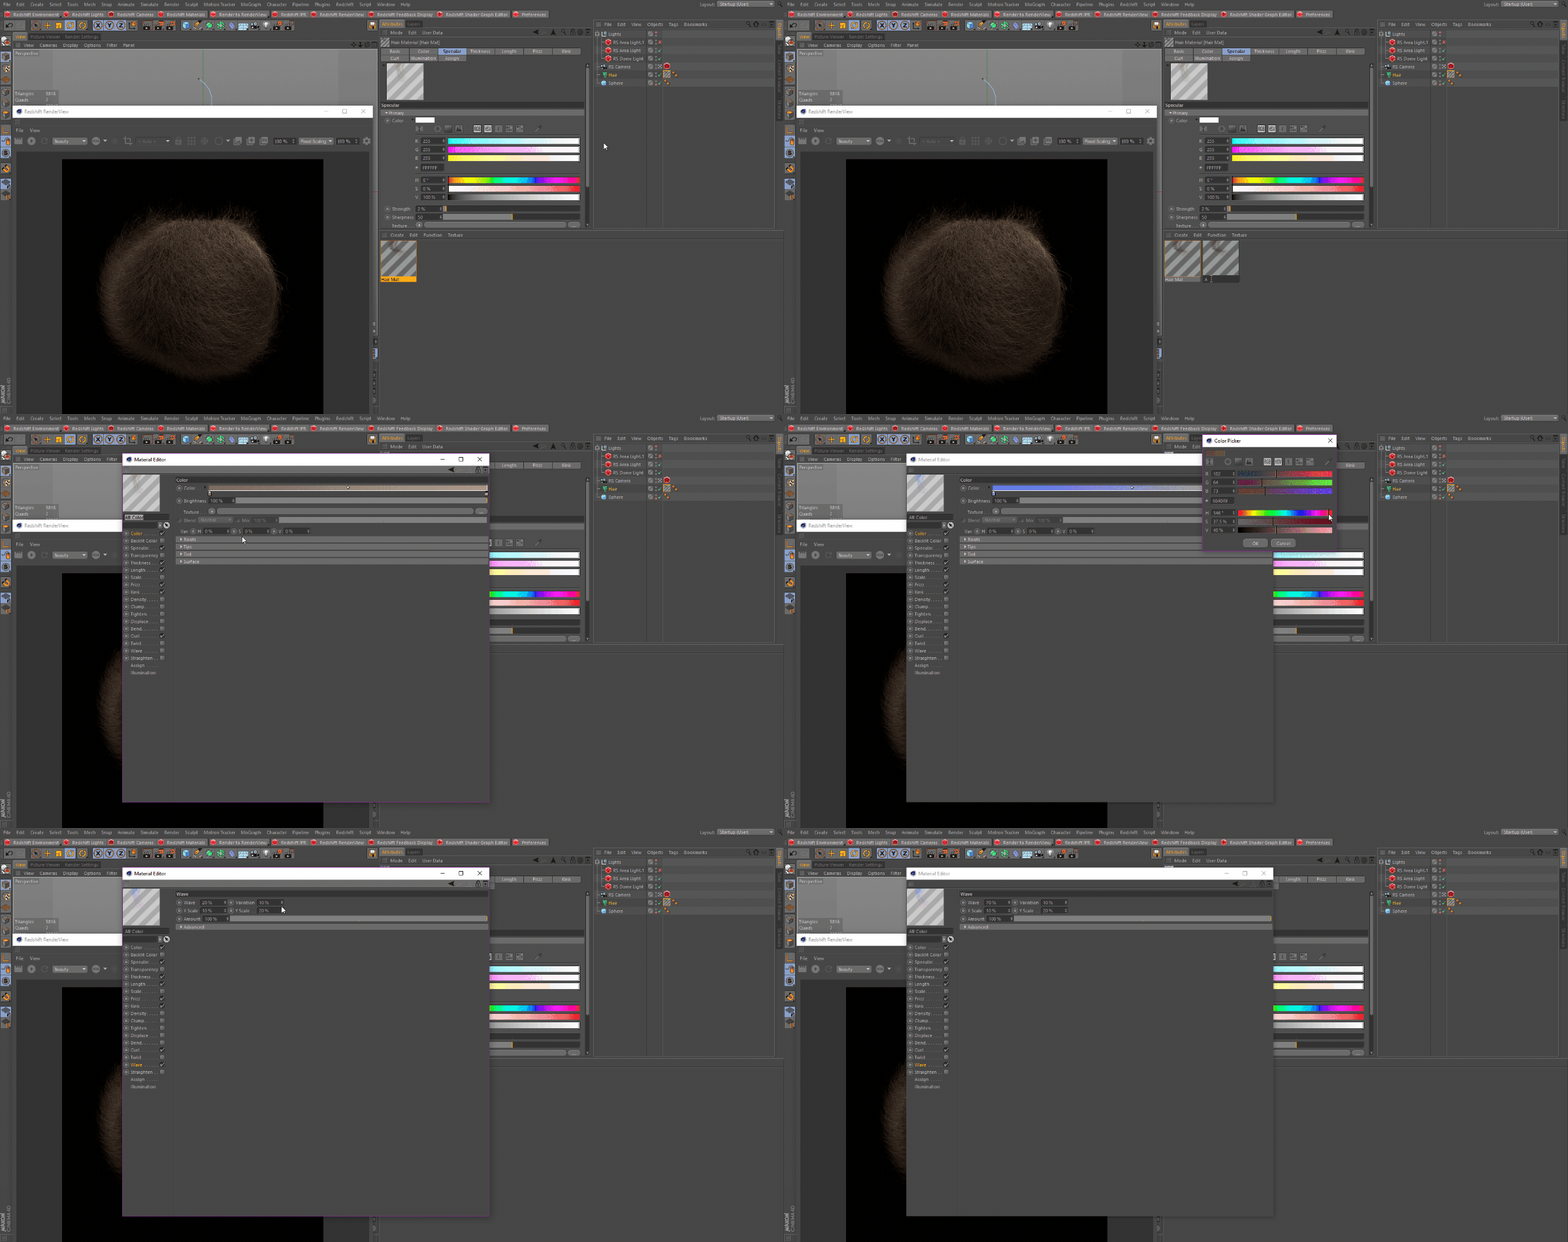
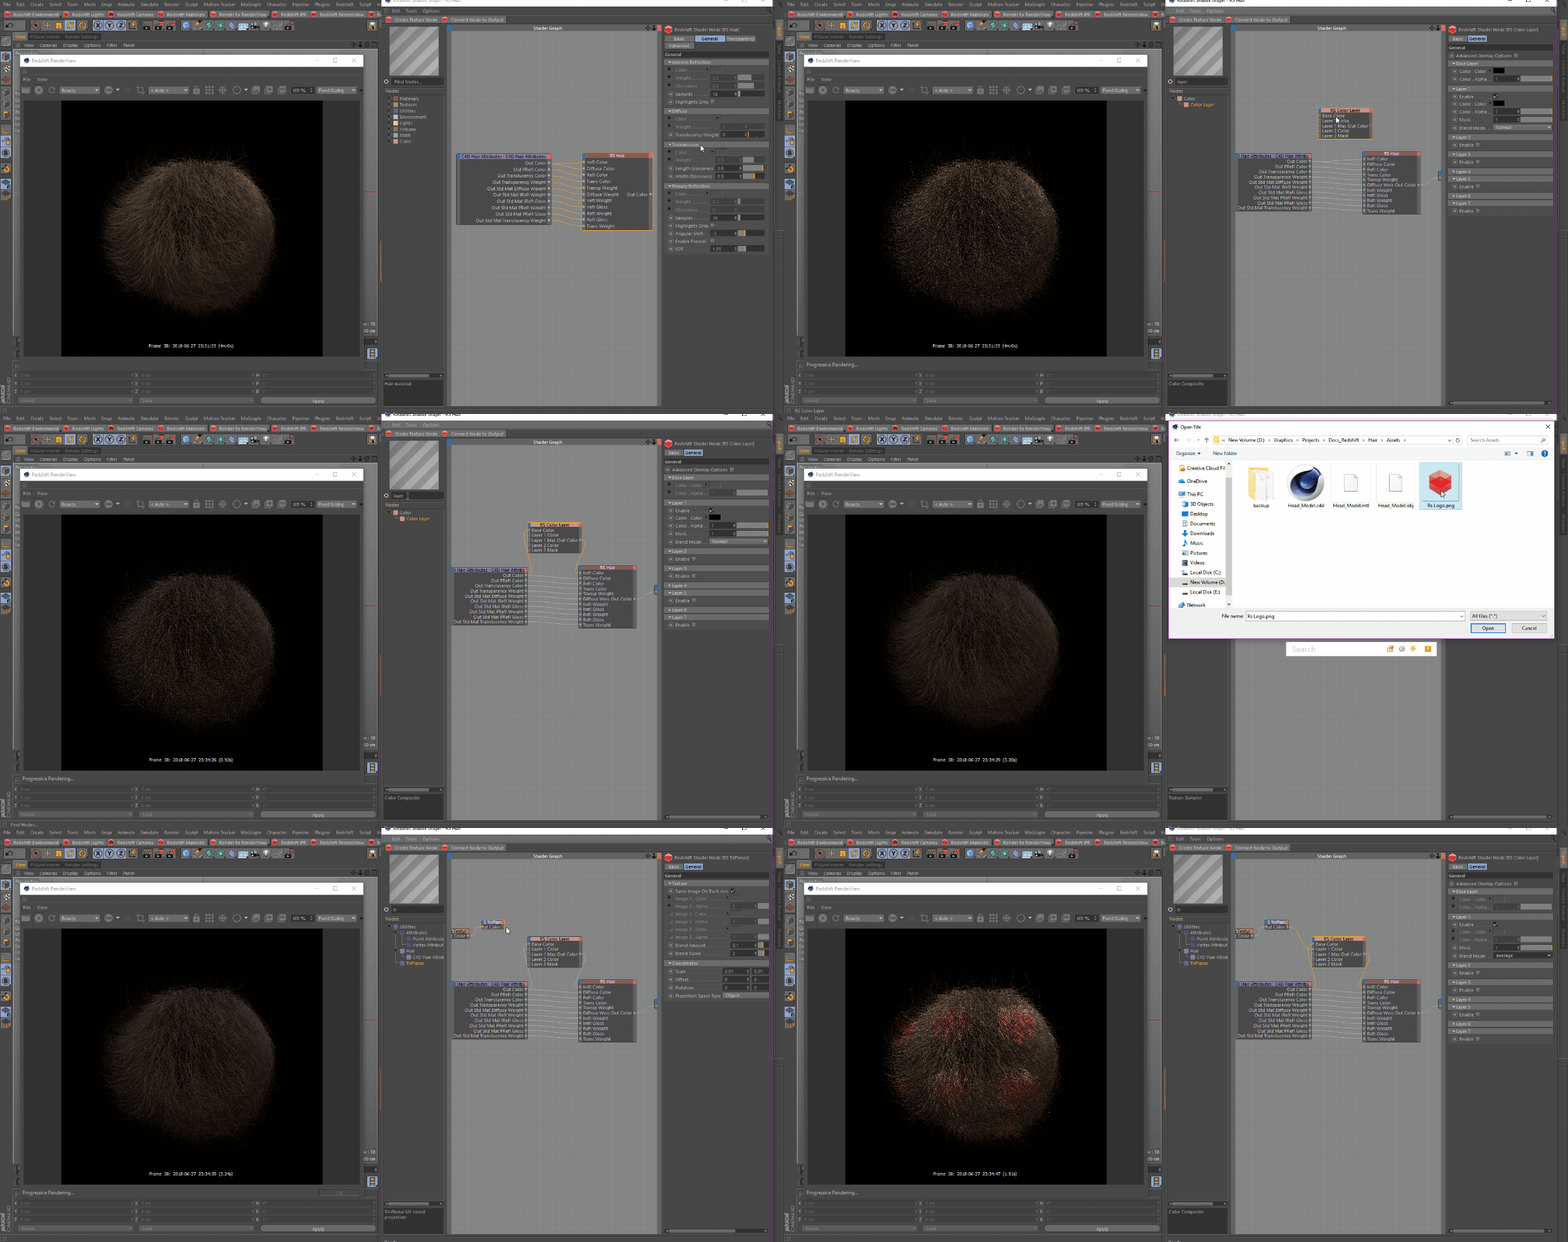
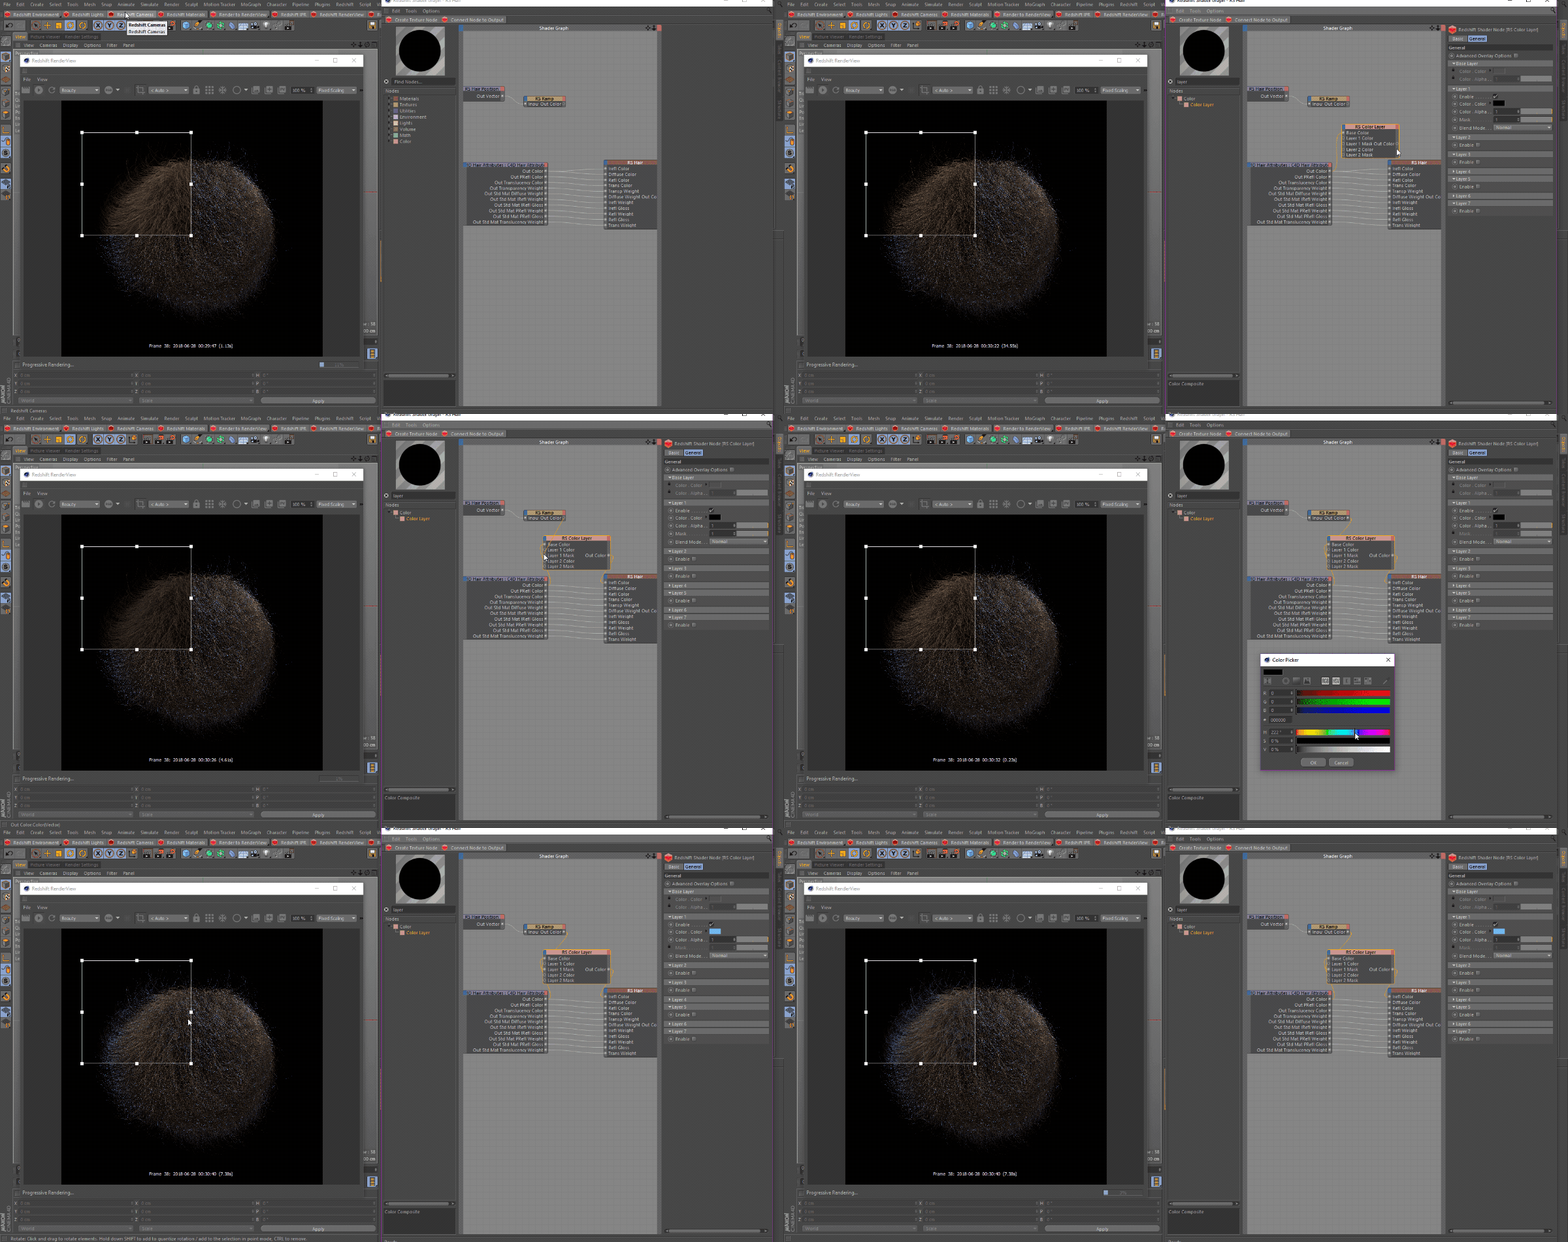
Let's take a look at how we can customize our hair material through the Redshift Shader Graph. First we add a Color Layer and connect it between the our C4D Hair Attributes and our RS Hair node. Then we add a texture and a triplanar and set the mode to average. As you can see our Redshift logo is now populating our hair color.
让我们来看看如何通过红移着色图来定制我们的头发材质。首先,我们添加一个颜色层和连接之间的 C4D 头发属性和我们的 RS 头发节点。然后我们添加一个纹理和一个三平面,并设置模式为平均。你可以看到我们的红移标志现在填充我们的头发颜色。
Custom Hair Shading
自定义头发着色
HairPosition
发型
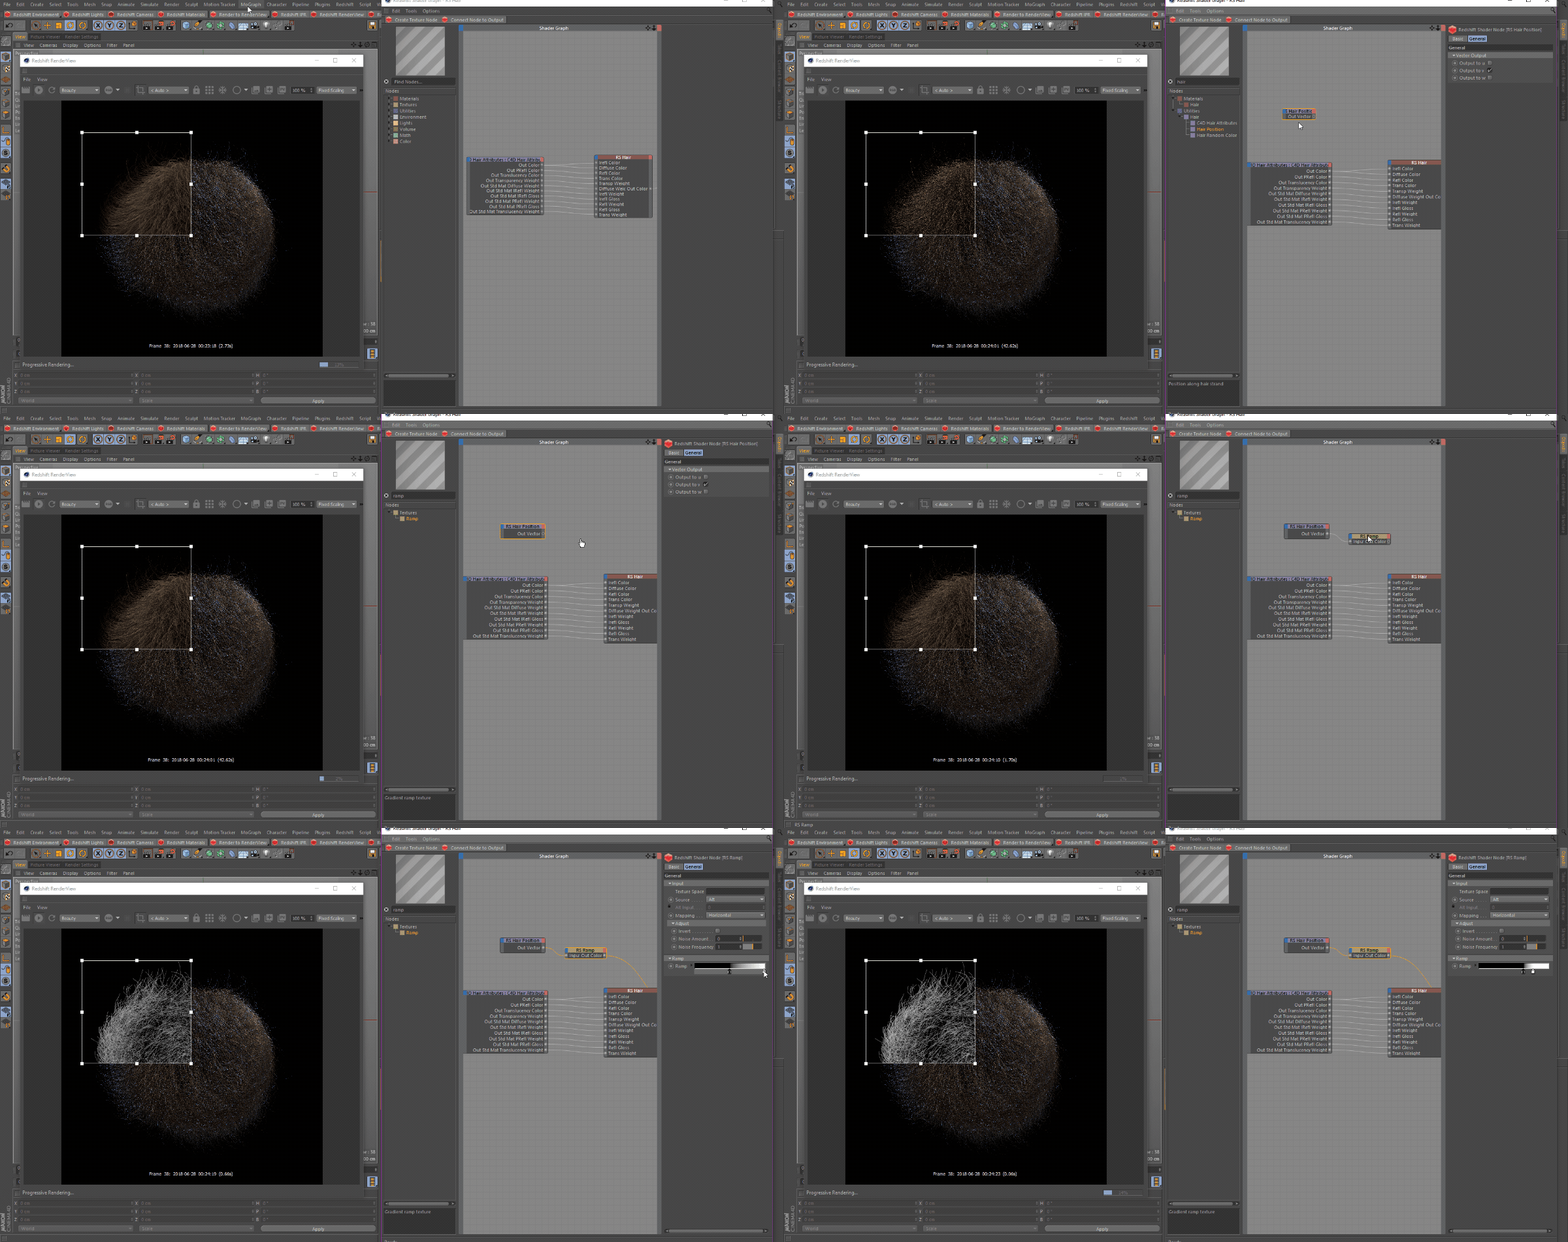
The Hair Position node will create a 0 to 1 value for each point on along our strand. This can be connected to a Ramp node set to Alt Source mode to remap the colors.
头发位置节点将为我们的链上的每个点创建一个0到1的值。这可以连接到 Ramp 节点设置为 Alt Source 模式来重新映射颜色。
Let's take a look at how we can use the HairPosition node as a mask to color the tips of our hairs with more control. First let's create a HairPosition node and remap this with a Ramp set to Alt Source mode, to push the white towards the end of our hairs. This will be used as a mask for our color layer.
让我们来看看如何使用 HairPosition 节点作为一个蒙版来更好地控制头发的颜色。首先,让我们创建一个 HairPosition 节点,并将其重新映射为 Ramp 设置为 Alt Source 模式,以将白色推向头发的末端。这将用作我们的颜色层的蒙版。
Hair Position Node
头发位置节点
Now let's add a Color layer node in-between our C4D Hair Attribute node & our RS Hair node. We will plug our Ramp into the Mask for Layer 1 and choose a bright blue as our color. As you can see we are now getting a blue color on the tips of our strands.
现在我们在 C4D Hair Attribute 节点和 RS Hair 节点之间添加一个 Color 图层节点。我们将斜坡插入图层1的蒙版,并选择亮蓝色作为我们的颜色。正如你所看到的,我们现在得到了一个蓝色的顶端我们的股。
Hair Position Node
头发位置节点
HairRandomColor
The Hair Random Color node is used for randomization per strand. Its parameters are described down below.
头发随机颜色节点用于每股随机化。其参数在下面描述。
Color
颜色
The Color parameter will be the overall shade of your strands.
Color 参数将是你头发的总体阴影。
Hue Amount
色相量
The Hue Amount will determine how strong each strand's Hue color will change with a value from 0-1. A value of 1 will effectively change every strand to a completely different color.
色相量将决定每个链的色相颜色的强度将改变一个值从0-1。一个1的值会有效地将每个链改变成一个完全不同的颜色。
Saturation Amount
饱和量
The Saturation Amount will determine the saturation value for each strand with a value from 0-1. A value of 1 will effectively desaturate some of your strands to the point they have no color and are white.
饱和度数量将决定每股的饱和值从0-1。值为1将有效地降低你头发中某些部分的饱和度,使它们变成没有颜色的白色。
Value Amount
价值金额
The Value Amount will determine the brightness & darkness value for each strand with a value from 0-1.
数值金额将决定每个链的亮度和黑暗值,值从0-1。
So let's take a look at how to use the Hair Random Color node. We are going to connect our Out Color from our C4D Hair Attributes node and connect it to our Color parameter in the Hair Random Color node and change some of the parameters to randomize our strands.
所以让我们来看看如何使用头发随机颜色节点。我们要连接我们的出彩从我们的 C4D 头发属性节点,并连接到我们的头发随机颜色参数节点,并改变一些参数,以随机我们的股。
HairRandomColor
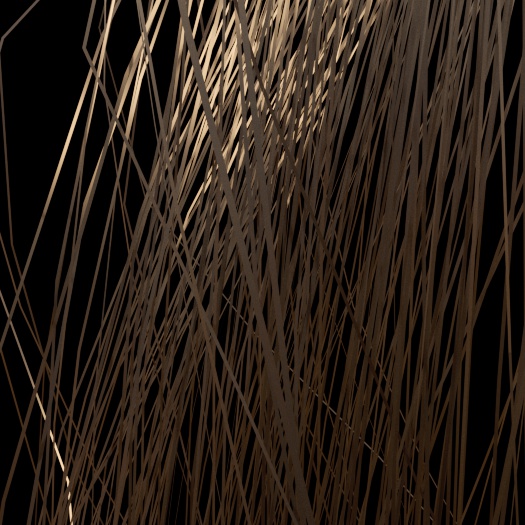
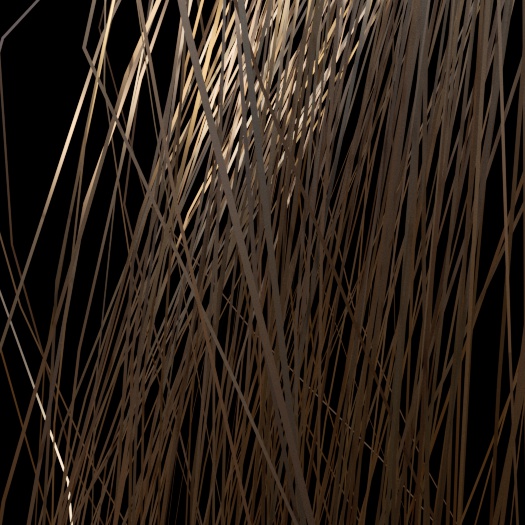
Below you can see a close up of our strands and how this node is affecting them.
下面你可以看到我们股的一个特写镜头,以及这个节点是如何影响它们的。
|
|
|
| Default Hair Material 默认的头发材质 | HairRandomColor Applied 应用 HairRandomColor |
The difference is subtle but like in actual hair not every piece will be the exact same color.
这种差异是微妙的,但就像真正的头发一样,并不是每一片都是完全相同的颜色。
The Redshift HairPos and HairRandomColor nodes will only work when a Strand pimitives is rendered for hair or curves,
和 HairRandomColor 节点只有当一个 Strand pimmitives 被渲染为 hair 或者 curves 时才起作用,
Example: Texture based shading
示例: 基于纹理的阴影
Let's take a look at using a texture to control the color of our strands. This texture will define the colors that will be distributed on our strands.
让我们来看看使用纹理来控制我们的股的颜色。这个纹理将定义颜色将分布在我们的股。
First we have a material with a couple different parameters adjusted to get a more randomized look. Remember to adjust the specular to lower value, more information on why, here.
首先,我们有一个材料与夫妇不同的参数调整,以获得一个更随机的外观。记住要调整镜面到较低的值,更多的信息为什么,这里。
C4D Hair Material
4d 头发材料
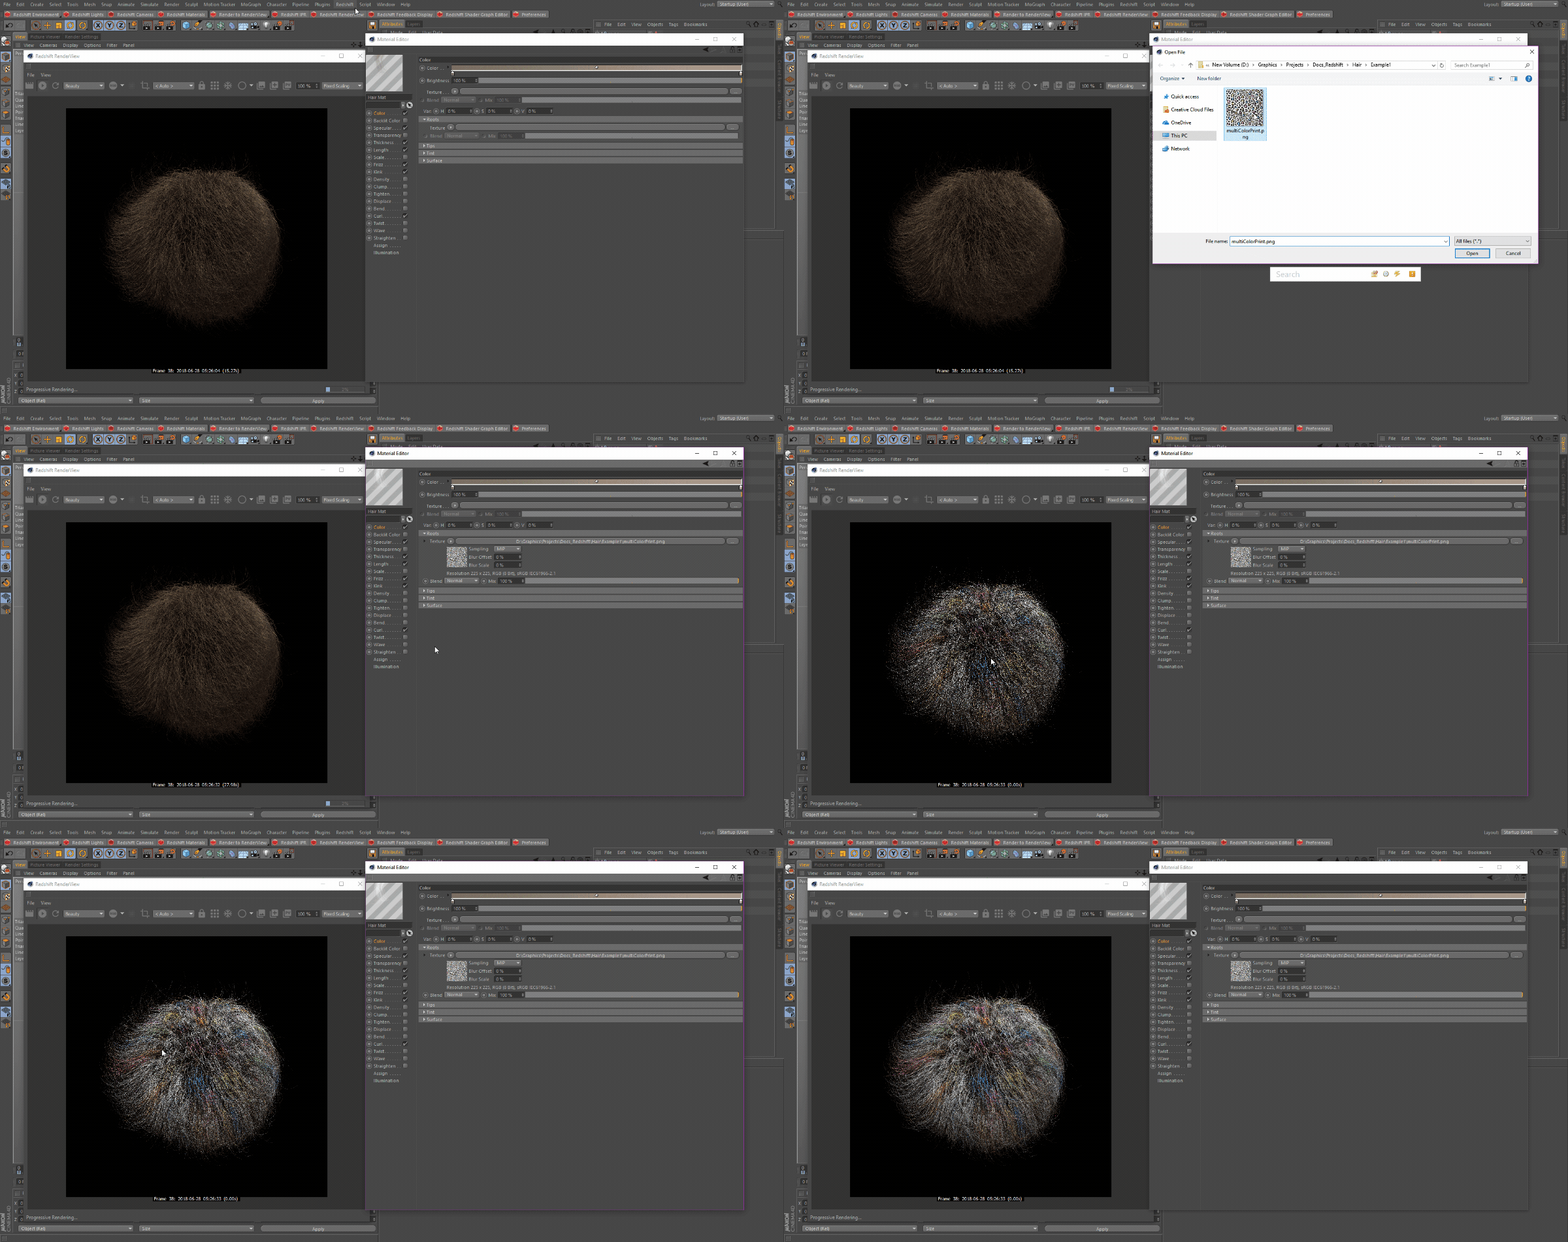
Next we want to load our texture that will be determining the color of our hairs, into the Roots channel as shown below.
接下来,我们要将决定头发颜色的纹理加载到 Roots 通道中,如下所示。
Roots Channel
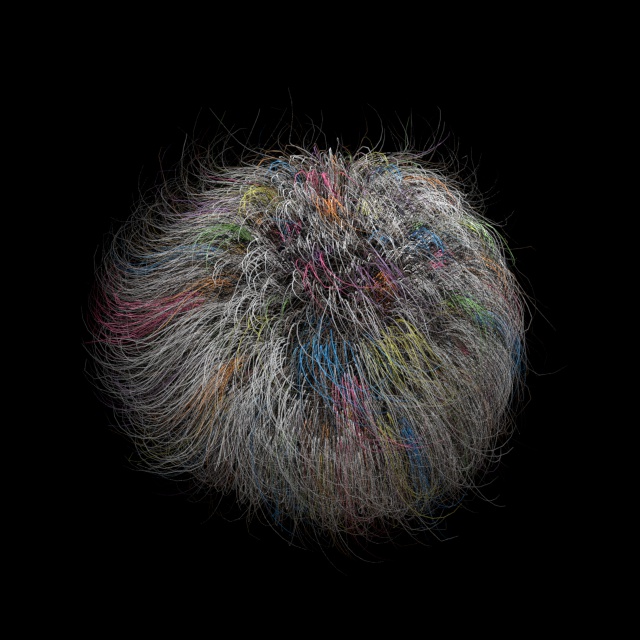
As you can see we are now getting colors based off the texture we loaded.
正如你看到的,我们现在得到的颜色基于我们加载的纹理。
Texture based shading for strands
基于纹理的线条着色
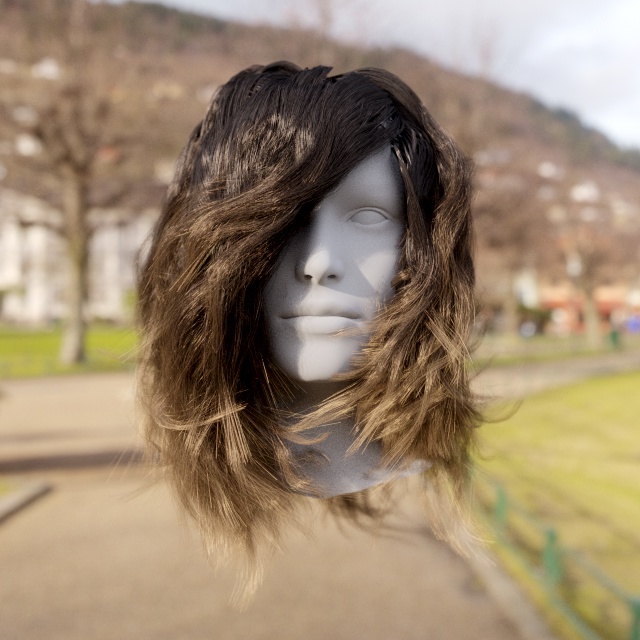
Example: Female Long hair
例如: 女性长发
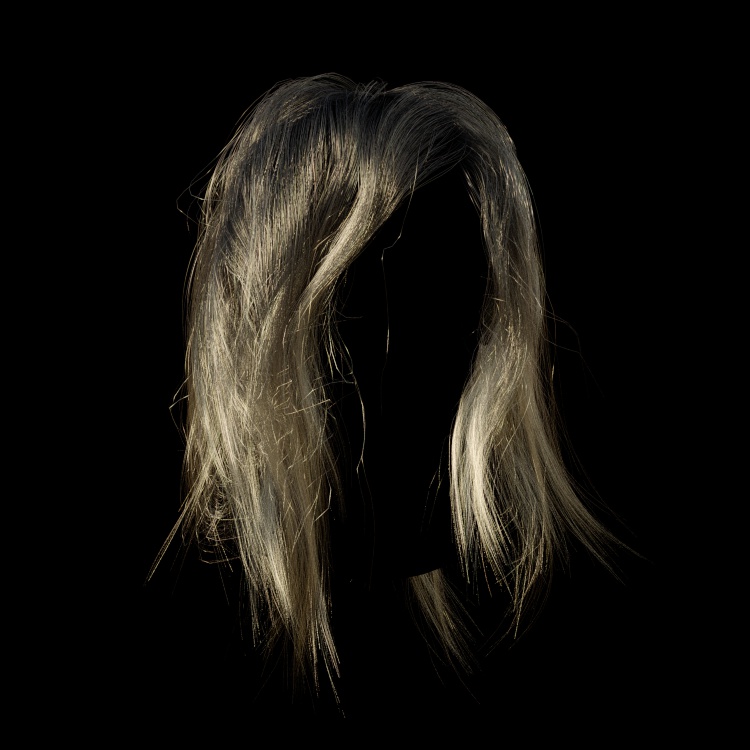
Let's take a look at how we can render & shade long hair inside of Redshift using the native hair shader inside of Cinema 4D.
让我们看看我们如何渲染和阴影长头发内的红移使用自然的头发着色器内的电影4 d。
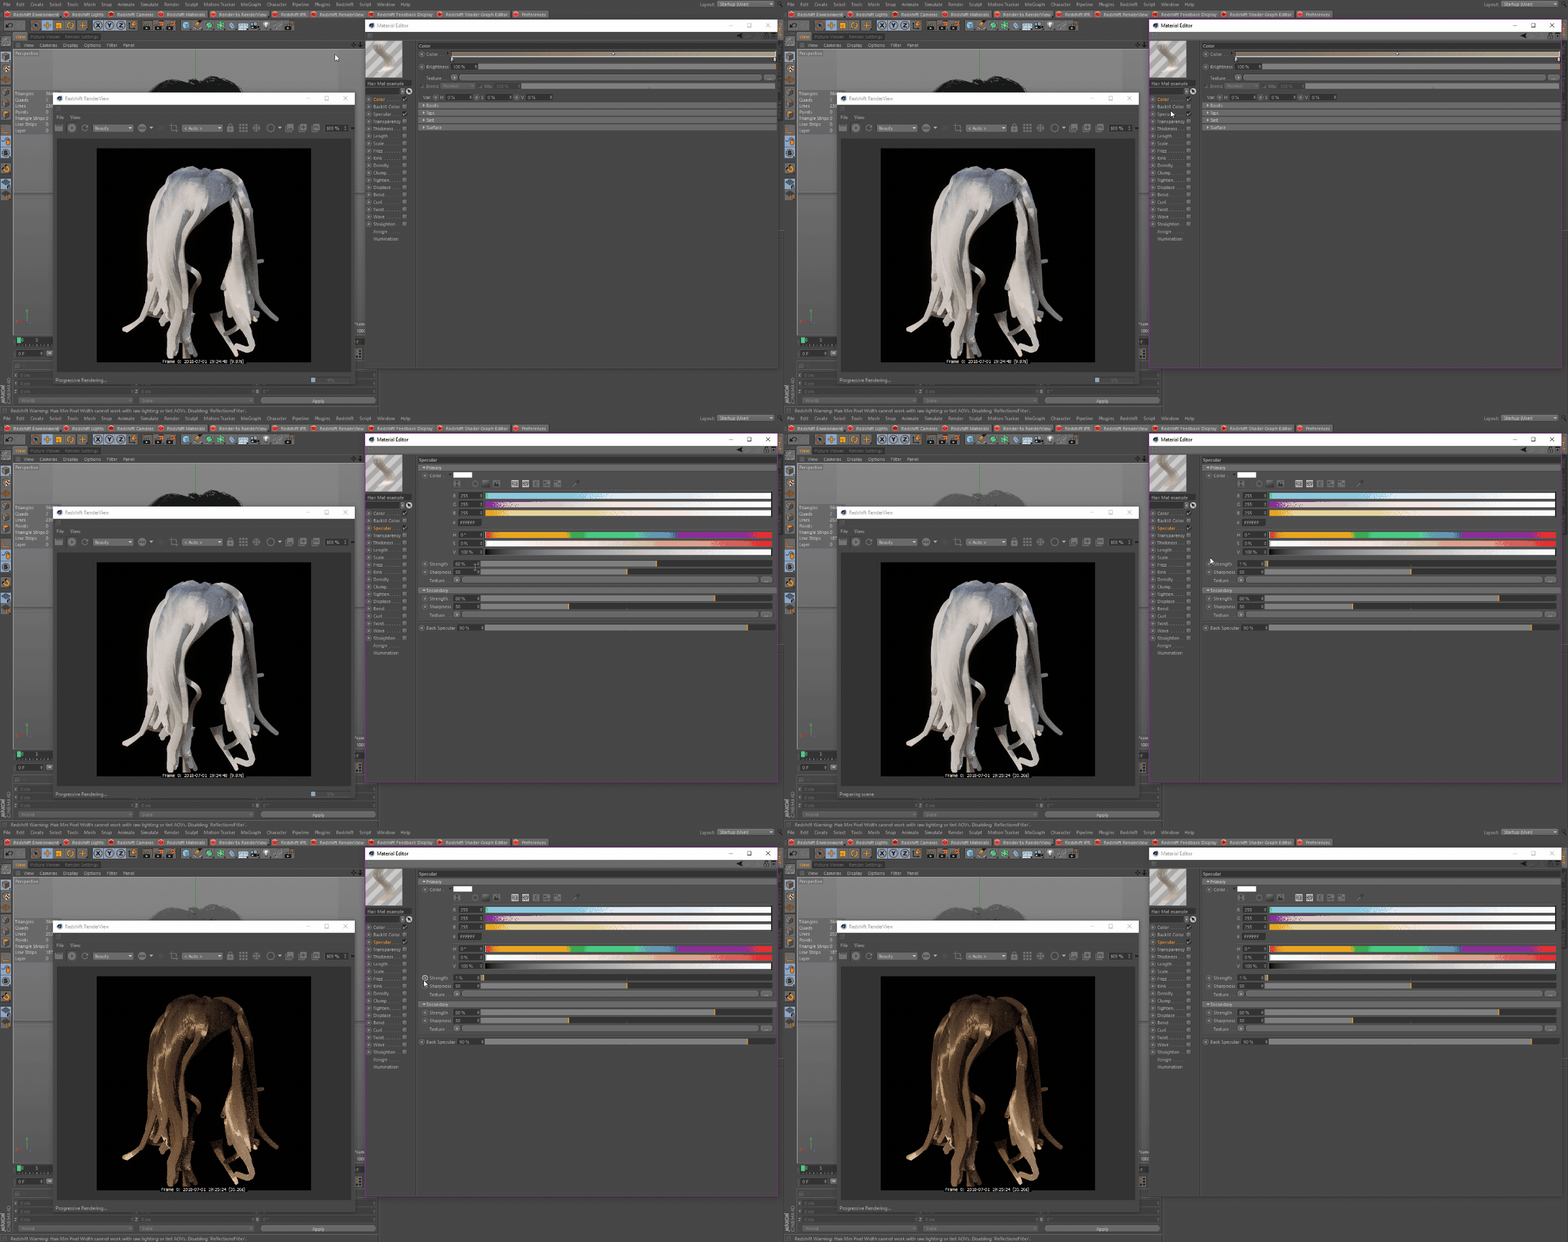
In this hair setup we have the default C4D Hair Material applied, as well as Dome Light in the scene with an HDRI image. First we want to adjust the specular Strength to a low value. Due to the differences in the hair shading model between C4D and RS, the C4D specular channel has a very strong effect.
在这个头发设置中,我们使用了默认的 C4D 头发材质,以及 HDRI 图像的场景中的穹顶光。首先,我们要调整镜面强度到一个较低的值。由于 C4D 和 RS 在头发着色模型上的差异,C4D 镜面通道具有很强的效果。
Adjusting Specular
调整镜面
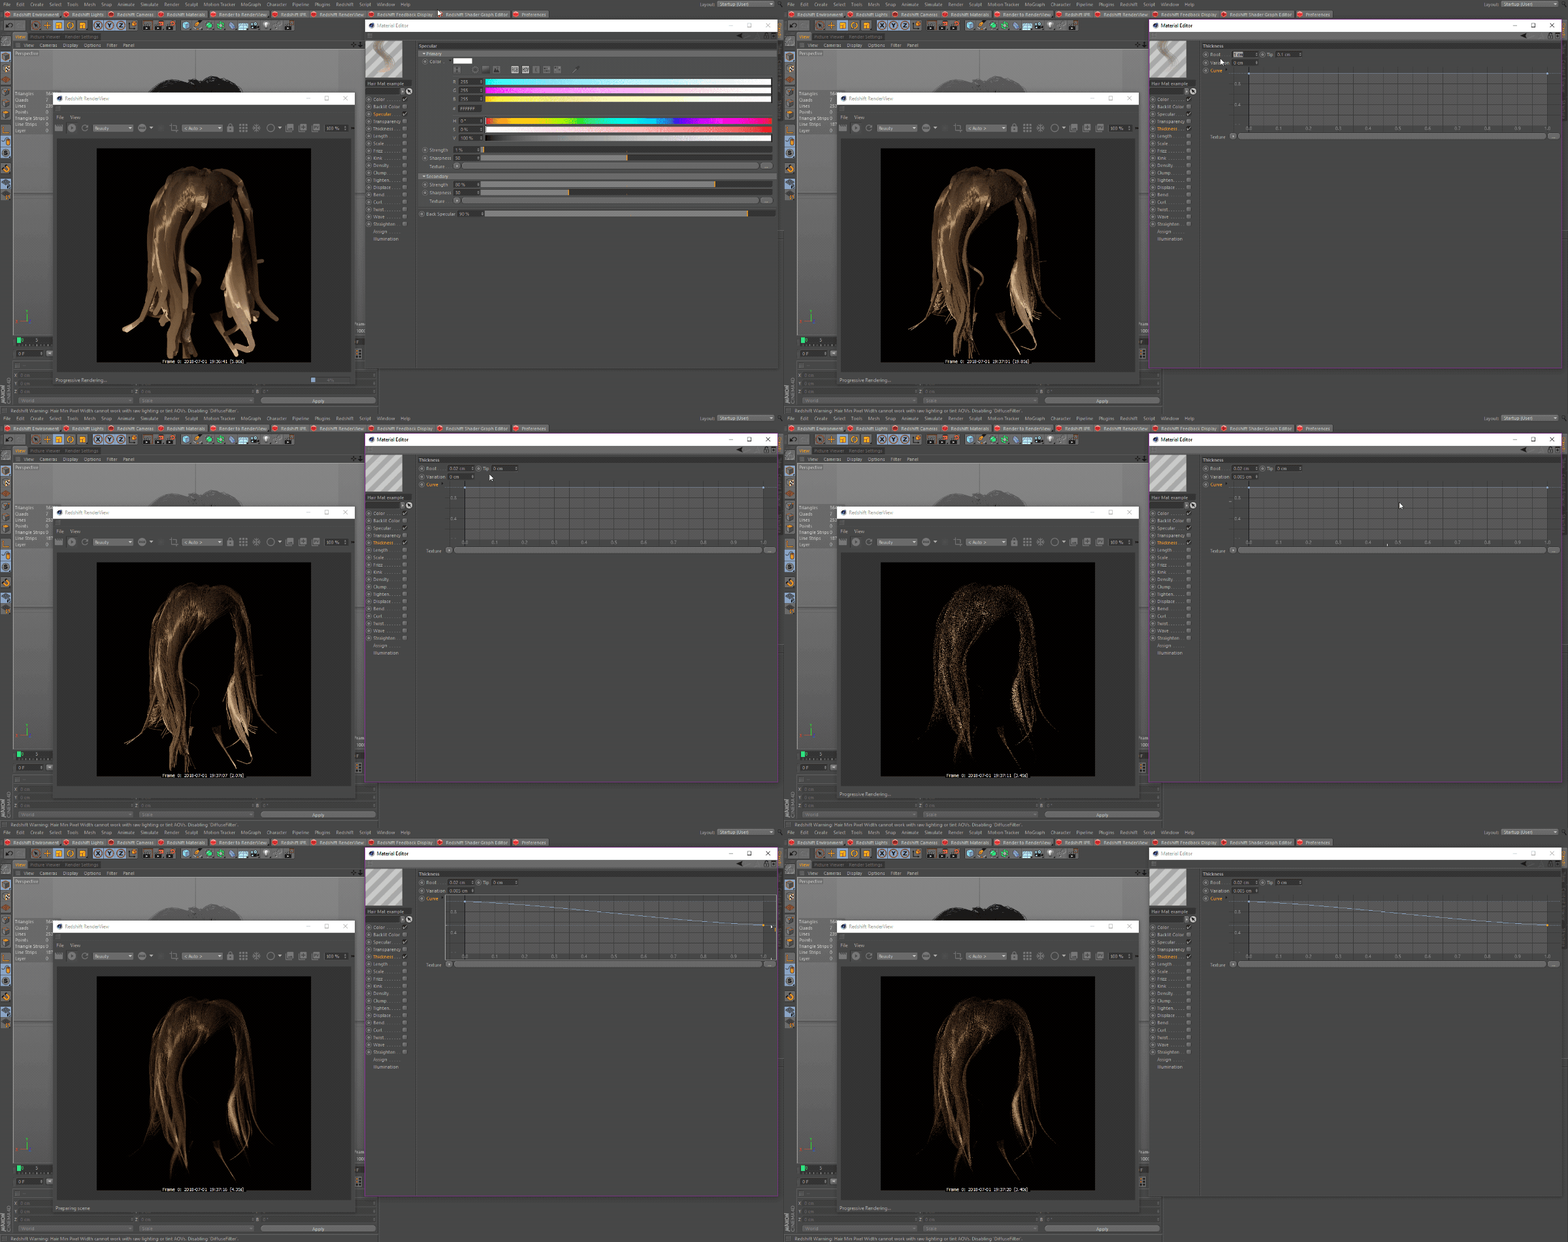
Next we want to define the overall shape of our strands, so let's adjust settings in the Thickness channel to make our strands thinner. We will set the Root to .02, set the Tip to 0, and add a slight Variation value of .005. We will also adjust the curve graph.
接下来我们要定义我们的股的整体形状,所以让我们调整厚度通道的设置,使我们的股更薄。我们将根设置为0.02,将尖端设置为0,并添加略微变化的值0.005。我们还将调整曲线图。
Thickness Channel
厚度通道
Thickness settings will be dependent on your scene scale.
厚度设置将取决于你的场景规模。
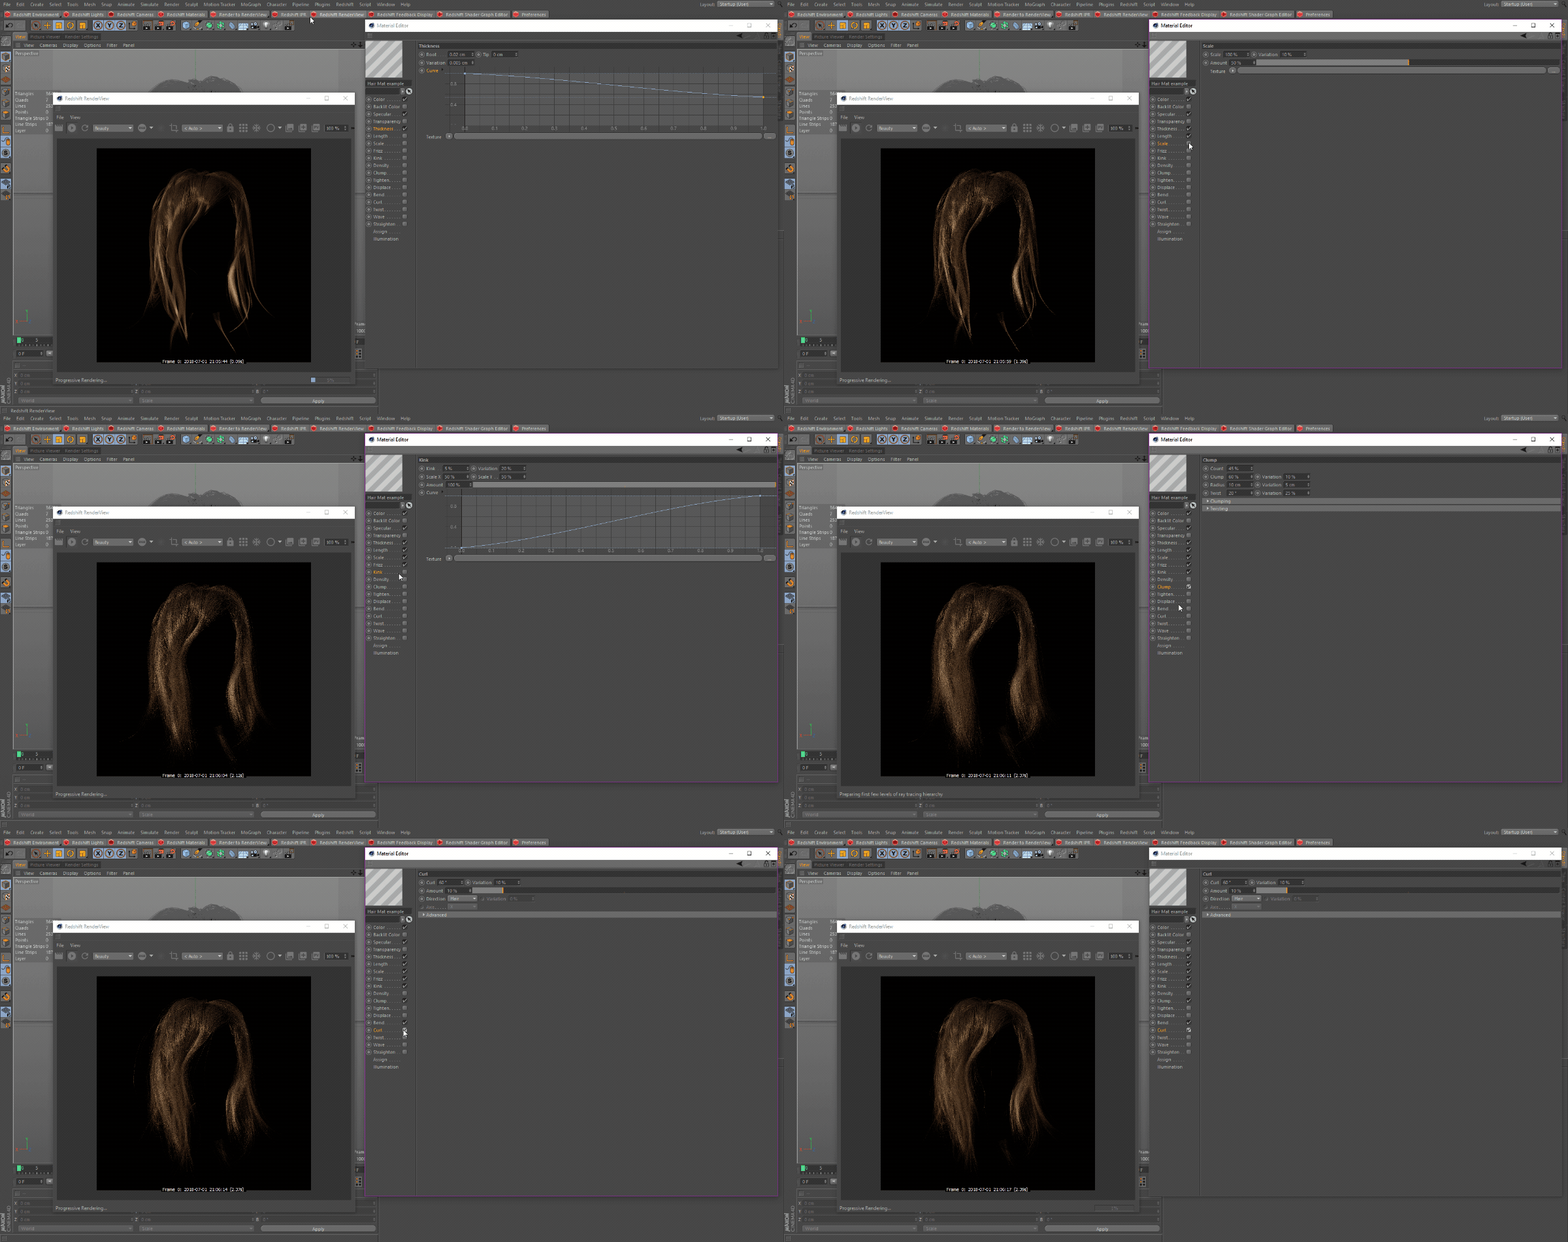
Now let's enable some of the other C4D Hair material channels, to add more detail to our hair. Below you can see what settings were used to get the result.
现在让我们启用一些其他的 C4D 头发材质通道,为我们的头发添加更多的细节。下面你可以看到什么设置被用来得到结果。
C4D Hair Parameters
4d 头发参数
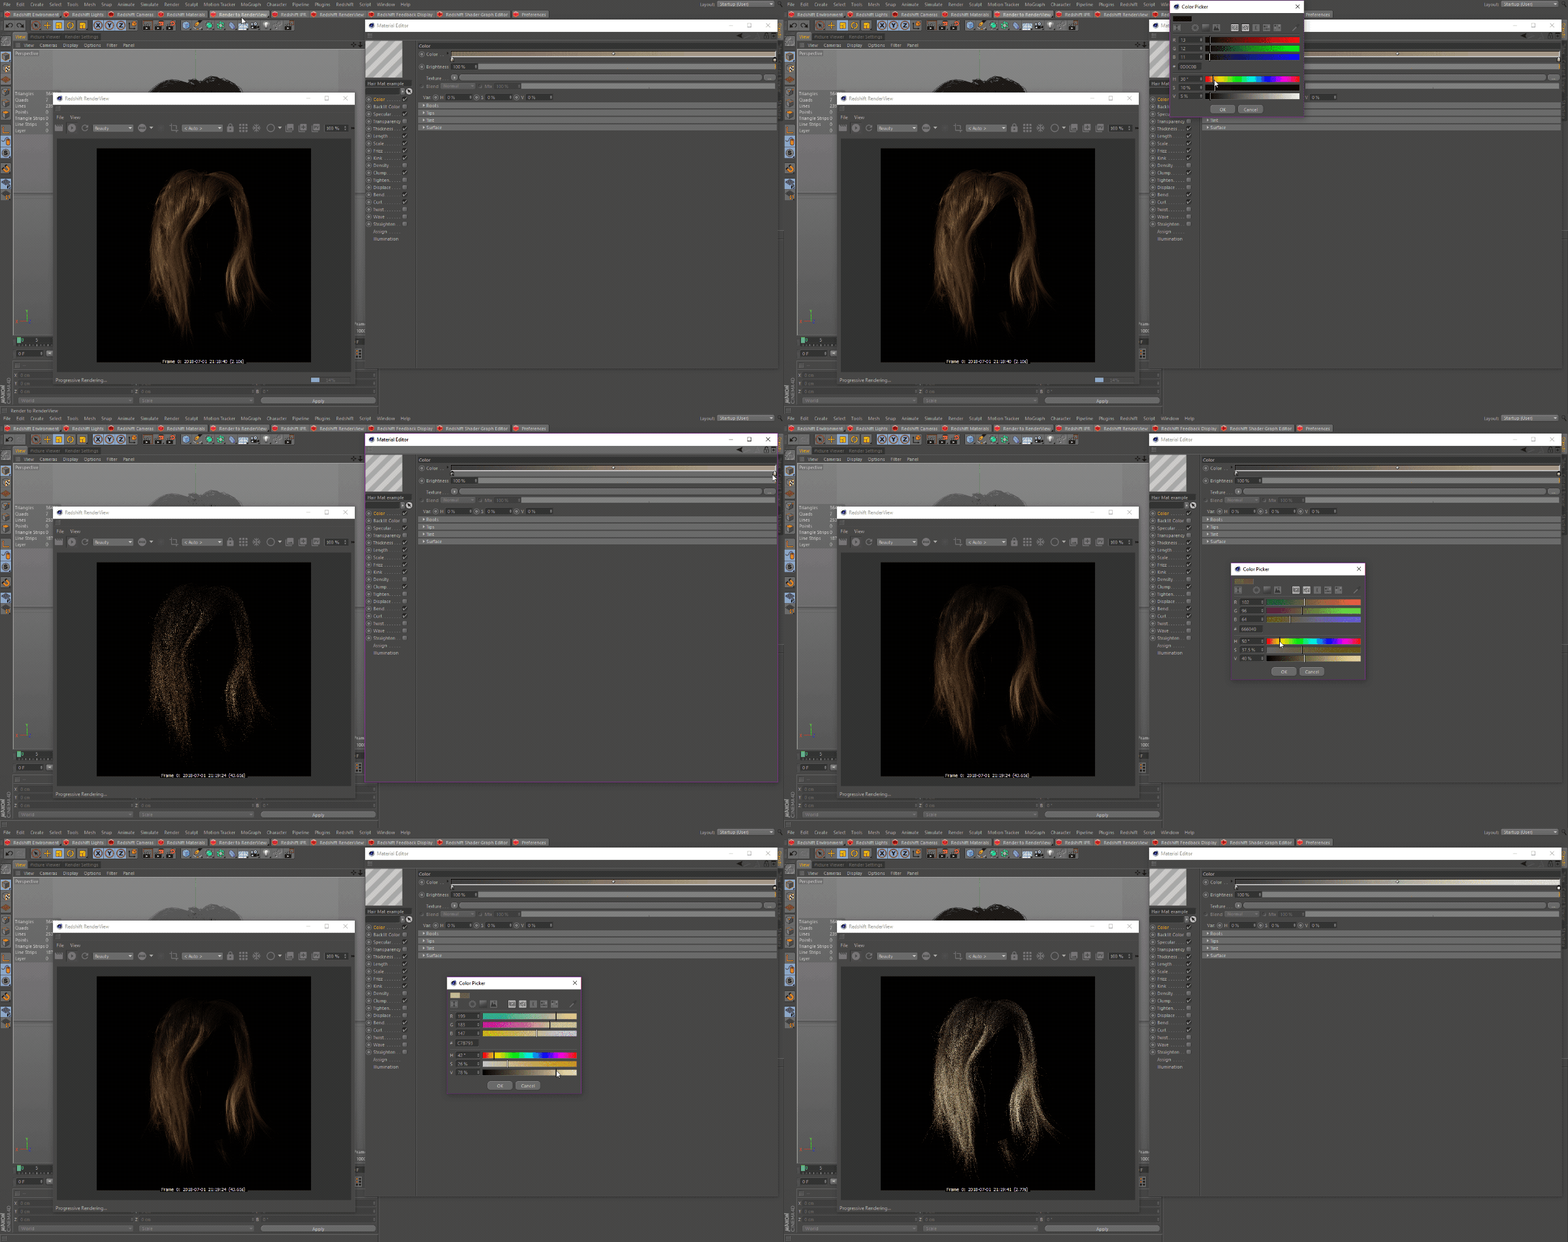
Next, let's adjust the actual color of our hair. We are going adjust our color gradient making the "roots" of our hair a darker color and the ends of our hair a blonde color.
接下来,让我们调整头发的实际颜色。我们要调整我们的颜色梯度使我们的头发的“根”颜色更深,我们的头发的末端是金色。
Hair Color
头发颜色
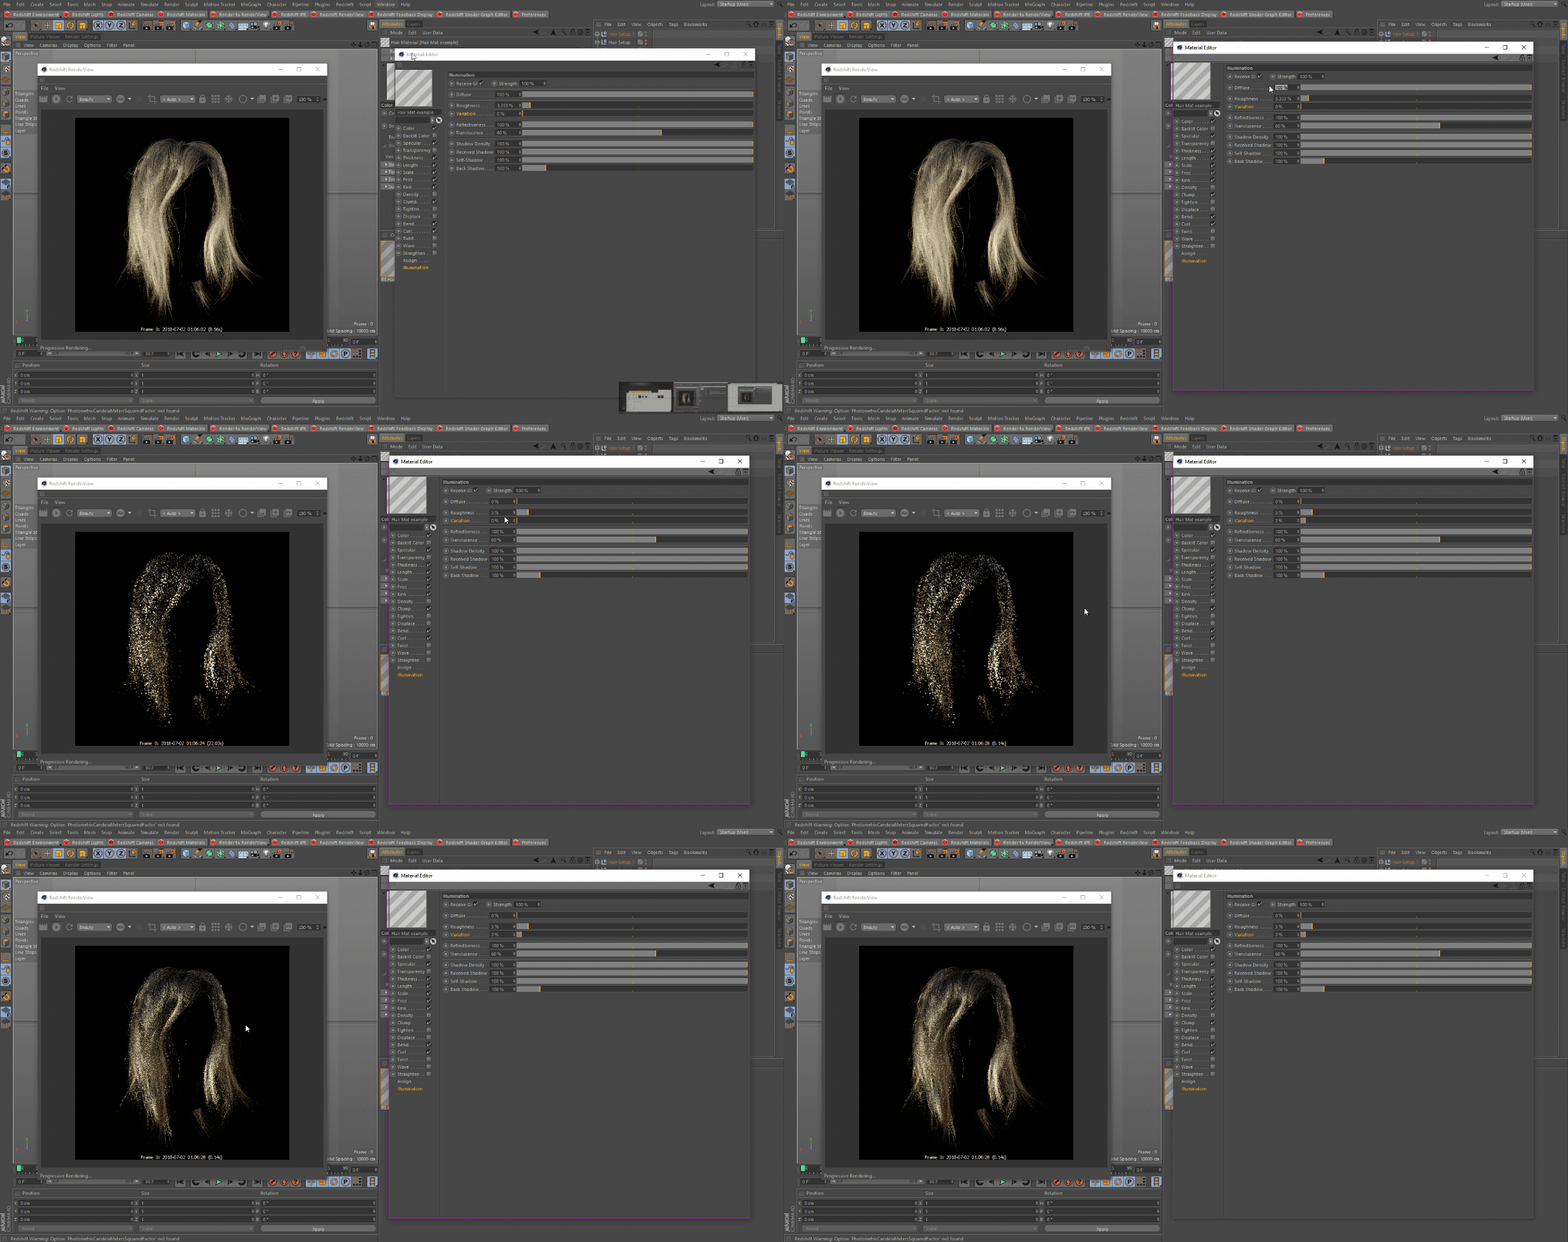
For more realistic hair we want to disable the diffuse in the Illumination channel, we can also adjust the roughness parameter here as well.
为了更真实的头发,我们想禁用漫反射的照明通道,我们也可以调整参数在这里。
Disabling diffuse
使扩散失效
Disabling the diffuse can yield longer render times.
禁用漫反射可以产生更长的渲染时间。



赶快留个言打破零评论!~