MOGRAPH EFFECTOR USAGE
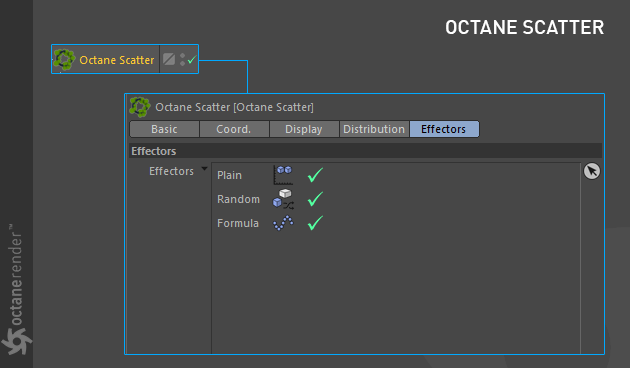
You can also use Cinema 4D Mograph effectors in Octane Scatter. It is shown in detail in the mini tutorial below. We have already described this tutorial in Instance Color. But we put it here once more to show how Scatter + Effector is being used.
Info: When you create an Effector, you must drag and drop this effector into Scatter's effector box. It's not automatically assigned.
图形效果器用法
您也可以在Octane Scatter中使用Cinema 4D Mograph效应器。它在下面的迷你教程中详细显示。我们已经在“实例颜色”中描述了本教程。但是我们再次将其放在此处以显示如何使用Scatter + Effector。
信息:创建效果器时,必须将该效果器拖放到Scatter的效果器框中。它不会自动分配。
SCATTER OBJECT + MOGRAPH (wITH INSTANCE COLOR USAGE)
In this example we will create an Instance color using Octane Scatter Object and Mograph.
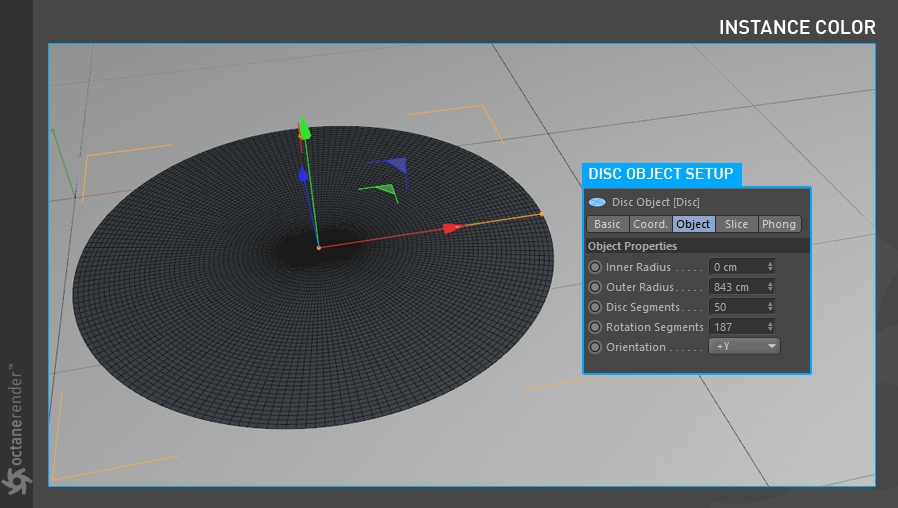
1- First create a disc object and change its properties as shown in the picture.
散射对象+图形(使用瞬时颜色时)
在此示例中,我们将使用Octane Scatter Object和Mograph创建实例颜色。
1-首先创建一个光盘对象并更改其属性,如图所示。
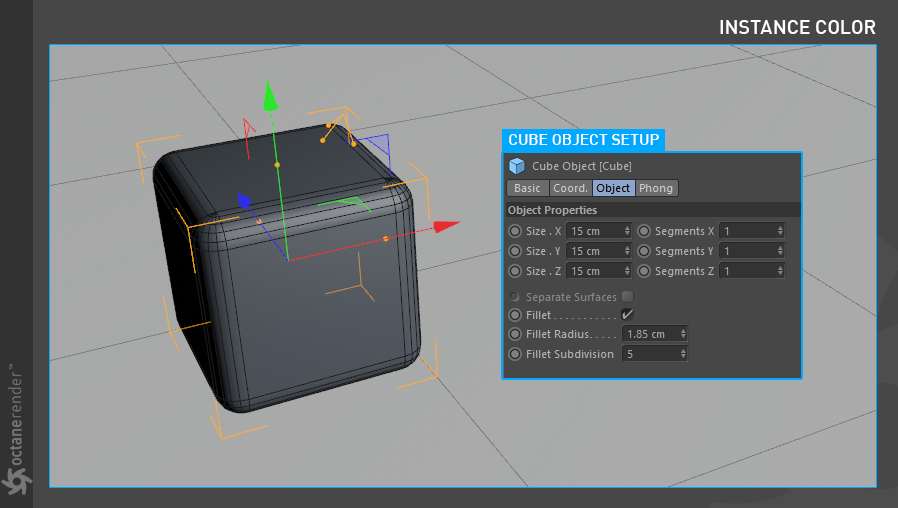
2- Now create a Cube object and change its properties as shown in the picture below.
2-现在创建一个多维数据集对象并更改其属性,如下图所示。
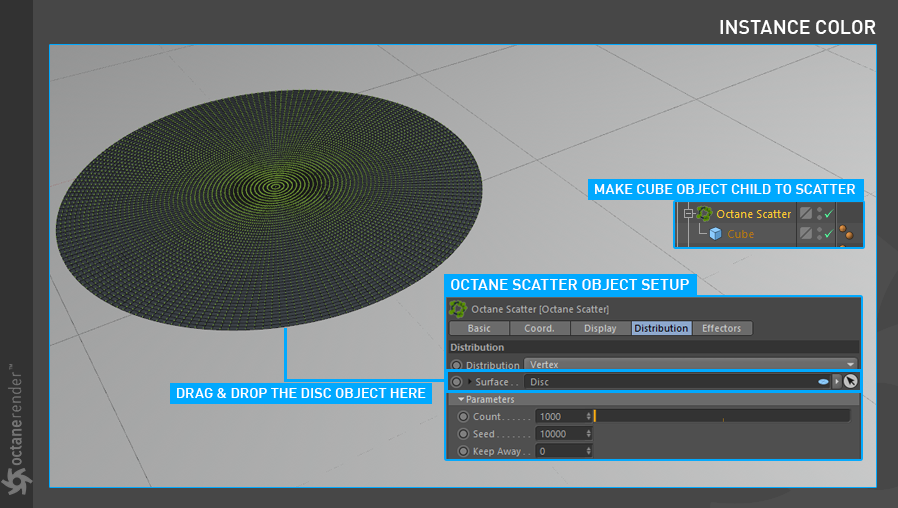
3- Create an Octane Scatter Object and make the Cube object child. Then drag and drop the Disc object to the surface section of the Scatter. The following picture shows the setup.
3-创建一个Octane散布对象,并使多维数据集对象成为子对象。然后将Disc对象拖放到Scatter的表面部分。下图显示了设置。
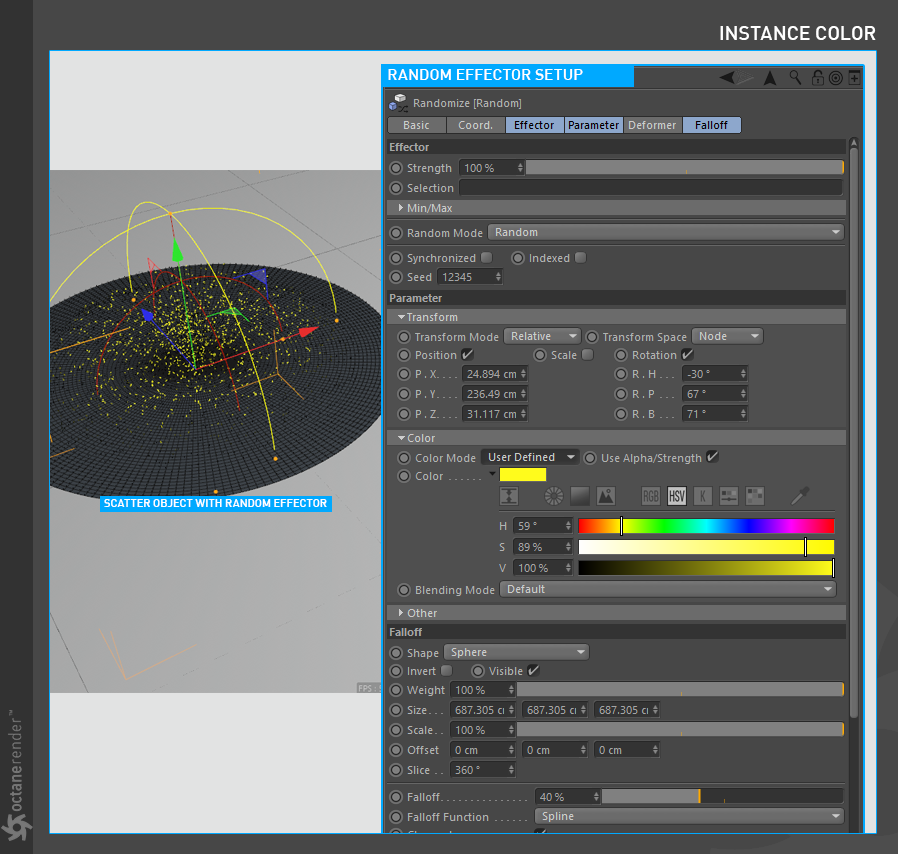
4- Now we will use Mograph in Scatter Object. To do this, first create a Random Effector from the Mograph menu and drag it to the Effector section of the Octane Scatter Object. Change the “Random Effector” properties as you see in the picture below. You don’t have to enter these properties exactly. You can change as you like the settings in the Transform and Falloff sections. For example, you can select "On" instead of “user defined” in the Color section, and you can create more colorful cubes. Or you can change the shape of the Falloff. It’s up to you.
4-现在我们将在分散对象中使用Mograph。为此,首先从Mograph菜单中创建一个随机效应器,然后将其拖动到Octane Scatter Object的效应器部分。如下图所示,更改“ Random Effector”属性。您不必完全输入这些属性。您可以根据需要更改“变换”和“衰减”部分中的设置。例如,您可以在“颜色”部分中选择“开”而不是“用户定义”,并且可以创建更多彩色的多维数据集。或者,您可以更改衰减的形状。由你决定。
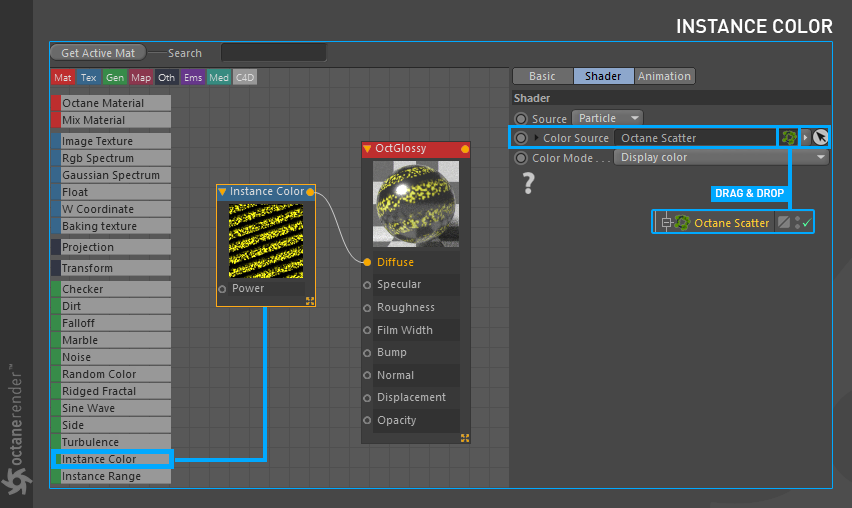
5- Next is the Material and Instance Color Setup. First create a Glossy Material. Then open the Node Editor and drag and drop the material you created into the Node editor window. Drag the Instance Color directly to the node editor from the menu on the left. Now, when Instance Color Node is selected, connect the tiny yellow spot on the upper right to the Diffuse channel of Material. Now it's time to set the Scatter Object as a Instance Source. When Instance Color Node is selected, select Particle as Source from the menu on the right. In the Color Source section, drag and drop the Octane Scatter Object. After the Material Setup, Assign it to Scatter Object. In the picture below you can see the material and Instance Color setup.
5-接下来是“材质和实例颜色设置”。首先创建光泽材质。然后打开“节点编辑器”,并将创建的材质拖放到“节点编辑器”窗口中。从左侧菜单将“实例颜色”直接拖到节点编辑器。现在,当选择“实例颜色节点”时,将右上方的小黄点连接到“材质”的“漫反射”通道。现在是时候将Scatter对象设置为实例源了。选择“实例颜色节点”后,从右侧菜单中选择“粒子”作为“源”。在“颜色源”部分中,拖放“Octane散布对象”。设置材质后,将其分配给散布对象。在下面的图片中,您可以看到材质和“实例颜色”设置。
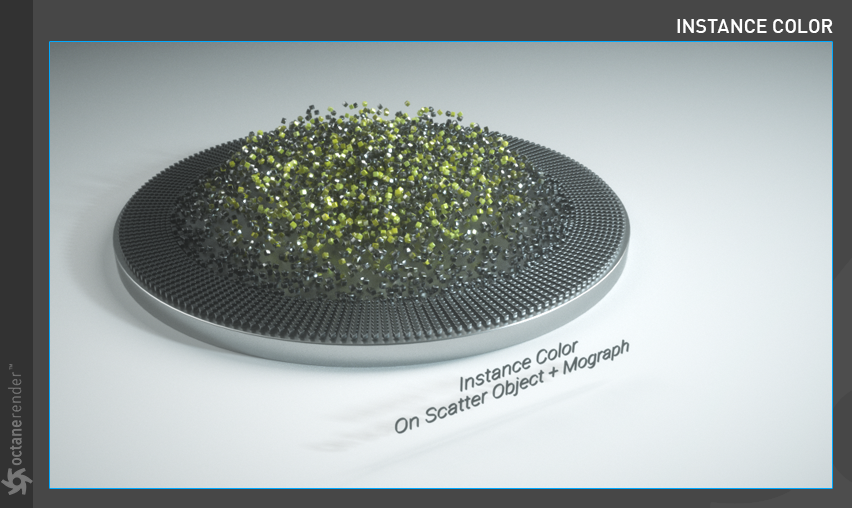
6- If you have done everything properly, you will get a result similar to the following picture (apart from the other cosmetic elements. You can also create HDRI environment, another light sources or secondary geometry etc.). As you can see, the cube objects were colored by the Random effector using “Instance Color”. By using Octane Scatter Object you can get rid of the limit of Cloner and generate a large number of instances. You can also use all the mograph tools.
6-如果您正确地完成了所有操作,则将获得与下图类似的结果(除其他装饰元素之外。您还可以创建HDRI环境,其他光源或辅助几何体等)。如您所见,多维数据集对象由随机效应器使用“实例颜色”着色。通过使用Octane Scatter Object,您可以摆脱Cloner的限制,并生成大量实例。您也可以使用所有测绘仪工具。


赶快留个言打破零评论!~